Give Your Home A Spring Refresh With These 5 Photo Ideas

A lot more time has been spent at home this past year. If you’re feeling like your space is getting a bit ‘stale’ and could use a design refresh right now, you’re not alone. Especially as we head into spring, now is a great time to brighten up your home with some fresh and colourful images! Try these 5 photo ideas from our LD Experts in the Photolab that will help breathe new life into your space.

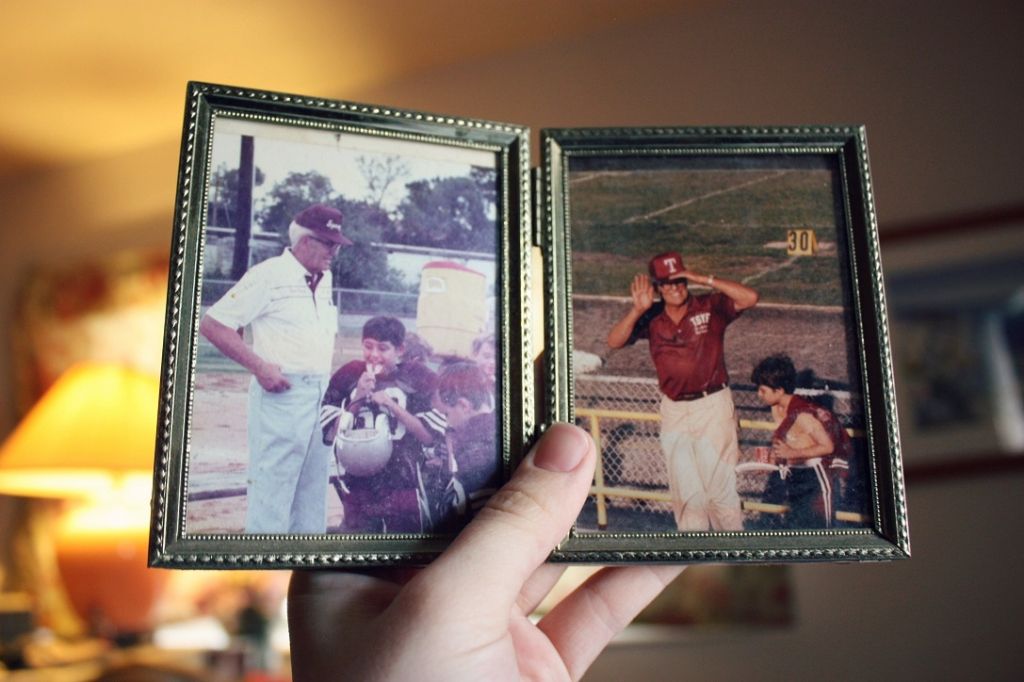
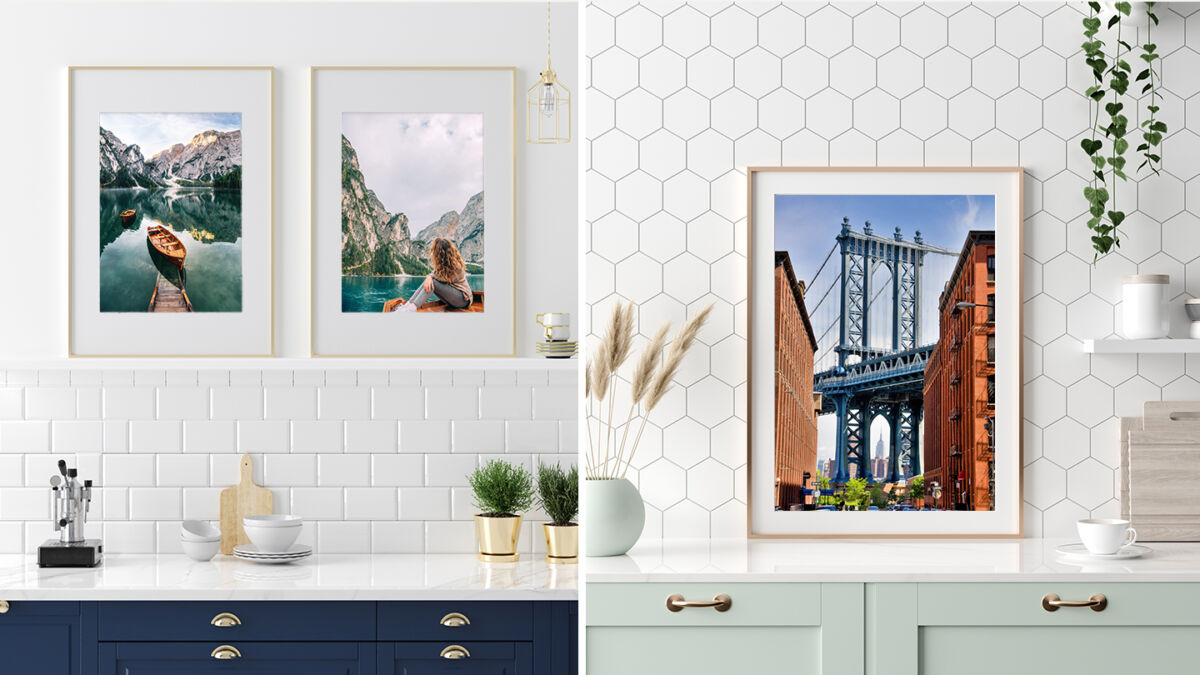
1. Swap Out Your Framed Photos

Freshening up your space is as simple as swapping out the photos in your existing frames! Pick some favourites from past spring seasons that will add some brightness and colour to your home. These could include landscape photos you’ve captured during spring or family photos of springtime events like Mother’s Day and Easter. Vacation photos are also a great way to brighten up your space.

We have a wide variety of print and enlargement sizes to fit all kinds of standard frames, from 4”x6” all the way up to 44”x96”. Pick between glossy or pearl finish, depending on your preference. For framed prints, we recommend pearl, as there isn’t as much glare with this mattified satin surface, making it a good option for displaying behind glass.

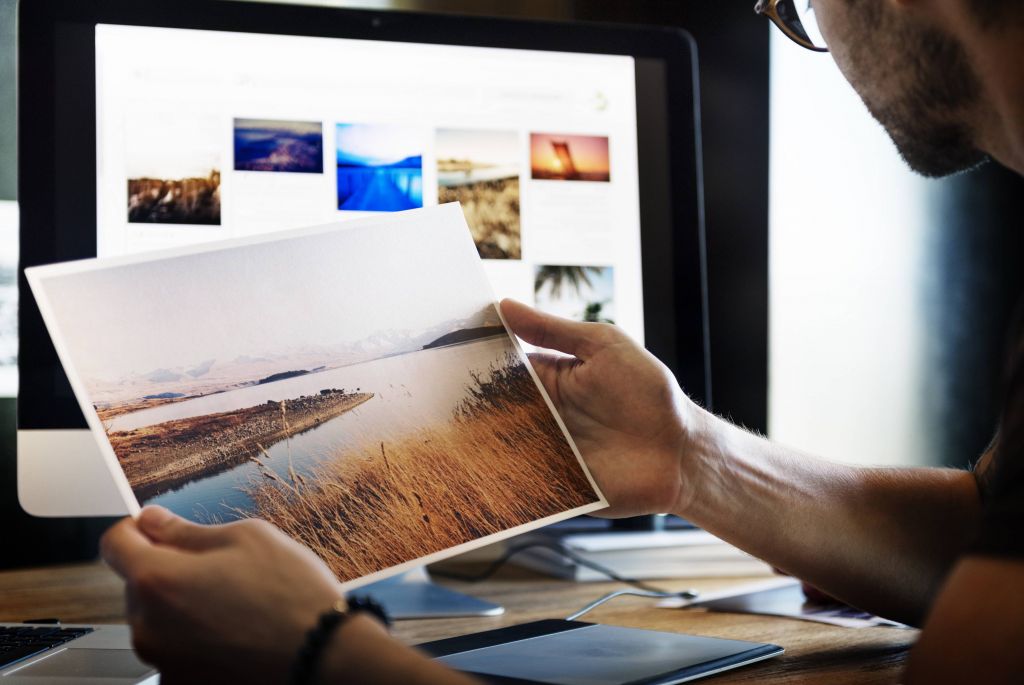
The easiest way to refresh your frames with new prints and enlargements is by downloading our London Drugs Photolab App on your smartphone (available for iOS and Android), uploading some of your photos directly from your phone, and ordering some prints. If your photos live on your computer, not to worry, you can always order from our Photolab website as well.

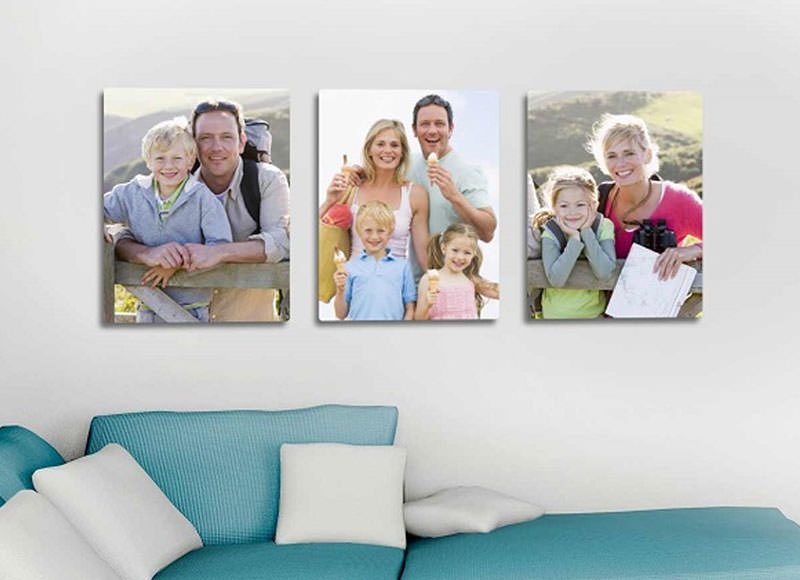
2. Create a DIY Gallery Wall

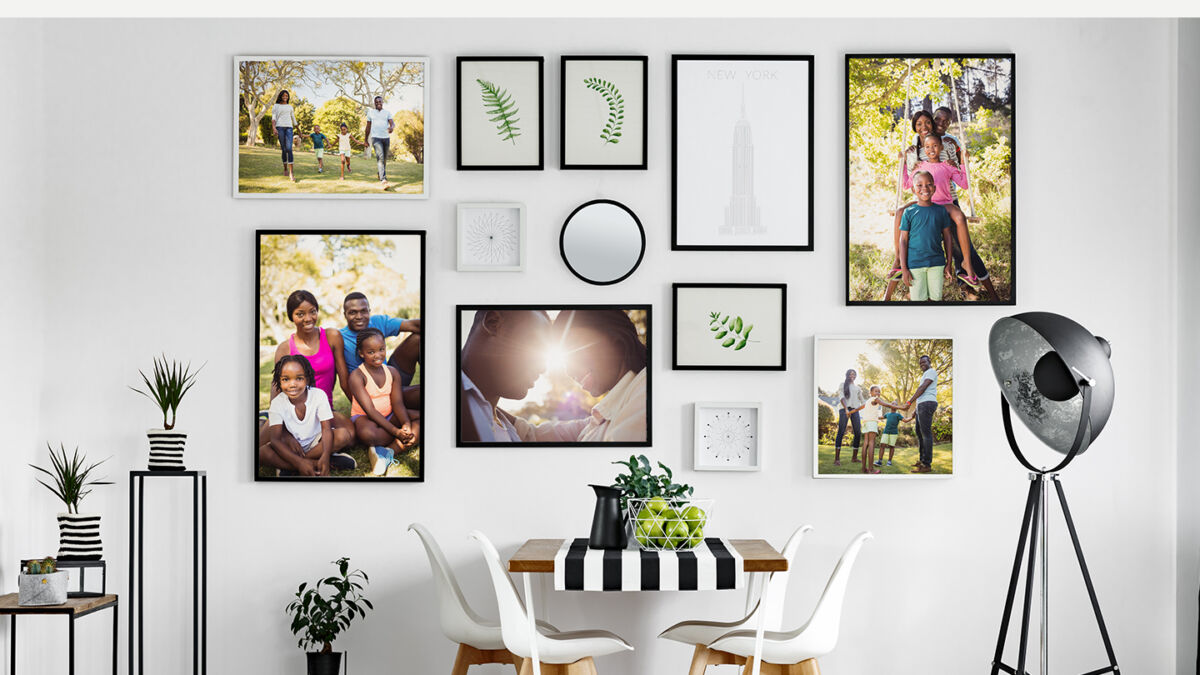
If you’re looking for a DIY project to take on at home, creating your own gallery wall is an easy and rewarding project that will give your space an entirely fresh look. This is also something you can add to as you find new frames and take new photos that you want to add to the gallery wall. Just like the other frames in your home, these can also be updated seasonally.

Here’s how to create your own gallery wall:

  1. Choose a colour palette. This can go for your frames (all one colour, or a mix of colours in a palette) and for your images (black and white or colour photos). A colour palette can help you keep a cohesive look and feel amongst all the prints on your gallery wall. Of course, if you prefer a more eclectic look with a variety of colours, go for it! Your space should reflect your style.
  2. Pick a theme. The theme could be your pets, family, friends, vacations, wedding photos, etc. They don’t have to all be from the same day, but choosing an overall theme will help you narrow down and select which images to feature. For instance, you could display photos of your pet throughout their life, or photos of various vacation destinations you’ve visited over the years. If you want to change your images seasonally, pick a spring theme for this time of year, selecting photos taken during previous spring seasons (or get outside and shoot some new ones!).
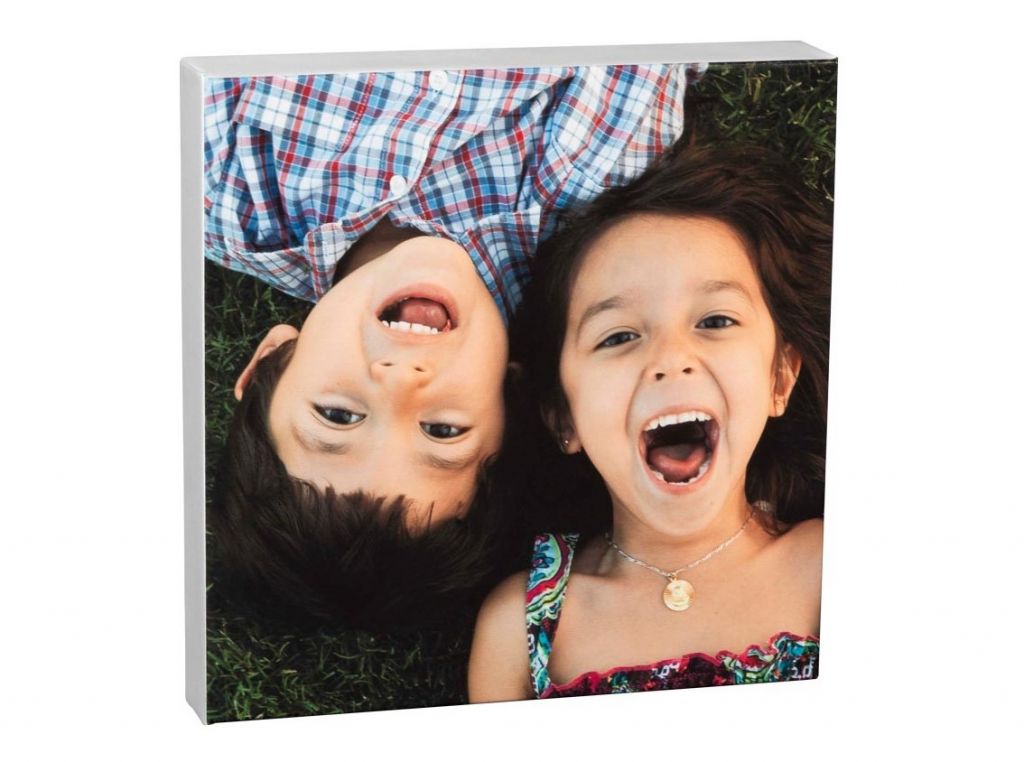
  3. Pick a display medium, and print your photos. Before you start printing, it’s important to decide how you want to display the photos in your gallery wall. As an example, do you want to go with framed prints or canvas gallery wraps? If you’re framing behind glass, you may want to opt for pearl versus glossy enlargements. Fine art prints are also an excellent choice to give your photos that gallery-quality look. Our Photolab also offers framed and matted prints if you want that matte look for your images. We recommend choosing one print style to stick to for all of your gallery prints.
  4. Choose a layout. Organize and assemble your images on the floor to see how they will look on display. This gives you the opportunity to make changes to your vision…before hammering any nails into the wall! It can help to put a vertical line of painter’s tape down on the floor to ensure your prints are being distributed equally on both sides of the tape and the overall ‘wall’ looks balanced. If you like clean lines, you may choose to have all of your prints fit nicely within a defined rectangle or square. Or, go with a more ‘imperfect’ look by having some prints stick out past the others.
  5. Measure out your display. Use painter’s tape once again to mark a vertical line, this time down the centre of the wall. Then measure your frames and tape a square/rectangle showing where you want each of your frames on the wall, keeping consistent with the spacing between your prints.
  6. Assess your gallery wall. Take a step back to assess whether you like the look. If not, peel the tape and try again!
  7. Hang your prints. Get your hammer, anchors and level out, it’s finally time to hang your prints!

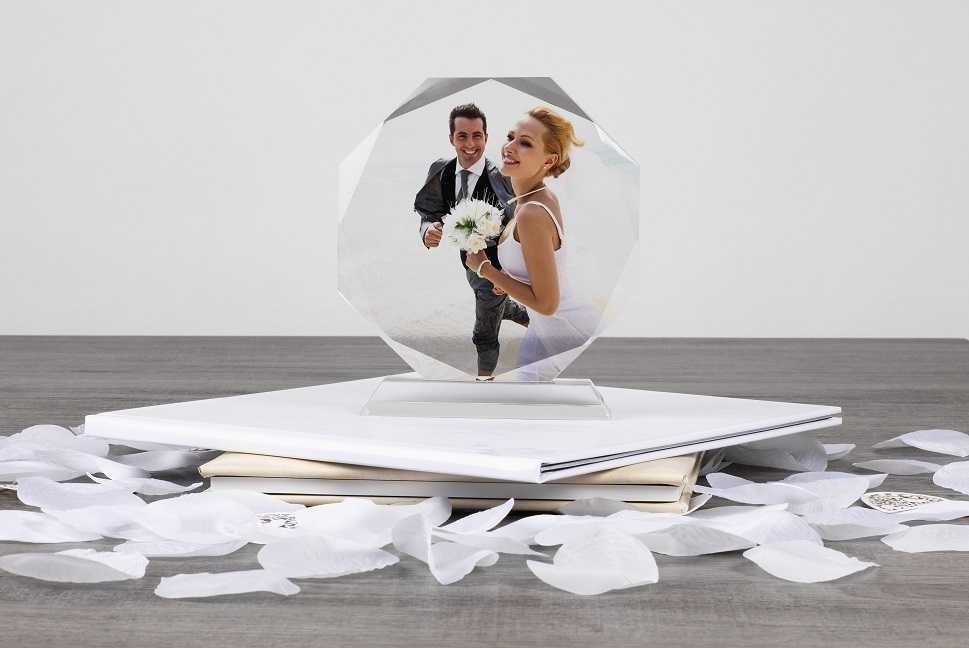
 3. Add Fresh Life to Your Coffeetable

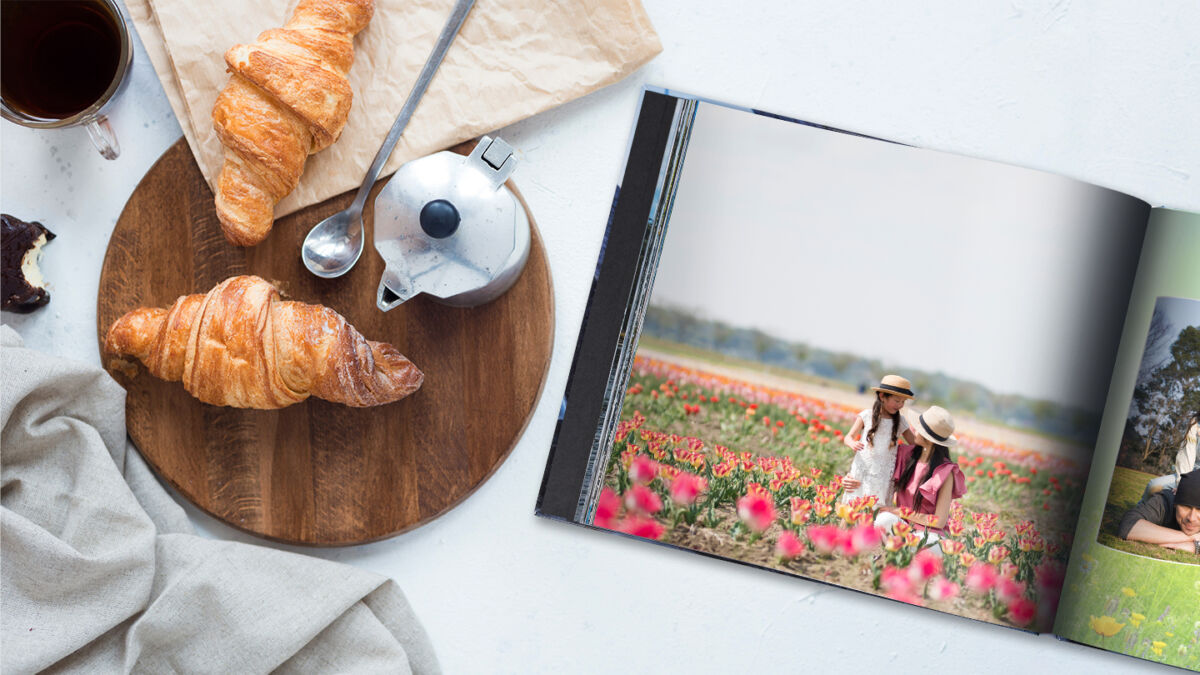
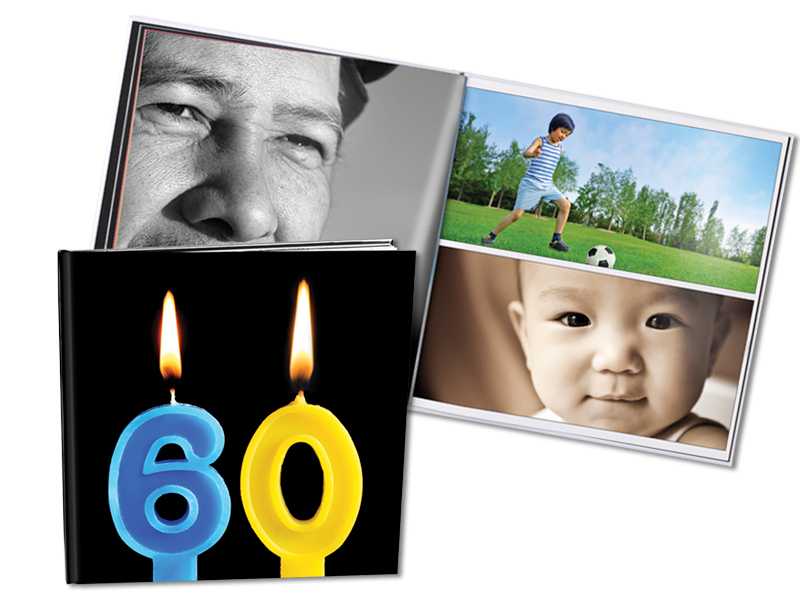
Don’t neglect your coffeetable, it’s easy to give it a refresh too! A new vase and a floral scented candle can breathe in some fresh new life, as can a bright new coffeetable book. A good coffeetable book is not only a conversation piece, and a place to store treasured memories, but it can also be a piece of décor that you can easily switch out from season to season. For spring, personalize a coffeetable book from our Photolab with some of your favourite springtime memories (scenic hikes, your garden, family activities, trips, etc.). You can even choose from spring templates to help theme your photo book. We recommend choosing the coffeetable book with a custom photo cover, or cover with a window; you will be able to personalize the cover with a spring-themed photo of your choice that will be seen when the book is sitting on your coffeetable, making it a perfect piece of seasonal décor.

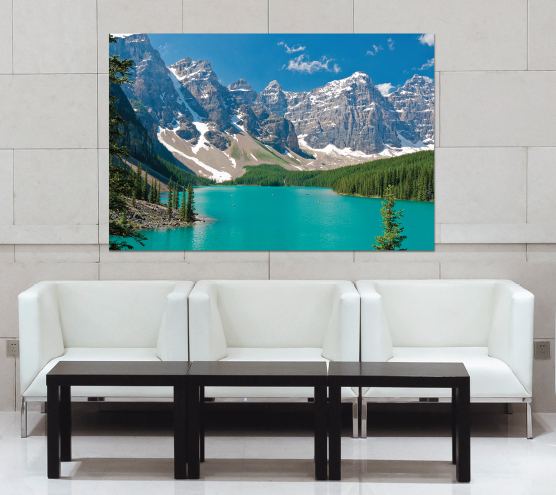
4. Bring Spring Indoors with Photo Panels

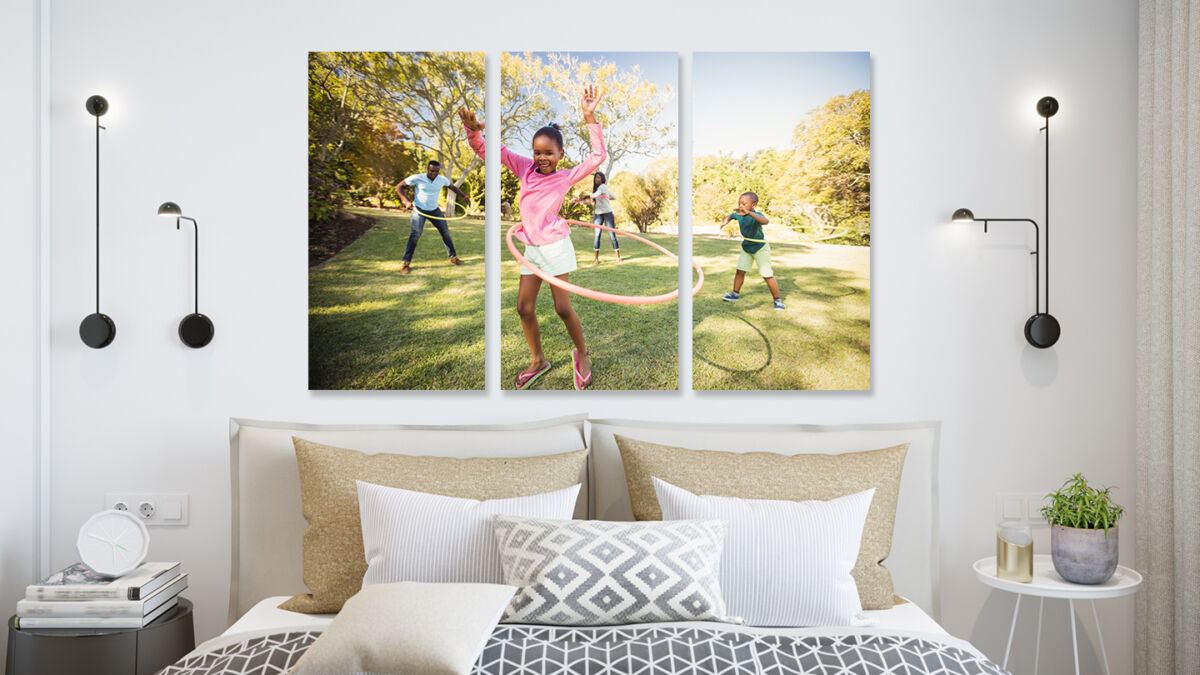
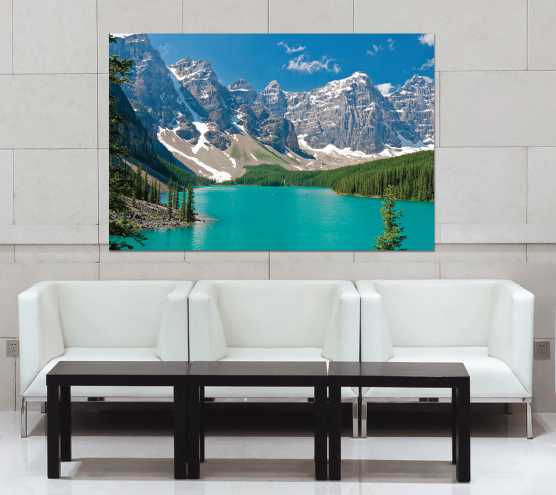
Liven up your space by going BIG with one of your favourite spring-themed images! While we have enlargements up to 44”x96” in size, another option is to have your image printed as multiple-panel split art, where your image is split over a few large prints. This style of wall art can make your images look even more eye-catching!

Our aluminum metal panels are a great choice for this split art style, as they are frameless and ready-to-hang. The high-gloss surface also makes colourful images pop really well, so they are perfect for brightening up your space with vibrant spring images. Lots of people seek out cherry blossoms and tulip fields for photo ops during the spring – those are great images to feature in this format, as would any other vibrant landscape images!

When hanging your split art, start with the middle panel first to ensure your prints will be centred on your wall. We suggest spacing the panels out about 2 to 3 inches apart if your panels are on the larger size. Smaller panels may look better with a little less spacing.

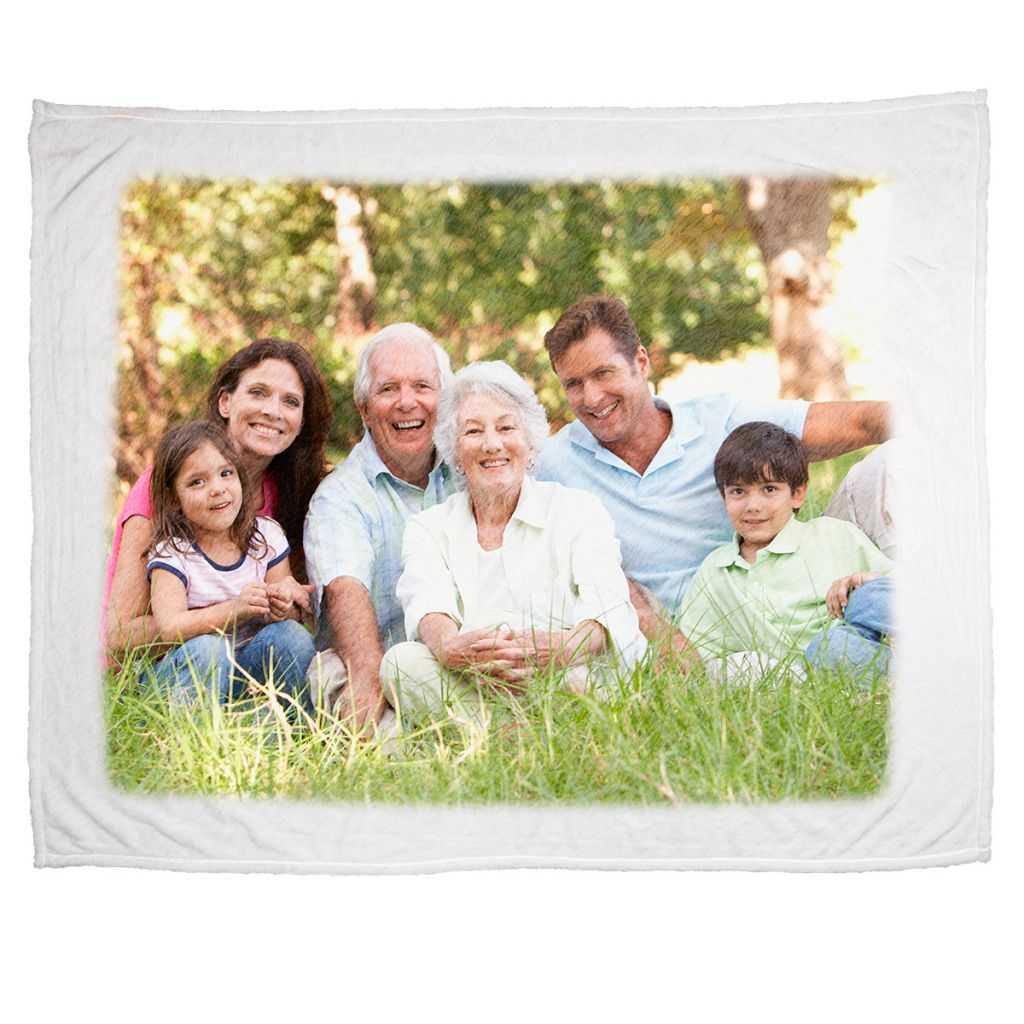
5. Brighten Up with Some Updated Pillows

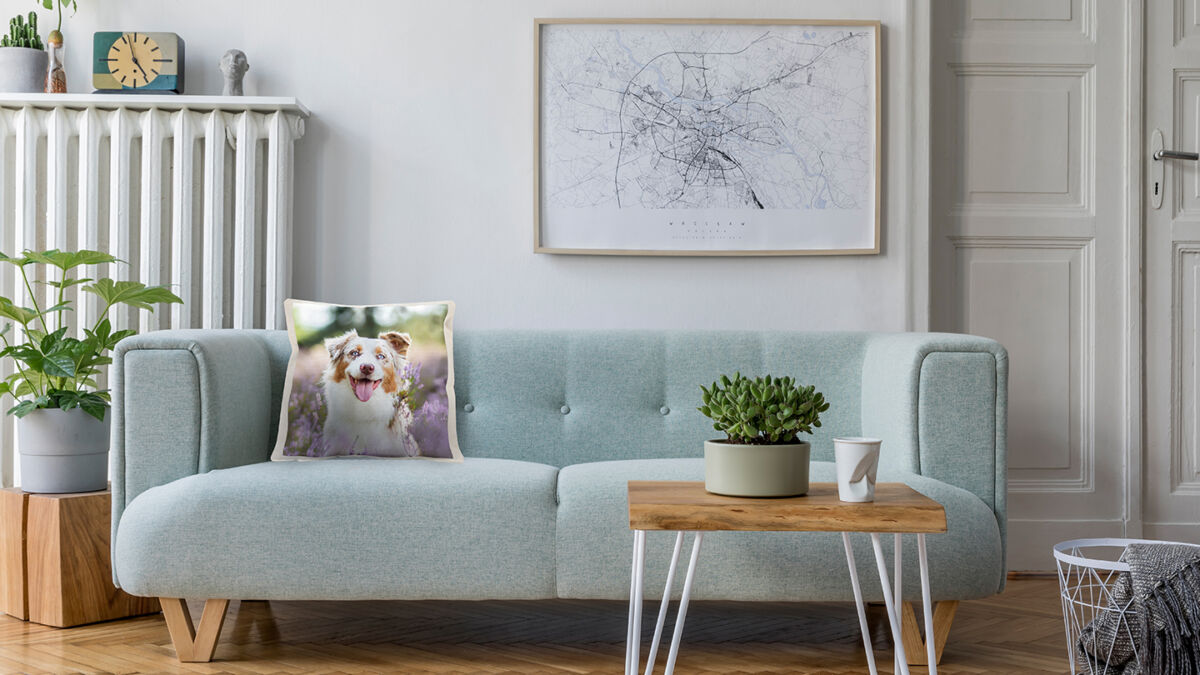
A tried and true way to add some brightness to your home in time for spring is to update your pillow cushions! A new cushion colour or pattern will do the trick, or you can customize something fun with our Photolab’s photo pillow cases. Choose a pet or family photo to feature, or if nature photography is your forte, a macro flower photo or other spring scenes would be a great way to customize your pillows for the season. They’re sure to make you smile every time you walk into the room!

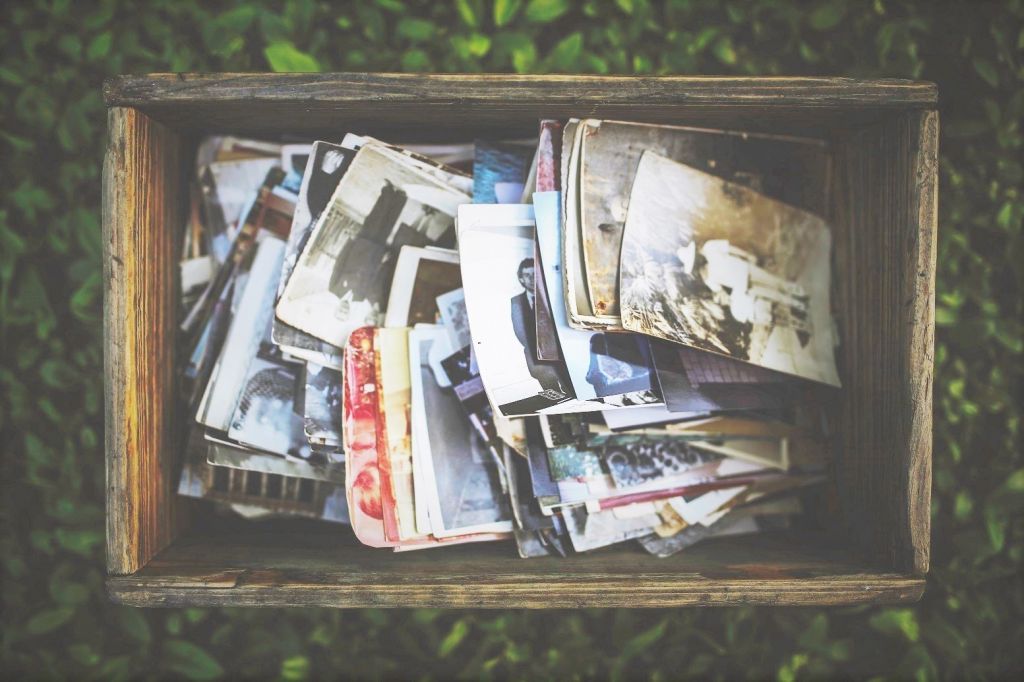
Spring Cleaning Your Photos

Speaking of refreshing your home with photos this spring, your photos might need a little spring cleaning too! If you have lots of old photos in albums or collecting dust shoeboxes, now is a good time to digitize them to ensure they aren’t lost to damage and degradation. Digitizing them yourself can be a big undertaking, but our Photolab can help make the process seamless. Just pick up a Photo Scanning Box at your local Photolab, bringing it home and fill it with up to 800 photographs and documents (up to 8.5”x11” in size). Then just bring the box back to us in-store, and we’ll digitize them all for you and put them on a USB drive. Simple as that! We also have a Slide Scanning Box to help you digitize up to 80 35mm slides.

Once digitized, your photos will not only be safe, but you’ll have so many more opportunities to share those precious photos! Use them in any of our 5 ideas above, from printing and framing them, to including them in your coffeetable photo book, or printing them on a pillow! The options are endless once your photos are digital.

You can also check out this blog for more tips on organizing and preserving your irreplaceable photos.


3 Easy Ways to Display Your Larger than Life Photos

Sometimes it’s hard to imagine just how incredible your photos are when they’re only displayed on your camera’s little display screen, or on your phone. But trust us when we say having them printed as a large format print will make them look breathtaking!

Using our state-of-the-art printing processes, we’re able to make your images larger than life, in a variety of fine art textures and finishes. And you might be surprised by just how big we can print your images – our ultimate enlargements, for example, go all the way up to a whopping 44”x96”!

No matter which surface or size you choose, our experienced Photolab technicians hand-inspect every image and correct it as needed; we can lighten, darken and even correct for colour shift. We also use patented dye inks that deliver rich colour with superior definition. And we guarantee satisfaction on every print. With over 35 years of photofinishing experience under our belts, we’re confident you’ll be blown away by the look and quality.

And if you’re on a time crunch – no need to worry. Many of our large format prints have quick turnaround times, so your photos will be ready to hang in no time.

Here are 3 easy ways to display your larger than life photos:

1. Ultimate Enlargements

Turnaround time: only 2 business days

Sizes available: 5”x7” up to 44”x96”

Our ultimate enlargements can be printed up to 44”x96”, which is definitely big enough to cover any of your bare walls. We use our Epson P9000 large format printer with high quality Epson inks, which have an archival stability of 200 years. Your print can even be mounted and laminated for easy display and durability. The only tough choice: will you order on high quality pearl or glossy photo paper?

2. Canvas Gallery Wraps

Turnaround time: only 3-5 business days

Sizes available: 9”x9” up to 40”x60”

For a textured fine art finish, you can order one of our premium quality Canvas Gallery Wraps up to 40”x60” in size. We have two finishes to choose from: traditional or pearlescent metallic. What’s great about this style of prints is that you don’t even need a frame! The canvas is stretched over a 1-3/4” deep wooden frame and can feature either black, white or mirrored edges. The wooden frame makes your print extra easy to display and gives your image added depth and dimension. Plus, you also have the option to order with a floating frame, so that your print looks even more polished when hung on the wall.

3. Aluminum Metal Panels

Turnaround time: only 5 business days (14 days for sizes larger than 16”x20”)

Sizes available: 4”x4” up to 40”x60”

Looking for an ultra-modern way to showcase your photos? Our Aluminum Metal Panels go up to size 40”x60”, and with their high-gloss finish, they’re sure to stand out. These lightweight metal panels are also very durable and resistant to fading, making them a great option for displaying in high traffic areas.

The metal panels are printed by taking coated aluminum sheets and infusing them with dyes. The process will make your image come alive with vibrant colour – especially if your image is highly detailed, like a landscape photo.


Ready to make your images larger than life? Get started by uploading your photos to our Photolab online, using our in-store kiosks, or downloading our London Drugs Photolab App for iOS and Android!

Celebrating Life and Special Milestones Through Photos

Life is filled with all kinds of defining moments and milestones. From birthdays to anniversaries, and even funerals, these moments in time are an opportunity for us to appreciate and celebrate the life we have lived.

For over a hundred years, photos have been an essential way of preserving life’s moments, allowing us to look back and celebrate each and every one of them. What has changed in those one hundred years, however, is the expanded variety of ways to showcase those precious photos.


Milestone Birthdays

Every birthday is special, but milestone birthdays, like the 30th, 40th, 50th (or even 90th!) birthdays, are extra special. A great way to commemorate that special year is with a Poster Collage or Photo Book of their best moments – from birth to now.

Dig through old snapshots to find some adorable baby photos, some of the awkward teen years, and some that are more current. In the end, you’ll have compiled a collection of photos that tells the story of their life…so far! We even offer a variety of birthday templates, to help design and customize your Photo Book. Wrap it up as a gift, or put it out on display at their birthday party so guests can flip through it.

If you need some help digitizing a collection of old photos to add to your Poster Collage or Photo Book, our Photo Scanning Box Service will make the process seamless. Just fill the box with up to 800 photographs and documents, bring it back to your local London Drugs Photolab, and our Experts will digitize them for you.

You can even use those digitized photos to create all kinds of other birthday gifts, from personalized t-shirts and puzzles, to photo calendars and jewelry boxes.


Anniversaries

Whether it’s your first wedding anniversary or your 15th, you’ll want to make that relationship milestone special. Why not celebrate by surprising your significant other with a gift that truly captures your love?

If you’re planning to give your hubby or wifey a traditional anniversary gift, we have a few suggestions that will show them just how much you appreciate the time you’ve spent together.


1st year: Paper

Don’t just go with regular old paper for your first anniversary, gift them luxe, glossy photo paper! Choose from any of our Photo Books, Enlargements, or Poster Collages and customize with your favourite photos together. Your wedding photos are a good place to start. In fact, we have lots of wedding-themed templates you can use while personalizing your photo gift.

2nd year: Cotton

Get creative with your second anniversary gift by ordering a Canvas Gallery Wrap. The textured print surface is made of cotton, so you’ll be on the dot with the traditional anniversary gift, plus your other half will be super impressed that you’ve turned a photo of you two into a piece of fine art for your home!


9th year: Pottery

A Photo Mug is the perfect way to fulfill that traditional ‘pottery’ anniversary gift, while also making them something thoughtful and personal. Just pick a mug colour (their favourite colour, perhaps?), a few photos, and some text (your anniversary date?) to completely customize your gift. It’s sure to impress!


10th year: Aluminum

The traditional ‘aluminum’ anniversary gift is meant to reflect your marriage’s resilience. What better way to share that than with a beautiful photo, printed on one of our highly durable Aluminum Metal Panels? Pick one memory you’d like to showcase from your 10 incredible years together, or if you can’t choose just one, create a collage with all your favourite moments.

15th year: Crystal

Just when they think you’ve run out of great anniversary gift ideas…you gift them a beautiful, personalized Photo Crystal for your 15th anniversary! A truly unique gift that showcases a favourite moment in time together. Choose from our selection of photo crystals, or our crystal ornaments (we think the heart-shaped ornament or crystal with base would be especially fitting).


Funerals

There’s a reason funerals are often called a ‘Celebration of Life’. It’s a time when family and friends can come together, in memory of someone special, to celebrate a life well lived.

A very touching way to help preserve and celebrate their memory is with photos. Start by combing through old photo albums and digging through shoe boxes full of old photographs. To make things a bit easier, use our Photo Scanning Box Service to have up to 800 photos and documents digitized for you by our Photolab, so you can easily personalize all kinds of beautiful photo keepsakes with the digital files.

To create a truly sentimental and heartfelt memento, personalize a Photo Book with images of their life, and blank sections for family and friends to add personal message and stories by hand. It’s a keepsake the family can take home at the end of the funeral service, and read over the kind words from supportive family and friends.

Another thoughtful gift for the family is a personalized Fleece Blanket. The cozy blanket will feel like a warm hug, as they cuddle up in the memories of their loved one. Choose one photo, or a selection of photos, to feature as a collage on the blanket’s surface.


Need a little help creating your photo gift? Speak with one of our Photolab Experts at your local London Drugs! Or, if you’re ready to go, you can start personalizing your gift on our Photolab website, or at any of our in-store Photolab kiosks.

Save Your Photos Day: Tips for Safeguarding Your Most Precious Memories

Historic family photos are often relegated in shoeboxes to the attic or basement. Others are proudly showcased in frames hung on the wall, or in photo albums. Whether they’re hidden away or displayed in the home, the reality is that print photographs are susceptible to degradation. National Save Your Photos Day is September 26th, and it’s the perfect opportunity to stop and think about what you can do to protect your precious photo memories.

Environmental factors such as light, heat and humidity can cause photos to fade – especially those taken between 1936 and 1990, due to the methods of film processing used at the time. The other threat to your photos is a disaster such as a fire or flood. Generations worth memories can be destroyed in just moments. Without duplicates or digital backups, those memories will be irreplaceable.

For peace of mind, and to ensure your photos survive the test of time, our LD Experts recommend saving your photos using these helpful steps:

  1. Scan your photos and documents

The first step in preserving and protecting your photos is to digitize them. You can either use an at-home scanner to digitize them yourself one-by-one, or our Photolab can help. Use our Photo Scanning Box service to have mass quantities of your photos digitized all at once. Just pick up a box from our Photolab, take it home and fill it with 800 photos and even old documents like birth certificates, and bring it back to any London Drugs Photolab location. The service is pre-paid for when the box is dropped off: $179.99 per box, which is approximately 22 cents per photo or document. Once our LD Experts are done scanning your photos at high resolution, you can pick up your hard copies as well the USB flash drive with all your digitized photos on it.

  1. Back up your digital photos

With your print photographs now digitized, the next step is to save those digital photos on to your computer as well as an external hard drive or USB flash drive. That way, if your computer crashes for any reason, or a flood destroys it, you’ll still have another digital copy that’s safe and sound. Ideally, store your digital photos on multiple external hard drives. Or consider uploading them to an online drive such as iCloud or Google Drive.

  1. Separate your hard drives

Even if you shoot digital and already keep your photos on a hard drive, our LD Experts recommend backing up your digital files on an extra hard drive and keeping it in a separate location. This will help to avoid losing your digital photos in a fire, flood or other disaster. Consider keeping one in the house and one at a family member’s home.

Once your photos are safe and digitized, the possibilities are endless! Make print copies using a photo printer at home, or easily order prints and enlargements through our Photolab. You can send them to family and friends so they can enjoy those cherished photos too. If you order from our Photolab, you can even have those prints sent directly to their home anywhere in Canada, or to their nearest London Drugs Photolab for pick-up. You can also get creative with all the different ways you can share your images: photo books, calendars, or wall décor just to name a few. Bring new life to old photographs that had previously remained unseen. After all, photo memories are meant to be shared.

To get started, visit the London Drugs Photolab online or in store.


World Photo Day 2017: Celebrating Moments in Time with Photofinishing

Even in today’s digital-centric world, printing has remained an incredibly important part of the photography process. Photography is meant to celebrate a special moment in time, and photo printing helps us to share that moment with the world. It’s worth reminding ourselves just how powerful a photo can be, especially while we celebrate World Photo Day.

Developing negatives has always been an exciting part of the process for any photographer, and for a long time it was the only way to share your captured images. It was the only way to tell your story. Henry Fox Talbot pioneered the process of chemically developing film negatives, patenting the process of ‘calotype’ in 1841. This calotype process made photography more practical than paintings and illustrations, with the new ability to make any number of prints from a single negative image. Suddenly, photography was accessible to the everyday person.

However while our options used to be limited to basic prints and enlargements, photographers now have all kinds of unique print surfaces at their fingertips. Thanks to digital technology, we can tell the story of each photo not just with the developed print, but through editing and the print surface itself. After all, a bright, vivid image won’t be conveyed the same way as a dark moody image on the same surface. You’ve chosen a moment in time that you want to celebrate, now you just have to find the perfect surface to share it. Here is a look at some of our favourite print surfaces.

Aluminum Metal Panels

These high-gloss aluminum metal panels have become a popular choice for photographers in recent years. We’ve had many professional photographers tell us these eye-catching prints have been popular with their clients as well. The coated aluminum sheets are infused with dyes that can make any image, especially detailed and rich landscape photos, come alive with vibrant colour.

The London Drugs Photolab has expanded the availability of metal printing technology from just one location to now several Photolab locations, which have the special presses necessary to create the aluminum prints on-site. The lightweight and durable surface makes these prints ideal for hanging on the walls of your home or gallery. They’re also an especially good choice for high traffic areas, thanks to their resistance to fading.

Local photographers Stacy William Head and Larry Hilderman have both printed their landscape images on aluminum metal panels. Stacy finds that the aluminum surface gives his rich, long exposures a very surreal feeling compared to paper or canvas. Larry appreciates the depth it gives his landscape images. You can read more about both Stacy and Larry’s experiences with aluminum metal panels on their respective blog posts here and here.

Canvas Gallery Wraps

Turning your most precious moments into a true work of art is easy with canvas gallery wraps. Using specially pigmented inks with archival qualities, the image is printed on a fine art canvas. The canvas is then stretched around the sides of a 1.75” wooden frame and secured on the back. This style gives the image added depth and dimension. Since the image is printed right to the very edge of the canvas (otherwise known as “full-bleed”), the print can be hung on a wall without an art frame. If you do want the look of a border, our LDExperts in the Photolab recommend a black or white frame, or a floating black frame.

Our LDExperts recommend keeping the canvas dry and avoiding water or liquid cleaning solutions. This will help to preserve the image’s colour and contrast, allowing it to last for many years without noticeable fading.

A new offering is the metallic canvas, which features a pearlescent finish and vibrant colour reproduction. If you’re looking for a unique surface texture, this is an excellent choice.

Bamboo Prints

The texture of bamboo prints really is unparalleled. Made of 90% bamboo fibres and 10% cotton, this ultra-matte, finely crafted white paper offers a unique look and feel to your image. The surface offers maximum aging resistance and an extremely large colour gamut. As an added bonus, bamboo prints are also environmentally-friendly, as bamboo is considered to be a highly renewable resource.

Local photographer Matt Ferguson was impressed after printing on bamboo for the first time. The “texture and physical feel to the print” made it stand out, and he felt as though he “could actually touch the trees and feel the coolness of the fog” featured in his image. If you’re curious to hear more about his experience you can, check out this blog post.


Hopefully World Photo Day will inspire you to experiment with your photofinishing options and try something new. Consider the image you have (portrait or landscape), the colours (vivid or dark), and the purpose (home décor or gallery display) and use those elements to help you decide which surface will best tell the story of your image. If you need a little extra help deciding which surface is the right choice, just speak with one of our LDExperts in the Photolab department in-store!