Facebook Live Recipes


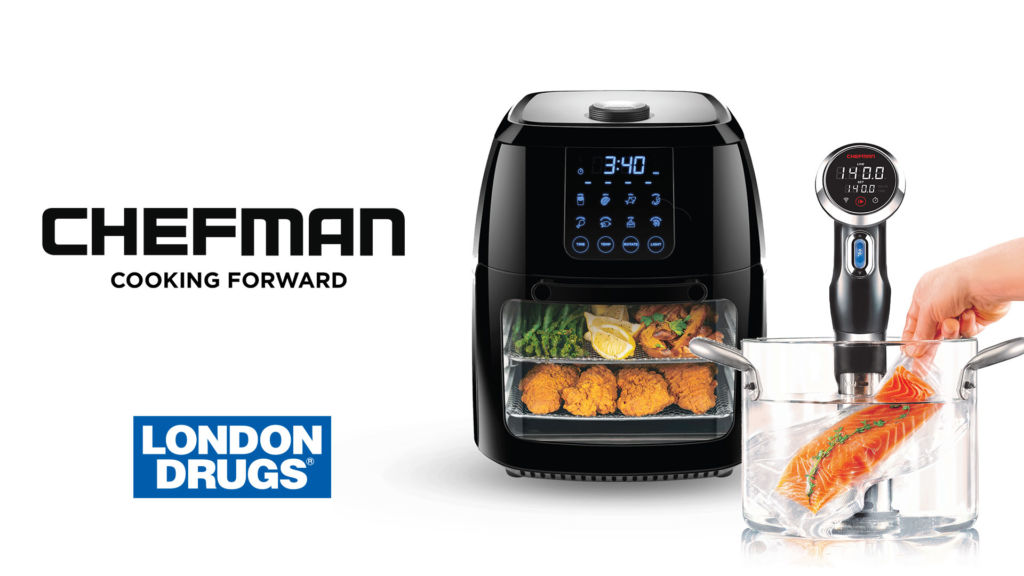
Check out these delicious recipes below that you can easily create at home with the Chefman 3-in-1 Air Fryer and the Chefman Sous Vide Immersion Circulator  – as featured on our Facebook Live event held on Sept 25th, 2019. View the full hour long video on our Facebook page here.

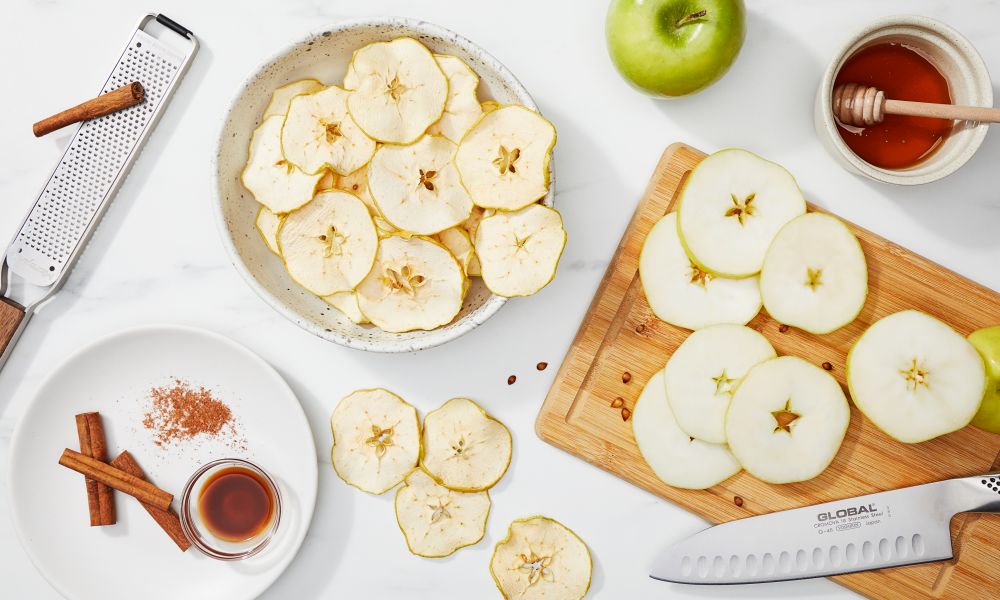
Apple Chips with Yogurt Dipping Sauce

Prep Time: 15 min
Dehydrate Time: 10 hr
Total Time: 10 hr 15 min
Level: Easy
Yield: 2 servings

Ingredients:
• 1 honey crisp apples, 1/8 inch slices
• ¼ cup plain Greek yogurt
• ½ tbsp honey
• ¼ tsp vanilla extract
• ¼ tsp cinnamon

Steps:
1. Arrange apple slices evenly on two trays then insert trays into the multi-function air fryer.
2. Set to Dehydrate at 140F for 10 hours.
3. While the apple slices are dehydrating, combine the yogurt, honey, vanilla extract and honey in a small bowl. Refrigerate for later use.
4. When the time has expired and the apples are crisp, remove from the multi-function air fryer.
5. Serve immediately with dipping sauce or store in an air-tight container.

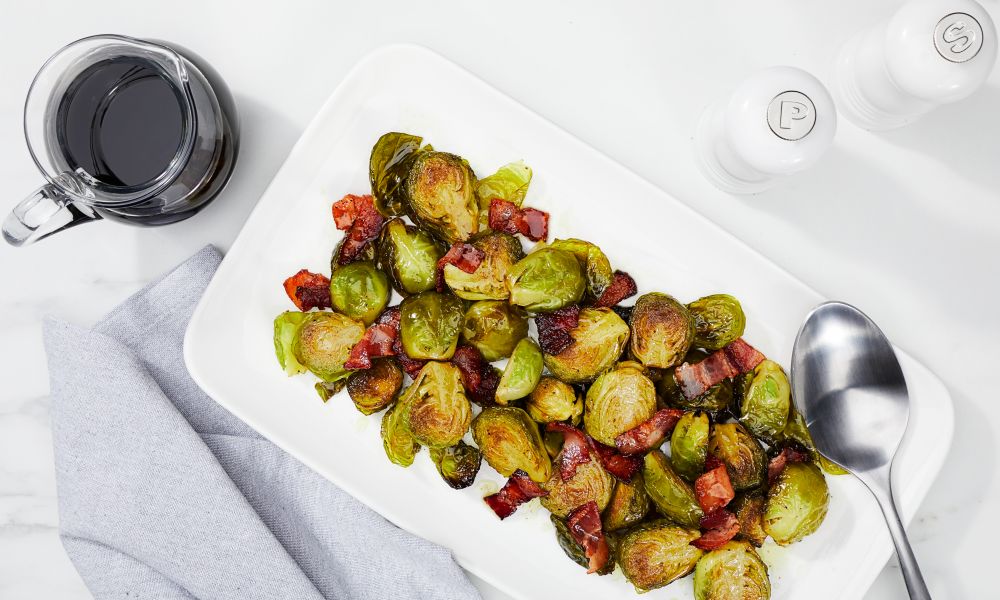
Balsamic Bacon Brussels Sprouts

Prep Time: 15 min
Air Fry Time: 25 min
Total Time: 50 min
Level: Easy
Yield: 5 servings

Ingredients:
• ½ cup olive oil
• 2 tbsp balsamic vinegar
• 1 tbsp salt
• 2 tsp black pepper
• 1 lb brussels sprouts, destemmed and halved
• 6 pieces of bacon, ½ inch pieces

Steps:
1. In a large bowl, whisk together the olive oil, balsamic, salt and pepper.
2. Add brussels sprouts and bacon then toss together until evenly coated.
3. Split the mixture between two trays and then place in the multi-function air fryer.
4. Set to 390F for 25 minutes.
5. When time has expired or food is crispy and dark in color, remove from the multi-function air fryer.
6. Serve immediately.

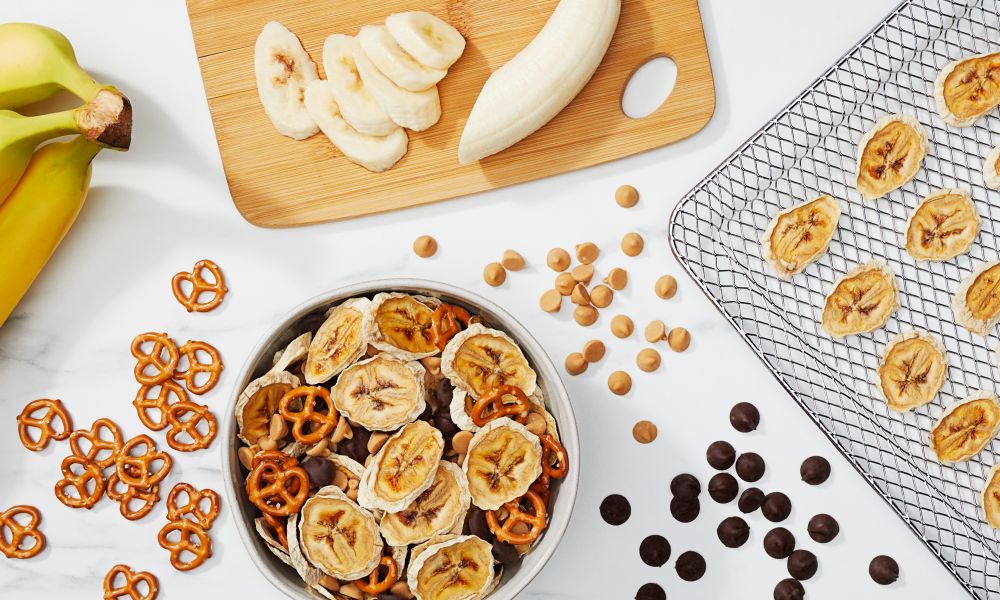
Banana Chip Trail Mix

Prep Time: 10 min
Dehydrate Time: 8 hr
Total Time: 8 hr 10 min
Level: Easy
Yield: 4 servings

Ingredients:
• 2 bananas, peeled, ¼ inch slices
• ¼ cup dark chocolate chips
• ¼ cup peanut butter chips
• ¼ cup mini pretzels

Steps:
1. Arrange sliced bananas evenly on two trays and insert them into the multi-function air fryer.
2. Set to Dehydrate at 140F for 8 hours.
3. When timer has expired and banana chips are crisp, remove from the multi-function air fryer.
4. In a large bowl, mix together banana chips, chocolate chips, peanut butter chips and pretzels.
5. Store in an air-tight container.

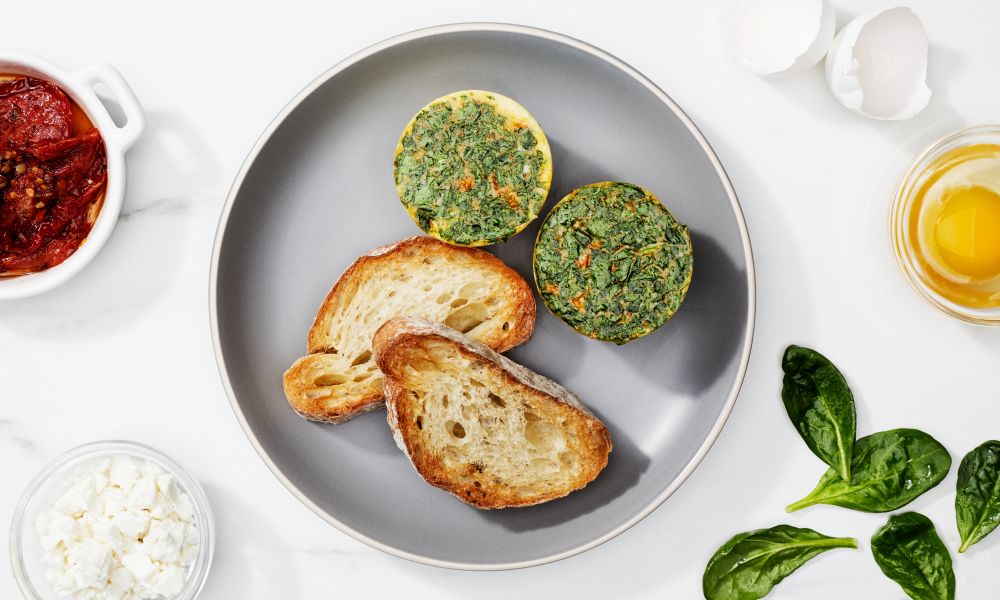
Mediterranean Sous Vide Egg Cups

Prep Time: 15 min
Sous Vide Time: 1 hr
Total Time: 1 hr 30 min
Level: Medium
Yield: 6 servings

Supplies Needed:
• Large container or pot
• 6 (4oz) mason jars with lids
• Chefman Immersion Circulator

Ingredients:
• Cooking spray
• 6 eggs
• ½ cup half and half
• ½ tsp salt
• ½ cup spinach, finely chopped
• ½ cup sundried tomatoes, finely chopped
• ½ cup feta, crumbled
• Oregano, for garnish

Steps:
1. Spray all 6 jars with cooking spray and set aside.
2. Fill large container or pot with warm water. Place immersion circulator in the water and set to 172F. Allow water to come to temperature.
3. In a large bowl, whisk eggs, half and half and salt until fully beaten and light yellow in color.
4. Add in spinach, sundried tomatoes and feta. Stir until evenly combined.
5. Evenly distribute into the sprayed jars. Close the lids tightly.
6. When water has reached the correct temperature, carefully place jars into water. (Note: The jars can be stacked if needed.)
7. Cook for 1 hour.
8. When time has expired carefully remove egg cups from water.
9. Remove from jars by taking off lid and inverting them or serve them in jars. Serve immediately with fresh oregano.
10. If storing, allow jars to cool then place in fridge. Reheat in jars without lids. (Note: Recipe can easily be doubled for 12 servings if desired.)

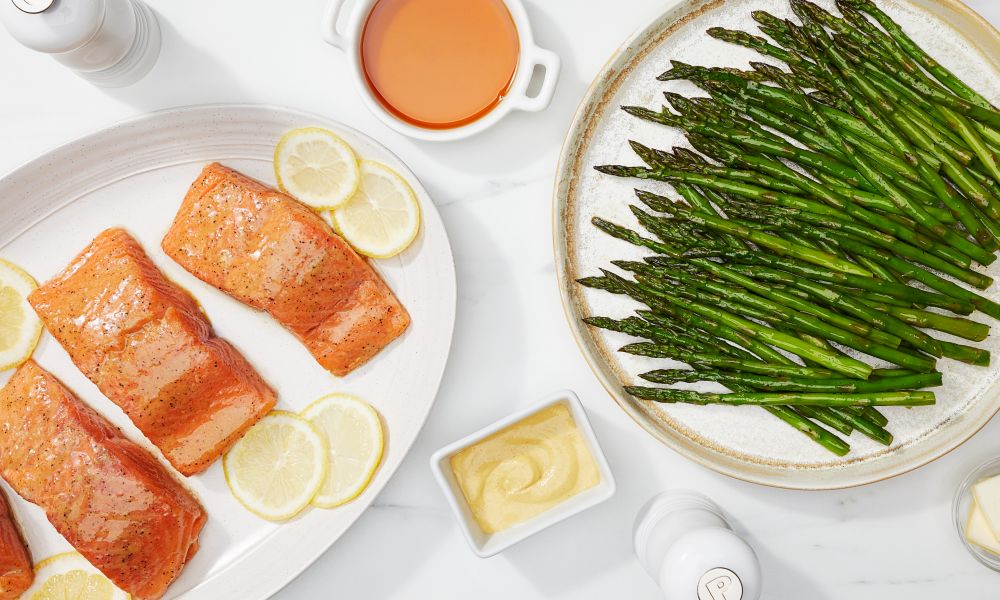
Maple Dijon Salmon with Asparagus

Prep Time: 15 min
Sous Vide Time: 1 hr 30 min
Total Time: 1 hr 45 min
Level: Medium
Yield: 4 servings

Supplies Needed:
• Vacuum sealer bags
• Vacuum sealer
• Large container or pot
• Brush
• Chefman Immersion Circulator

Ingredients:
• 1 bunch asparagus, cleaned
• 3 tbsp butter, melted
• 2 tsp salt
• 1 tsp black pepper

• 4-6oz salmon fillets
• 4 tbsp olive oil
• ½ tbsp salt
• 1 tsp black pepper
• ¼ cup maple syrup
• 3 tbsp Dijon

Steps:
1. Fill a large container with warm water. Place immersion circulator in water and set to 125F. Allow water to get to temperature.
2. In a large bowl, combine asparagus, melted butter, 2 tsp salt and 1 tsp pepper. Evenly coat.
3. Place in a single layer in a large vacuum sealer bag. Seal bag until airtight. Set aside.
4. When water has reached the correct temperature, place bagged asparagus in water. Cook for 40 minutes.
5. Brush the salmon on all sides with butter then season evenly with ½ tbsp salt and 1 tsp pepper.
6. In a small bowl, combine maple syrup and Dijon mustard. Brush mixture on all sides of salmon.
7. Place salmon in a single layer in a large vacuum sealer bag. Pour any additional sauce into the bag and seal until airtight. Store in the fridge until 40 minute timer on asparagus has expired.
8. When time has expired, place bagged salmon in water with asparagus and cook for 50 minutes (Note: The total time for cooking the asparagus is 1 hour and 30 minutes).
9. When time has expired, remove asparagus and salmon. Gently remove both from bags.
10. Serve immediately or sear salmon and asparagus in a hot pan with oil to add color and texture.

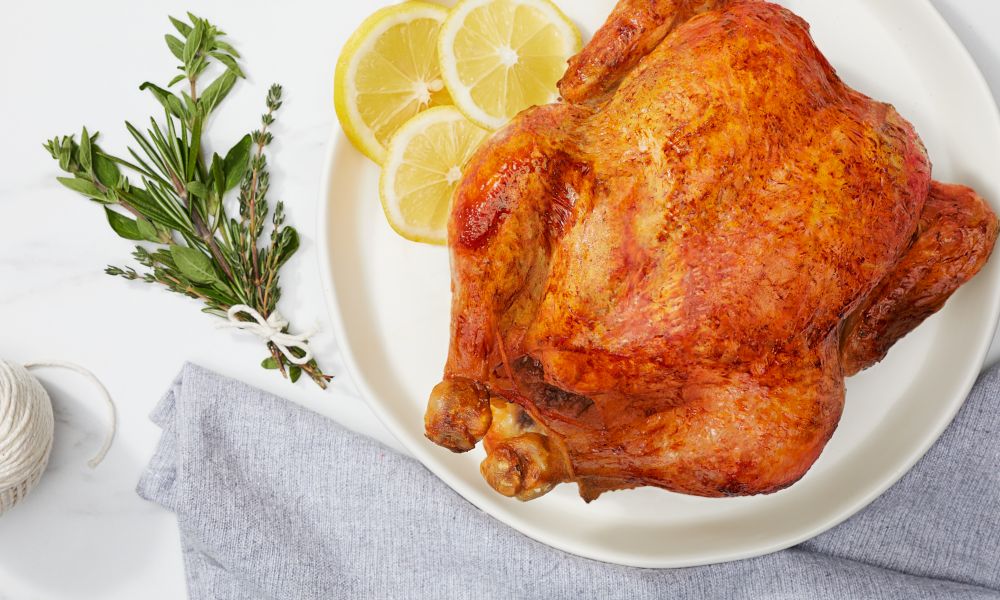
Rotisserie Chicken

Prep Time: 5 min
Air Fry Time: 45 min
Total Time: 55 min
Level: Medium
Yield: 4 servings

Supplies Needed:
• Twine

Ingredients:
• 3.5 lb whole chicken
• ¼ cup olive oil
• 2 tbsp salt
• 2 tsp black pepper

Steps:
1. Truss the chicken with twine to make sure the wings and legs are tucked in and therefore will cook evenly.
2. Rub chicken with olive oil then evenly season with salt and pepper.
3. Place chicken on the included rotisserie spit with forks to secure chicken.
4. Place chicken into the rotisserie slots on the center rack.
5. Set to 380F for 45 minutes. Press the Rotisserie button to rotate the chicken while cooking.
6. When time has expired and the internal temperature of the chicken is 165F, remove the chicken with rack removal tool. Rest chicken for 5 minutes.
7. Remove twine and cut chicken as desired.
8. Serve immediately.

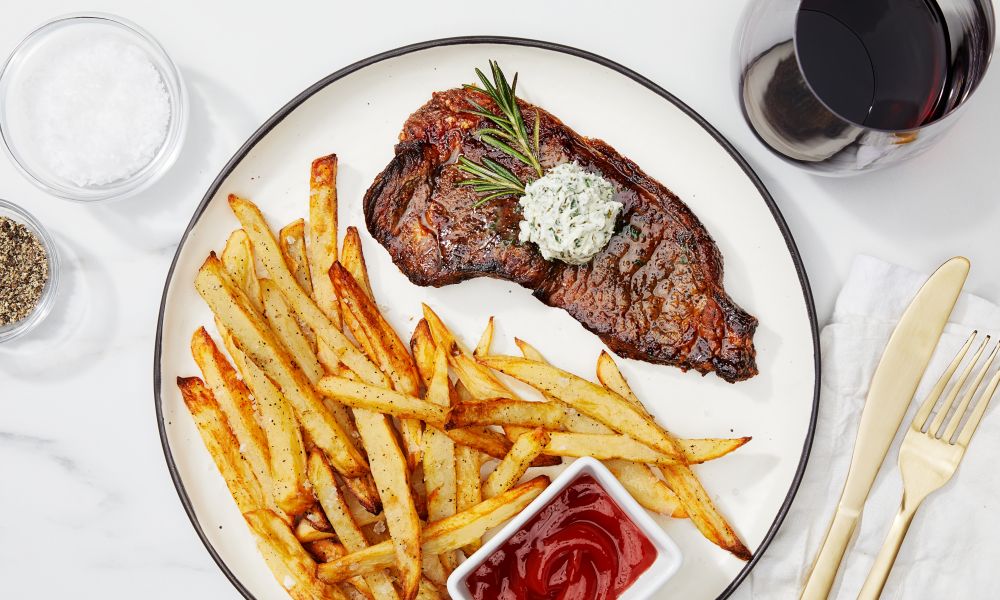
Steak Frites

Prep Time: 25 min
Air Fry Time: 25 minTotal Time: 55 min
Level: Medium
Yield: 2 servings

Ingredients:
• 1 russet potato, peeled and cut into ¼ inch sticks
• 4 cups water
• 4 tbsp olive oil, divided in half
• 6 tsp salt, divided in half
• 2 tsp black pepper, divided in half
• 2-12oz bone-in strip steaks, room temperature
• Herb butter, for serving

Steps:
1. Place potatoes in a container with water and allow to soak for 10 minutes.
2. After the fries have soaked, pat dry and then place in a large bowl.
3. Add 2 tbsp olive oil, 3 tsp salt and 1 tsp pepper to the bowl. Evenly coat the fries.
4. Place fries in a single layer on a tray and insert into the multi-function air fryer on the top shelf.
5. Rub remaining 2 tbsp of oil on the steaks then season with remaining salt and pepper.
6. Place steaks on a tray and insert them below the fries.
7. Set to 380F for 25 minutes.
8. When time has expired, remove steaks and allow to rest for about 5 minutes.
9. When fries are fully cooked, golden brown and crispy, remove.
10. Serve immediately with steak and herb butter.

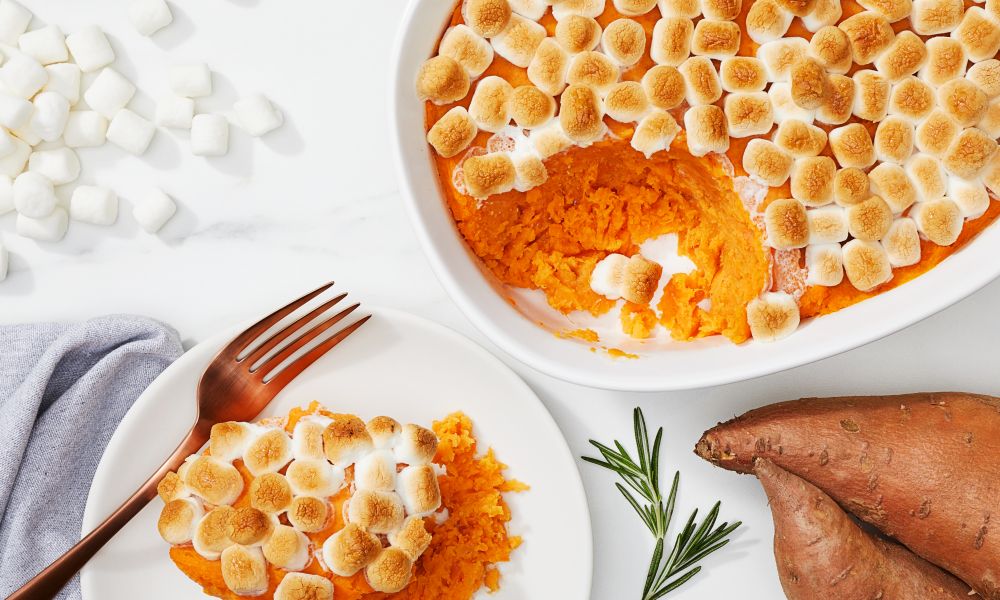
Sweet Potato Casserole

Prep Time: 15 min
Sous Vide Time: 2 hr 30 min
Bake Time: 10 min
Total Time: 2 hr 55 min
Level: Medium
Yield: 5 servings

Supplies Needed:
• Vacuum Sealer
• Large Vacuum Sealer Bag
• Large Pot or Container
• Chefman Immersion Circulator
• Potato Masher
• 8×8 baking dish
• Chefman Multi-Function Air Fryer

Ingredients:
• 4 large sweet potatoes, peeled and diced
• 4 tbsp butter, cut into 3 pieces
• ¼ cup brown sugar
• 1 tbsp salt
• 1 tsp black pepper
• 2 tsp ground cinnamon
• 1 tsp ground nutmeg
• 4 sprigs thyme
• 2 sprigs rosemary
• Cooking spray
• 2 cups mini marshmallows

Steps:
1. Fill a large container or pot with warm water then place the immersion circulator in the water. Set to 180F and allow the water to come to temperature.
2. Place the sweet potatoes, butter, brown sugar, salt, pepper, cinnamon, nutmeg, thyme and rosemary in large vacuum seal bag. Seal bag until it is air-tight.
3. When water is at correct temperature, place bagged sweet potatoes in the water. Set a timer for 2 hours and 30 minutes.
4. When potatoes are very tender, remove from water. Place sweet potato mixture into a large bowl, removing and discarding the rosemary and thyme.
5. Using a potato masher, mash all ingredients together until fluffy and evenly combined.
6. Transfer the sweet potatoes to a sprayed 8×8 baking dish.
7. Place marshmallows on top and place in the multi-function air fryer. Set to Bake at 400F for 10 minutes.

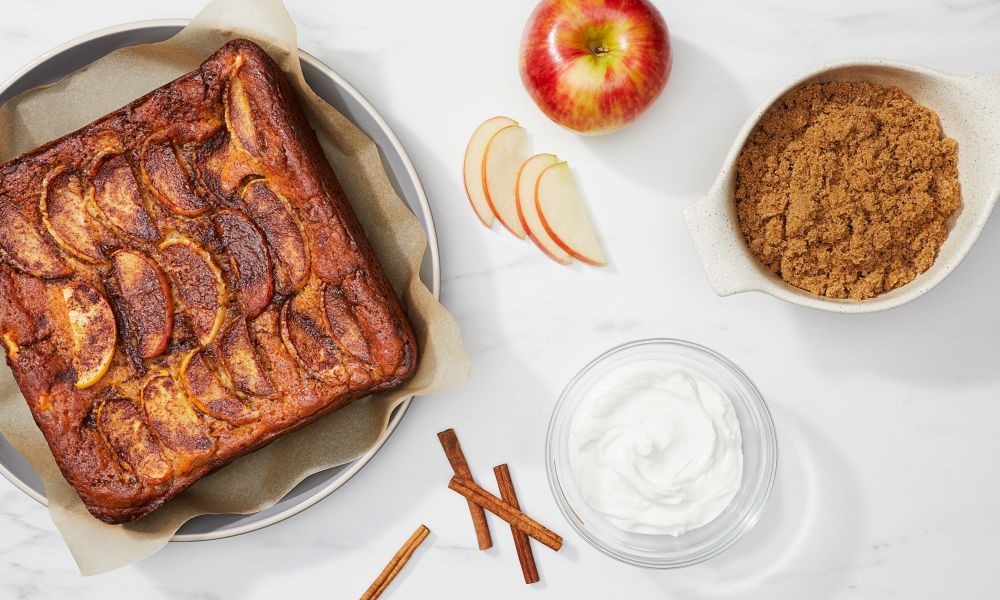
Yogurt Apple Cake

Prep Time: 30 min
Bake Time: 1 hr 20 min
Total Time: 1 hr 50 min
Level: Medium
Yield: 9 servings

Supplies Needed:
• Hand or Stand Mixer
• 8×8 baking pan
• Aluminum Foil

Ingredients:
• ½ cup brown sugar
• 8 tbsp butter, room temperature
• 2 eggs
• 1 ¼ cups plain Greek yogurt
• 1 ½ tsp vanilla extract
• 1 ½ cups flour
• 1 tsp baking powder
• 1 tsp baking soda
• 1 tsp salt
• ½ tsp cinnamon
• 1 honey crisp apple, peeled and ½ inch diced
• Cooking spray
• 4 tbsp butter, melted
• ¼ cup brown sugar
• 2 tsp cinnamon
• 1 honey crisp apple, sliced

Steps:
1. In a large bowl with a hand mixer or stand mixer, whisk brown sugar and room temperature butter until creamed together and fluffy, about 5 minutes.
2. Add one egg at a time while mixing until each is fully combined.
3. Add yogurt and mix until fully combined.
4. Add vanilla and mix until incorporated.
5. In a medium bowl, stir together flour, baking powder, baking soda, salt and cinnamon.
6. While mixing, slowly add the dry ingredient mixture to the wet mixture until a smooth batter is formed.
7. Finally, mix in diced apples until just incorporated, making sure to not overwork the batter.
8. Spray baking dish with cooking spray and then pour batter into pan.
9. In a small bowl, mix together melted butter, ¼ cup brown sugar and 2 tsp cinnamon and combine to make a paste.



10 Healthy(ish) Recipes for the New Year

We’ve all been there: December has come and gone, and with it all the cookies, turkey, and sweet treats.

Come January, we’re ready to get back on track!

Healthy Recipes from London Drugs Blog

While there’s nothing wrong with setting your goals high, sometimes you need a little wiggle room to keep them within reach. Maybe you’re simply hoping to add more vegetables to your diet – or perhaps you’d just like to cut out that second cup of coffee every morning.

Whatever your resolutions are, don’t be too hard on yourself – sometimes it’s good to indulge (in moderation, of course)! If you’d like to make some healthy changes to your food choices in 2019, we’ve assembled 10 of our favourite healthy(ish) recipes to motivate you well into the new year.


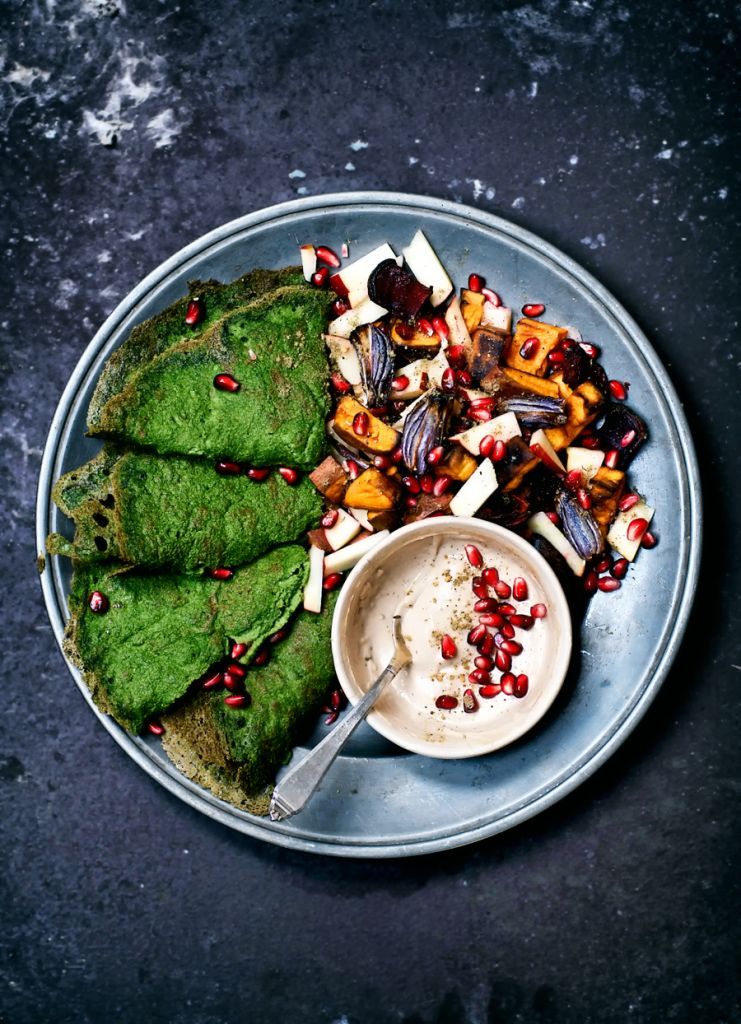
1. Spinach Crepes with Roasted Root Vegetables and Tahini Sauce

[Photo cred + find the recipe at Occasionally Eggs]

For those of you who follow a grain-free or gluten-free diet, it doesn’t mean you have to miss out on delicious savoury meals! These spinach crepes require only spinach, water, chickpea flour, and seasoning – and can be paired with your favourite fillings.


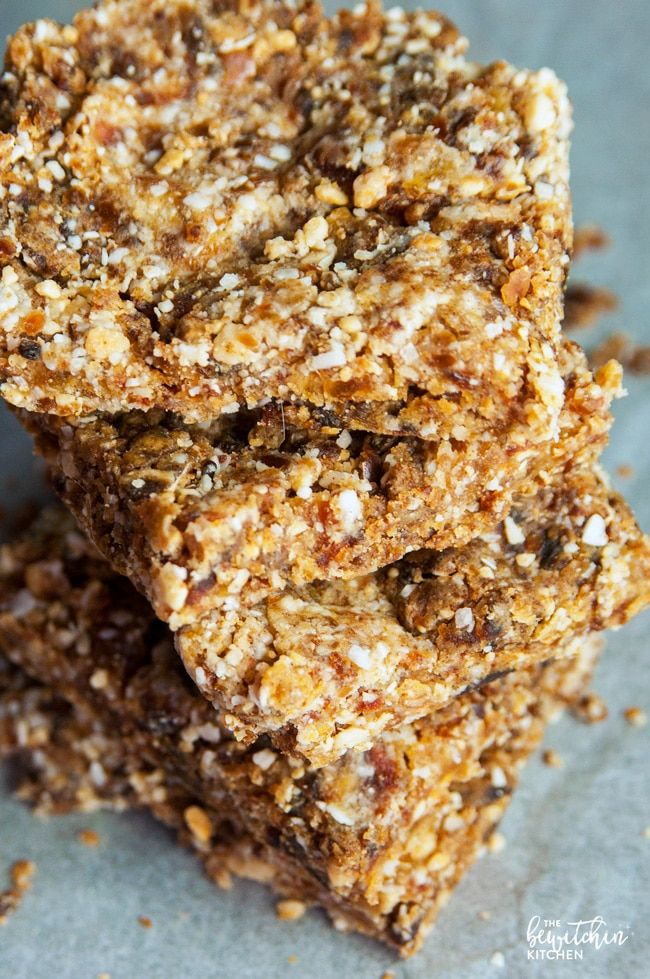
2. Coconut Cashew Bars

[Photo cred + find the recipe at The Bewitchin Kitchen]

Three all-natural ingredients and 10 minutes is all you need to prepare these sweet and crunchy coconut cashew bars. Eat them for breakfast or grab them for an on-the-go snack!


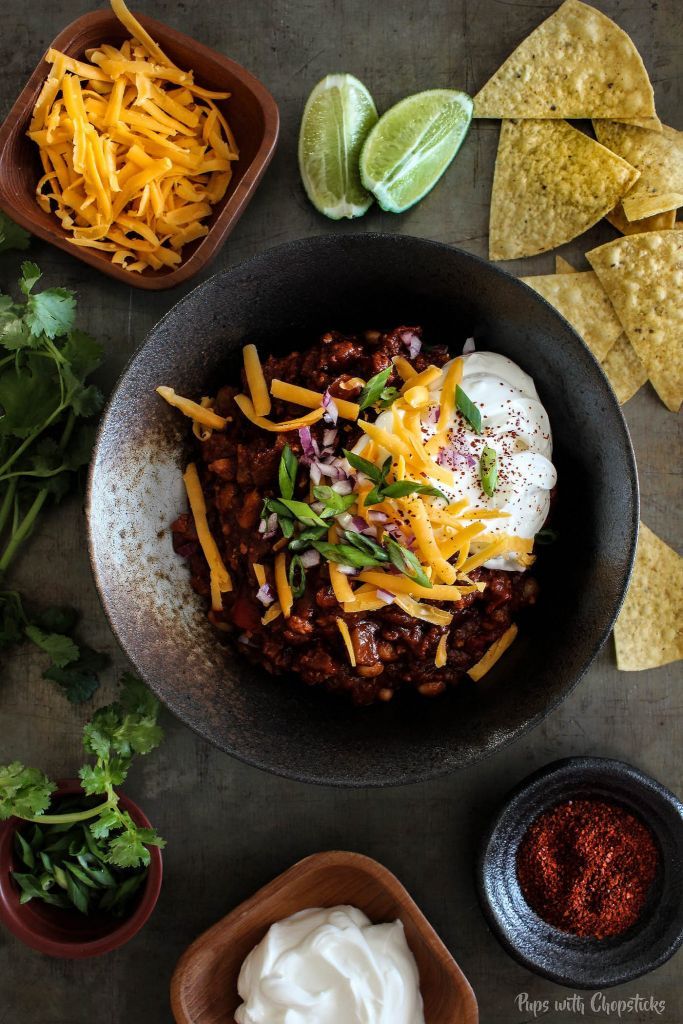
3. Sweet & Smoky Pineapple Chipotle Chili

[Photo cred + find the recipe at Pups with Chopsticks]

When you think of chili, the word “healthy” doesn’t usually come to mind. However, this recipe features well-rounded flavours like pineapple, chipotle, gochujang, pork, and maple syrup that make for a sumptuous – and nutritious – meal.


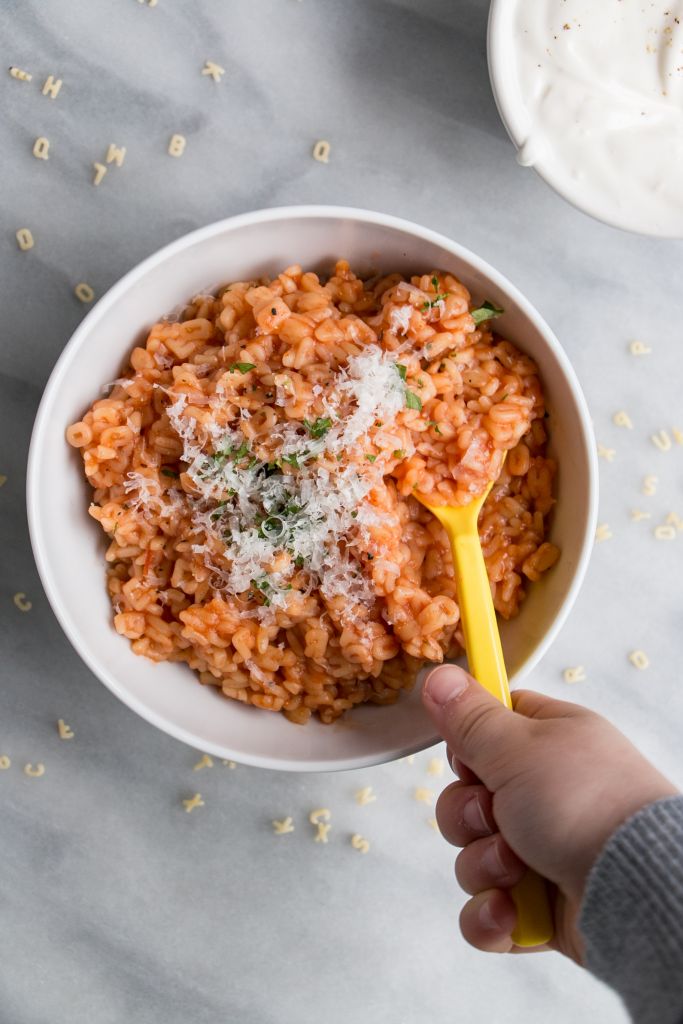
4. Healthier Homemade Alphagetti

[Photo cred + find the recipe at My Kitchen Love]

For parents out there who struggle with convincing their kids to eat real food – we’ve found the perfect shortcut! Dupe their favourite canned meal and make your own homemade noodle and tomato dish with a handful of simple, fresh ingredients.


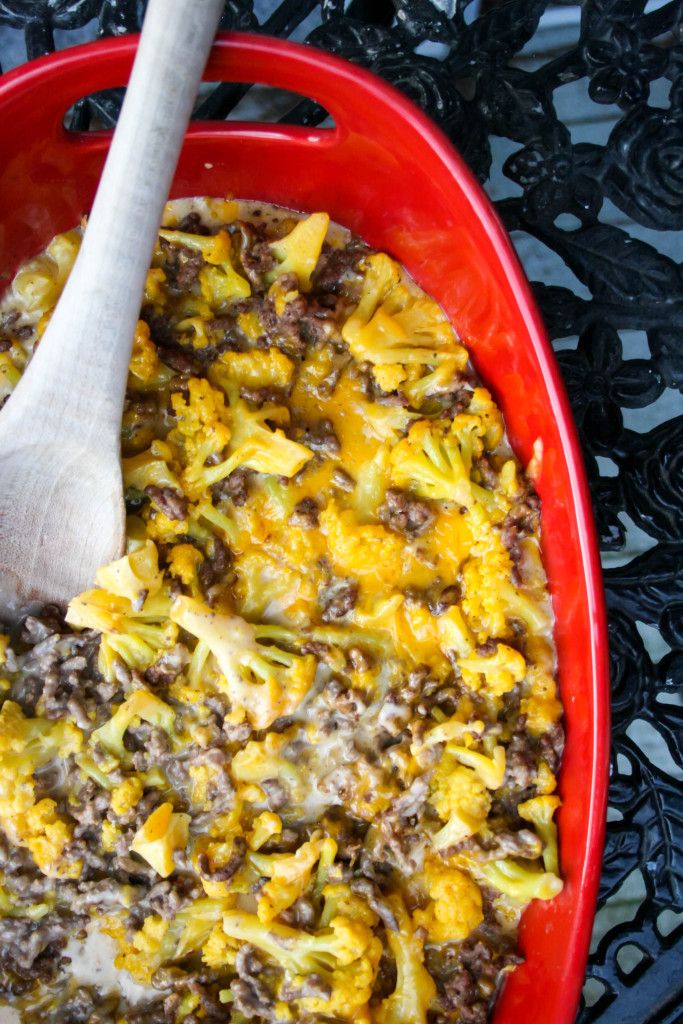
5. Cauliflower Cheeseburger Casserole

[Photo cred + find the recipe at Food & Whine]

It may not be a salad, but this “healthy” take on beef and pasta boxed meals swaps cauliflower-rich in Vitamins C, K, and B6 – for noodles, and requires real ingredients. For those who are gluten-free, omit the flour, butter, and milk in the roux and replace with a cup of heavy cream and extra cheese!


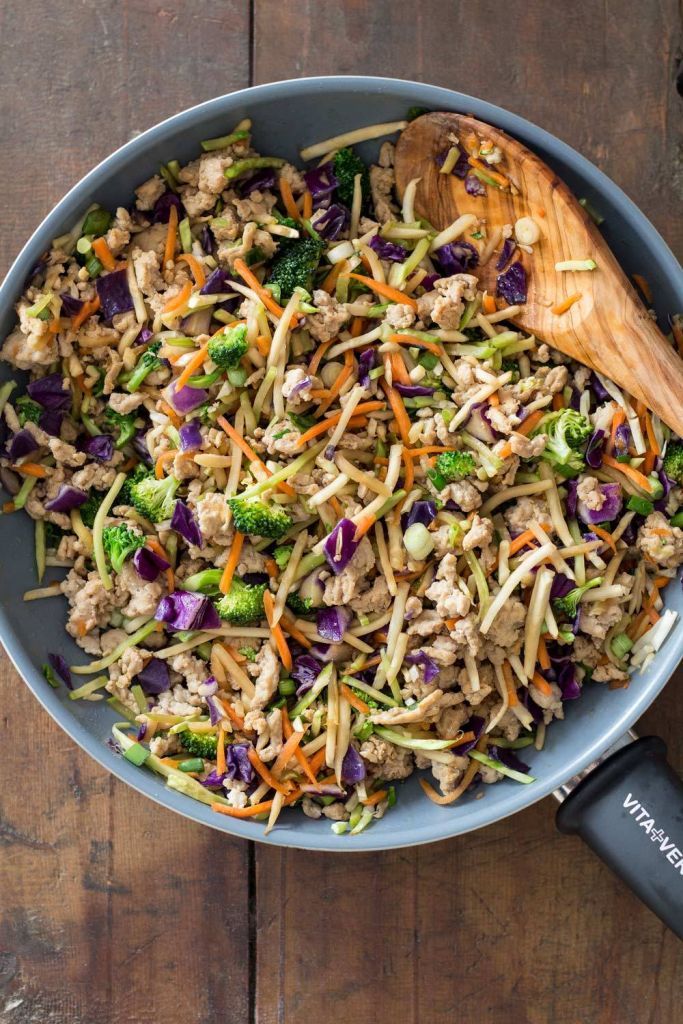
6. The Ultimate Low-Carb Stir-Fry

[Photo cred + find the recipe at Green Healthy Cooking]

Stir-fry meals are a go-to for any household on a time crunch or a budget. Thankfully, you can adapt your stir-fry to whatever food restrictions or preferences you may have. Add chicken, turkey, shrimp, pork, or beef and sprinkle with a splash of soy sauce.


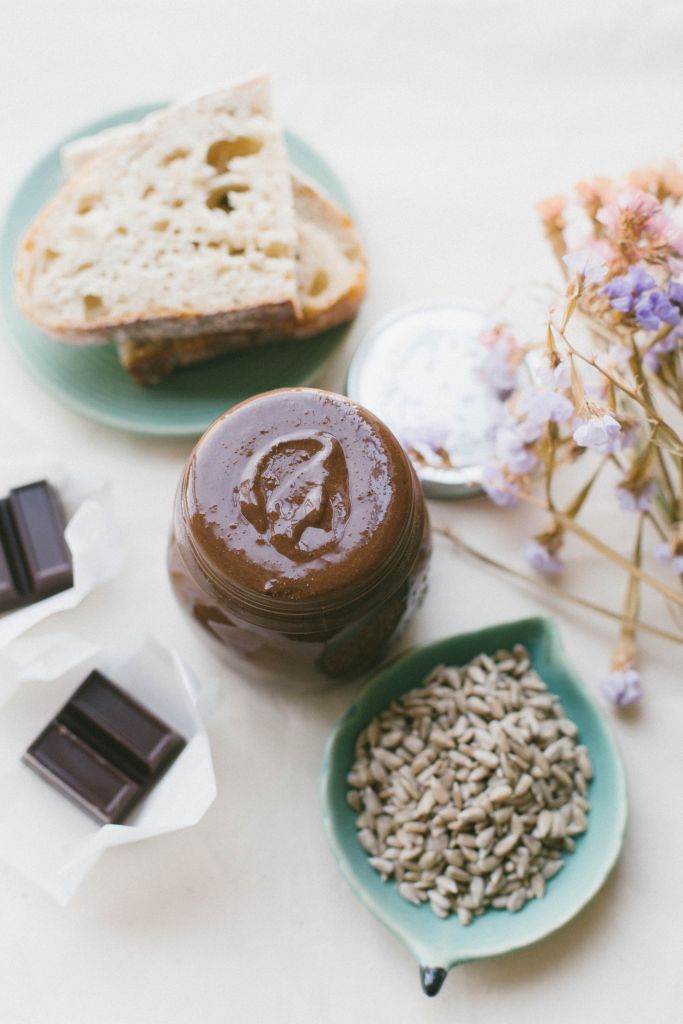
7. Salted Dark Chocolate Sunflower Seed Butter

[Photo cred + find the recipe at Spice and Sprout]

Make your own natural version of the well-known, crowd-pleasing hazelnut butter – but without the excessive sugar and preservatives! Perfect for anyone with nut allergies! Easily blend together sunflower seeds, coconut oil, dark chocolate, and a little bit of icing sugar and salt for a delectable spread.


8. Duck Ramen (Paleo)

[Photo cred + find the recipe at Flash Fiction Kitchen]

Sweet potato and kelp noodles are life savers whenever those following a gluten- and grain-free diet are craving some pasta. Make this fresh duck ramen with rich broth, bok choy, avocado – and any of your favourite soup toppings!


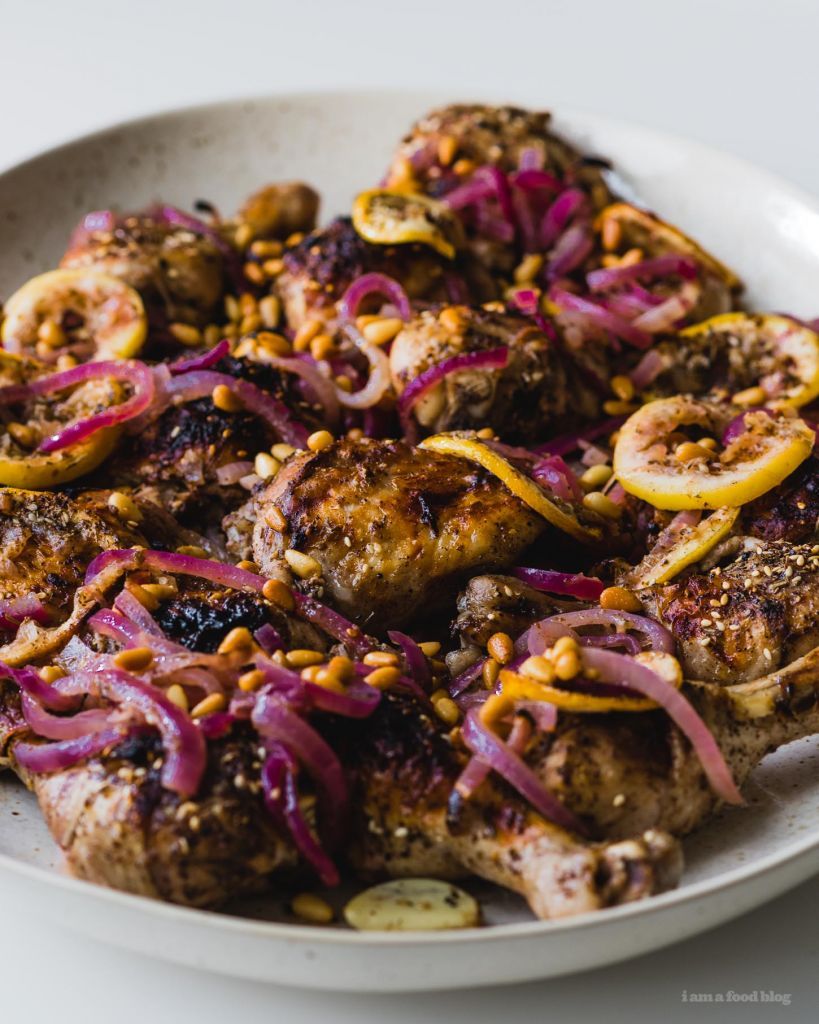
9. Za’atar Roast Chicken

[Photo cred + find the recipe at i am a food blog]

Impress your friends and family while sticking to your nutrition resolutions at your next dinner party or celebration. Filled to the brim with aromatic spices, olive oil, chicken, and red onion – this dish is so tasty your guests won’t even realize what they’re eating is so good for them!


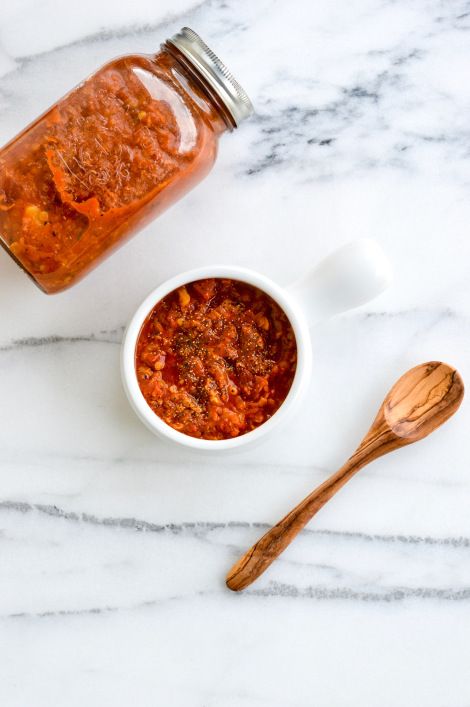
10. Spicy Cabbage Soup (Vegan)

[Photo cred + find the recipe at Eff Yeah Food]

The cabbage craze has taken off – and for good reason, as the vegetable comes packed with nutrients and is a great source of manganese and fiber. Make your own delicious cabbage soup with ingredients you may already have in your pantry, including canned tomatoes and a plethora of spices.


Do you have a favourite healthy(ish) recipe for the new year?

Share your drool-worthy recipes and tag us on Facebook, Twitter, Instagram, Pinterest or YouTube !

8 Heavenly Hanukkah Recipes to Savour this Season

Photo via DPM Does

At Hanukkah, Jewish families celebrate an ancient miracle, when one day’s worth of oil lasted for eight days. It’s not a surprise, then, that oil-based cooking is an inspiration for this holiday’s decadent feature dishes. But whether or not you celebrate Hanukkah, these must-try comfort foods are sure to warm your belly and satisfy family and friends on any cold winter night.

Latkes (Potato Pancakes)

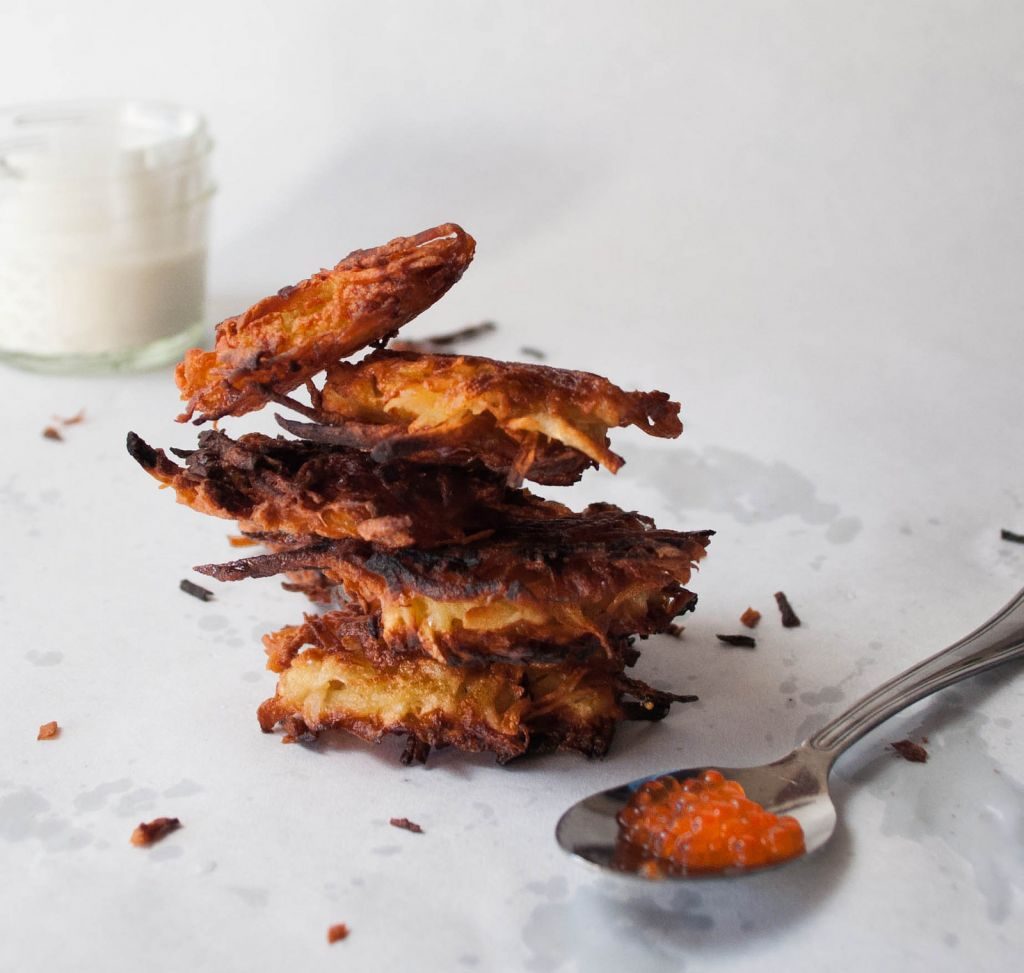
Your eyes aren’t deceiving you. Your favourite breakfast foods (hashbrowns and pancakes) have combined into one glorious stack of onion-y dinner goodness. Making these is a family affair: they don’t taste right if there aren’t half a dozen people crammed into your kitchen hand-shaping the patties, fighting over flipping duty or trying to sneak a bite. Load them with sour cream, applesauce, or caviar if you’re feeling fancy.

[Find the recipe at ToriAvey.com]

Jewish-Style Braised Brisket

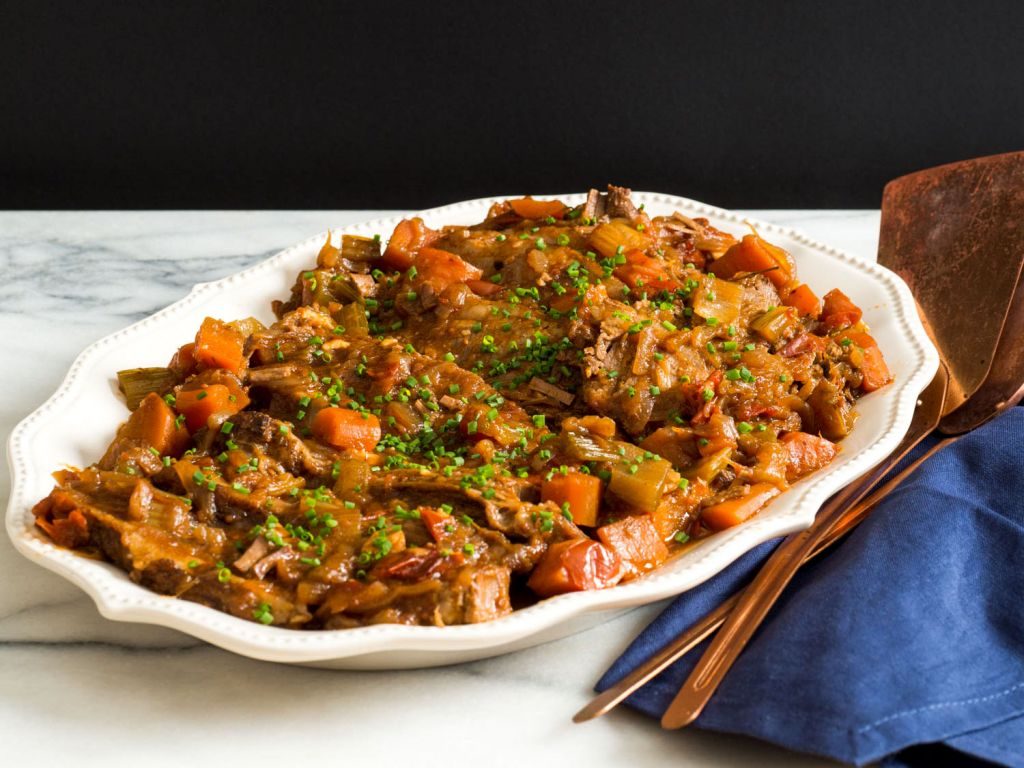
With all of the pre-dinner shmoozing (read: chatting) that goes on at family events, waiting for that meat course can be tantalizing. Likewise, preparing this mouthwatering masterpiece requires a long-game strategy—we’re talking 3-4 hours in a good roasting pan—but it’s worth the wait. Bonus: This dish can be made in advance and stored in its braising liquid up to 4 days before your party. Extra marinating time, anyone?

[Find the recipe at SeriousEats.com]

Photo via Serious Eats


Sufganiyot (Jelly Doughnuts)

This globally recognized treat has a special place in Jewish tradition. It’s easy to fry up a batch in your own kitchen using a cast iron frying pan. Customize with different jams, or swap the milk and butter with coconut milk and coconut oil to make them dairy-free. These treats are best enjoyed fresh. (This also serves as justification for eating several. Right now. You’re welcome.)

[Find the recipe at SmittenKitchen.com]

Photo via Smitten Kitchen

Sweet Noodle Kugel

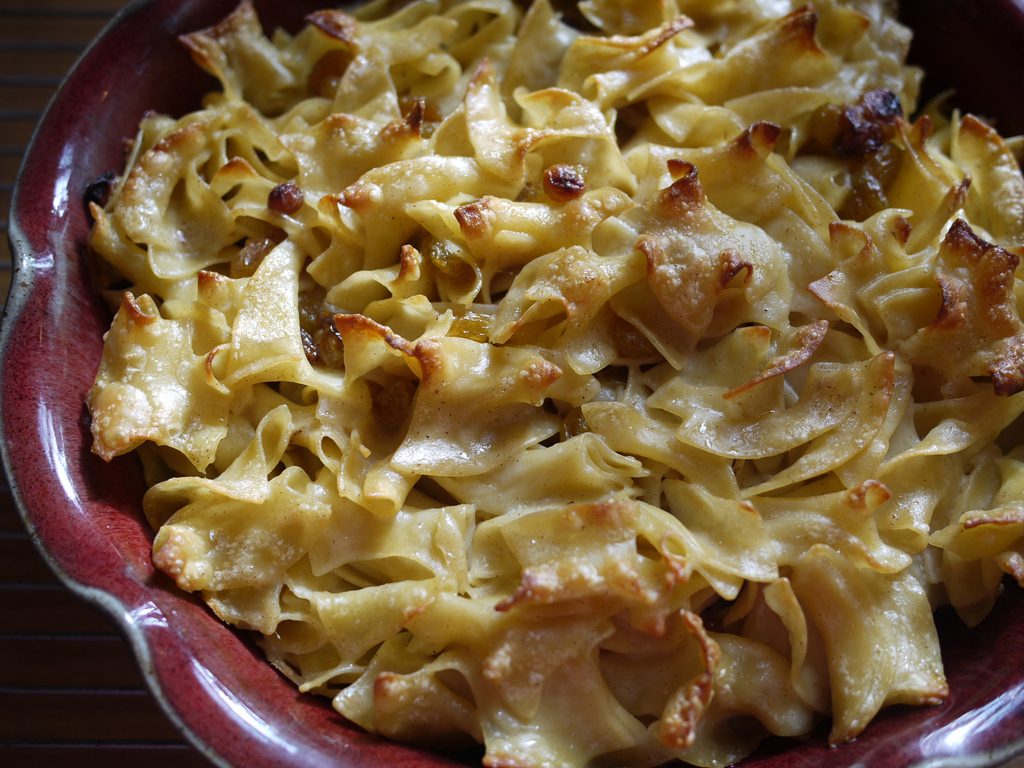
Noodle Kugel is an ultra-comforting casserole, and it’s unbelievably simple to make. This creamy dish is lightly sweetened, which might seem surprising at first, but have a little faith…it’s a must-have at Jewish holiday gatherings for a reason. Serve it warm or cold next to your main. Adding raisins and a dash of cinnamon is highly recommended.

[Find the recipe at ChowHound.com] 

Photo via Rebecca Seigel


Classic Challah Bread

Challah is a type of braided egg bread that’s traditionally shared on the Jewish sabbath. After it rises, each braid loop forms a scrumptious little bun that can be broken off as the bread is passed down the table. Move aside, dinner rolls! This moist, luscious loaf is the perfect complement to any hearty meal.

 [Find the recipe at The Nosher]

Photo via The Nosher

Rugelach Pastries

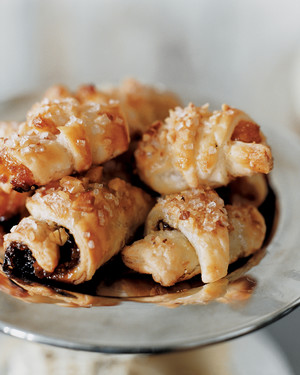
These flaky spiral crescents are made with a special cream cheese dough, and can be filled with dried fruit, chopped walnuts, chocolate, poppy seeds, or whatever else your heart desires. Consider them a timeless treasure. They’re found in Jewish bakeries and cafes all year round, but rugelach-lovers will find any excuse to bring them out, and nobody ever argues.

[Find the recipe at MarthaStewart.com]

Photo via Martha Stewart

Homemade Chocolate Gelt

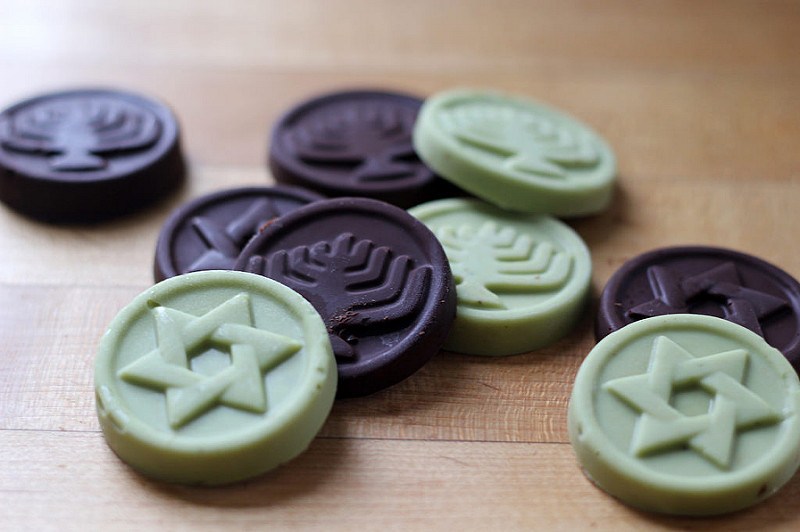
In old Jewish tradition, money (“gelt”) was given out at Hanukkah. Nowadays, most families distribute chocolate coins wrapped in gold or silver foil. They’re often store-bought, but personalized gelt can be made at home if you’re crafty. Prefer white chocolate? Try mixing in some matcha powder for added flair.

[Find the recipe at dpmdoes.com]

Photo via DPM Does

Hanukkah Chocolate Gelt Cake

Very lucky kids get a Chocolate Surprise Gelt Cake at Hanukkah. These cakes typically have a hollowed-out core filled with (you guessed it) chocolate gelt. One slice reveals the spoils, and havoc ensues! For a less messy but equally delicious option, people with a sweet tooth can chop up the gelt and use it for cake layers. In the spirit of the holiday, some recipes call for olive oil in place of the eggs and butter.

[Find the recipe at Kitchen-Tested.com]


8 BBQ Tips To Make You a Backyard Superstar

Summer is in full swing, and that means your backyard should be ground zero for the majority of your meals for the next few months. Whether it’s the smoky, delicious flavour barbecue provides or just the act of cooking al fresco, BBQing is one of the pleasures of summer. Here are eight tips to help make you the master of the grill.

Brining and injecting aren’t cheating

Master grillers might look down their noses on these methods, but when you’re barbecuing at home, you’re not in a competition. You’re only cheating yourself if you’re not using all the tools at your disposal that will help you get the most flavour out of your meat. Brining (letting the meat soak in salted water for up to 24 hours) and injecting (where you use a syringe to inject flavourful liquids into the meat) helps to ensure that the meat will be moist and tasty. There’s nothing worse than a dry piece of BBQ, so rigging the game for a favourable outcome is just smart cooking.

Smoke it if you’ve got it

If you only have a gas-powered barbecue, it’s perfectly fine – you’ll get effective heat distribution with gas. But if you do have access to charcoal it will give your meat a distinctive and delicious flavour that you just won’t find with gas.

Searing is a waste of time

Just like the idea that you can see the Great Wall of China from space, the idea that searing meat will hold in moisture is a myth. Instead, it’s more likely that searing will cause the fibres of the meat to tighten, which in turn  means you’ll lose moisture. The crusty surface that’s formed by searing isn’t waterproof, and therefore won’t hold in any fluids.

Don’t poke your meat

While you might be tempted to use that impressive looking BBQ fork, don’t. If you puncture the meat, you’re letting valuable juices leak out. Instead, use the less cool but far more effective pair of tongs when you need to flip things.

Cook it low and slow

If you know you’re going to be using the grill, plan ahead. If you’re not rushed you will have the ability to cook the meat at a lower temperature for a longer amount of time. The higher the temperatures, the more the fibres of the meat contract, squeezing out moisture and taking away from the flavour of the cut. But if you’re going to grill at low temperatures, make sure you give the meat enough time to cook so that it doesn’t come out raw.

Patience is a virtue

When you’re done grilling, take a few minutes and wait before you cut your meat. We know – it’s tough to sit there salivating when a perfectly cooked piece of steak is sitting right in front of you, but trust that the wait will be worth it. By holding off, you’ll effectively retain a lot of those precious juices you’ve been cultivating from the very beginning. If you cut into the meat right away, those juices will just spill out onto the plate, where they can’t be enjoyed.

Boil? Never.

If you’re looking for the quickest way to rob your meat of flavour, by all means, boil it before putting it on the BBQ. By boiling, you’re losing all of the feat and flavour that provides taste. Even if you’re pressed for time, don’t take this shortcut.

With veggies, speed is key

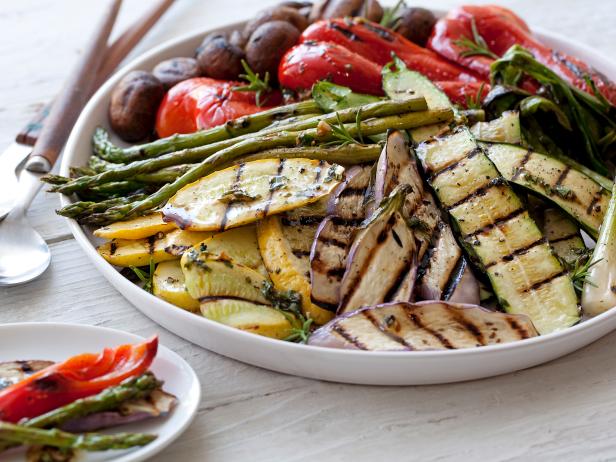
If you’re cooking veggies on the grill, speed is your friend. Slice your veggies into thin strips and then char along the bars. You don’t have cook them for long to achieve that BBQ appearance and flavour.


If you want to up your BBQ game this summer, London Drugs has everything you need to become a master griller, including barbecues, camp stoves, tools, fuel, and accessories.

Cooking for Dad on Facebook Live: Father’s Day Brunch

Cooking for Dad Father's Day London Drugs Facebook Live

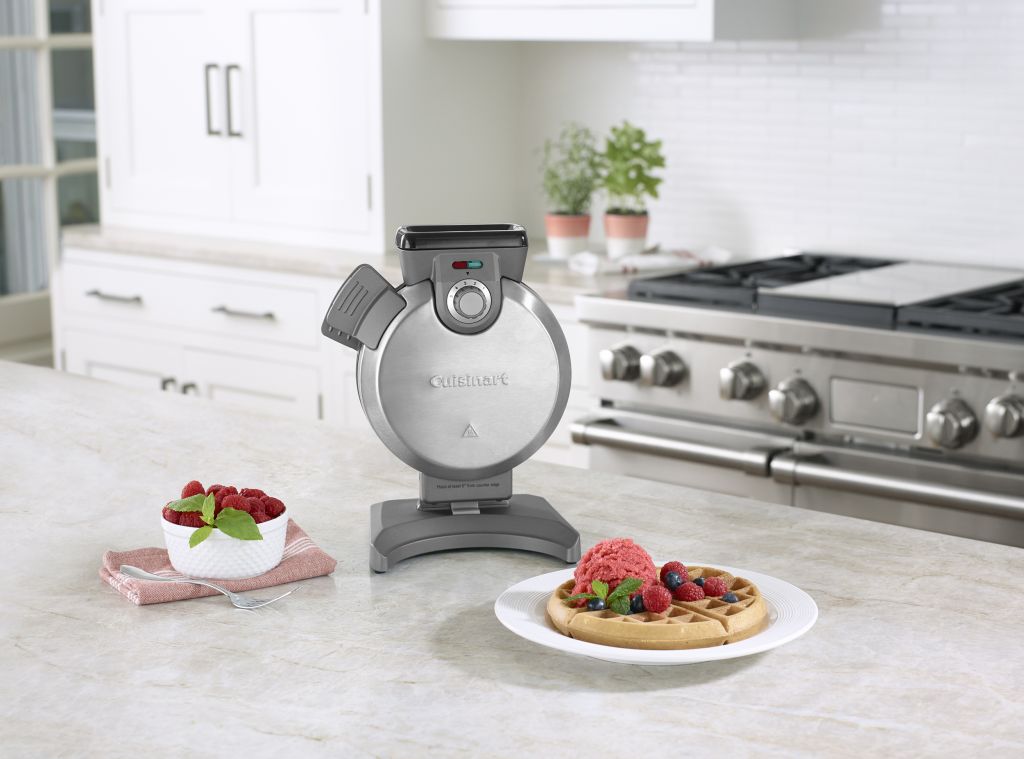
Join London Drugs and Chef Miki Arambulo as we make the ultimate family friendly Father’s Day brunch! During the event we’ll prepare two delicious recipes for Dad using Cuisinart’s Precision Master Stand Mixer, Vertical Waffle Maker, and Air Fryer Oven (featured on Oprah’s Favorite Things 2017).

Join the conversation on Wednesday May 30th at 12pm and learn tips and tricks for the ultimate Father’s Day brunch. Subscribe to live notifications and tune in to have your questions answered live. Have a question about one of the appliances or recipes? Visit the Facebook event and comment with your questions and we will do our best to answer all questions during the event!

Our event co-host Chef Miki

Chef Miki has worked at many of Vancouver’s well know restaurant groups such as Earls, Brown’s and Cactus Club. A graduate of the Art Institute Dubrulle Culinary Arts School and a Red Seal Certified Chef, Miki is now a culinary instructor at Vancouver Community College.

Try these two family-friendly recipes

Enter for a chance to WIN a Cuisinart appliance!

Vertical Waffle Maker Cuisinart London Drugs

To enter: Log on to Facebook.com and either sign in if you are already a registered user or create an account. Then comment during the Facebook Live on the London Drugs Facebook page at www.facebook.com/LondonDrugs in the form of posting a question or comment on the live event. You will be automatically entered into the Contest.  Only one entry per Facebook account is permitted during the Contest Period.

Contest is open to all residents of British Columbia, Alberta, Saskatchewan, and Manitoba who, as of the date the prize draw is made: (i) have not won a London Drugs contest since May 30th 2017; (ii) have reached the age of majority in the province in which they reside as of May 30th 2018; (iii) are not employees of London Drugs, their respective advertising and promotional agencies, the independent judging organization (if any), or any family member living with any such employee.

No purchase necessary. Limit one (1) entry per person per social network per contest. Entries must be received no later than 1 PM Pacific Time on May 30th 2018. London Drugs is not responsible for entries that become lost or misdirected. All entries become the property of London Drugs Limited and will not be returned.

One (1) winner will be randomly chosen on the day the contest ends (see dates below) in Vancouver, British Columbia, from all eligible entries received per contest. To win, selected entrants must correctly answer a skill-testing mathematical question and must sign London Drugs’ declaration and release confirming compliance with the contest rules and acceptance of the prize(s) as awarded, releasing London Drugs from liability in association with the contest and prize and consenting to the use of their name, photograph, voice and statements for promotional and publicity purposes.

There will be three (3) prizes:

  • One (1) Cuisinart 5-1/2 Qtr. Stand Mixer (Retail value of $399.99)
  • One (1) Cuisinart Vertical Waffle Maker (Retail value of $99.99)
  • One (1) Cuisinart Air Fryer (Retail value of $299.99)

See details and contest date below. Prizes must be accepted as awarded, are non-transferable and no substitutions are permitted. Prizes will be awarded at the closest London Drugs location to contest winners.


Contest date – Wednesday May 30th 2018 from 12 PM PST –1 PM PST

Draw date – Friday June 1st, 2018

Only one prize may be won by any one person and household. In the event that any selected entrant incorrectly answers the skill-testing question or is otherwise unwilling or unable to comply in full with these rules, a new entry will be drawn.

Selected winners will be contacted by email or on the social network they were drawn from. No correspondence will be entered into except with selected entrants. If the winners do not respond then they will be notified for the second time, 3 (three) days after the first notification. If the winners still do not respond within 3 days of the second notification, a new winner will be chosen in the same manner until a winner is successfully contacted.

The chances of winning a prize will depend on the number of eligible entries received. Decisions of the judges in respect of all aspects of this contest including, but not limited to, eligibility of entries and correctness of answers given to the skill-testing question, are final.

London Drugs and their respective advertising and promotional agencies, the independent judging organization, and their respective agents are not liable to an entrant in any manner relating to the contest or the awarding and use of the prize(s).

This contest is subject to all federal, provincial, and municipal laws and regulations. By entering the entrant consents to the collection of all personal information included on their entry and agrees to the use and disclosure of such information by and between London Drugs, an independent judging organization, and their agents. The winner(s) also agrees to the collection, use, and disclosure of their name, entry, photographs, voice, and statements for London Drugs’ publicity purposes without further compensation. All personal information collected from entrants will be used only for the purposes of administering the contest and for marketing and promotional purposes as contemplated by these rules; under no circumstances will any personal information be sold or rented to third parties. All personal information collected by London Drugs will be kept in accordance with the privacy policy of London Drugs, which can be viewed at www.londondrugs.com, and in accordance with all applicable privacy laws.

The right is reserved by London Drugs to terminate this contest, in whole or in part, and/or modify, amend or suspend the contest, and/or these rules in any way, should any cause beyond the reasonable control of London Drugs or its agents affect the proper administration thereof.

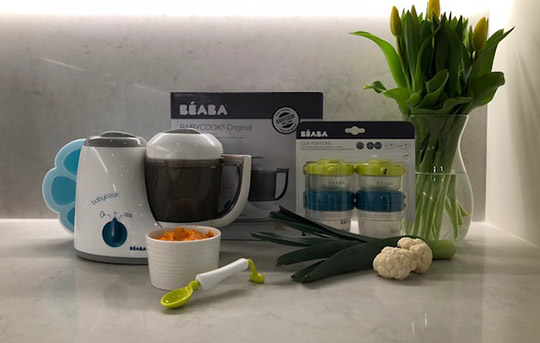
Baby Feeding and Nutrition Facebook Live Event with Carley Mendes and Beaba

Introducing solid foods to your little one should be a fun and exciting adventure, but there are often many questions on how and when to take this step. By the time baby is ready for solid food, new parents have already researched so many other things…. strollers, car seats, sleep!

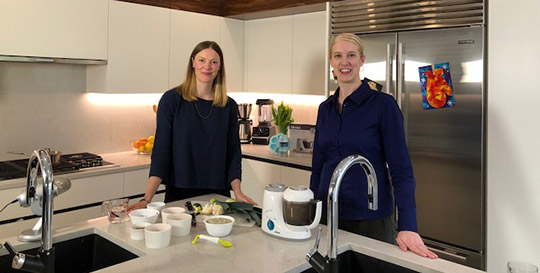
Earlier this month I partnered with London Drugs and Beaba to host a Facebook Live event and answer viewers questions about first foods for baby. I’m a holistic nutritionist and founder of Oh Baby Nutrition. I specialize in naturally nourishing pregnancy, postpartum, and starting solids with your baby. I love talking about feeding babies because you have such an amazing opportunity to help little ones establish healthy eating habits right from the beginning.

We covered quite a bit of important information in the Facebook event, such as…

When to start solids

During the event, I recommended to introduce first foods when baby is around 6 months, but also waiting until a few key developmental milestones have been met. Specifically that your baby can sit up unassisted, has lost the tongue-thrust reflex (does not automatically push solids out of their mouth with their tongue), and is ready and willing to chew.

Different methods of introducing solids

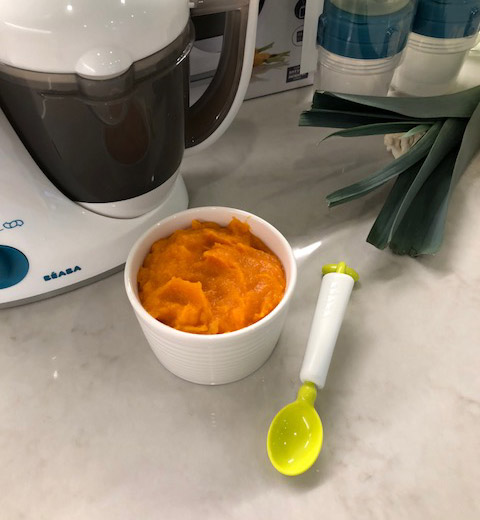
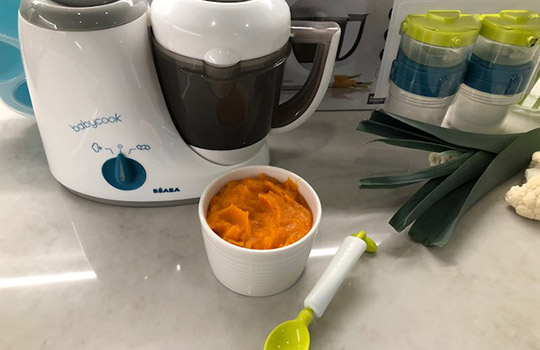
The two primary methods of introduction are spoon-feeding purees vs baby-led weaning. With baby-led weaning, you skip the purees and start with finger foods right away.  These two methods do not have to be done exclusively and you can try a mix of both feeding styles with your little one. I’ve created a comprehensive guide to starting solids called Baby Knows Best that helps parents make an educated decision about the method that feels right for them and their babies. The Beaba Babycook that was featured in our Facebook event cooks both purees and finger foods.

Finger foods: shape, size & texture

Whether starting with finger foods or introducing them after purees, it’s critical to understand the proper shape, size & texture for safety.  Stick or finger shaped foods allows your baby to firmly hold the food in the palm of their hand and bite off little pieces, with or without teeth. It helps them learn how to chew, and learn how much food they can safely manage in their mouths. I’ve written more extensively about this here.

Best flavors to offer baby: sweet vs savoury

Parents are often concerned that offering sweet before savoury will cause babies to develop a sweet tooth. However, humans are naturally drawn to sweet flavours because in nature they represent energy dense, safe foods that are less likely to carry foodborne illness. Plus, breast milk (formula) is very sweet so they already have a taste for it. Initial introduction isn’t as important as making sure to include a variety of flavours in baby’s diet once they’ve started solids. Offering variety in a baby’s diet is also the best ways to avoid picky eating habits in toddlers.

How much food to feed baby

Each baby is different and the age at which they’ll be ready for more food will vary.  So it’s recommended to watch your baby’s cues and follow their lead. Its best not to rush into things and only offer 1 serving a day for the first month or so, then build slowly from there.


We also had some fantastic questions from viewers of our Facebook Live event, such as…


When you start to introduce solids does it take the place of a nursing feed?

When solid food is initially introduced, servings will be tiny and baby’s intake of breast milk should remain the same. As food intake slowly increases over time, breast milk consumption will naturally decrease and mother’s supply will adapt to the lessened demand. This exchange of breast milk for food should happen very gradually.


What would you recommend as a good first food to start your baby on?

I prefer fresh foods over packaged foods, and nutrient-dense foods over fortified foods. Some important nutrients for babies are iron, calcium, and DHA. In my guide to starting solids, I list all of my favorite foods, along with recipes and meal plans for various ages.


Is it ok to start babies on a full variety of mixed food from the very start or should you start with individual foods and then combine once we are sure they are ok to eat?

It was previously recommended to introduce new foods one at a time, waiting a few days between. However this advice has changed and now only applies to highly allergenic foods, such as cow’s milk, hen’s eggs, soy, wheat, nuts, sesame, shellfish and fish.


I have a very, very big baby so is it better to add water as opposed to breast milk to my baby food?

Breast milk is the most nutrient-dense sustenance for babies, so it’s not recommended to limit intake. However feel free to mix up the liquid you use to make purees, such as the water used to steam baby food, bone broth, coconut water, or even non-medicinal herbal tea.

My baby is 8 months (I started solids at 6 months) and he still does not seem very interested in food. Is this uncommon?

Some babies take to solids right away, but it can definitely take others some time to show an interest.  Let your baby lead the way and set the pace. It’s best not to try enticing them to consume more than they’re inclined too, so they can preserve their innate ability to self-regulate their appetite. However, I suggest talking with your health care provider if your baby isn’t taking to solids and is also exhibiting other developmental delays.
Is your little one ready to begin the adventure of first foods? My guide, Baby Knows Best includes a 4-part video series and 4 part-eBook series that will show you exactly how and when to take this exciting step. Baby Knows Best will answer all of your questions, eliminate your doubts, and allow you to start solids with confidence.
 

Carley Mendes, Holistic Nutritionist

Oh Baby Nutrition (www.ohbabynutrition.com)
Facebook (https://www.facebook.com/ohbabynutrition/)
Instagram (https://www.instagram.com/ohbabynutrition/?hl=en)

8 Unexpected Waffle Iron Recipes

Eight Tasty Treats You Can Make In Your Waffle Iron (That Aren’t Waffles)

We know we don’t have to say it–waffle irons are great! Who doesn’t love a fresh, fluffy waffle hot off the iron for Sunday breakfast? A waffle iron makes a great gift, and if you’re married, chances are you received one as a wedding present. (Thanks, Aunt Linda!). But, let’s face it, they’re not exactly a frequently used item. That’s about to change, because we’ve got eight delicious recipes that will bring your waffle iron into regular kitchen rotation.
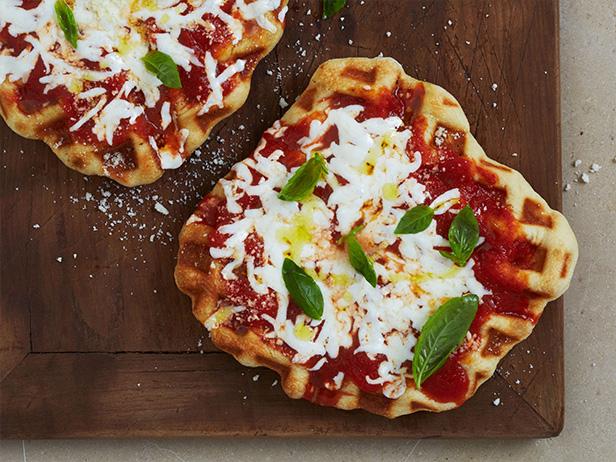
  1. Margherita Pizza

Unexpected Waffle Iron Recipes

Yes, it looks a bit funny, but your mouth will thank you for the wells of extra savoury sauce and gooey cheese. Plus, the waffle maker doubles as an oven for baking the crust to perfection, and a broiler for melting the cheese. 

[Find the recipe at The Food Network]

  1. Cinnamon RollsUnexpected Waffle Iron Recipes

These mouth-watering morsels are relatively simple to make, and can be made in less time than it takes to make dinner. Bonus: your house will smell amazing afterwards.

[Find the recipe at Creations by Kara]

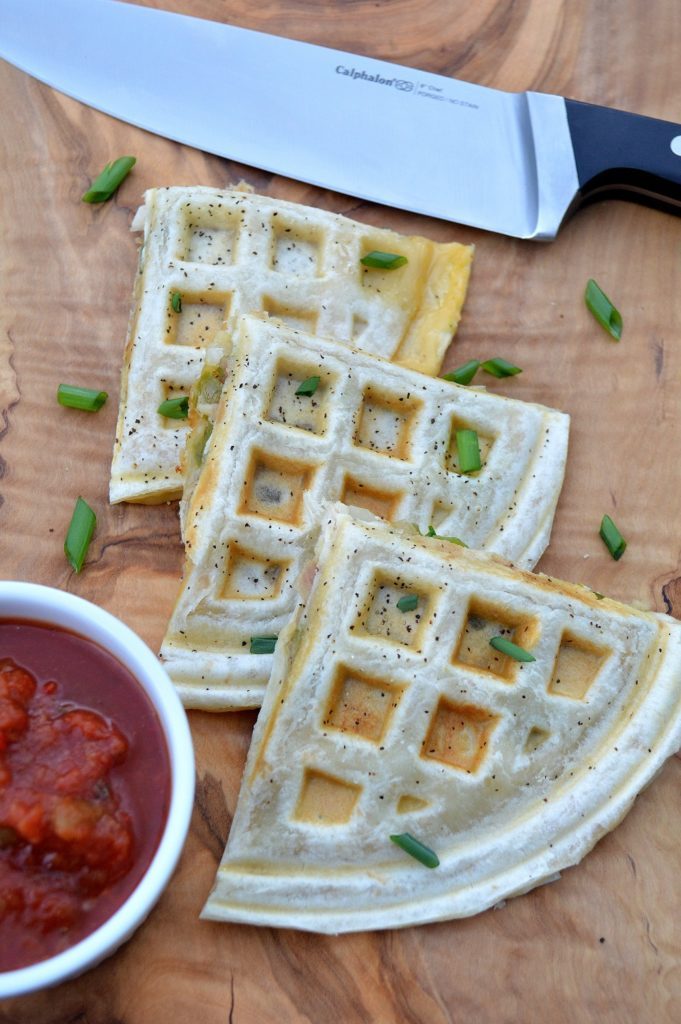
Easy Chicken and Cheese Quesadillas

Quesadillas are a satisfying, kid-friendly and easy dinner choice, but they’re never quite the same at home as the more authentic ones from a restaurant. The professional secret to perfect quesadillas is cooking them right on a griddle. Well, guess what a waffle iron is—a tiny, hatched griddle. A grid-dle!

[Find the recipe at Souffle Bombay]

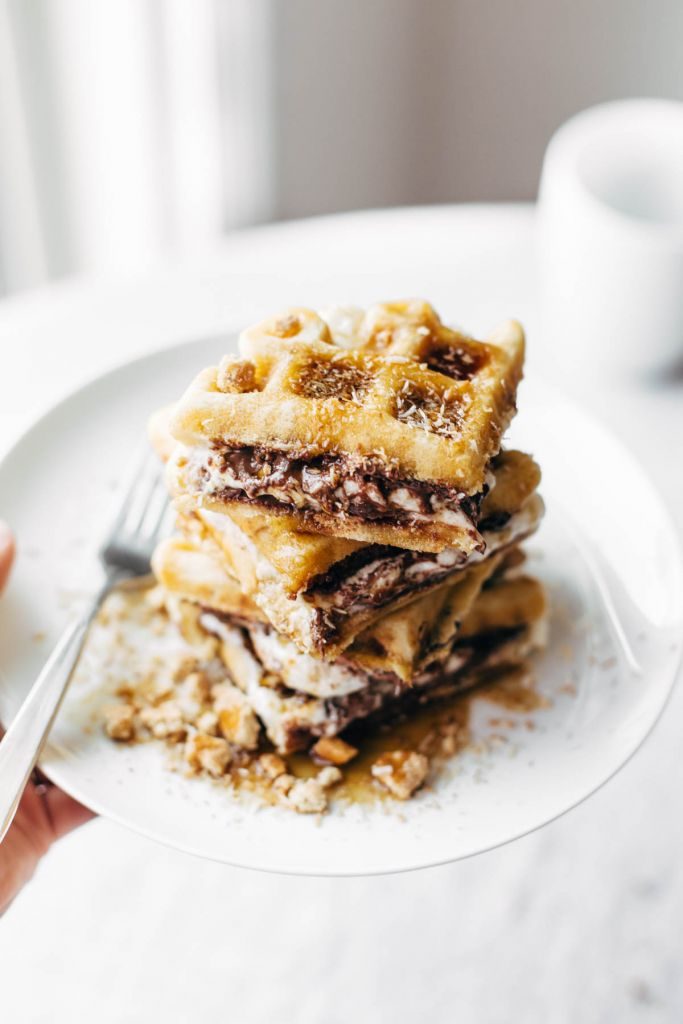
  1. S’mores. Yes, s’mores.

Unexpected Waffle Iron Recipes

Don’t have a campfire handy? You’re in luck, because these warm, sweet and decadent treats can be waffled! (Yes, we just used waffle as a verb. Sorry. Not sorry.)

[Find the recipe at Pinch of Yum]

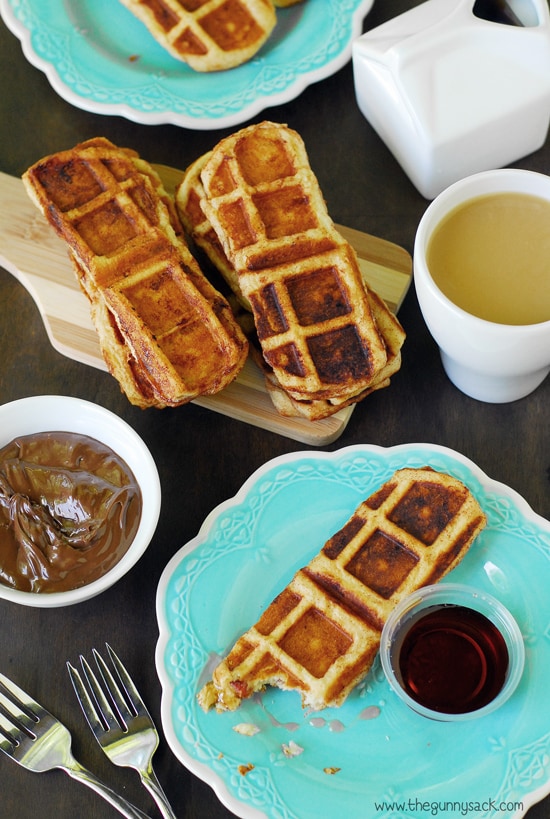
  1. Bacon-Stuffed Waffle Sticks

Unexpected Waffle Iron Recipes

Okay, okay these are technically waffles. But, they look so sensational, we had to include them on this list. Take the opportunity to experiment with the dips—maple syrup, Nutella, peanut butter, whipped cream…the possibilities are delicious.

[Find the recipe at The Gunny Sack]

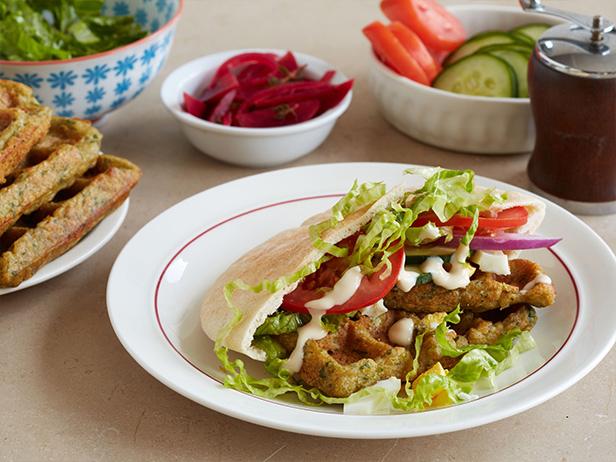
  1. Waffled Falafels

Unexpected Waffle Iron Recipes

Yes, it’s true—you can make healthy, vegetarian things in your waffle maker, too! These are super easy, even healthier than traditional, deep-fried falafels, and the best part is saying the name of this recipe out loud. Waffled falafels. Waffled falafels. We can’t stop. 

[Find the recipe at The Food Network]

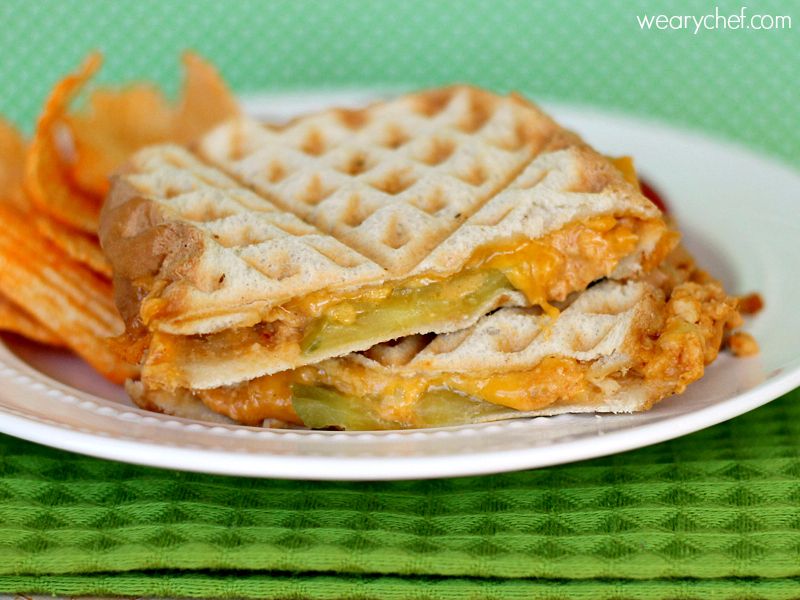
  1. Spicy Tuna Melt

Unexpected Waffle Iron Recipes

This comfort food classic is perfect for a quick lunch, and the spicy dash of hot sauce gives it an extra kick. We love the sound of this particular recipe, but honestly, any sandwich that would go in a panini press works great in a waffle maker. Kitchen space saver!

[Find the recipe at The Weary Chef]

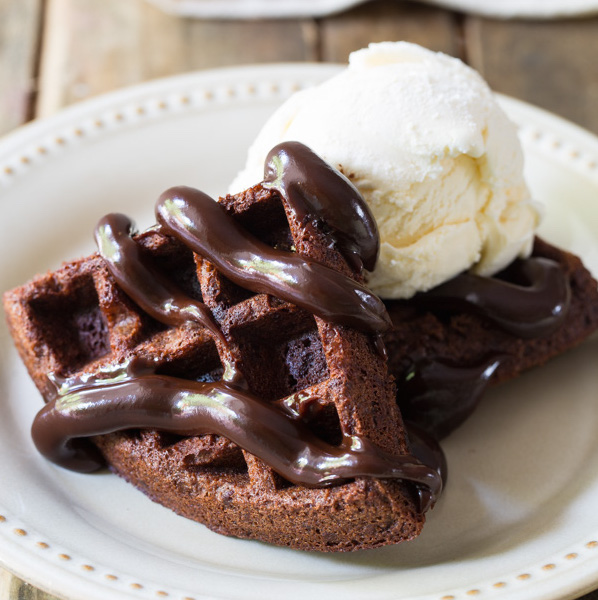
  1. Brownies A La Mode

Unexpected Waffle Iron RecipesWhat’s everyone’s favourite part of a pan of brownies? The edges, right? Well, waffle iron brownies, with their crispy outsides and soft insides, offers the promise of all edges, all the time. They also take a fraction of the time to make than baking in the oven. Top them with rich, vanilla ice cream, and you’ve basically won at life.  

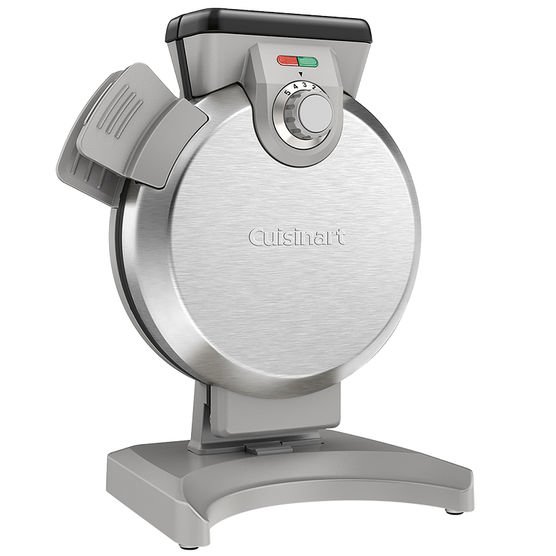
Need a great waffle maker to help you master these delicious creations? Check out the Cuisinart Vertical Waffle Maker or the Chefman Volcano Waffle Maker. Either one will help you create delicious waffle-y treats.

Well, what are you waiting for? Get waffling!

Next Page »