6 Vegan Recipes for Veganuary

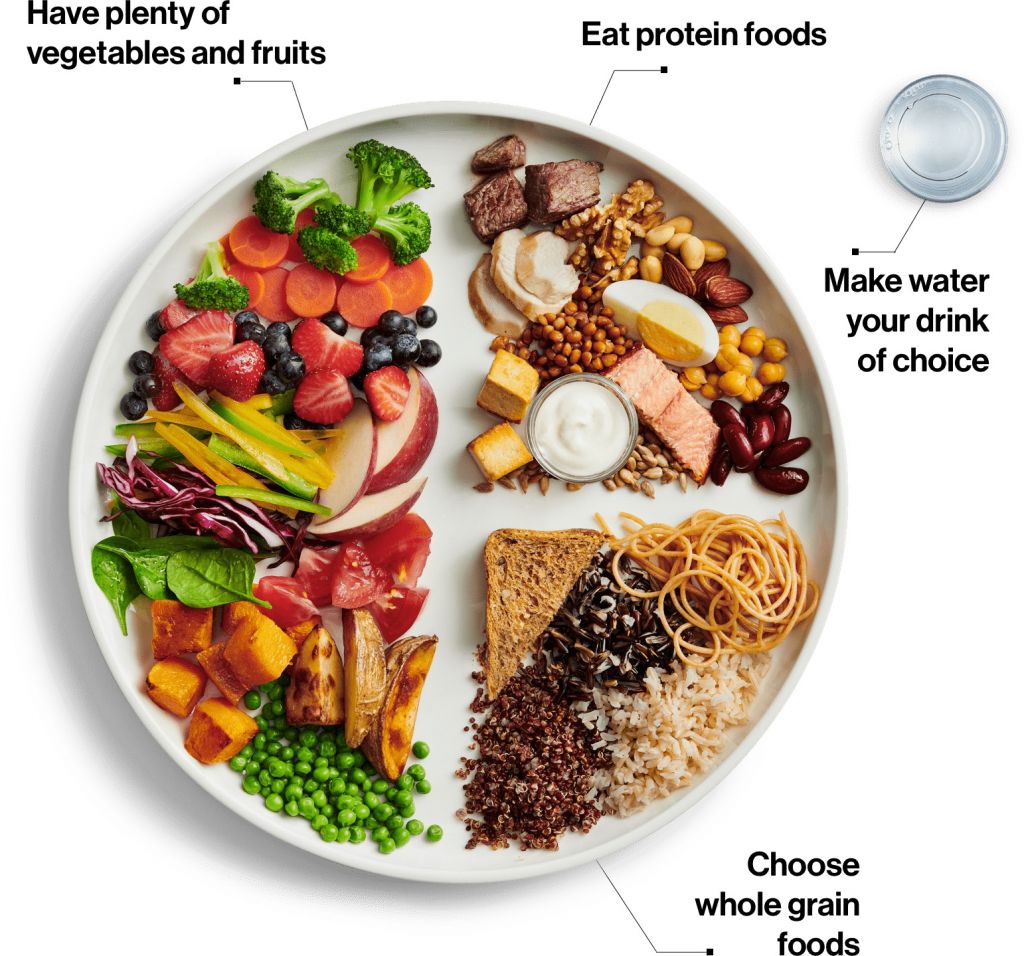
If you’re someone who’s been considering adopting a vegan lifestyle, or if you’re just looking to explore some vegan meal options to incorporate into your diet, Veganuary is the perfect time to do so! For those who may not know, Veganuary is a global campaign that encourages people to try out a vegan diet for the month of January. Whether you’re a vegan veteran or a complete newbie, finding new and exciting vegan meals to cook can be a fun and creative challenge. So, we’ve rounded up some delicious meal ideas to inspire you this Veganuary.

Banana Matcha Green Tea Smoothie

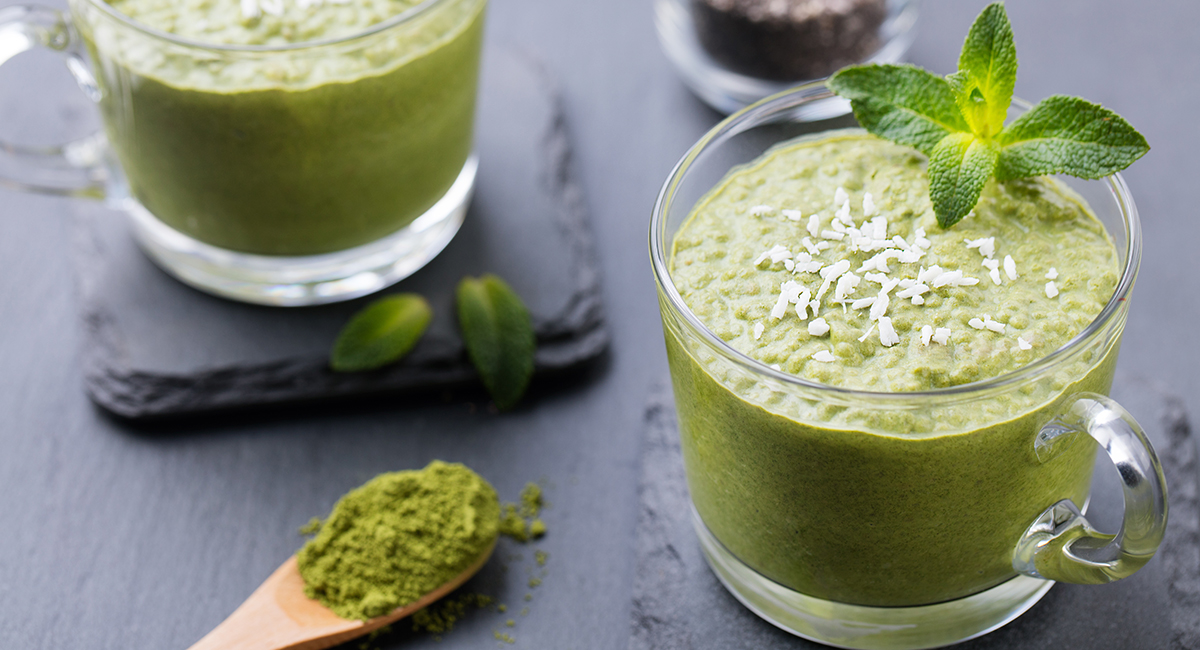
This green smoothie is an easy, delicious breakfast you can quickly whip up in the mornings.

Ingredients

Instructions

  1. Blend together all the ingredients in a blender or food processor.
  2. Blend until smooth. Add in more nut milk or water if needed, to reach your desired consistency.
  3. Divide into two glasses and enjoy!

Recipe from Emilie Eats

Overnight Chocolate Chia Seed Pudding

This simple breakfast is great, as you can prepare the night before. Plus, you can change up the flavour combinations to whatever you like!

Ingredients

Instructions

  1. In a small mixing bowl, whisk together the cacao powder (sift first to reduce clumps), maple syrup, ground cinnamon, salt, and vanilla. Add a little almond milk at a time and whisk until a paste forms. Add the rest of the almond milk and whisk until smooth.
  2. Add chia seeds and whisk once more to combine. Cover and refrigerate overnight, or at least 3-5 hours, or until it has a pudding-like consistency.
  3. Leftovers keep covered in the fridge for 4-5 days, though best when fresh. Serve chilled with whatever toppings you like, such as fruit, nuts or granola.

Recipe from Minimalist Baker

Peanut Butter, Tahini and Chocolate Chip Cookies

These vegan cookies are super soft with a light, buttery crumb and an irresistibly nutty flavour. Packed with dark chocolate, peanut butter and tahini, they’re delicious without being overly rich.

And the best part is they’re easy to whip up and are a guaranteed crowd-pleaser!

Makes 6 cookies

Ingredients

Instructions

  1. In a small bowl, whisk together the ground psyllium husks/ground flax seeds with the water. Set aside to thicken into your egg mixture.
  2. In a medium bowl, mix together the flour, baking soda, baking powder and salt. Set aside.
  3. In the bowl of a stand mixer, beat together the vegan butter, sugars, soy milk and psyllium/flax egg mixture until smooth and fluffy. Add the peanut butter and tahini and beat for another few minutes.
  4. Add the flour mixture and beat gently until just combined. Finally, add the chocolate chips, reserving a small handful for decorating the top of the cookies later.
  5. Cover the dough with cling film and place in the fridge for 30 minutes.
  6. Preheat the oven to 170c and line two baking trays with baking parchment.
  7. Using a cookie dough scoop or a tablespoon, place scoops of dough around the size of walnuts on the prepared baking trays with a few inches between each cookie. You should fit 10 per tray.
  8. Top each cookie with a couple of the reserved chocolate chips. Sprinkle the tops of the cookies with the sesame seeds and the flaky sea salt.
  9. Gently press down each ball of dough with a fork. Don’t worry about making a pattern or design on top – this will disappear as they bake.
  10. Bake for 20 minutes, being careful not to let the cookies burn on the edges. Remove from the oven and leave to cool fully on a wire cooling rack.
  11. Once cooled, serve and enjoy!

Recipe from Veganuary.com

Vegan Meatballs & Spaghetti

A delicious savoury dish that makes a great meal option for lunch or dinner.

Ingredients – Meatballs

Ingredients – Tomato Sauce

  • 2 tbsp olive oil
  • 1 onion, very finely chopped
  • 1 large garlic clove, crushed
  • Small pinch of chilli flakes
  • 2 x 400g cans chopped tomatoes
  • 1 tbsp soft brown sugar
  • ½ small bunch of basil, finely chopped

Instructions

  1. Add the dried porcini into a bowl and cover with boiling water. Leave to soak for 20 mins.
  2. Meanwhile heat 1 tbsp of olive oil a frying pan. Add the onion and fry over low heat for 10 minutes or until softened and translucent. Add the garlic and paprika and cook for 1 min.
  3. Add the black beans and oats into a food processor and blend until you have a chunky, textured mixture. Scoop out the beans into a mixing bowl and stir through the miso, breadcrumbs and cooked onion mix. Strain and finely chop the porcini mushrooms and add those (keep the liquid for soup or risotto). Season and roll into 12 balls and chill in the fridge while you make the sauce.
  4. Heat 2 tbsp oil in a saucepan. Add the onion and fry over low heat for 10 minutes or until softened and translucent. Add the garlic and chilli and cook for 1 min. Stir through the tomatoes and sugar and season to taste. Simmer uncovered for 20 mins.
  5. Heat the oven to 180C/160C fan/gas 4. Heat the remaining 2 tbsp oil for the meatballs in a non-stick frying pan over medium heat. Add the balls and fry for 5 minutes until evenly brown. Transfer to a baking tray and put in the oven to cook through for 12 mins.
  6. Add the cooked meatballs to the pan of sauce and toss everything to coat, then scatter with the basil. Serve with spaghetti or soft polenta.

Recipe from BBC Good Food

Amazing Lentil Soup

A slightly spicy, hearty soup that will warm you up on even the coldest nights!

Ingredients

  • ¼ cup extra virgin olive oil
  • 1 medium yellow or white onion, chopped
  • 2 carrots, peeled and chopped
  • 4 garlic cloves, pressed or minced
  • 2 teaspoons ground cumin
  • 1 teaspoon curry powder
  • ½ teaspoon dried thyme
  • 1 large can (28 ounces) diced tomatoes, lightly drained
  • 1 cup brown or green lentils, picked over and rinsed
  • 4 cups vegetable broth
  • 2 cups water
  • 1 teaspoon salt, more to taste
  • Pinch of red pepper flakes
  • Freshly ground black pepper, to taste
  • 1 cup chopped fresh collard greens or kale, tough ribs removed
  • 1 to 2 tablespoons lemon juice (½ to 1 medium lemon), to taste

Instructions

  1. Warm the olive oil in a large Dutch oven or pot over medium heat. One-fourth cup of olive oil may seem like a lot, but it adds a lovely richness and heartiness to this nutritious soup.
  2. Once the oil is shimmering, add the chopped onion and carrot and cook, stirring often, until the onion has softened and is turning translucent, about 5 minutes.
  3. Add the garlic, cumin, curry powder and thyme. Cook until fragrant while stirring constantly, about 30 seconds. Pour in the drained diced tomatoes and cook for a few more minutes, stirring often, in order to enhance their flavor.
  4. Pour in the lentils, broth and the water. Add 1 teaspoon salt and a pinch of red pepper flakes. Season generously with freshly ground black pepper. Raise the heat and bring the mixture to a boil, then partially cover the pot and reduce the heat to maintain a gentle simmer. Cook for 25 to 30 minutes or until the lentils are tender but still hold their shape.
  5. Transfer 2 cups of the soup to a blender. Securely fasten the lid, protect your hand from steam with a tea towel placed over the lid, and purée the soup until smooth. Pour the puréed soup back into the pot. (Or, use an immersion blender to blend a portion of the soup.)
  6. Add the chopped greens and cook for 5 more minutes or until the greens have softened to your liking. Remove the pot from the heat and stir in 1 tablespoon of lemon juice. Taste and season with more salt, pepper and/or lemon juice until the flavours really sing. For a spicier soup, add another pinch or two of red pepper flakes.
  7. Serve while hot. Leftovers will keep well for about 4 days in the refrigerator, or can be frozen for several months (just defrost before serving).

Recipe from Cookie + Kate

3 Ingredient Vegan Banana Brownies

A super-simple and satisfying take on brownies – Chocolate lovers rejoice!

Ingredients

Instructions

  1. Heat oven to 350 degrees
  2. In a large mixing bowl, mash bananas until lump-free.
  3.  Mix in the nut butter and cocoa powder.
  4. Grease a baking sheet, and evenly distribute the batter into the pan.
  5. Bake for 17-20 minutes. Use the toothpick method to determine if they’re done.
  6. Let the brownies chill in the refrigerator for 45 minutes.
  7. Store in the refrigerator for best results.

Recipe by Simply Taralynn


Explore of full selection of vegan products for Veganuary here.

What’s New with the Canada Food Guide

2019 Canada Food Guide

Photo credit: Government of Canada

Have you seen the new Canada Food Guide?

The new version includes some significant changes since its last update in 2007. Gone are the four traditional food groups. They’ve been replaced by fruit, vegetables, whole grains, and proteins. The accompanying image shows a white plate in which roughly half is filled with fruit and vegetables, while the other half includes whole grains and proteins. You’ll even spot some tofu on that plate. 

So apart from the obvious, what are the biggest differences between the previous food guide and the 2019 version?

Reduced Emphasis on Meat and Dairy

The new food guide emphasizes fruit and vegetables over meat and dairy

Dairy products no longer feature as a separate food group, and meat also plays a less significant role in the new food guide. Proteins now include both dairy and meat as well as plant-based proteins, such as legumes, nuts and tofu. As the guide suggests, “Choose protein foods that come from plants more often. Plant-based protein foods can provide more fibre and less saturated fat than other types of protein foods. This can be beneficial for your heart health.”

Water is the Beverage of Choice

The previous food guide included a serving of 100% fruit juice as a suitable equivalent to a serving of fruit. That recommendation has been removed from the new food guide and drinking water is encouraged.

Reducing alcohol consumption is also encouraged. The guidelines recommend “no more than two drinks a day, 10 per week for women, and three drinks a day, 15 per week for men, with an extra drink allowed on special occasions.” ​

Other healthy beverage choices include:

  • White milk (unsweetened lower fat milk)
  • Unsweetened fortified plant-based beverages such as:
    • Soy beverage
    • Almond beverage
  • Unsweetened coffee and teas

No More Numbers

While the previous food guide included a daily number of recommended servings per food group, the new guide has a more holistic approach, recommending that our diets consist of roughly half fruits and vegetables and the rest whole grains and protein. The updated food guide suggests a more mindful approach to eating. It encourages listening to your body’s cues and choosing the right foods to stay satiated for longer periods.

Healthier Eating Habits

Canada's Food Guide suggests eating new foods together

The updated food guide recommends that we develop healthy eating habits, cooking more, enjoying food (trying cultural foods), and eating with others. Sharing meals with others is particularly emphasized. According to the new food guide, eating alone or separately from others in the home can create a sense of isolation or loneliness. The benefits of eating together as a family helps our children:

  • Explore new healthy foods
  • Establish healthy eating routines
  • Improve their overall eating pattern

Another of the healthy habit recommendations is to choose foods that reflect different cultures and food traditions. According to the guide, this can help you:

  • Choose foods that you enjoy
  • Grow your skills and knowledge
  • Learn about cultures and food traditions
  • Create a sense of community and foster connections
  • Keep your cultural roots and food traditions alive by sharing them across generations and with others.

Overall, the updated food guide is a comprehensive nutritional guide including categories on food choices (including what to limit or avoid – most notably processed foods), eating habitsrecipes, tips (including meal planning, budgeting, healthy snacking, food safety and other strategies for healthier eating), and resources.

If you have any questions about your daily nutritional needs, our pharmacists can assist you in making sense of the new Food Guide recommendations. Visit us at any of our locations and speak to our in-store nutritional experts.

9 Warm and Welcoming New Year’s Day Brunch Recipes

The new year is just around the corner, so why not ring in 2019 with a delicious brunch get-together? We’ve got some of the best New Year’s Day brunch recipes to help you and your friends or family celebrate in the best way we know how – surrounded by delicious food.

Cranberry-Apple Cider Punch

Photo credit

Coffee and tea are musts for brunch, but this fresh spritzer will quench some holiday thirsts, too.

Ingredients:

4 cups apple cider, chilled
2 cups cranberry juice cocktail, chilled
2 cups ginger ale, chilled
1 can (12oz.) frozen orange juice concentrate
apple slices and orange slices for garnish
frozen cranberries, optional for garnish
or rosemary cranberry sprig for individual garnish, as shown in image

Directions:

In a large jug combine cider, juice, and orange juice concentrate. Refrigerate until serving time. Just before serving add chilled ginger ale. Garnish with frozen cranberries, apples, and orange slices.

Get more non-alcoholic drink recipes at Say Yes.

Eggnog Scones

Photo credit

You know you’ve got some leftover eggnog in your fridge. Put it to good use with these warm, sweet pastries that are sure to be a hit.

Ingredients:

2 cups all-purpose flour
2 tbsp granulated sugar
1 tbsp baking powder
1/2 tsp salt
1/4 tsp nutmeg
1/2 cup cold unsalted butter, cut into cubes
3/4 cup eggnog

Directions:

Stir flour with sugar, baking powder, salt, and nutmeg in a large bowl. Work in butter until crumbly. Pour in eggnog and stir until just mixed. Pat dough into a 2cm-thick circle. Cut into 8 triangle-shaped scones. Arrange 2cm apart on a baking sheet. Bake at 425°F until golden, about 15 min.

Recipe from Chatelaine

Broccoli-Rabe and Ricotta Frittata

Photo credit

This one is as fun to eat as it is to say.

Serves 4

Ingredients:

3/4 pound broccoli rabe, tough stems removed
9 eggs
3/4 cup ricotta (about 1/3 pound)
3/4 teaspoon salt
1/2 teaspoon fresh-ground black pepper
2 tablespoons olive oil
1 clove garlic, minced
2 tablespoons grated Parmesan

Directions:

Heat the oven to 325°F. In a large pot of boiling salted water, cook the broccoli rabe until almost tender, about 3 minutes. Drain. Rinse the broccoli rabe with cold water and drain thoroughly. Cut the broccoli rabe into 2-inch lengths and set aside.

In a large bowl, beat the eggs with the ricotta and 1/4 teaspoon each of the salt and the pepper.

In a medium cast-iron or ovenproof nonstick frying pan (we recommend the Berghoff Neo Enamel Cast Iron Fry Pan), heat the oil over moderate heat. Add the garlic and cook, stirring, until fragrant, about 30 seconds. Add the blanched broccoli rabe and the remaining 1/2 teaspoon salt and 1/4teaspoon pepper and cook, stirring, for 2 minutes.

Evenly distribute the broccoli rabe in the pan and then add the egg mixture. Cook the frittata, without stirring, until the edges start to set, about 2 minutes. Sprinkle the parmesan over the top and bake until firm, about 25 minutes.

Tip: Broccoli rabe can be bitter, but blanching the vegetable in boiling salted water for a few minutes before proceeding with the recipe tempers its strength. The trick, used here, can be applied to almost any dish.

Recipe from Food & Wine


Red Velvet Pancakes with Cream Cheese Glaze

Photo credit

Yes you read that right. These decadent treats will wow your guests and have them talking for the rest of the year.

Yield: 16 pancakes

Ingredients:

2 cups all-purpose flour
3 Tbsp cocoa powder
2 tsp baking powder
1/2 tsp baking soda
1/2 tsp salt
2 cups milk
2 Tbsp white vinegar
1/2 cup granulated sugar
2 large eggs
1 1/2 Tbsp red food colouring
2 tsp vanilla extract
1/3 cup salted butter, melted
1 recipe Cream Cheese Glaze, recipe follows
fresh raspberries and mint leaves, for garnish (optional)

Cream Cheese Glaze
6 oz cream cheese, softened
6 Tbsp butter, softened
2 cups powdered sugar
1/2 cup milk, plus more if desired
1/2 tsp vanilla extract

Directions:

Preheat an electric non-stick griddle (like this affordable Black & Decker griddle) to 350°F. In a mixing bowl, whisk together flour, cocoa powder, baking powder, baking soda, and salt, set aside. Measure out milk into a liquid measuring cup and whisk in vinegar, allow mixture to rest for 2 minutes. Pour milk mixture into a separate large mixing bowl and add in sugar, eggs, red food colouring, vanilla, and melted butter. Whisk mixture until well combined. While whisking, slowly add in dry ingredients and mix just until combined.

Butter griddle if necessary and pour about a 1/4 – 1/3 cup batter (depending on how large you want your pancakes) at a time onto hot griddle (you can also use the back of measuring cup or spoon to lightly spread batter from centre out to the edge a bit so they aren’t thicker in the centre than they are on the edges). Cook until bubbles begin to appear on the top surface of the pancakes then flip and cook opposite side until pancake is cooked through (I didn’t want the tops of the pancakes to be brownish red so I flipped them a little earlier than I normally do with pancakes, I didn’t wait for many bubbles). Serve warm with Cream Cheese Glaze and garnish with fresh raspberries and mint leaves if desired.

Cream Cheese Glaze
In a mixing bowl, using an electric hand mixer set on medium speed, blend together cream cheese and butter until well combine and fluffy, about 2 minutes. Add in remaining ingredients and mix about 1 minute until well combined, adding additional milk to thin if desired. Store in an airtight container in refrigerator.

Recipe from Cooking Classy

Bacon in the Oven

Photo credit

You can’t have pancakes without bacon, but cooking bacon for a big group can be a hassle. In the oven it’s much less work, less mess, and it will be just as crispy as the stovetop method.

Directions:

1. Preheat to 400°F and line a large baking sheet with foil. (You’ll be thankful once it’s time to do dishes.)

2. If you like your bacon extra crispy, put a metal cooling rack inside the baking sheet. Elevating the bacon allows the strips to cook from all sides. If you like your bacon with a little chew, or you don’t have a cooling rack, skip this step. Your bacon will still be amazing.

3. Lay bacon strips in a SINGLE layer on the baking sheet. Do not let them overlap or the strips will stick together. Bake until the bacon is crispy, about 20 minutes, depending on its thickness. Our advice: Start checking after 15 minutes because some ovens are finicky and burnt bacon is sad.

4. Per usual, drain the (very greasy) bacon slices on a paper towel-lined plate, then serve immediately.

5. Pour grease into a mason jar (or other glass container) and store in the fridge. Seriously though — saving the fat will be the best decision you make all week. You can use it to cook eggs, roast vegetables, and pop popcorn!

Recipe from Delish

Healthy Breakfast Bake with Spaghetti Squash

Photo credit

If you or your guests are looking to take a break from the holiday treats, this healthy selection will still satisfy your craving for a special breakfast.

Ingredients:

Note: This recipe is for one serving, increase quantities as needed.

½ spaghetti squash
salt and pepper
2 – 3 Tbsp tomato sauce
1 – 2 handfuls spinach, chopped
1 handful mushrooms, diced
2 slices ham, chopped
1 – 2 thin slices red onion, chopped in half
1 handful Cheddar cheese, shredded
1 handful green onions, chopped
2 eggs

Directions:

Preheat oven to 400ºF (205ºC). Slice squash in half and clean out seeds. Sprinkle squash with salt and pepper to taste. Spread tomato sauce in squash. Place spinach, followed by mushrooms, ham, red onion and cheese, followed by another sprinkle of salt and pepper.

Once oven is preheated, bake squash for 15 to 20 minutes. After 15 to 20 minutes crack two eggs into the spaghetti squash and continue to bake until egg reaches your desired doneness (about 15 to 20 minutes). Finish with salt and pepper and serve.

Recipe from Food Network


Cranberry Bliss Muffins

Photo credit

Craving your favourite treat from a certain coffee shop chain? Satisfy your craving with these delectable knock-offs.

Ingredients:

2 cups (10 ounces) all-purpose flour*
1 tablespoon baking powder
1/2 teaspoon salt
1 large egg
1 cup dark brown sugar, packed
4 tablespoons unsalted butter, melted
2 teaspoons pure vanilla extract
2 teaspoons orange zest (optional)
1 1/4 cups sour cream
1 1/2 cups dried cranberries, lightly chopped, divided
1 1/2 cups white chocolate chips, divided

Cream Cheese Frosting:
4 ounces cream cheese, room temperature
1/4 cup unsalted butter, room temperature
1 1/2 cups powdered sugar (aka confectioners’ sugar)
1 teaspoon pure vanilla extract
Pinch salt

Directions:

1. Preheat oven to 350°F. Prepare a standard-size muffin pan with 12 cups by either greasing or adding cupcake liners.

2. In a large bowl, whisk together the flour, baking powder, and salt.

3. Crack the egg into a medium bowl and whisk until pale, about 30 seconds. Add the sugar and whisk vigorously until thick and well-combined for another 30 seconds. Add the melted butter and whisk vigorously to combine. Stir in the vanilla and orange zest. Lastly, add the sour cream in two additions, whisking just until combined.

4. Chop the cranberries (if you haven’t already). Reserve 2 tablespoons and set aside. Add the remainder to the flour mixture along with 1 1/4 cups white chocolate chips. Toss the cranberries and white chocolate chips with the flour mixture just until distributed.

5. Add the sour cream mixture to the flour and fold very gently with a rubber spatula, continuing to fold and stir gently just until combined. The batter will be very thick and there may still be bits of flour here and there; that’s okay. Better to have spots of flour than to overmix.

6. Scoop into muffin cups in approx. 1/3 cup increments, dividing evenly between the 12 cups. Bake until the muffins are golden brown and a toothpick inserted into the centre comes out clean, about 25 minutes. Allow to cool in the pan for 5 minutes, then transfer to a wire rack to cool completely.

7. For the frosting, using a stand mixer (like this classic KitchenAid model) or hand mixer, beat the cream cheese and butter on medium speed until well combined, about 30 seconds. Add the powdered sugar, vanilla extract, and salt. Mix on medium speed until well combined and smooth, about 60 seconds.

8. Frost cooled muffins with a knife – each takes about a tablespoon of frosting. Sprinkle on remaining chopped cranberries. Lastly, place 1/4 cup white chocolate chips in a microwave-safe bowl and heat at 50% power in 15-second increments until they melt when stirred. If the white chocolate siezes up, try adding a 1/4 teaspoon or so of vegetable oil to help get it to a drizzle-able consistency. Using a spoon, drizzle the white chocolate over the tops of each muffin in long, thin streams. Let sit until white chocolate hardens, about 30 minutes, and serve.

Recipe from Kitchen Treaty

Perfect French Toast

Nothing says brunch like this classic. Bonus – it’s also super easy!

Ingredients:

1 cup half-and-half
3 large eggs
2 tablespoons honey, warmed in microwave for 20 seconds
1/4 teaspoon salt
8 (1/2-inch) slices day-old or stale country loaf, brioche or challah bread
4 tablespoons butter

Directions:

In medium-sized mixing bowl, whisk together the half-and-half, eggs, honey, and salt. You may do this the night before. When ready to cook, pour custard mixture into a pie pan and set aside.

Preheat oven to 375°F. Dip bread into mixture, allow to soak for 30 seconds on each side, and then remove to a cooling rack that is sitting in a sheet pan, and allow to sit for 1 to 2 minutes.

Over medium-low heat, melt 1 tablespoon of butter in a 10-inch nonstick saute pan. Place 2 slices of bread at a time into the pan and cook until golden brown, approximately 2 to 3 minutes per side. Remove from pan and place on rack in oven for 5 minutes. Repeat with all 8 slices. Serve immediately with maple syrup, whipped cream or fruit


Baked Oatmeal with Orange and Almonds

Photo credit

Even the pickiest eaters will love this healthy update on a comforting breakfast staple.

Serves 4-6

Ingredients:

2 cups rolled oats (not quick cooking!)
½ cup sliced almonds
1½ teaspoons ground cinnamon
1 teaspoon baking powder
½ teaspoon fine-grain sea salt
2 cups unsweetened almond milk
1 large egg
1/3 cup pure maple syrup
1½ tablespoons liquid virgin coconut oil
2 teaspoons pure vanilla extract
1 teaspoon orange zest
4 oranges of your choice, skin and pith removed and sliced into roughly ¼” rounds
1 tablespoon turbinado sugar (optional)
For serving: (optional)
Almond milk
Maple syrup

Directions:

Pre-heat your oven to 375°F with a rack in the top third of the oven. Grease a medium baking dish with coconut oil and set aside.

In a mixing bowl, combine the oats, half of the almonds, cinnamon, baking powder and salt. In a separate bowl, whisk the almond milk, egg, maple syrup, coconut oil, vanilla extract and orange zest. Arrange half of the sliced oranges in the bottom of the baking dish. Top with the oat mixture. Then pour the milk mixture over the oats. Lightly tap the baking dish on the counter a few times to help distribute the liquid through the oats. Bake for 20 minutes until the oat mixture is just beginning to set. Top with the remaining almonds and orange slices. Return to the oven and bake for another 20-25 minutes until the oatmeal is set and the top is very lightly browned. (Optional: sprinkle the orange segments with turbinado sugar and pop the oatmeal under the broiler for a minute or two to caramelize the citrus.)

Note: If you’re not into citrus, feel free to mix up the fruit. You could also use a mix of bananas and blueberries, but almost any fruit will do. Think thinly sliced (or finely chopped) apples and pears in fall/winter, peaches and cherries in summer, etc.

Recipe from Domesticate Me


Happy brunching! We hope the new year brings you you warmth, peace and time with family and friends. 

The Candy That Will Help You Kick Sugar: Smart Sweets

Smart Sweets founder, Tara Bosch (image via Facebook)

This post marks the first in a series of product profiles that we plan to publish on the London Drugs blog, exploring the talented people producing some of the exciting Canadian products on our shelves. 

22-year-old founder Tara Bosch launched the confectionary company Smart Sweets in 2016, and in doing so, shook up the candy world. If you picked up a bag of her treats at your local London Drugs, you may have wondered in fact whether you were getting candy or a health product.

You’re getting both.

Bosch set out to create a treat that wasn’t loaded with the usual amount of sugar. Where a 56-gram bag of Skittles contains 43 grams of sugar, Smart Sweets contains just 2 grams of sugar per 50-gram pouch (not to mention 24 grams of fibre and 5 grams of protein). It’s a sweet snack that you can feel a little better about enjoying.

An up-and-comer in the business world, Bosch has already been on the popular TV program Dragons’ Den (earning praise from all the judges) and has been honoured in the Pitch for the Purse contest as well as in the most recent BCBusiness 30 under 30 issue.

“It was amazing to see and hear the stories of how people’s lives have been impacted by sugar. There is no better time to be part of the wellness​ industry in Canada as more and more people are realizing the impact that food, specifically sugar, has on our body and are eagerly waiting for options to be innovated so they can make smaller, smarter choices in their daily lives,” says Bosch.

“It was so cool to see people who watched our episode reach out and share their stories about how they are kicking sugar, too. Smart Sweets has the opportunity to make a massive impact in people’s lives. At the end of the day, it’s about being able to feel good about enjoying the foods we love, and life’s too short not to be able to eat candy everyday.”

When asked where Bosch sees Smart Sweets going from here, the entrepreneur doesn’t balk. “Smart Sweets is revolutionizing candy consumption. Tackling one of the largest and most concerning problems hidden in our everyday foods, we are driving innovation through creation of the first candy products that kick sugar naturally … We want to empower people to live their best lives by giving them the choice to kick sugar.”

Bosch’s dream of seeing Smart Sweets take up space on shelves across the world–including shelves at London Drugs, of course–just may become reality. We wish her the best.

Smart Sweets is currently available in stores across Canada, including London Drugs. The product will be launching in the U.S. in the first quarter of 2018.

5 Tips to Help You #KickSugar in 2018

Whether you’re climbing aboard the resolution train or not, a new year really does come with a fresh start feeling where anything is possible. If that anything for you is to reduce your sugar consumption – no problem, these five tips can help you stick with it.

Photo from @eatsmartsweets

For any lifestyle change or new habit, it’s all about making small changes. Any sudden, drastic moves to cut out sugar completely are often paired with some intense cravings that can make someone with the strongest of willpower give up altogether. And that’s not what we’re going for, is it?

Incorporate these small steps to help you on your #kicksugar journey even one per week and you’ll be crushing those new year goals in no time:

1. Stay Hydrated

Boring I know. Drink water? Heard it a million times before. But for real, this is key. Dehydration can cause the body to become sluggish and tired, craving foods it doesn’t even need including high-sugar foods. Keep hydrated by drinking water throughout the day in whichever form you like – on its own, with lemon, herbal tea – you name it, just drink it. Try to get at least 4-6 glasses in a day.

2. Sip Some Apple Cider Vinegar

This might seem like a strange one. What the heck does vinegar have to do with reducing sugar? Well let me tell you. Apple cider vinegar has countless benefits, one of them including balancing blood sugar. When blood sugar is unstable, up and down like a rollercoaster, this is when sugar cravings can come in strong and fast. Start with 1 tsp of ACV in ½ cup of water with meals to help balance blood sugar. You can even start with one meal and work up to taking it with all your meals.

3. Get Those Probiotics

You’d have to be living under a rock to not have heard the benefits of beneficial bacteria or ‘probiotics’ for overall and intestinal health (if you’ve been under a rock, please just Google it). The connection to sugar cravings is that the bacteria living in your intestinal tract can dictate the foods you crave. If there is an imbalance of bacteria in gut, sugar cravings can be fierce and steady. Support your intestinal flora balance by consuming fermented foods like raw sauerkraut and unsweetened yogurt and/or supplementing with probiotics.

4. Keep Low-Sugar Snacks Within Arm’s Reach

Photo from @eatsmartsweets

One of the toughest times to avoid sugary foods is when you’re out and about, haven’t eaten for too long and hunger strikes. Most convenient snacks include a shocking amount of sugar, naturally-occurring or not. Something like keeping a stash of your favourite nuts in your car or desk is great snack to tide you over to a meal. Having low-sugar treats around is also key. Just because you’re reducing sugar, it doesn’t mean you shouldn’t be able to treat yourself. SmartSweets Low-Sugar Gummy Bears are a total game changer when you feel like a sweet treat. With 2g or sugar per serving, you can get your sweet fix without falling off the wagon.

5. Check Your Mindset

I totally get it, been there. Reducing sugar can mean saying ‘see ya later’ to some of your very favourite foods. Which can even be slightly emotional. Instead, think of this as an opportunity to invite different foods into your life rather than saying goodbye to the higher-sugar ones. Adding in more variety and new foods you haven’t tried before can mean new favourite foods. Get creative, hunt for some new exciting recipes and get busy in the kitchen.

Remember, it’s all about those small changes. Be easy on yourself and have fun with it! Join the SmartSweets #kicksugar challenge by following @EatSmartSweets on Instagram and share how you’re kicking sugar to the curb in 2018.

Paige Webster
Registered Holistic Nutritionist

A Beginners Guide to Canning and Preserving

Fall is here! But don’t worry, it’s not all rain and cold weather. Fall is a beautiful season of bounty, and you can make the most of that bounty by taking up your new favourite hobby: canning. That beautiful jam you like? You can make it. Dill pickles? You can make those too. Those cans of tomatoes you buy every other week? Yep, you got it! All you need is a bit of equipment and a bit of know-how. London Drugs has got you covered on both counts.

Woman In Kitchen Listing Ingredients In Vegetable Preserves

Canning is really just a way of preserving food. Water bath canning is the easiest way to start: you fill glass jars with the stuff you want to preserve (jams, jellies, pickles, etc.) and boil them in hot water. This kills any bacteria present, removes air from the jar, and seals it to prevent any more bacteria from getting in. Water bath canning only works for high-acid foods like fruit, tomatoes, and pickled things.

If you want to get really fancy and preserve your perfect pumpkin pie filling, you’ll need to upgrade to a pressure canner. But the basic process is to sterilize your jars in boiling water, make your preserves, put those preserves in the jars, put on the lids, and throw them back in boiling water. Easy peasy, right?

So where do you begin? First, you need some equipment:

  • Large stockpot, deep enough to completely cover your jars
  • Canning jars
  • Canning lids (these will come with jars if you buy a new set!)
  • Jar lifter
  • Lid lifter
  • Funnel

We’ve got a complete canning kit that includes the jar lifter, lid lifter, and funnel, as well as 250ml jars, 500ml jars, and even 1L jars for things like pickles and whole tomatoes. If you’re making jam or jelly, you’ll also need pectin.

Once you’ve acquired the equipment, you need to decide what you want to can! In early fall we still have stone fruit like peaches and plums, and lots of tomatoes. Later in the season, root vegetables like carrots and beets can make some excellent pickles. And apples, of course!

Pickled cucumbers, homemade preserved on wooden table

If you’ve got a well stocked grocery store that brings in produce from further afield, you can can small batches with basically any type of fruit. We’ve got recipes for strawberry balsamic jam and sour cherry jelly on the blog from earlier this summer. (What’s the difference between jam and jelly, you ask? Jam is made from crushed fruit while jelly is made from fruit juice! The more you know.)

Next, as a beginner, follow a recipe!

Canning isn’t difficult, but when mistakes are made they can range from something minor like a jam that doesn’t set to something dangerous like food that is unsafe to eat. You may balk at the amount of sugar in some of these recipes, but it’s integral to getting the jelly or jam to set properly, and it helps prevent spoilage.

Boiling time will vary depending on what altitude you’re at. You also can’t reuse the flat part of the two part lid for canning jars; you can reuse the ring, but you need a new lid each time you can. And don’t forget to sterilize your jars before filling them with your preserves!

Bell pepper preserves - London Drugs Blog

There are a ton of great websites you can go to for more information and recipes, including the National Center for Home Food Preservation, Food in Jars, and Punk Domestics. Companies that make canning supplies like Bernardin and Ball are also fantastic resources.

Here are a few of our favourite fall recipes. Go ahead and get canning! You can can!

8 Clever Hacks for Your Kitchen Appliances

There’s no time like the present to dust off that waffle iron you received as a wedding gift two years ago. The same applies to the slow cooker only brought out for potlucks, and the popcorn machine you can’t reach at the back of the cupboard. When it comes to kitchen appliances, the possibilities are only limited by your imagination. Coffee makers and dishwashers are capable of doing much more than what it claims on their packaging. The following hacks take everyday kitchen appliances (and a few kitchen tools!) from one-dimensional to multi-faceted.

Cheese Grater

kitchen cooking hacks

We all know how frustrating it can be trying to butter a fluffy piece of toast with a cold slab of butter. Not only can a cheese grater solve all your butter problems, but it can also double as a vegetable slicer, spice grinder, and chocolate shaver. Find more grater hacks here.

READ MORE

Next Page »