Upcycle This: 5 Cools Crafts to Do on a Cold Day

Upcycler Extraordinaire Denise Corcoran
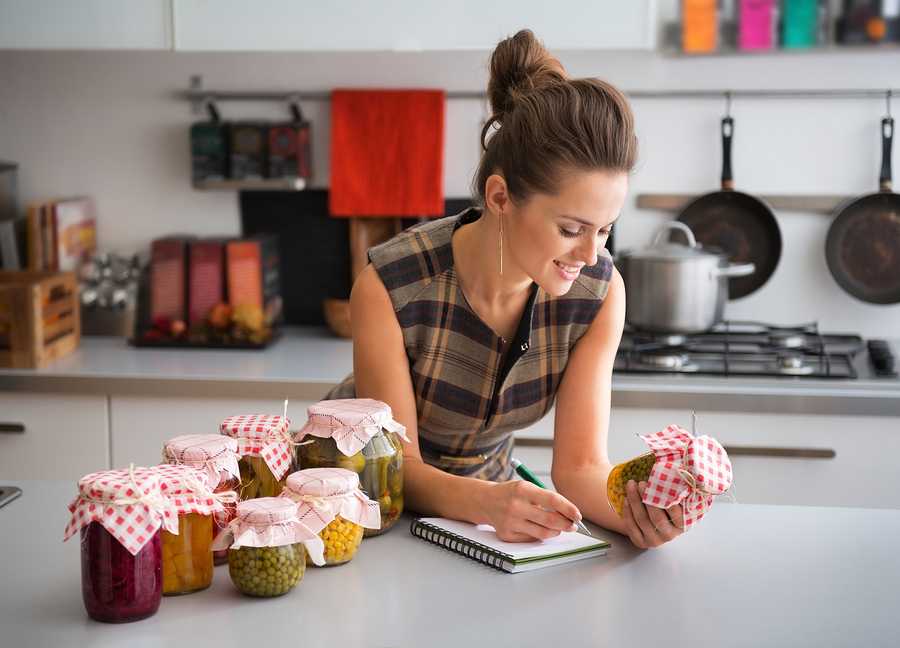
Upcycler and crafter extraordinaire Denise Corcoran (Thrifty By Design) has a passion for turning ‘junk’ into new and funky pieces. From refinishing furniture to repurposing discarded items like wine corks into jewellery, she believes there is no limit to what a bit of time and know-how can create and save from the landfill. Here Denise shares 5 of her favourite upcycled crafts.

Do you ever look in your recycle bin and think you could make crafty magic happen with your recyclables? I do. All the time!

So many items you find in your recycle bin can be repurposed into fun rainy day projects. From mason jars (which you can find at London Drugs!) to cereal boxes to tin cans… there are simple DIYs that turn used objects into treasure. And the bonus for all of us is that you help keep these objects out of the landfill. Here are a few easy upcycled crafts to get you started!

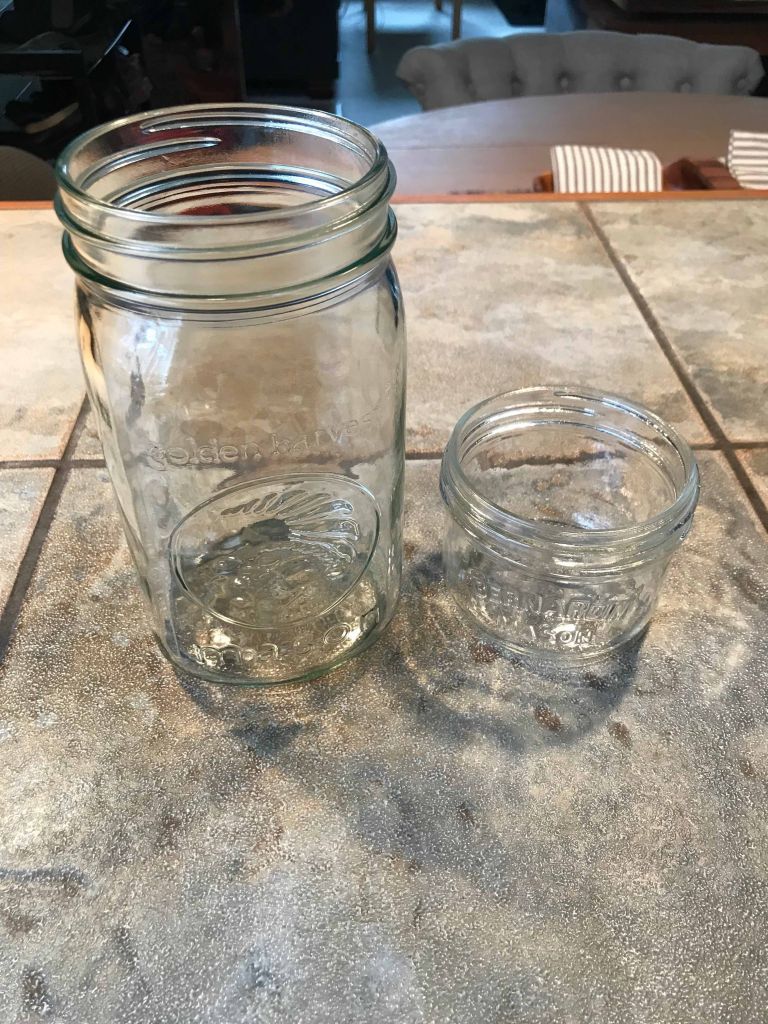
1. Mason Jar Lanterns

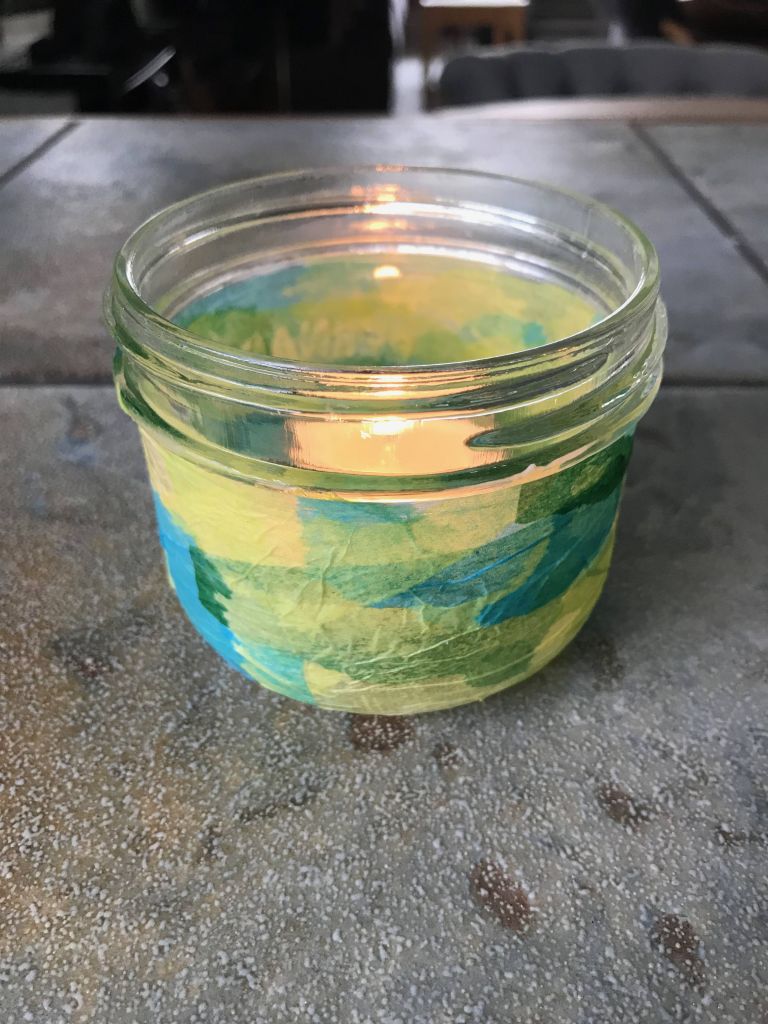
Mason jars are super trendy when it comes to upcycling. One easy project is to refashion the mason jar into a lantern. By decoupaging tissue paper on the outside then adding a tea light in the mason jar, you’ve crafted an easy lantern. You can even step it up a notch by taking a Sharpie and adding a face or design to the decoupage.

Step 1: Grab some mason jars of various sizes and ensure they are clean.

Upcycled mason jars


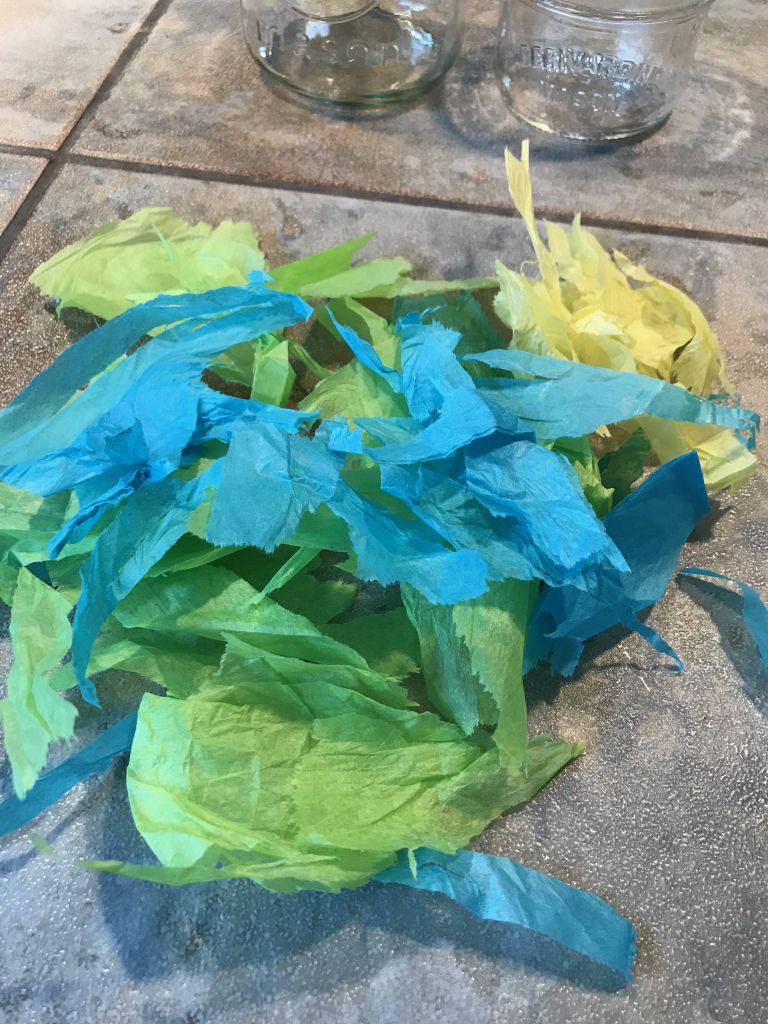
Step 2: Tear up pieces of tissue paper. Either use one colour or try mixing it up with various colours.

Upcycled crafts


Step 3: Add a coat of Mod Podge or liquid white glue to the mason jar.

Upcycled Crafts with Mason Jars


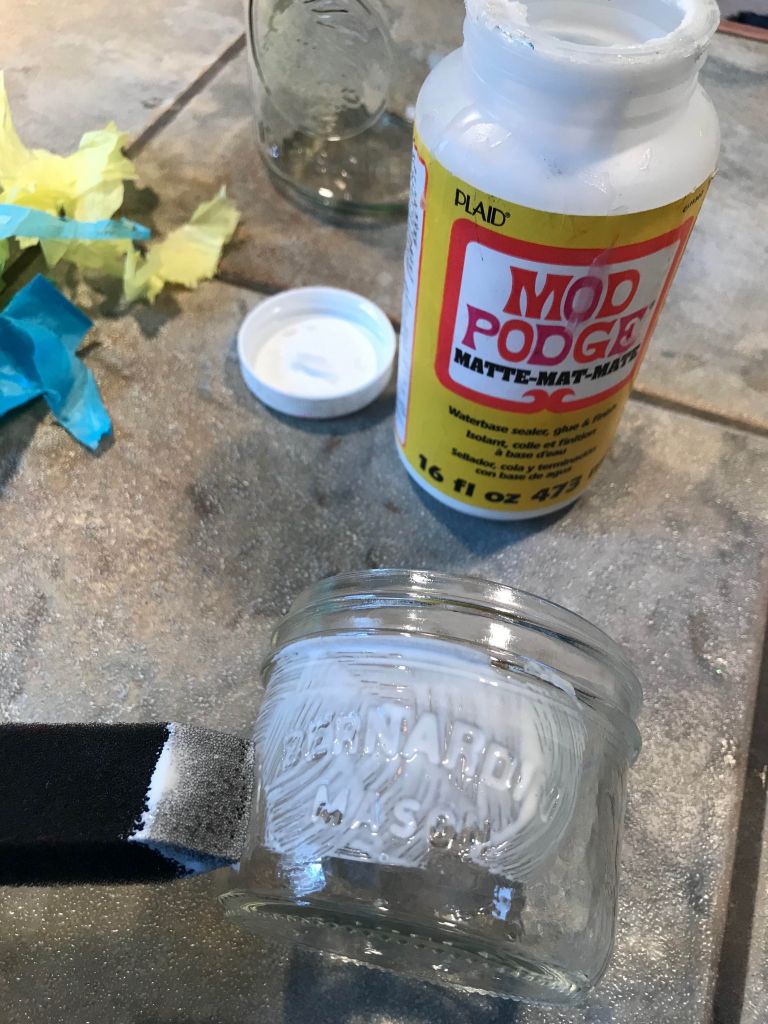
Step 4: Add pieces of tissue paper to the glued area. Then coat the tissue paper with more Mod Podge to smooth out the paper and seal it.

Upcycled Crafts with Mason Jars


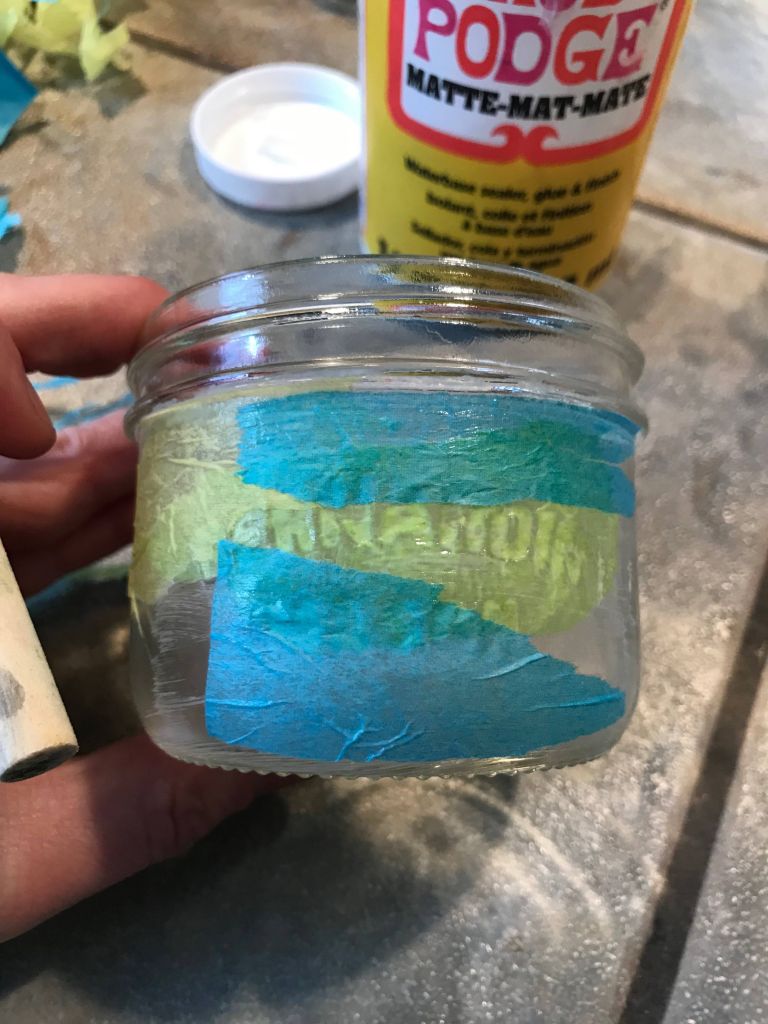
Step 5: Continue step 3 and 4 until the mason jar is completely covered with tissue paper. Allow to dry.

Upcycled Crafts with Mason Jars


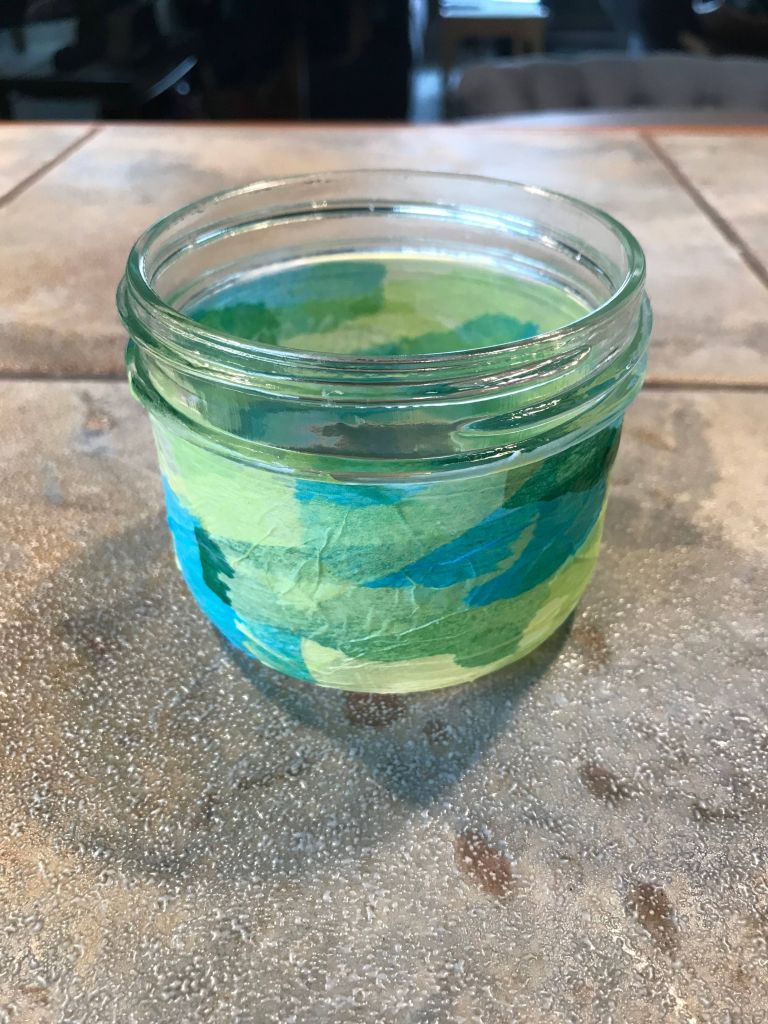
Step 6: Insert a regular or LED tea light into the mason jar to create a lantern.

Upcycled Crafts with Mason Jars

2. Cereal Box Organizers

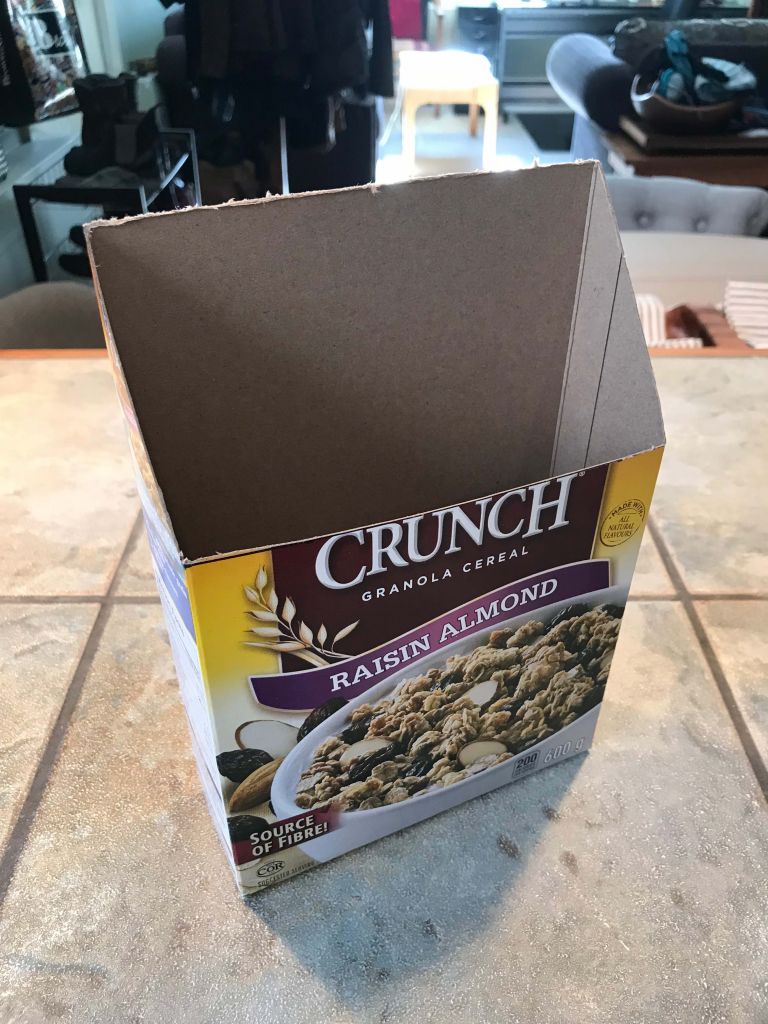
One of my favourite go-to items from my recycle bin is cereal boxes. They’re perfect for DIY stationery, art, gift boxes, or gift tags. They’re also perfect for your office to organize your papers, magazines, or mail. It doesn’t take much to turn an empty box into a swanky organizer for your kitchen or office.

Step 1: You can use any size of cereal box to create your DIY office organizer.

Upcycled Crafts with Cereal Boxes


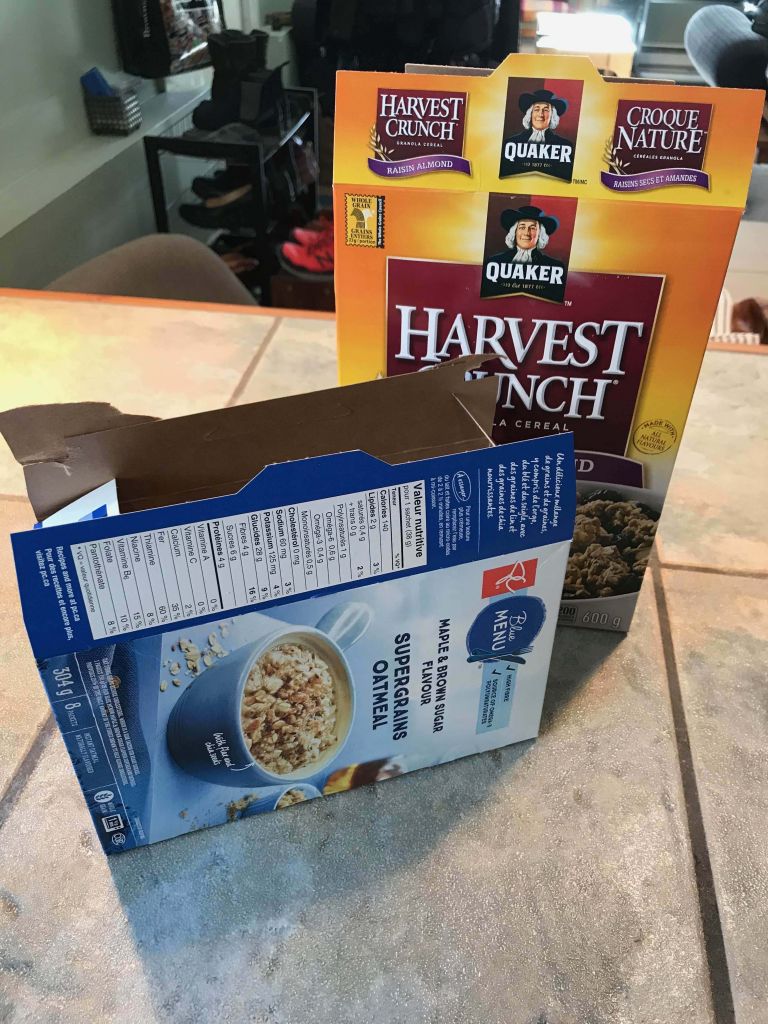
Step 2: Measure and mark where you want to trim the cereal box.

Upcycled Crafts with Cereal Boxes


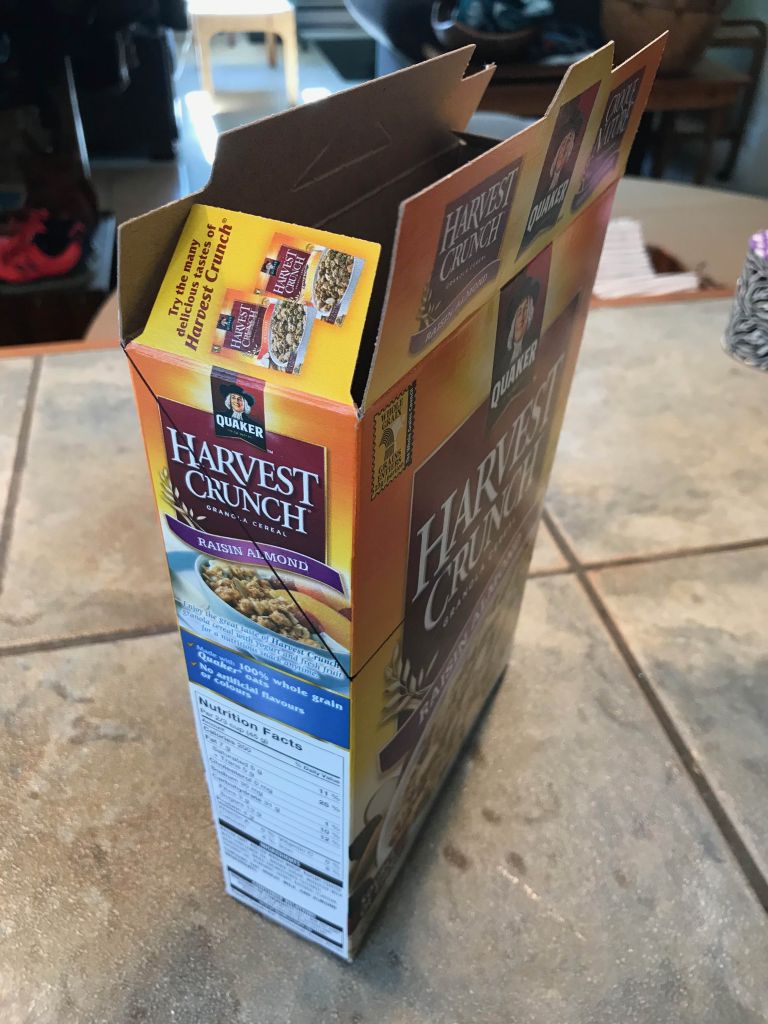
Step 3: Use scissors or an X-acto knife to trim the box.

Upcycled Crafts with Cereal Boxes


Step 4: Cover the cereal box in old wrapping paper using a glue stick or Mod Podge.

Upcycled Crafts with Cereal Boxes


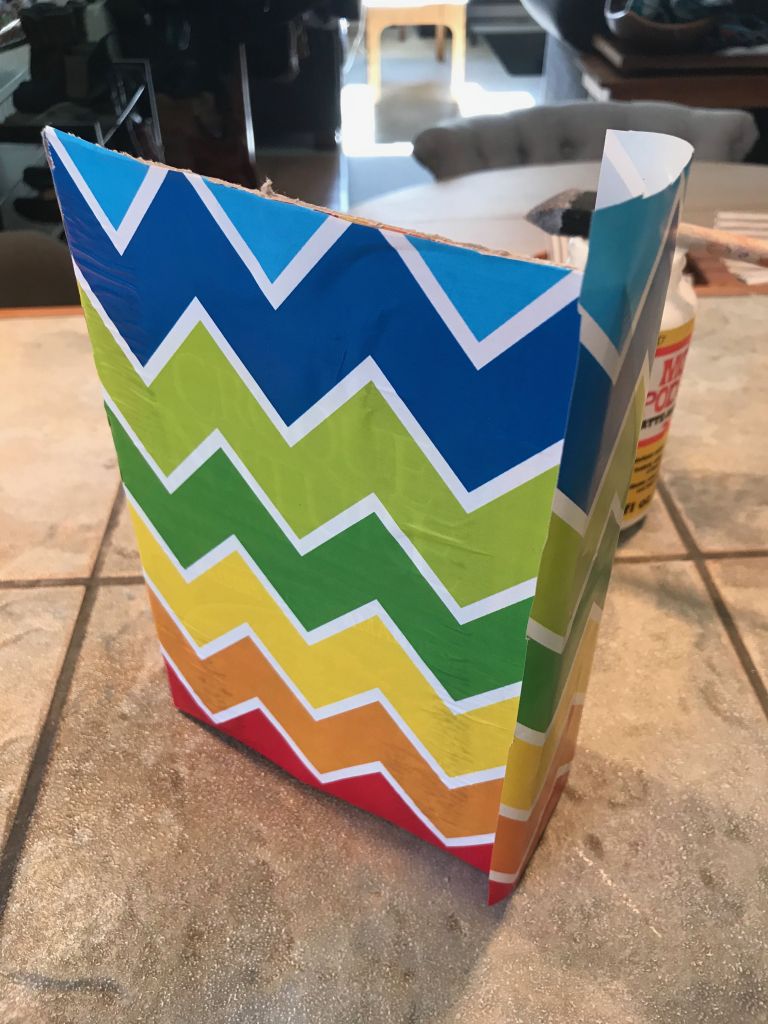
Step 5 (optional): Jazz up your organizer with ribbon or funky tape trim to add a bit more pizzazz.

Upcycled Crafts with Cereal Boxes

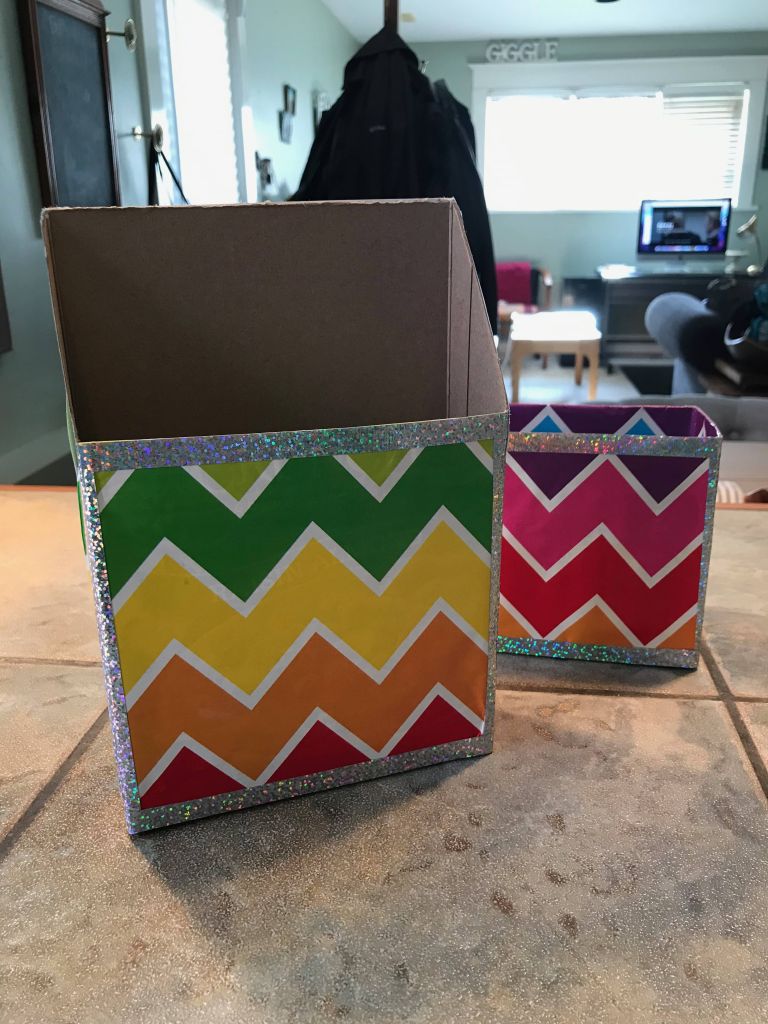
Step 6: Upcycle more boxes to create a set of organizers.
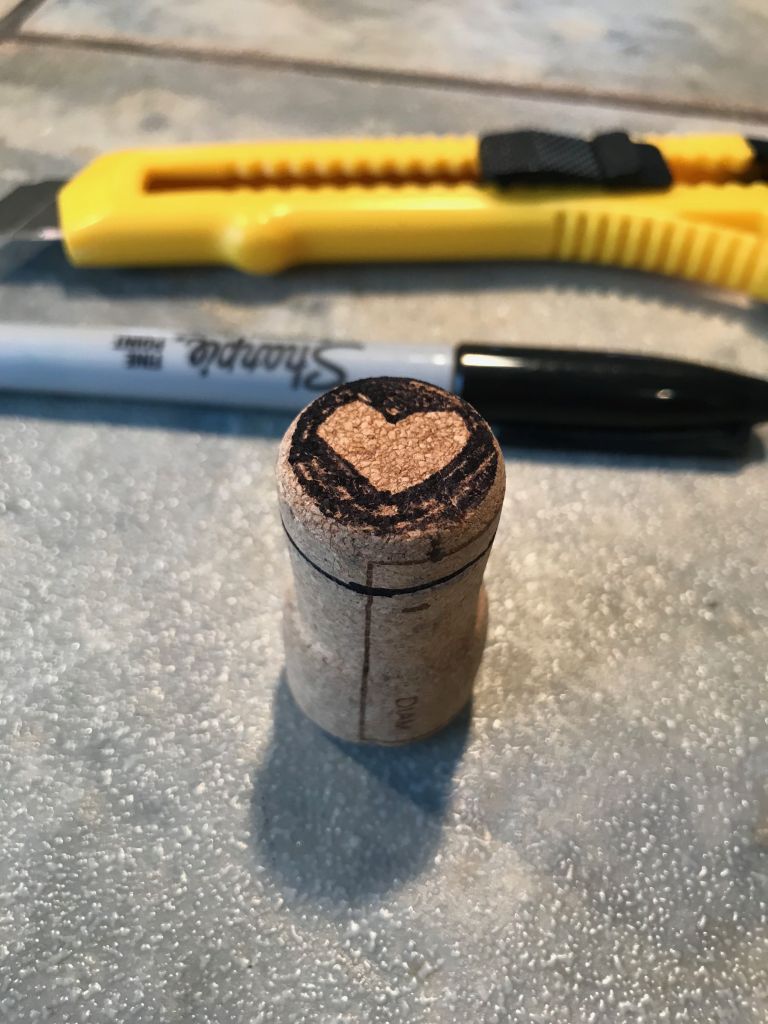
3. Wine Cork Stamps

There are some super fun DIYs out there when it comes to upcycling wine corks. You can turn wine corks into a boat, fridge magnets, or even repurpose them into jewelry. So many possibilities! On a cold day why not stay in, make wine cork stamps, then use them to decorate handwritten notes or to create your own stationery. Just be careful when creating your stamps since you’ll need an X-Acto knife.

Step 1: Find wine corks with dense cork to use for your stamps. With a pen, outline your stamp design. Also add a line about a 1/4 inch along the wine cork.

Upcycled Crafts with Wine Corks


Step 2: Cut your design out using an X-Acto knife. Cut into your design and then into the line along the side of the wine cork. This will remove the cork to create your stamp.

Upcycled Crafts with Wine Corks


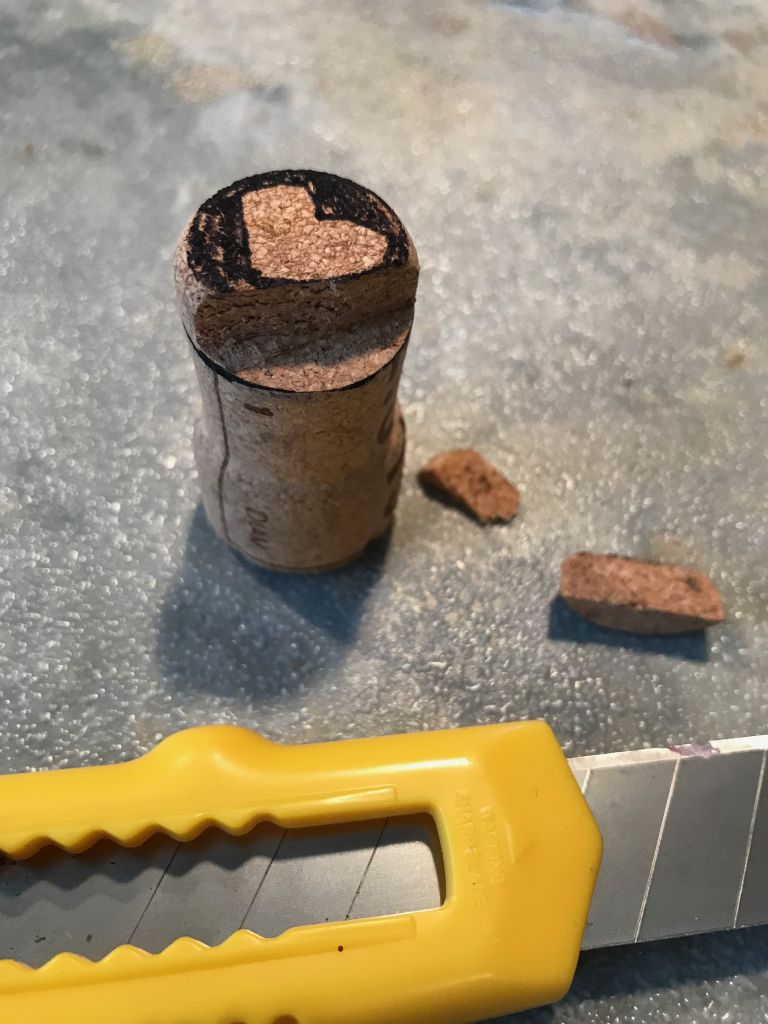
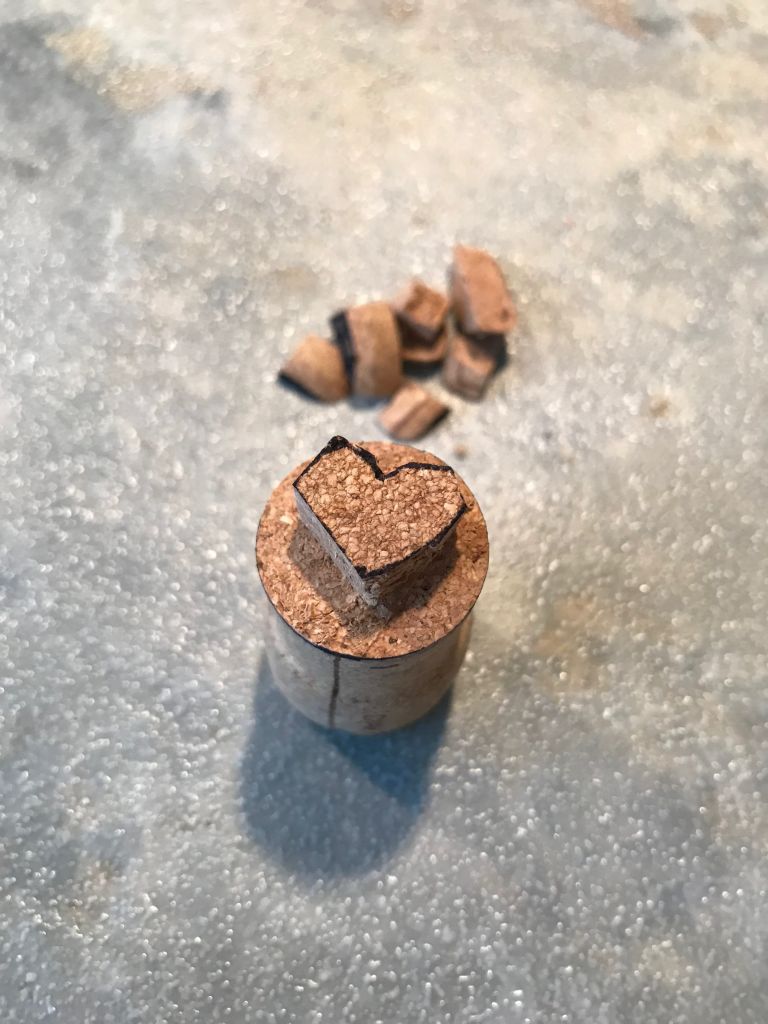
Step 3: Keep cutting until you’ve fully exposed your design.

Upcycled Crafts with Wine Corks


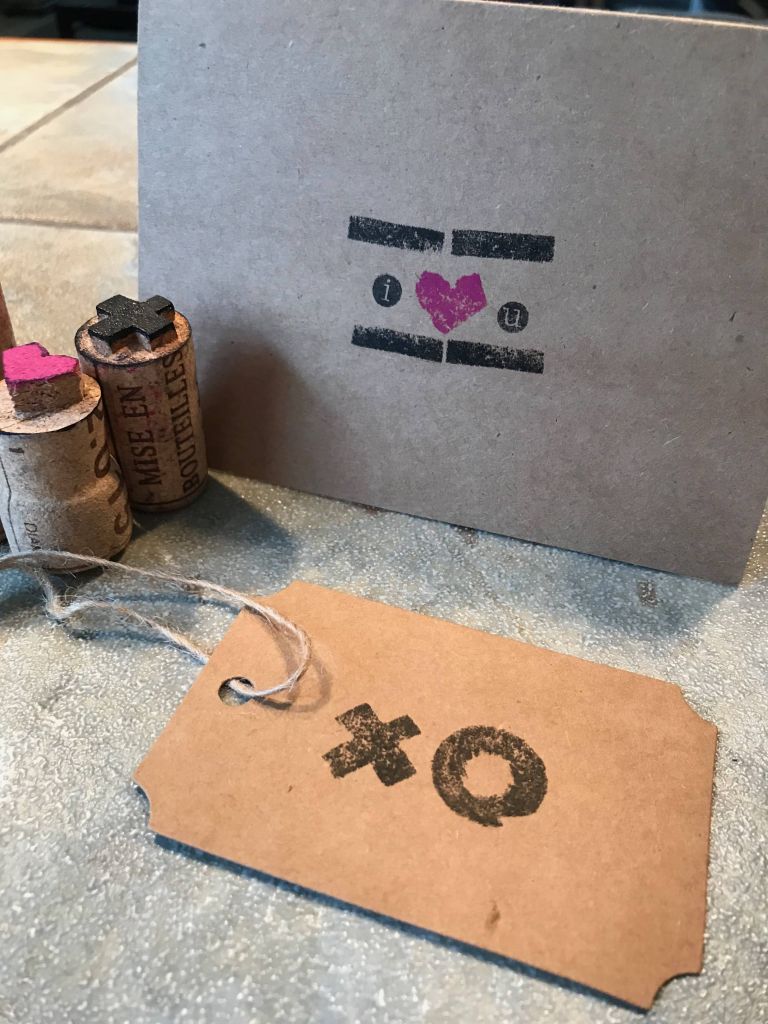
Step 4: Start stamping! You can use an ink pad or acrylic paint to create your design for DIY cards, gift tags, etc.
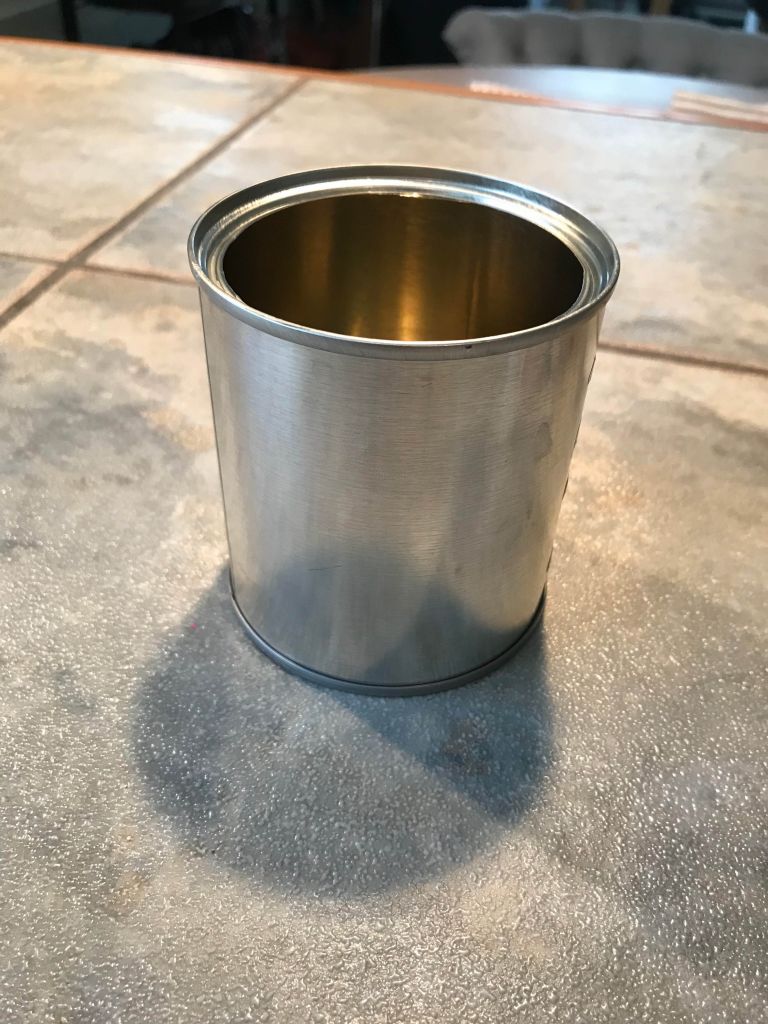
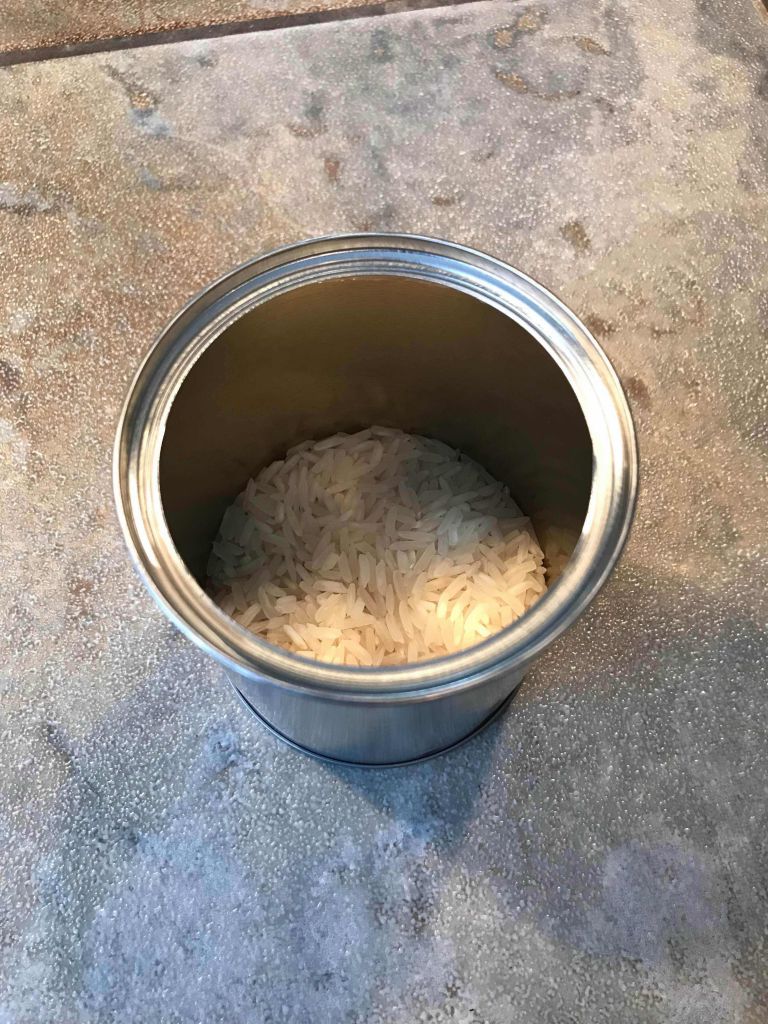
Upcycled Crafts with Wine Corks

4. Tin Can Shaker

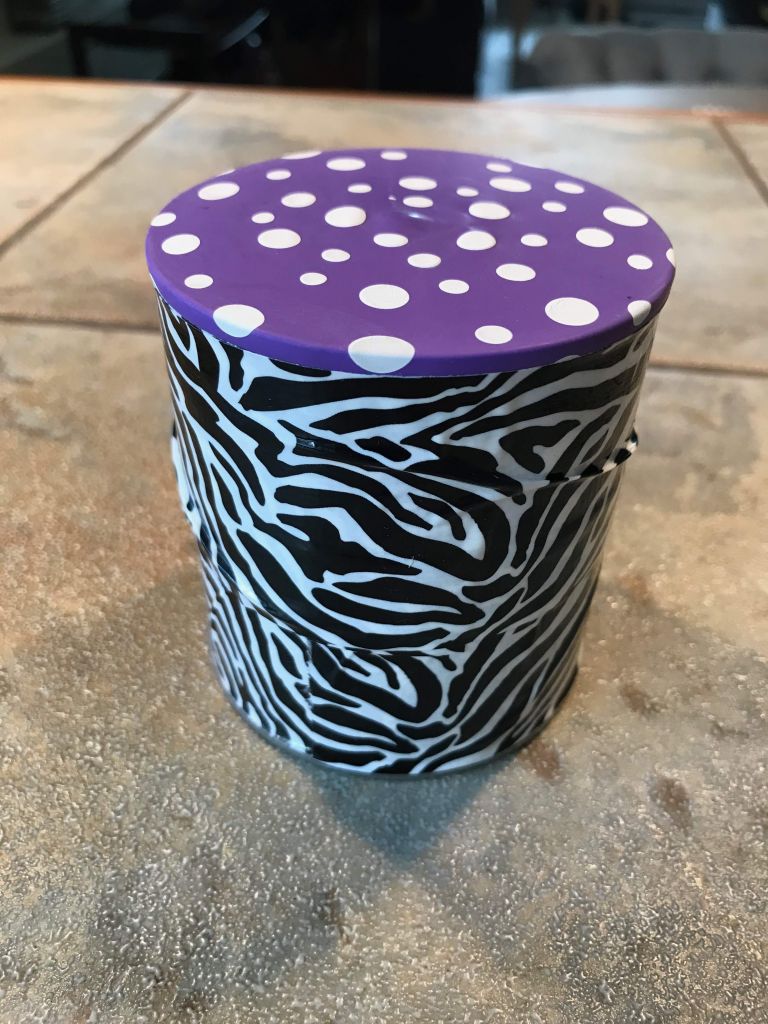
Depending on the size of the tin cans you have on hand, you can refashion them into a pencil holder, a planter, or maybe even a cute robot. I love turning a boring tin can into a musical instrument. All you need is rice and beans for the inside of the can, and a balloon and duct tape for the top. It’s that easy to take your junk and make some funk. One of my top go-to craft materials is duct tape. You can get patterned duct tape that is an easy way to jazz up your shaker.

Step 1: Grab a tin can from your recycle bin. You can use any size for your DIY shaker.

Upcycled Crafts with Tin Cans


Step 2: Fill it with rice, dried beans, or anything else that will be good for making music. You don’t need much — maybe 3-4 tablespoons.

Upcycled Crafts with Tin Cans


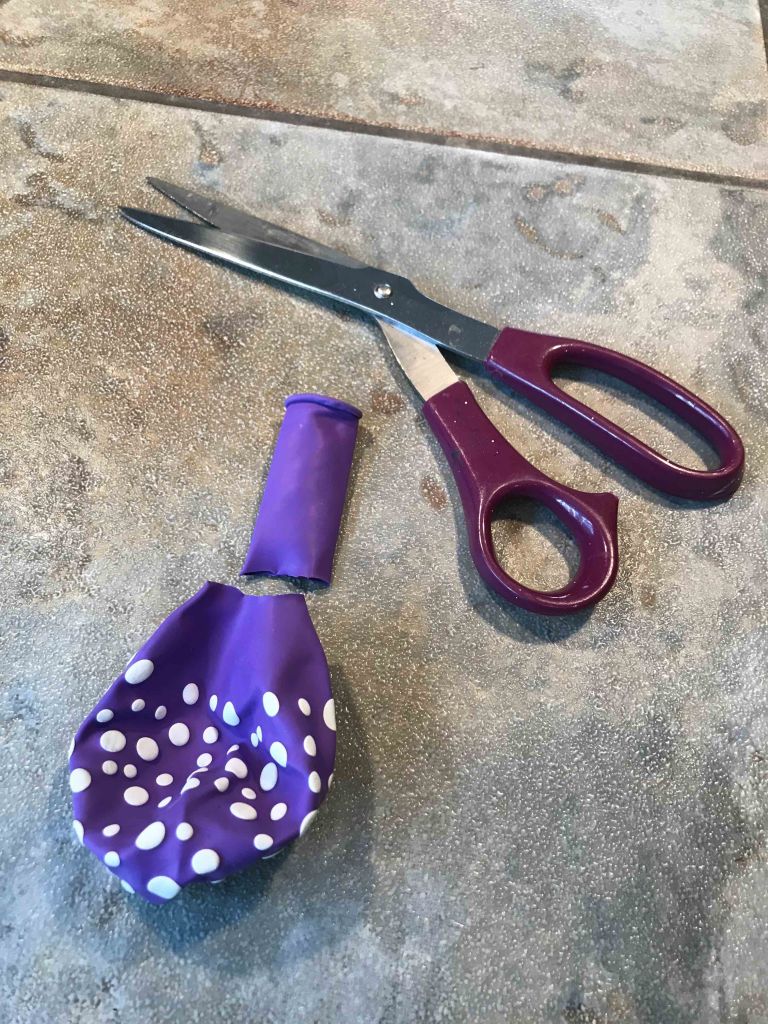
Step 3: Cut the opening of your balloon. You want to remove this since you’ll be stretching the balloon over the opening of the tin can.

Upcycled Crafts with Tin Cans


Step 4: Stretch the balloon over the opening of the tin can. Ensure it’s tight and that the balloon stretches down the tin can.

Upcycled Crafts with Tin Cans


Step 5: Cover the tin can with funky duct tape. This ensures the balloon stays in place plus adds some funk to your shaker. Feel free to add other embellishments.
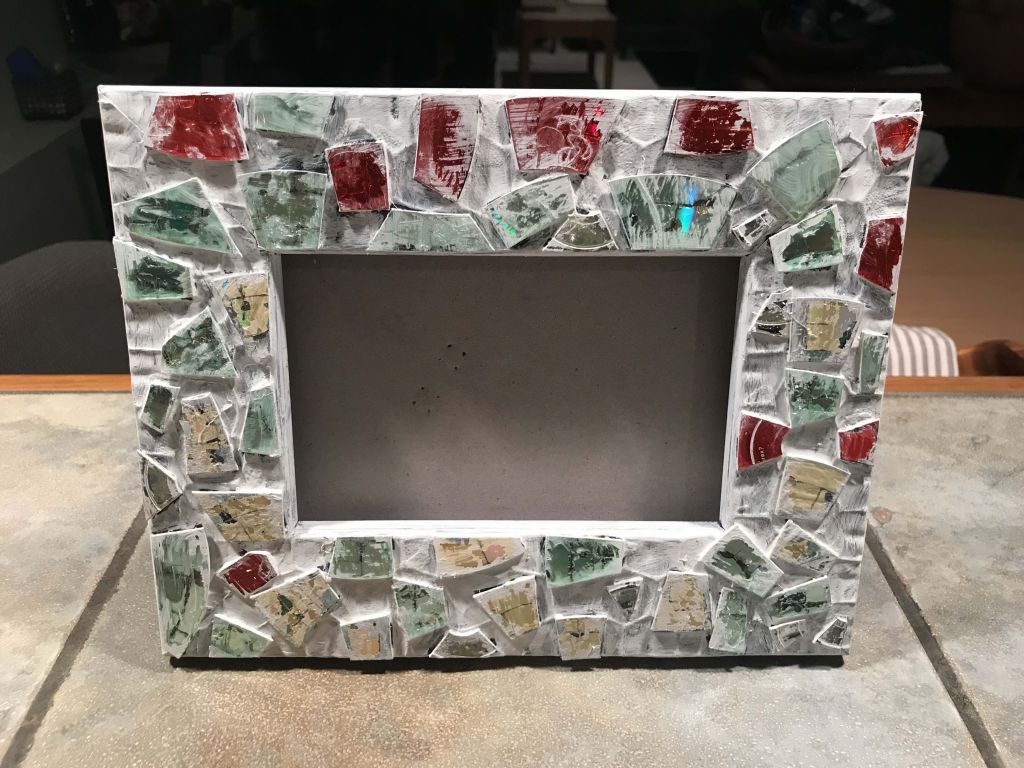
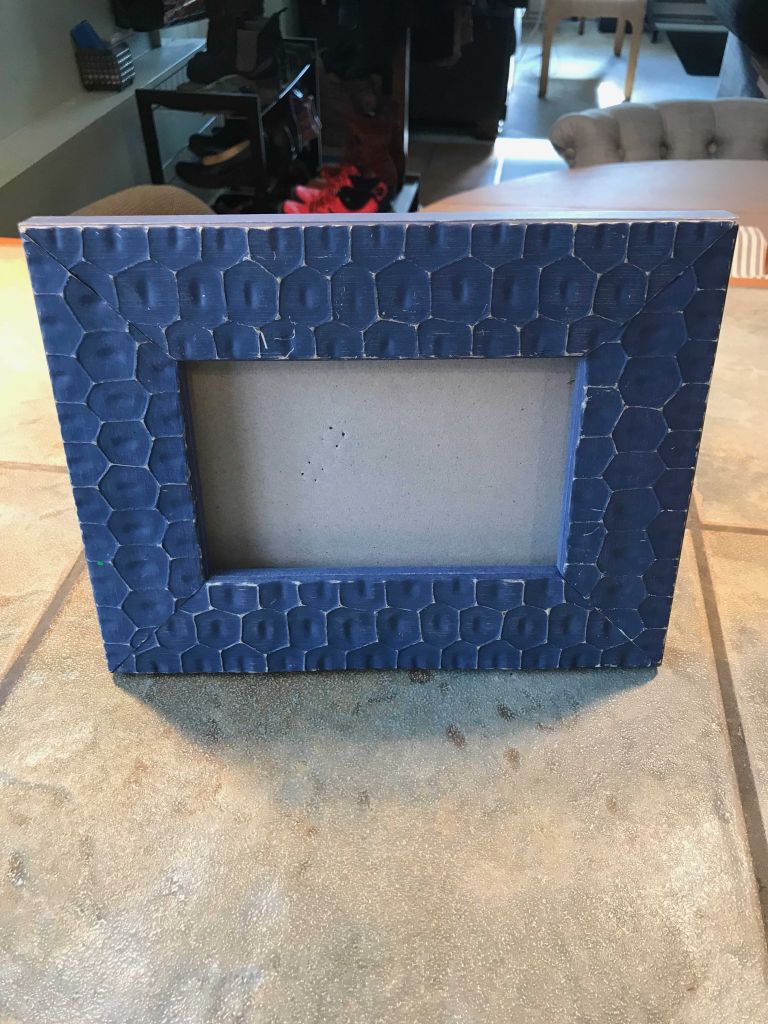
Upcycled Crafts with Tin Cans

5. CD Mosaic Frame

You can take an old CD and make gold with it. CDs can be cute animals, coasters, or even art. You can even upcycle the CD case into a frame for your art! A cool but messy DIY would be to cut up old CDs and create a mosaic. You can dress up an old frame or table using repurposed CDs, adhesive, and craft paint. I use white craft paint to mimic grout around the pieces of CD.

Step 1: Take an old frame or score one from a thrift store that has a flat surface.

Upcycled Crafts with CDs


Step 2: Gather your supplies — a pair of scissors, old CDs, and some adhesive.

Upcycled Crafts with CDs


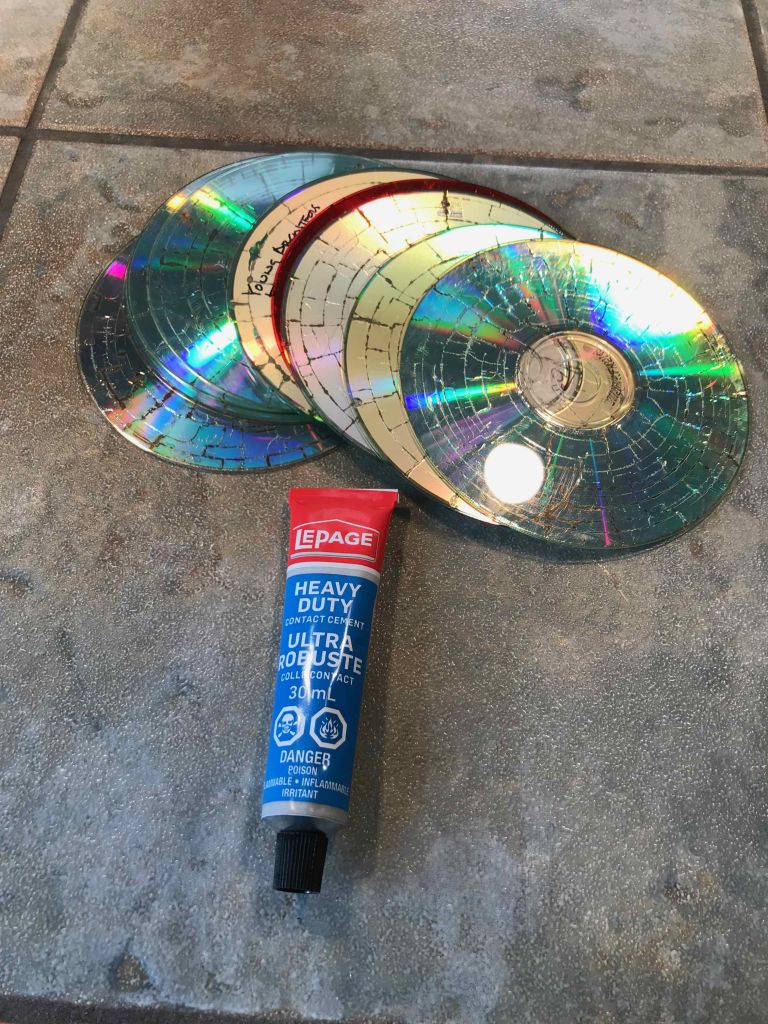
Step 3: Cut up your old CDs. This can be a bit messy so be prepared. Cut the CDs into a variety of sizes.

Upcycled Crafts with CDs


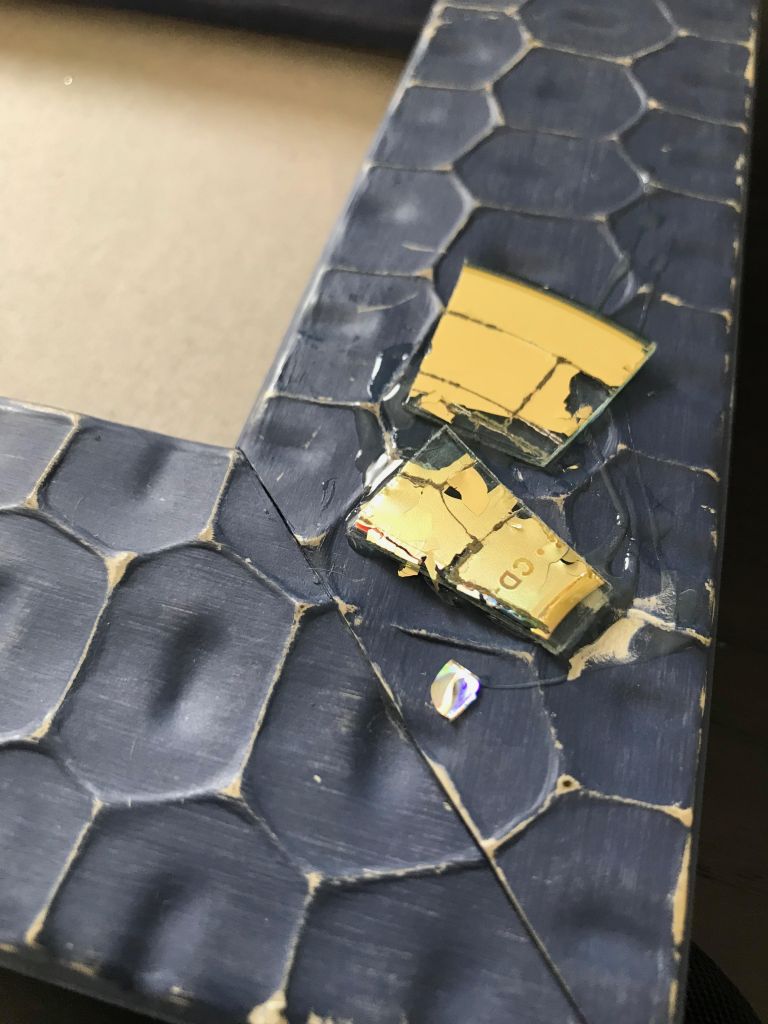
Step 4: Add glue to the surface of the frame then add your pieces of CD.

Upcycled Crafts with CDs


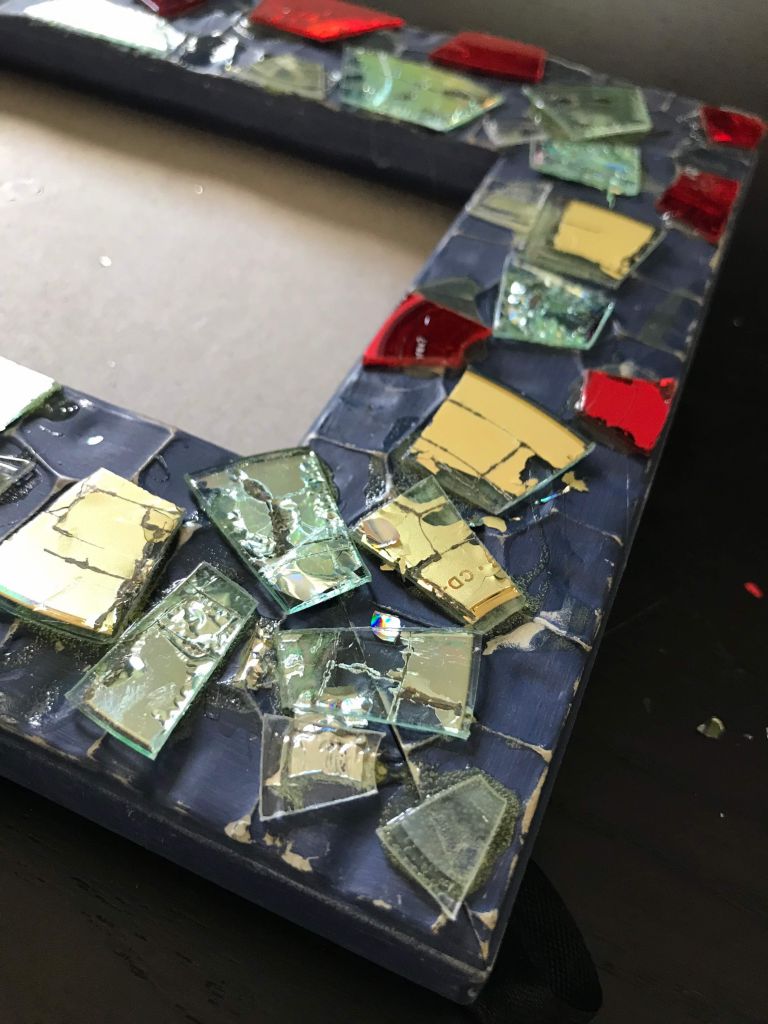
Step 5: Keep adding pieces until the frame is covered.

Upcycled Crafts with CDs


Step 6: Cover the frame with white acrylic paint. Allow to dry. Rub or scratch the CD pieces to remove the white paint. Then you’re done.

Upcycled Crafts with CDs


Based in North Vancouver, B.C., Denise Corcoran is the author is Raw Crafts: 40 Projects from Hemp, Jute, Burlap and Cork. Sharing her enthusiasm for crafting and upcycling, Denise facilitates ‘Crafternoons’ throughout Vancouver where participants of all ages and skill levels learn how to make things from unorthodox materials. She was a featured panelist at the Craft Council of BC talk called ‘Craft, The Environment & Our Community’. She was also the inaugural BC Champion for the fourth annual Culture Days, a national, nonprofit 3-day event promoting culture throughout Canada. Denise is also a Creative Expert for the Salvation Army Thrift Store, sharing thrifting tips and simple upcycling DIYs. 

Cool Containers for Healthy Eating on the Go

Could the right food container help you make better food and drink choices? We think so! With all of the cool container options available today — from mason jars to bento boxes to refillable condiment tubes — you can reduce waste, save money, and pack healthy meals for eating on the go. Most are also freezer, microwave, and dishwasher safe, making meal prep and clean-up a breeze.

Bento Boxes

Bento box healthy lunch

If one of your goals is to get a grasp on portion sizes without sacrificing variety, try a bento box container. Traditional bento boxes originated in Japan as individually portioned take-away containers that allow for different ingredients to be neatly compartmentalized. Each section begs to be filled with something tasty, but because you have to be mindful about portions, you’ll never have to worry about over-packing (and overeating).

Mason Jars

Mason jars make food more beautiful

If you get excited about beautiful food, the humble mason jar is your best friend. With no fancy packaging to hide behind, your food’s going to have to be colourful and varied, which usually means more vegetables.

And with Canada’s new food guide recommending that half of each meal be made up of fruits and vegetables, this is a good thing. As each layer builds in your jar, you’ll be inspired to make the next one contrasting in colour and texture. Even better, get an assembly line going and fill up three or four at once.

Rubbermaid Soup Set

Soup Sets

Because soup alone is never enough, invest in a soup set that includes a vessel specifically designed to prevent hot liquids from leaking but also comes with other containers that will hold a salad, protein, bread, etc.

A set that’s all bundled together means each container nestles into the next and may even come with a carrying strap so you can skip a separate carrying bag.

Water Bottles

London Drugs Water BottleAlways need your water to be ice-cold or piping hot? If that’s been your excuse for not drinking enough water throughout the day, you need to get yourself a double wall water bottle. The two layers produce an insulating effect, meaning your hot liquids stay hot and your cold liquids stay cold.

Just do yourself a favour and buy separate ones for water and coffee/tea; once your water bottle makes contact with anything other than water it’ll retain a hint of that flavour forever.  

Eco PackagingPyrex containers 

In Japan, there’s a tradition of wrapping gifts in pretty, reusable fabric, furoshiki. It’s environmentally friendly, practical, and so much more original and creative than using traditional wrapping paper.

Adopt this technique and use a pretty, reusable container for gifting home baking or for returning borrowed sugar/flour/eggs to a neighbour. And think beyond the kitchen — these containers would be great for gifting and storing kids’ toys, sewing notions, makeup, etc.

Silicone tubesSilicone Tubes

It’s true: condiments make everything better. But when it comes to carrying slippery sauces and drippy dressings, ditch conventional lidded containers for refillable, soft silicone tubes. They come in a variety of sizes and the smallest ones are perfect for salad dressing, hot sauce, or even fresh lemon juice. So tiny they can fit in your pocket but made for travel so they’ll never leak or burst.


Once you find a container set that works for your lifestyle, double up and get a second set. That way, one set can go into the dishwasher while the other set is ready to be filled. 

Find all the container sets you need in our Food Storage section at londondrugs.com.

A Beginners Guide to Canning and Preserving

Fall is here! But don’t worry, it’s not all rain and cold weather. Fall is a beautiful season of bounty, and you can make the most of that bounty by taking up your new favourite hobby: canning. That beautiful jam you like? You can make it. Dill pickles? You can make those too. Those cans of tomatoes you buy every other week? Yep, you got it! All you need is a bit of equipment and a bit of know-how. London Drugs has got you covered on both counts.

Woman In Kitchen Listing Ingredients In Vegetable Preserves

Canning is really just a way of preserving food. Water bath canning is the easiest way to start: you fill glass jars with the stuff you want to preserve (jams, jellies, pickles, etc.) and boil them in hot water. This kills any bacteria present, removes air from the jar, and seals it to prevent any more bacteria from getting in. Water bath canning only works for high-acid foods like fruit, tomatoes, and pickled things.

If you want to get really fancy and preserve your perfect pumpkin pie filling, you’ll need to upgrade to a pressure canner. But the basic process is to sterilize your jars in boiling water, make your preserves, put those preserves in the jars, put on the lids, and throw them back in boiling water. Easy peasy, right?

So where do you begin? First, you need some equipment:

  • Large stockpot, deep enough to completely cover your jars
  • Canning jars
  • Canning lids (these will come with jars if you buy a new set!)
  • Jar lifter
  • Lid lifter
  • Funnel

We’ve got a complete canning kit that includes the jar lifter, lid lifter, and funnel, as well as 250ml jars, 500ml jars, and even 1L jars for things like pickles and whole tomatoes. If you’re making jam or jelly, you’ll also need pectin.

Once you’ve acquired the equipment, you need to decide what you want to can! In early fall we still have stone fruit like peaches and plums, and lots of tomatoes. Later in the season, root vegetables like carrots and beets can make some excellent pickles. And apples, of course!

Pickled cucumbers, homemade preserved on wooden table

If you’ve got a well stocked grocery store that brings in produce from further afield, you can can small batches with basically any type of fruit. We’ve got recipes for strawberry balsamic jam and sour cherry jelly on the blog from earlier this summer. (What’s the difference between jam and jelly, you ask? Jam is made from crushed fruit while jelly is made from fruit juice! The more you know.)

Next, as a beginner, follow a recipe!

Canning isn’t difficult, but when mistakes are made they can range from something minor like a jam that doesn’t set to something dangerous like food that is unsafe to eat. You may balk at the amount of sugar in some of these recipes, but it’s integral to getting the jelly or jam to set properly, and it helps prevent spoilage.

Boiling time will vary depending on what altitude you’re at. You also can’t reuse the flat part of the two part lid for canning jars; you can reuse the ring, but you need a new lid each time you can. And don’t forget to sterilize your jars before filling them with your preserves!

Bell pepper preserves - London Drugs Blog

There are a ton of great websites you can go to for more information and recipes, including the National Center for Home Food Preservation, Food in Jars, and Punk Domestics. Companies that make canning supplies like Bernardin and Ball are also fantastic resources.

Here are a few of our favourite fall recipes. Go ahead and get canning! You can can!

Disorganized Mornings? We Take Care of That.

Do you have trouble getting your kids to do their morning tasks, and getting them out the door before school? Here’s one clever (and tasty) trick that makes it fun for kids to complete their morning tasks. This little life hack will have you out the door on time with smiling kids. The answer to disorganized mornings is here!

Disorganized mornings? We take care of that.

  1. Grab a few popsicle sticks (treat your kids to one a day before!)
  2. Use classic markers to colour the top of each popsicle stick
  3. Use a sharpie to write different morning tasks on each one
  4. Make bed…Wash face…Brush teeth…anything to encourage them to get ready!
  5. Grab two mason jars–mark one for the to do’s and one for done
  6. Get out the door and off to school!

Need other great tips and tricks to make life easier? Check out more of our helpful LD Solutions Videos on YouTube or individually here on the London Drugs Blog: