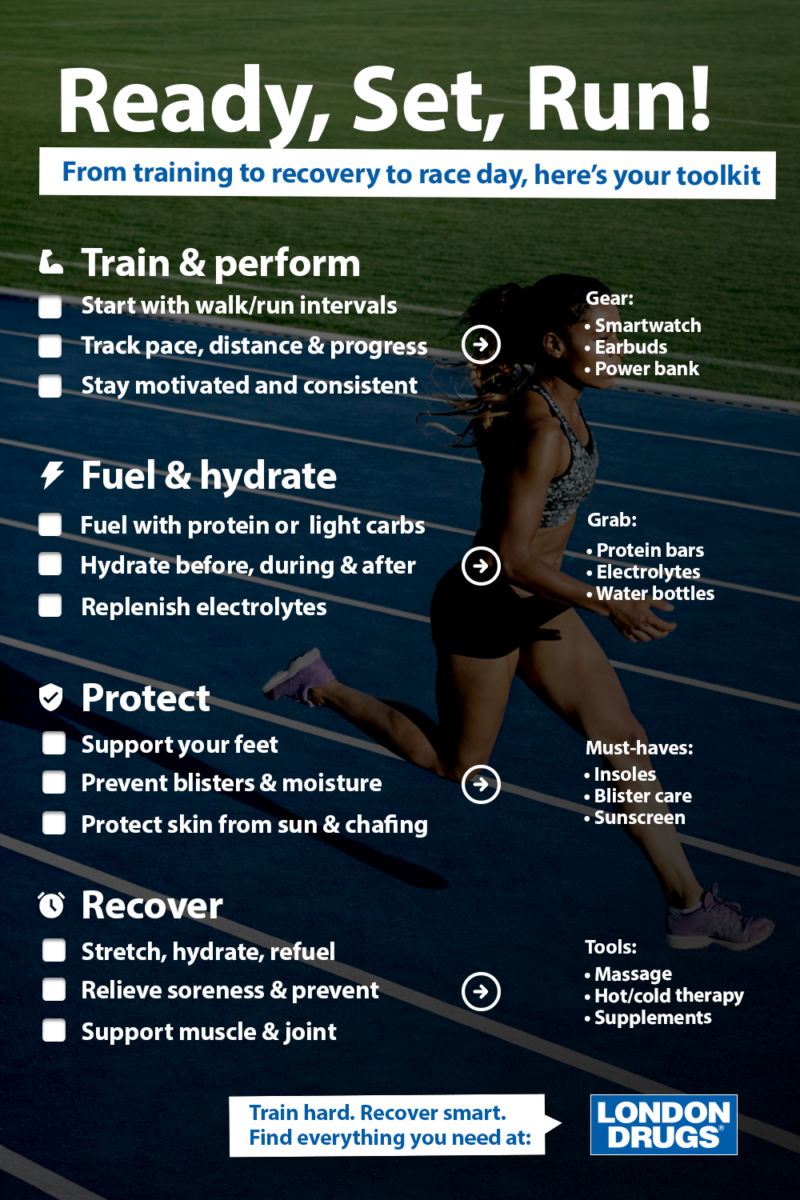
In 2026, we’re seeing some of the most innovative additions to the kitchen space since the new appliance wave of the 60s and 70s. From the best kitchen gadgets of 2026 to smarter everyday tools, smart technology is now showing up in cookware, too! Why? Smart kitchen tools can help you save time, reduce effort, and bring creativity to your meals without adding complexity to your routine.
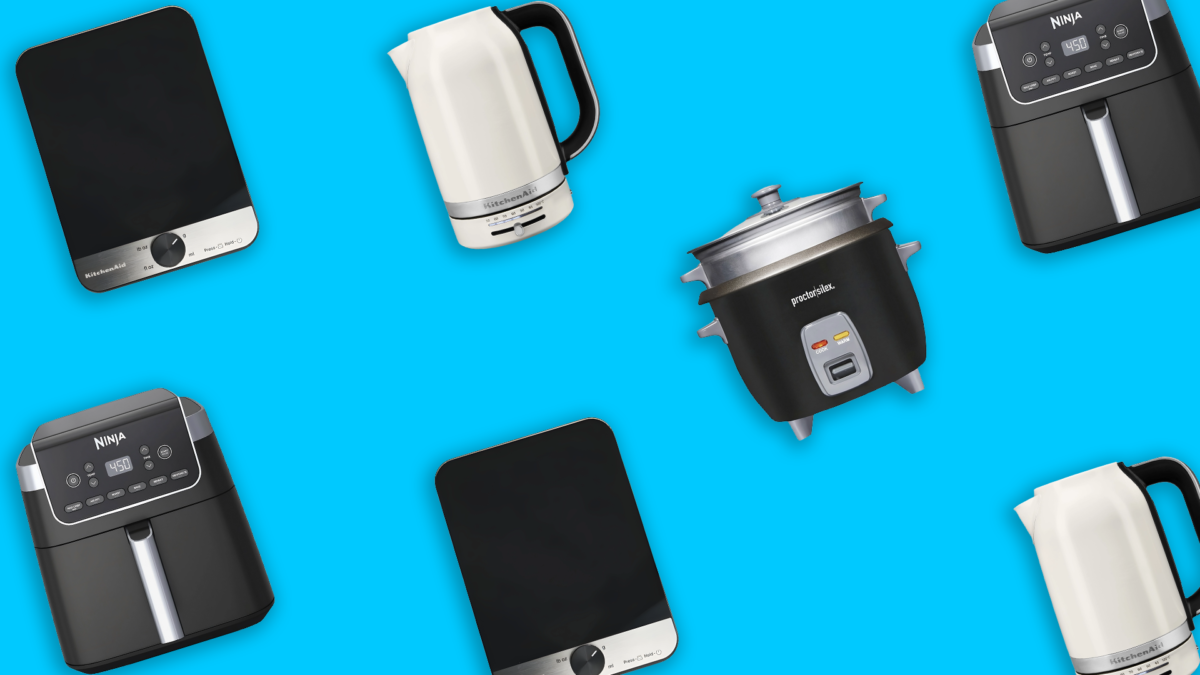
Air Fryers
Air fryers have advanced from simple gadgets to intelligent appliances built around efficiency, customization, and ease of use, making them strong contenders in the best air fryer category.
What’s New in 2026
The biggest change comes from built-in sensors that automatically adjust time, temperature, and airflow. Some can detect moisture, food type, and even portion size to prevent overcooking or dryness.
This is an advancement over basic presets, which don’t accommodate cooking a wide variety of foods. Not to mention triple heating elements, dual-zone air fryer technology, dual baskets, and voice-control models that all deliver maximum efficiency for countertop cooking.
Why It Saves Time
- Eliminate guesswork with automatic adjustments
- Faster preheating and cook times with advanced heating systems
- Dual-zone cooking allows multiple foods to be cooked at once with synchronized finish times
Featured LD Picks
Best For
Air fryers are a great tool for busy parents, athletes who meal prep, college students, and anyone looking to simplify dinner prep without sacrificing quality.
Browse air fryers at London Drugs.
Kettles, Coffee Makers & At-Home Barista Tools
Today’s beverage stations are smarter than ever, with smart coffee gadgets and automated drink maker settings that make brewing your daily cuppa a breeze. Coffee makers and espresso machines bring artisanal coffeeshop quality to your fingertips, while smart kettles can transform your morning routine.
What’s New in 2026
Modern kettles feature app-based and temperature-specific controls, making them a key category in app-connected kitchen gadgets. You can heat water to the exact degree needed for green tea, pour-over coffee, or French press.
Milk frothers and espresso machines have also evolved, offering customizable drink profiles and smart scheduling so your coffee is ready when you are.
Why It Saves Time
- Pre-set schedules mean drinks are ready when you wake up
- Precise temperature control removes trial and error
- Multi-function machines reduce the need for separate tools
Featured LD Picks
Best For
Early risers, coffee lovers, and anyone who wants cafe-quality drinks at home without the wait.
Explore coffee makers, milk frothers, kettles, and espresso machines at London Drugs.
Multi-Tasking Cookers & Countertop Ovens
For those looking to streamline their kitchen and save space, look for cookers, grills, and toaster ovens that combine multiple appliances into a single unit. These app-connected kitchen gadgets are redefining efficiency in compact spaces.
What’s New in 2026
Today’s multi-cookers and countertop ovens feature 6-in-1 (or more!) functionality, handling everything from pressure cooking and slow cooking to baking and air frying. Many models are now fully app-connected, letting you monitor and control cooking remotely.
Why It Saves Time
- Replaces multiple appliances, reducing setup and cleanup
- Programmable cooking functions allow hands-off meals
- Faster cooking methods like pressure cooking cut meal time significantly
Featured LD Picks
Best For
Countertop appliances and multicookers make the most of limited kitchen space, and are particularly helpful for those who hope to maximize functionality, families, and meal preppers.
Browse multi-cookers and toaster ovens at London Drugs to compare features.
LD Tip: Compare Online, Test In-Store
Compare models online through London Drugs product pages, then take advantage of free in-store pickup to get cooking faster—or find a store near you to see features and sizes in action before you buy.
Thermometers, Scales & Smart Sensors
Upgrade your cooking accuracy with precision cooking tools designed for maximum consistency.
What’s New in 2026
Precision cooking tools now include predictive, instant-read thermometers and ultra-accurate digital scales. Some models even sync with apps to guide cooking temperatures or track measurements, making them essential gadgets for home cooks of all skill levels.
Why Precision Matters
- Reduces cooking errors and wasted ingredients
- Ensures consistent results every time
- Helps prevent undercooking or overcooking
Featured LD Picks
Best For
These gadgets are suitable for home bakers, detail-oriented cooks, and anyone looking to improve consistency and confidence in the kitchen.
Explore kitchen tools and gadgets online at London Drugs.
Rice Cookers & Hot-Water Dispensers
In 2026, kitchens are reflecting more diverse cooking needs than ever. These time-saving kitchen gadgets simplify everyday meal prep while supporting a wide range of cuisines.
What’s New in 2026
Modern rice cookers now offer advanced keep-warm and scheduling functions, along with multi-use settings for different grains and dishes.
Why It Saves Time
- Set-it-and-forget-it functionality frees up your schedule
- Multi-grain settings eliminate the need for multiple cooking methods
- Keep-warm features ensure food is ready when you are
Featured LD Picks
Best For
Home cooks who value reliable hands-off cooking and exploring diverse cuisine with the help of staple kitchen appliances.
Browse rice cookers at London Drugs.
Energy-Efficient, Low-Waste Gadgets
Sustainability is no longer a bonus—it’s built into modern design. Many of today’s energy-efficient kitchen appliances focus on reducing waste while improving convenience.
What’s New in 2026
Kitchen gadgets now prioritize smarter storage and efficiency. Vacuum sealers extend shelf life, while dehydrators preserve ingredients for long-term storage. Emerging smart pantry tech—like connected storage containers—helps track freshness and reduce spoilage.
Why It Saves Time
- Less frequent grocery trips thanks to longer-lasting food
- Batch prep and preservation reduce daily cooking demands
- Minimizes food waste and the need to replace ingredients
Featured LD Picks
Best For
Sustainability-focused households, those who buy in bulk, meal preppers, and anyone looking to reduce waste while maximizing efficiency.
Find vacuum sealers and dehydrators at London Drugs.
Explore Smart Kitchen Gadgets at London Drugs
Kitchens are smarter, faster, and more intuitive than ever before. Whether you’re upgrading a single appliance or rethinking your entire cooking routine, today’s tools are designed to save time and enhance how you prepare and enjoy food.
From intelligent air fryers to precision cooking tools and sustainable storage solutions, there’s never been a better time to upgrade. Explore kitchen appliances at London Drugs with convenient delivery or pickup options.