Give Your Home A Spring Refresh With These 5 Photo Ideas

A lot more time has been spent at home this past year. If you’re feeling like your space is getting a bit ‘stale’ and could use a design refresh right now, you’re not alone. Especially as we head into spring, now is a great time to brighten up your home with some fresh and colourful images! Try these 5 photo ideas from our LD Experts in the Photolab that will help breathe new life into your space.

1. Swap Out Your Framed Photos
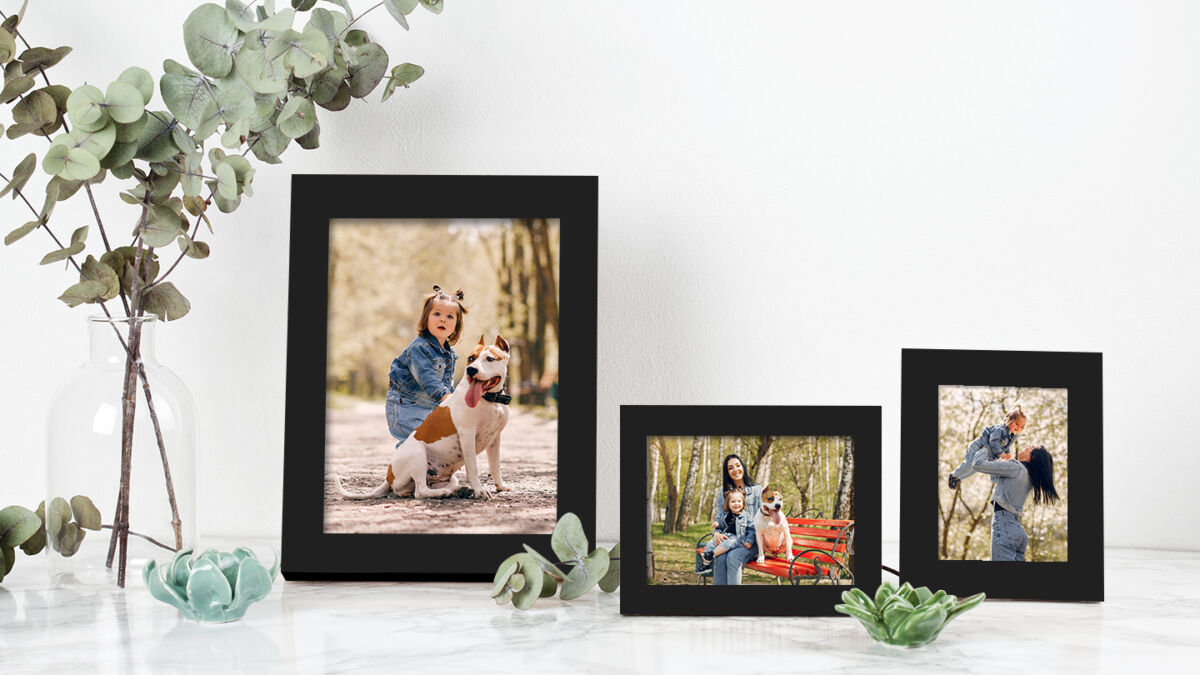
Freshening up your space is as simple as swapping out the photos in your existing frames! Pick some favourites from past spring seasons that will add some brightness and colour to your home. These could include landscape photos you’ve captured during spring or family photos of springtime events like Mother’s Day and Easter. Vacation photos are also a great way to brighten up your space.

We have a wide variety of print and enlargement sizes to fit all kinds of standard frames, from 4”x6” all the way up to 44”x96”. Pick between glossy or pearl finish, depending on your preference. For framed prints, we recommend pearl, as there isn’t as much glare with this mattified satin surface, making it a good option for displaying behind glass.
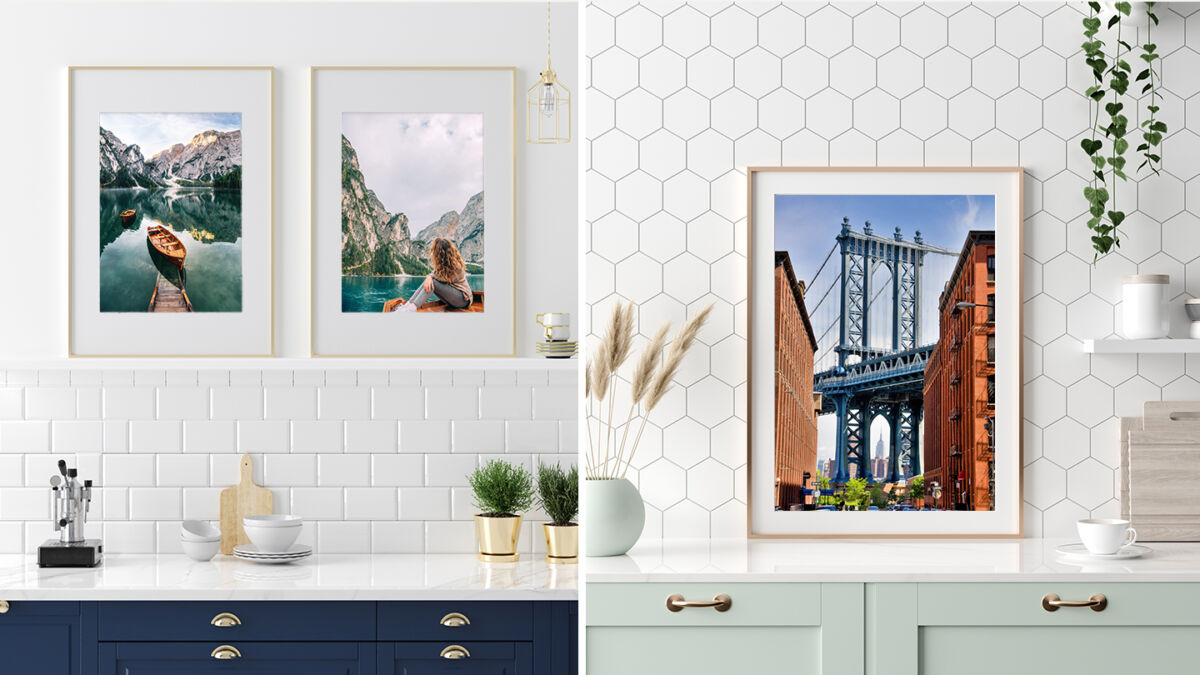
The easiest way to refresh your frames with new prints and enlargements is by downloading our London Drugs Photolab App on your smartphone (available for iOS and Android), uploading some of your photos directly from your phone, and ordering some prints. If your photos live on your computer, not to worry, you can always order from our Photolab website as well.

2. Create a DIY Gallery Wall
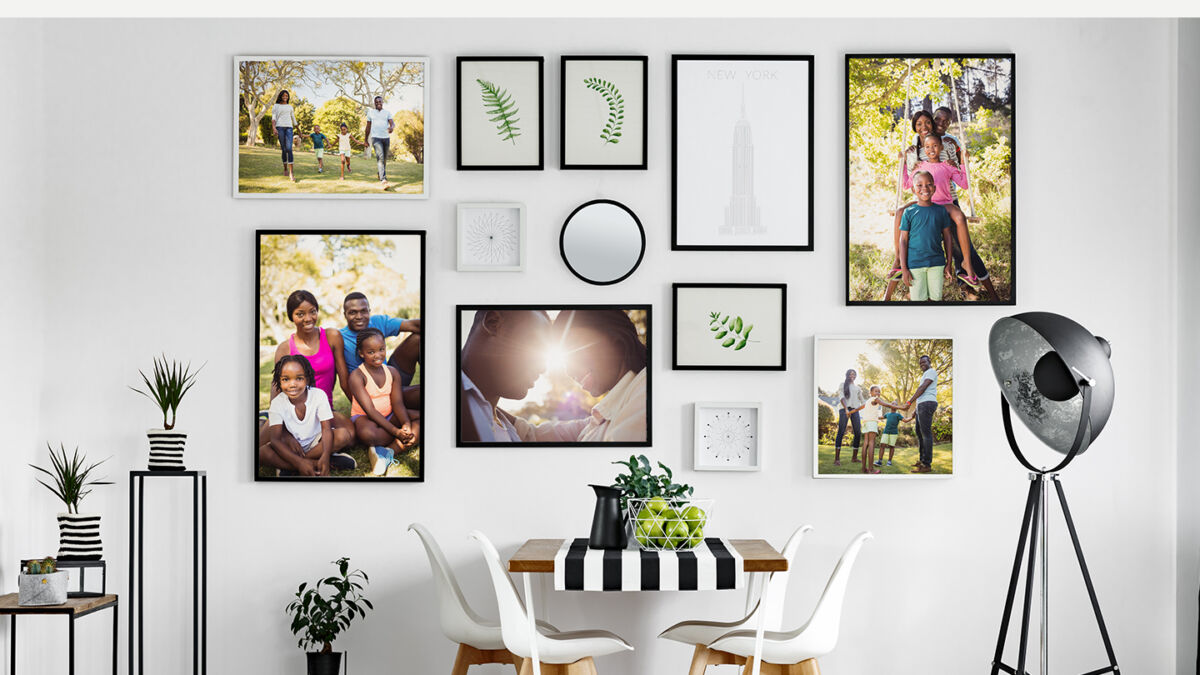
If you’re looking for a DIY project to take on at home, creating your own gallery wall is an easy and rewarding project that will give your space an entirely fresh look. This is also something you can add to as you find new frames and take new photos that you want to add to the gallery wall. Just like the other frames in your home, these can also be updated seasonally.

Here’s how to create your own gallery wall:

  1. Choose a colour palette. This can go for your frames (all one colour, or a mix of colours in a palette) and for your images (black and white or colour photos). A colour palette can help you keep a cohesive look and feel amongst all the prints on your gallery wall. Of course, if you prefer a more eclectic look with a variety of colours, go for it! Your space should reflect your style.
  2. Pick a theme. The theme could be your pets, family, friends, vacations, wedding photos, etc. They don’t have to all be from the same day, but choosing an overall theme will help you narrow down and select which images to feature. For instance, you could display photos of your pet throughout their life, or photos of various vacation destinations you’ve visited over the years. If you want to change your images seasonally, pick a spring theme for this time of year, selecting photos taken during previous spring seasons (or get outside and shoot some new ones!).
  3. Pick a display medium, and print your photos. Before you start printing, it’s important to decide how you want to display the photos in your gallery wall. As an example, do you want to go with framed prints or canvas gallery wraps? If you’re framing behind glass, you may want to opt for pearl versus glossy enlargements. Fine art prints are also an excellent choice to give your photos that gallery-quality look. Our Photolab also offers framed and matted prints if you want that matte look for your images. We recommend choosing one print style to stick to for all of your gallery prints.
  4. Choose a layout. Organize and assemble your images on the floor to see how they will look on display. This gives you the opportunity to make changes to your vision…before hammering any nails into the wall! It can help to put a vertical line of painter’s tape down on the floor to ensure your prints are being distributed equally on both sides of the tape and the overall ‘wall’ looks balanced. If you like clean lines, you may choose to have all of your prints fit nicely within a defined rectangle or square. Or, go with a more ‘imperfect’ look by having some prints stick out past the others.
  5. Measure out your display. Use painter’s tape once again to mark a vertical line, this time down the centre of the wall. Then measure your frames and tape a square/rectangle showing where you want each of your frames on the wall, keeping consistent with the spacing between your prints.
  6. Assess your gallery wall. Take a step back to assess whether you like the look. If not, peel the tape and try again!
  7. Hang your prints. Get your hammer, anchors and level out, it’s finally time to hang your prints!

 3. Add Fresh Life to Your Coffeetable
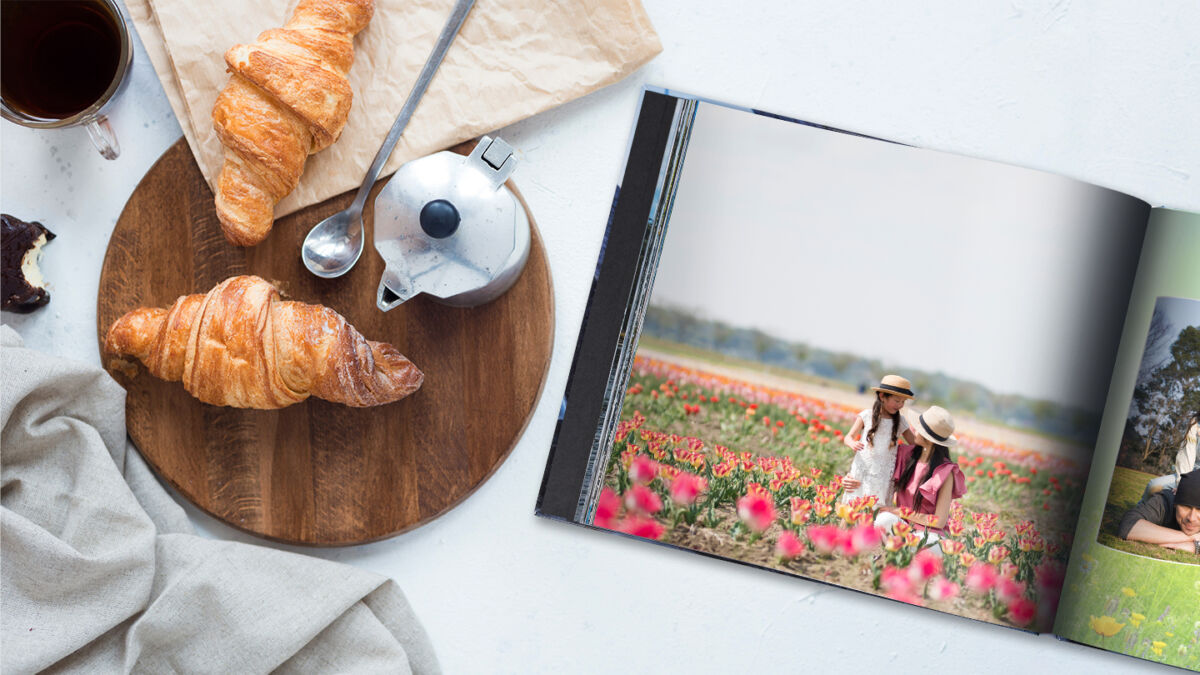
Don’t neglect your coffeetable, it’s easy to give it a refresh too! A new vase and a floral scented candle can breathe in some fresh new life, as can a bright new coffeetable book. A good coffeetable book is not only a conversation piece, and a place to store treasured memories, but it can also be a piece of décor that you can easily switch out from season to season. For spring, personalize a coffeetable book from our Photolab with some of your favourite springtime memories (scenic hikes, your garden, family activities, trips, etc.). You can even choose from spring templates to help theme your photo book. We recommend choosing the coffeetable book with a custom photo cover, or cover with a window; you will be able to personalize the cover with a spring-themed photo of your choice that will be seen when the book is sitting on your coffeetable, making it a perfect piece of seasonal décor.

4. Bring Spring Indoors with Photo Panels
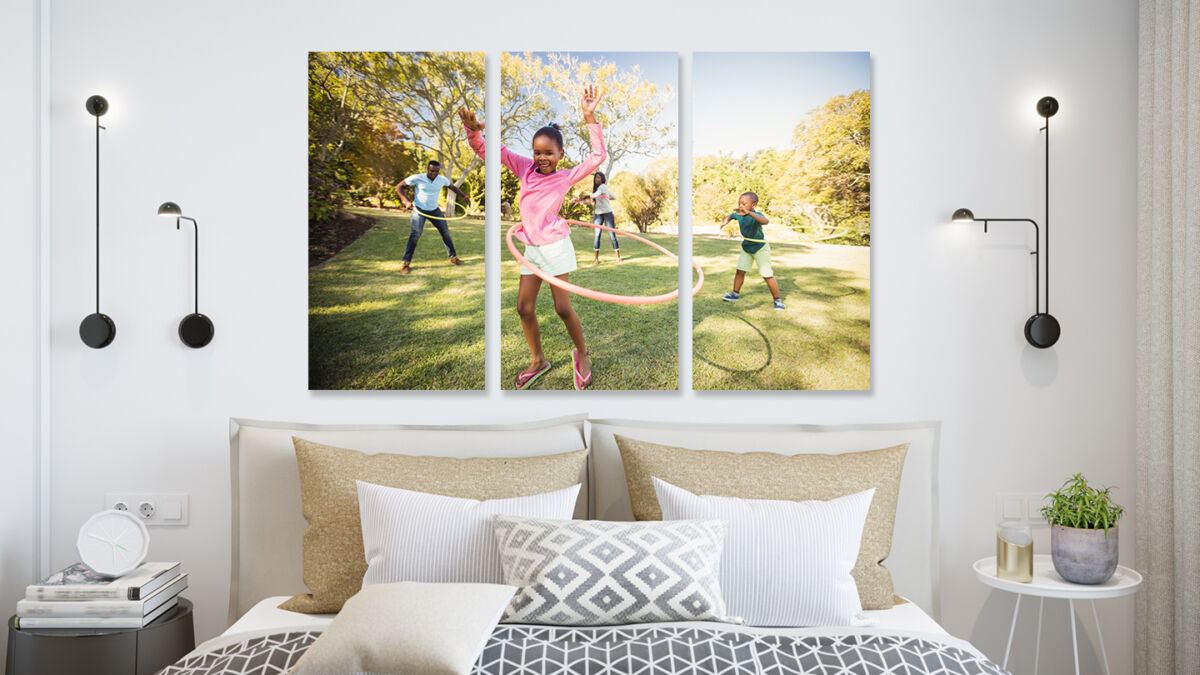
Liven up your space by going BIG with one of your favourite spring-themed images! While we have enlargements up to 44”x96” in size, another option is to have your image printed as multiple-panel split art, where your image is split over a few large prints. This style of wall art can make your images look even more eye-catching!

Our aluminum metal panels are a great choice for this split art style, as they are frameless and ready-to-hang. The high-gloss surface also makes colourful images pop really well, so they are perfect for brightening up your space with vibrant spring images. Lots of people seek out cherry blossoms and tulip fields for photo ops during the spring – those are great images to feature in this format, as would any other vibrant landscape images!

When hanging your split art, start with the middle panel first to ensure your prints will be centred on your wall. We suggest spacing the panels out about 2 to 3 inches apart if your panels are on the larger size. Smaller panels may look better with a little less spacing.

5. Brighten Up with Some Updated Pillows
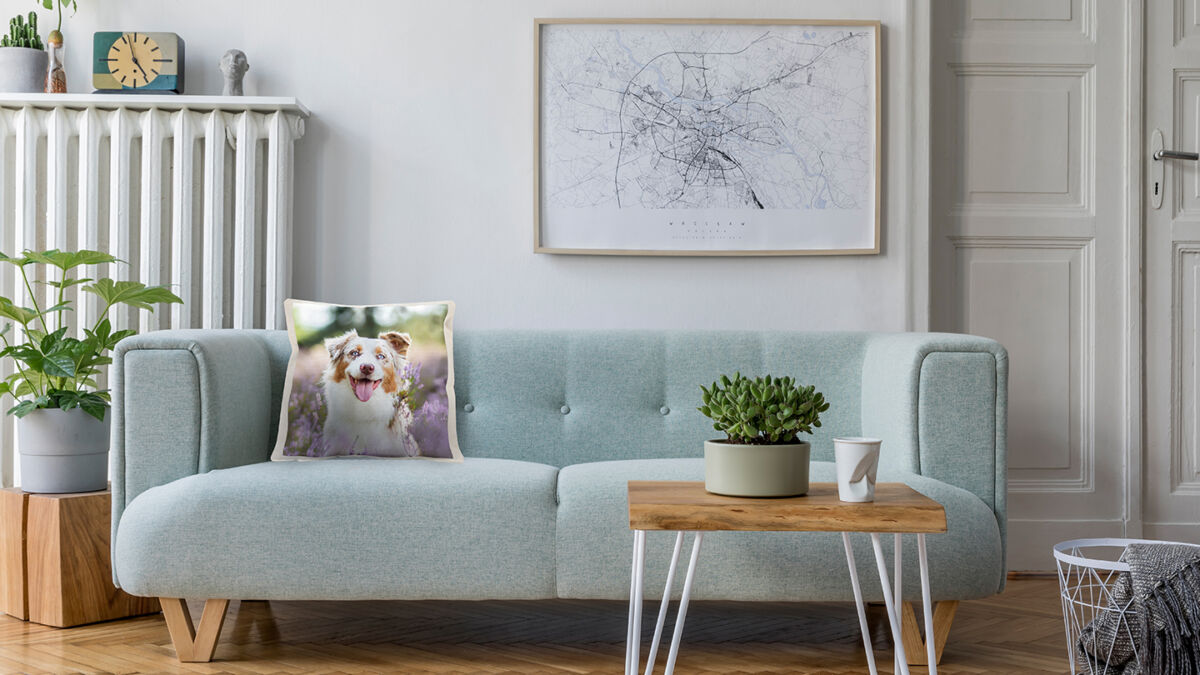
A tried and true way to add some brightness to your home in time for spring is to update your pillow cushions! A new cushion colour or pattern will do the trick, or you can customize something fun with our Photolab’s photo pillow cases. Choose a pet or family photo to feature, or if nature photography is your forte, a macro flower photo or other spring scenes would be a great way to customize your pillows for the season. They’re sure to make you smile every time you walk into the room!

Spring Cleaning Your Photos

Speaking of refreshing your home with photos this spring, your photos might need a little spring cleaning too! If you have lots of old photos in albums or collecting dust shoeboxes, now is a good time to digitize them to ensure they aren’t lost to damage and degradation. Digitizing them yourself can be a big undertaking, but our Photolab can help make the process seamless. Just pick up a Photo Scanning Box at your local Photolab, bringing it home and fill it with up to 800 photographs and documents (up to 8.5”x11” in size). Then just bring the box back to us in-store, and we’ll digitize them all for you and put them on a USB drive. Simple as that! We also have a Slide Scanning Box to help you digitize up to 80 35mm slides.

Once digitized, your photos will not only be safe, but you’ll have so many more opportunities to share those precious photos! Use them in any of our 5 ideas above, from printing and framing them, to including them in your coffeetable photo book, or printing them on a pillow! The options are endless once your photos are digital.

You can also check out this blog for more tips on organizing and preserving your irreplaceable photos.


 

5 DIY Halloween Costumes Using Items #FoundAtLondonDrugs

Although Halloween may look a little different this year, it doesn’t mean you still can’t celebrate safely. These 5 D.I.Y. Halloween looks can be easily created using items found at London Drugs, while also adding a Halloween face mask from our selection or creating a customized face mask from our Photolab to fit the look! Keep reading for a step-by-step on each Halloween costume.

Want to turn yourself into a mythical mermaid? We’re showing you how to really up your Halloween game to create this elevated creature-from-the-deep Sea Witch look, complete with pearlescent scales, striking blue hair, and eerie contact lenses.

WHAT WE USED:

NYX Professional Makeup Ultimate Shadow Palette in Onyx and Brights
Ardell Faux Mink Lashes in 810
-Primal Costume Contact Lenses in Cotton Candy (find them in-store at select stores!)
NYX Professional Makeup Liquid Suede Cream Lipstick in Little Denim Dress
NYX Professional Makeup Glitter Primer
NYX Professional Makeup Face & Body Glitter in Ice
NYX Professional Makeup Pigments in Froyo
KISS Glam Fantasy Special FX Gel Nails in FGF01
NYX Professional Makeup White Eyeshadow Base
L’Oreal Colorista Spray 1-Day Colour in Blue300 and PastelBlue300
Fishnet Stockings

STEP 1
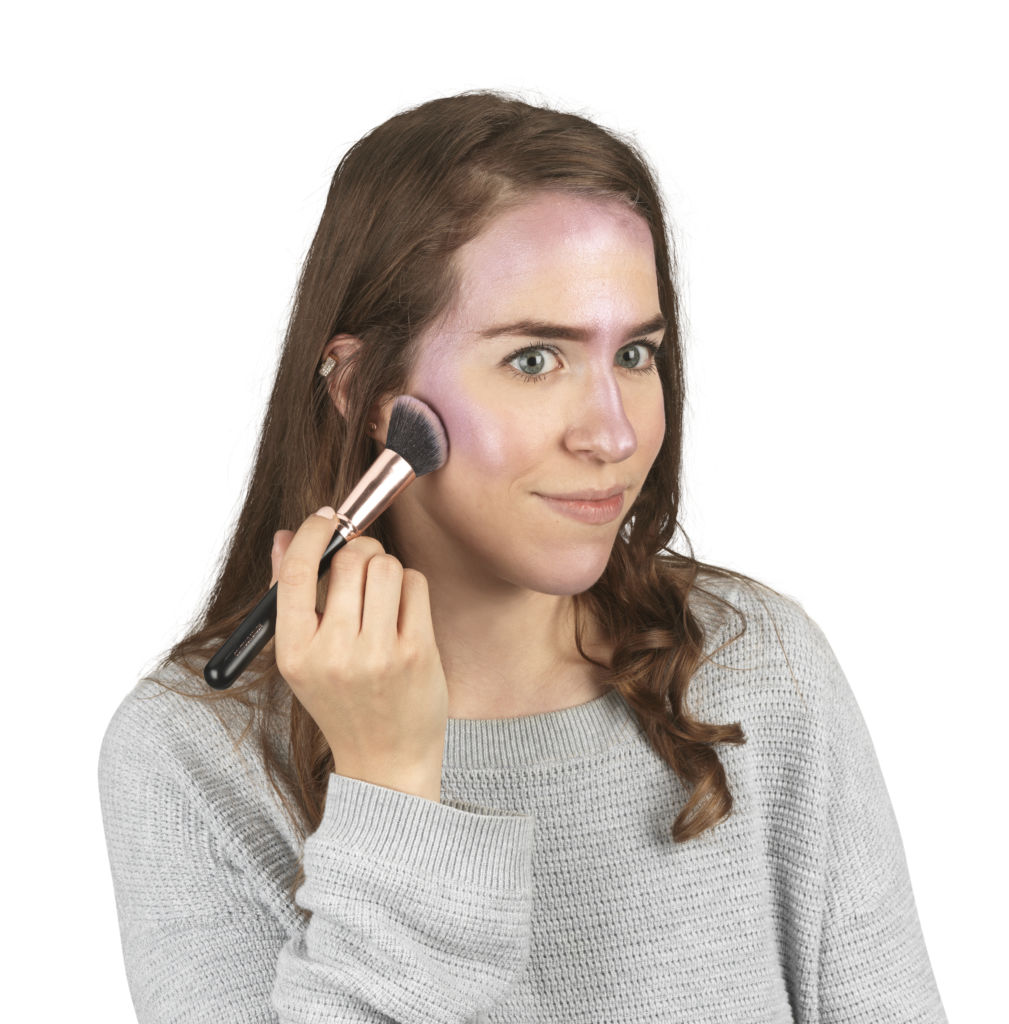
Firstly, you’re going to want your makeup to last all night, so using a primer is a MUST. We’ve used the NYX Professional Makeup Eyeshadow Base in white. What’s great about this is that because it’s white, any colours you layer over it will really pop. Use this on eyelids and anywhere you’re planning on putting your mermaid scales on (we’ll explain more about these scales later). We recommend applying the primer along your hairline on your forehead, cheekbones, chin and nose.

STEP 2
Next, apply iridescent coloured eyeshadow using a makeup brush to the areas where the primer was applied. We recommend a pastel colour like blue, pink or purple. Here, we’ve mixed some purple shadows from the NYX Professional Makeup Ultimate Shadow Palette in Brights and NYX Professional Makeup Pigments in Froyo.

STEP 3
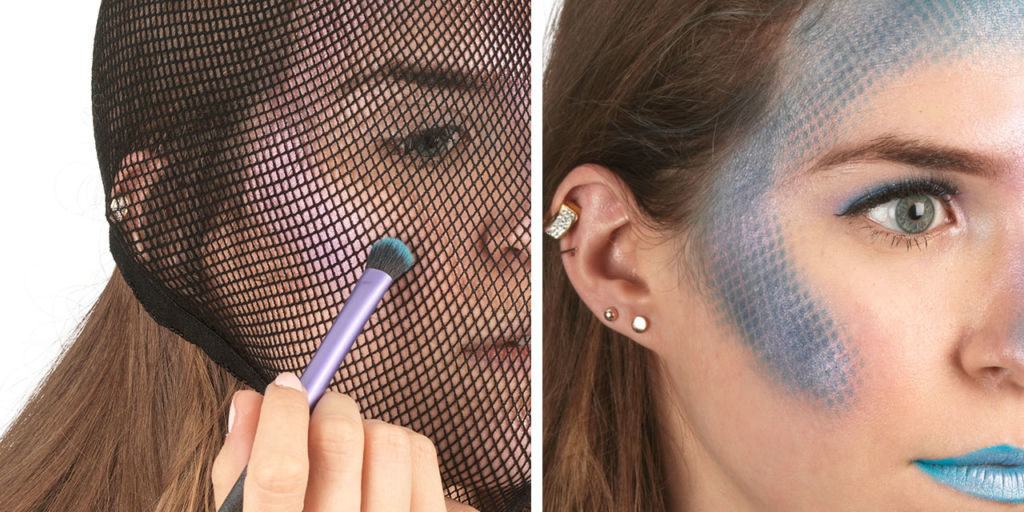
Now it’s time to add the key part of the look- the scales! Stretch the fishnet stocking over your face and dab on dark blue eyeshadow over the spots you applied the purple eyeshadow. We’re using blue shades from the NYX Professional Makeup Ultimate Shadow Palettes in Brights and Onyx. Apply generously and remove the stocking to reveal your aquatic scales!

STEP 4
Turn your regular hair into Sea Witch hair. Use L’Oreal Colorista Spray 1-Day Colour to get temporary hair colour that easily washes out. We recommend shades of blues, purples and pinks. Here we’re using shades Blue 300 and Pastel Blue 30.

STEP 5
A great Halloween look is all in the details. Deepen your eyeshadow by adding blue to the corners, line your eyelids with liquid black liner and apply some false lashes. You can even pat on some glitter to capture that mystical underwater element. This is your chance to get creative! We’ve used the NYX Professional Makeup Vinyl Liquid Liner, Ardell Faux Mink Lashes, NYX Professional Makeup Glitter Primer and NYX Professional Makeup Face & Body Glitter in Ice.

Also add to the look with ocean accessories. These can be done by gluing seashells to a headband or hairclips. Don’t have any of those? Don’t worry-we’ve simply cut out printed images of starfish and shells and taped them in place. BONUS TIP: Use our London Drugs Photolab to print out items such as these for effortless costume accessories. You can also add fake nails to complete your costume. Here, we’ve used Kiss Gel Fantasy Special FX Gel Nails.

ELEVATE THE LOOK: You’ll want to make your eyes the main focus as you wear your face mask. We’ve taken this look from simple mermaid to Sea Witch by adding Primal Costume Contact Lenses. We’ve used the colour Cotton Candy here. They are easy to put on and add a super eerie vibe. Find them in-store at select London Drugs locations.

MASK: We went with a mermaid-scale pattern face mask to compliment the costume. Find this template at our Photolab or upload your own image!

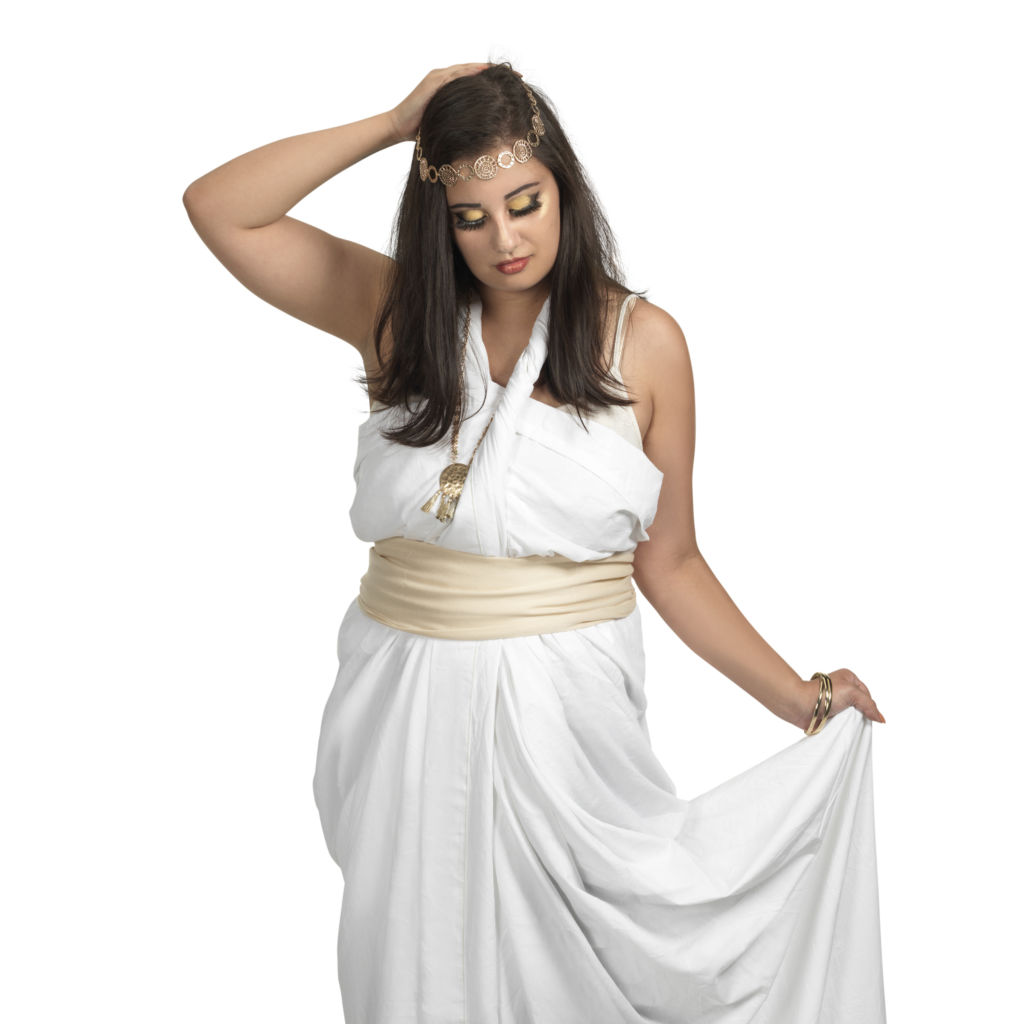
Feel elegant and divine by simply turning a bed sheet and scarf into this easy DIY Greek Goddess costume. It also gives you an excuse to get all decked out in gold! Keep reading below to find out how to get the look.


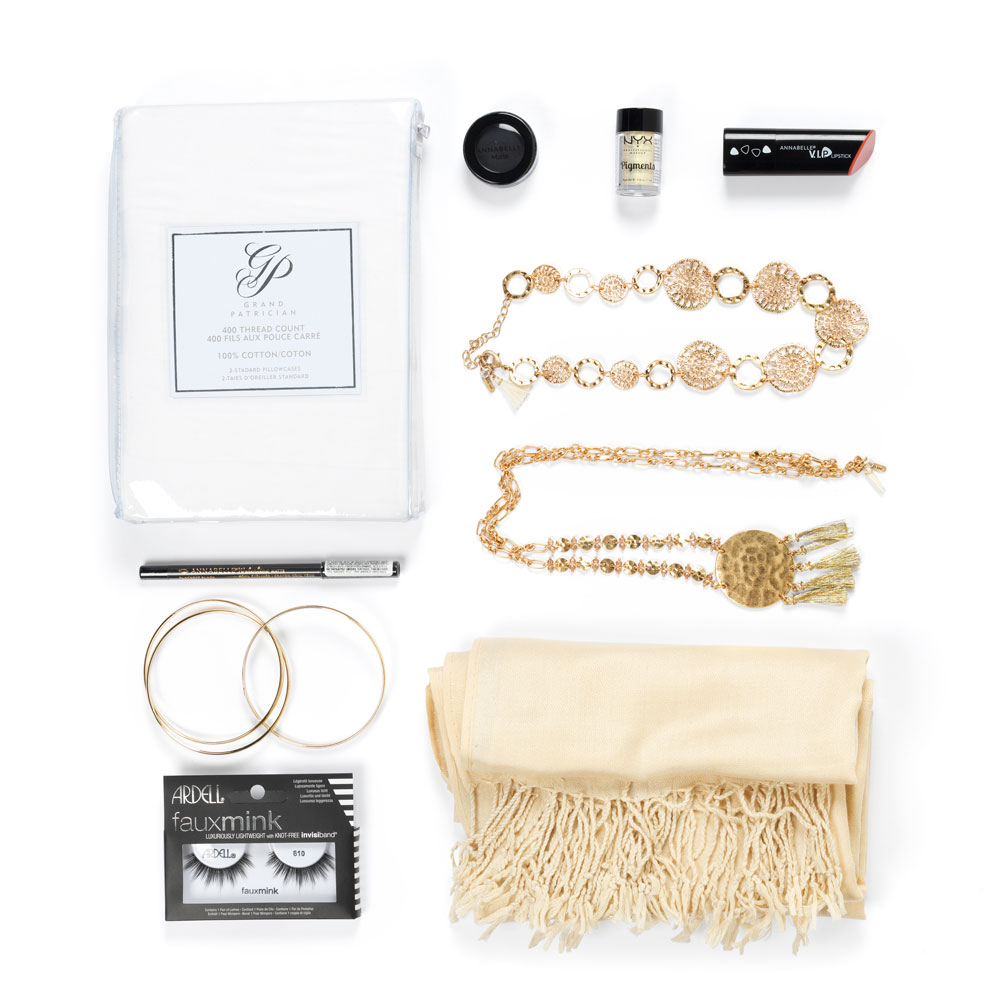
WHAT WE USED:

White Bed Sheet
Annabelle Smoothliner Eyeliner in Black
Gold Coloured Jewellery
Ardell Faux Mink Lashes in 810
Annabelle Single Eyeshadow in Ebony
NYX Professional Makeup Pigments in Go H.A.M.
NYX Professional Makeup Pigments in Brighten Up
Annabelle V.I.P. Lipstick in Nevada
-Gold rope or beige sash (find them in-store!)

STEP 1
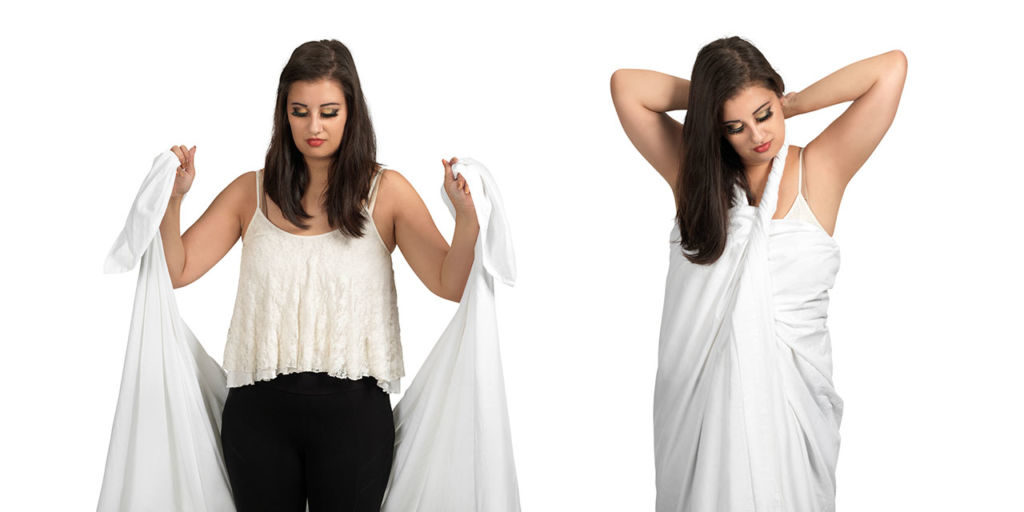
The very first part of the costume is tying the toga. For this, we’ve simply use a white bed sheet that you can find at any London Drugs. First, grab two ends on the long side of the bedsheet and twist each end so that they make a rope. Cross each rope end over each other and bring them up so that they are behind your neck. There, secure it with a knot.

STEP 2
No Greek goddess is complete without her gold jewelry and accessories. Use a piece of rope or a sash to tie around your waist. Here, we’ve used a beige-coloured pashmina scarf and some jewellery you can find in our cosmetics department.

STEP 3
For your makeup, start off with your usual foundation routine. Since you’re a divine entity, add a gold eyeshadow to your eyelids and deepen the outer corners with some black eyeshadow. We’ve used NYX Professional Makeup Pigments in Go H.A.M and Annabelle Single Eyeshadow in Ebony. Line eyes with some black liner and add some drama with false lashes. Here, we’ve used Annabelle Smoothliner Eyeliner and Ardell Faux Mink Luxuriously Lightweight Lashes in 810. For lips, we went with a neutral shade from Annabelle’s V.I.P. Lipstick line. Also, don’t forget to add highlight everywhere to get that lit-from-within heavenly glow! We’re using NYX Professional Makeup’s Pigments in Brighten Up (we even added some to the lips!). Lastly, swipe on some gold nail polish to complete the look. We suggest using Sally Hansen’s Insta-Dri Fast Dry Colour in Go For Gold.

MASK: We went with a gold-pattern face mask to compliment the costume. Find this template at our Photolab or create a personalized mask by uploading your own photo.

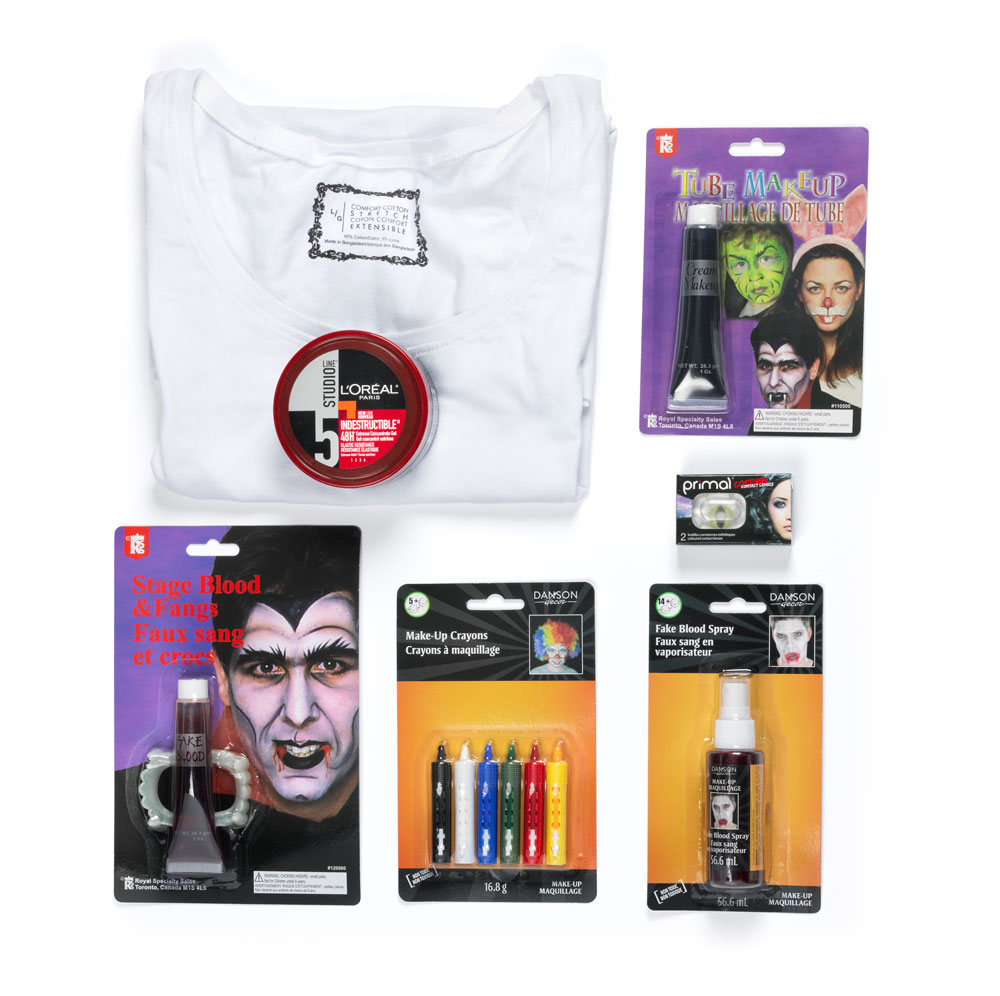
There might not be a full moon on Halloween, but that doesn’t mean you can’t transform yourself into a hair-raising wolfman! We’ve laid out everything you need to create this terrifying look below.

WHAT WE USED:

A white shirt
-Hair Gel (L’Oreal Studio Line Indestructable Gel Concentrate)
-Halloween Stage Blood & Fangs
Danson Makeup Crayons
Halloween Tube Makeup in Black
-Primal Costume Contact Lenses in Thriller (find them in-store at select stores!)
Danson Fake Blood Spray

STEP 1
The great thing about this costume is that you can use regular clothes! We recommend wearing jeans, a plaid long sleeve shirt, and a white shirt you don’t mind getting some fake blood on.

STEP 2
Using a brush or a makeup sponge, apply the black cream makeup around the hairline, jaw bone and cheek bones. Let it dry and then use a black face paint crayon to draw “hair marks” over the areas you applied the black cream. Also draw hair marks on the eyebrows and along either side of the nose. This doesn’t have to be perfect and can be messy-you’re a scruffy wolfman after all!

STEP 3
Next, use the black crayon to colour the tip of the nose and nostrils and to draw half almond shapes under the eyes. Apply the black cream makeup to the lips. You can also apply a small amount of the black cream to the sponge and dab it over the face to give it a “dirty” look.

STEP 4
Apply a generous amount of hair gel so that your hair looks like a crazy mess (you’re a wolfman, remember!) We’ve used the L’Oreal Studio Line Indestructable Gel Concentrate.

STEP 5
Now time for the part that will really transform you into a wild animal! Put in some fangs and apply generous dollops of the fake blood to the corners of the mouth. Use the blood spray to apply blood onto the neck, your white shirt, and anywhere else you want!

ELEVATE THE LOOK: Take your costume from basic wolfman to terrifying werewolf by wearing Primal Contact Lenses. For this look, we’ve chosen the style Thriller. Now get out there and do your best howl (while maintaining your social distance!)

MASK: We went with a growling werewolf face mask to go with the costume. Find this template at our Photolab or upload your own image to create a personalized face mask.


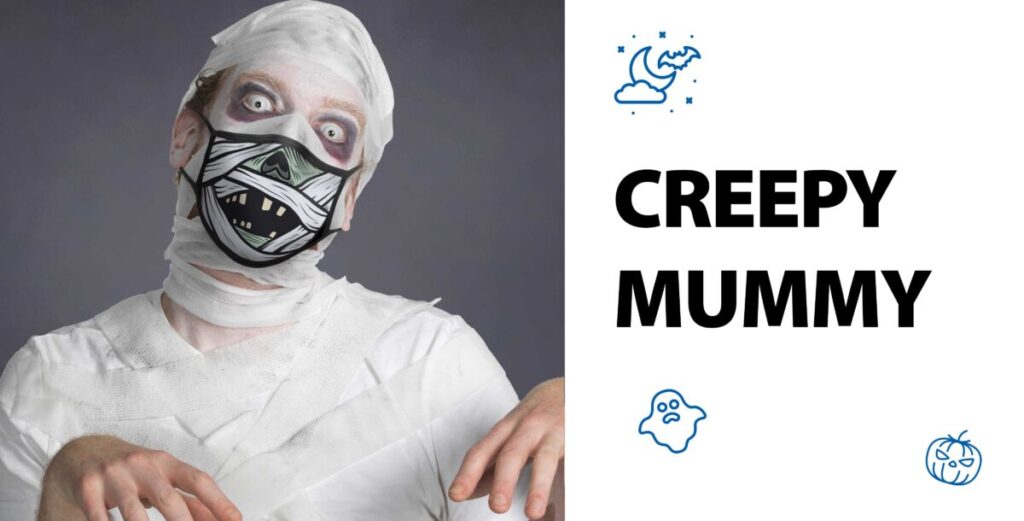
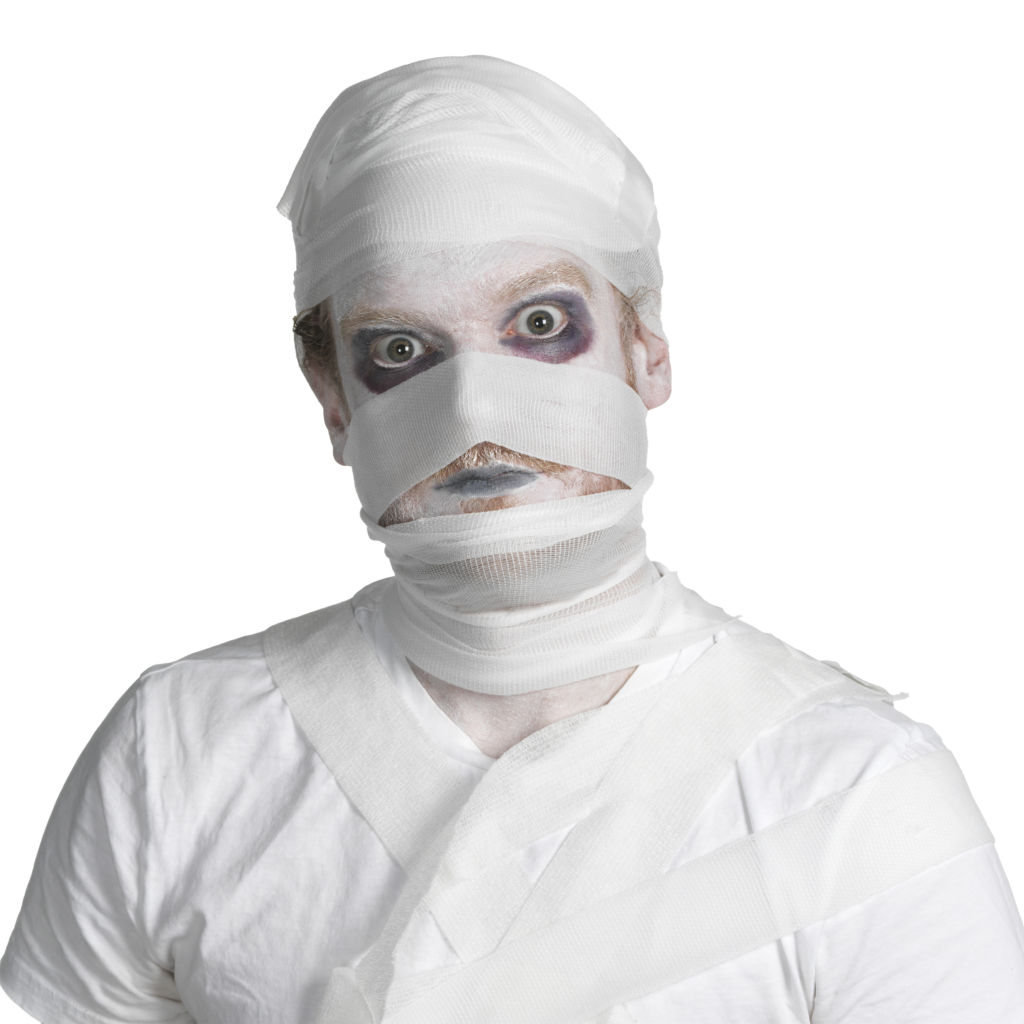
This costume is just as classic as it is creepy. Keep reading to learn how you can transform into a mummy with face paint and bandages you can find at London Drugs.

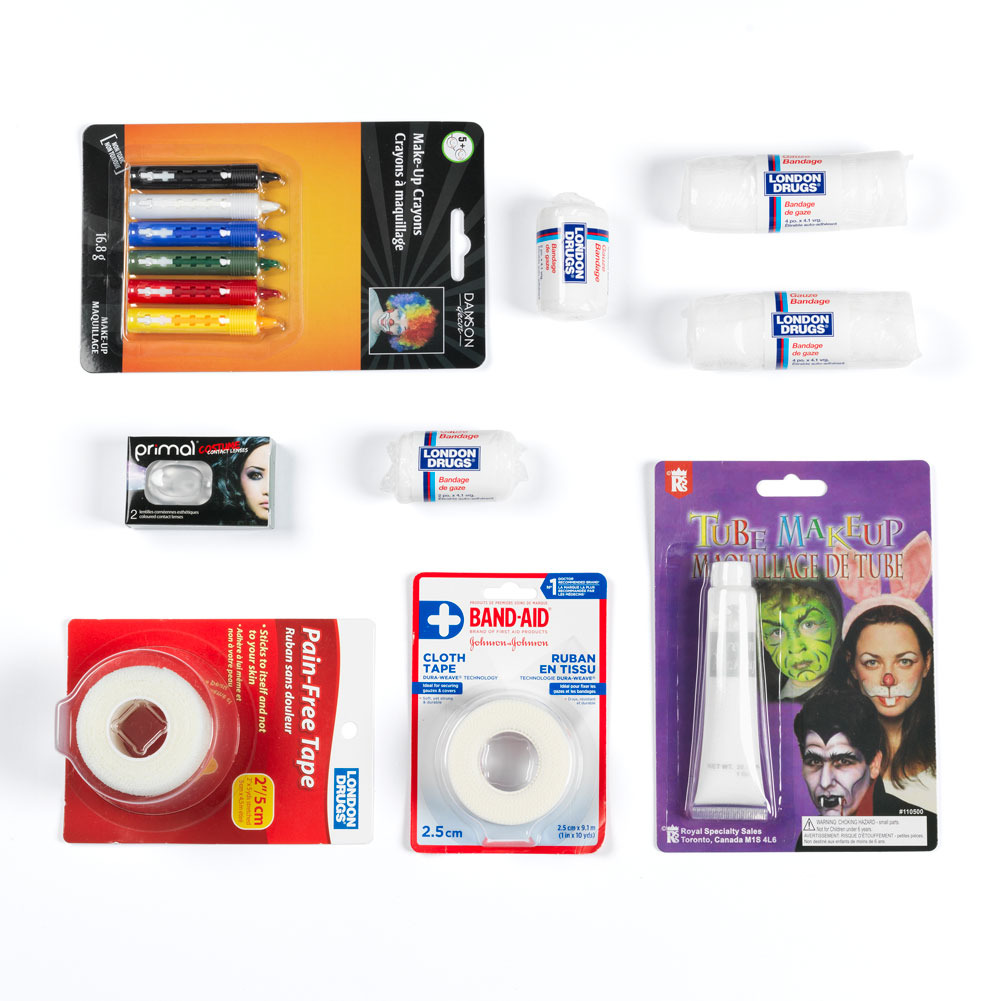
WHAT WE USED:

Danson Makeup Crayons
-Primal Costume Contact Lenses in Zombie I (find them in-store at select stores!)
Adhesive Medical Tape
Gauze bandages
Halloween Tube Makeup in White

STEP 1
All that’s required for the actual costume part of this look is a white shirt. Bonus points if you have white pants but a pair of black pants or even jeans will do.

STEP 2
Using a sponge, brush or your fingers, apply the white cream makeup to the entire face, down to the neck and ears. Next, mix the black, red and blue face paint crayons together to create a black-purple colour. Apply this colour on the lips and around the eyes and lids to create a sunken-eye look.

STEP 3
Now it’s time for the mummy wrappings! Using gauze bandages, wrap around the head, neck and face, leaving the eyes and the mouth exposed. Secure into place using adhesive medical tape. Take the gauze and also use it to wrap around the chest, arms, legs, anywhere you want – the more bandage, the better. You can also use safety pins to secure the bandages to your clothing. That way, you can do your best mummy walk without having to worry about unravelling!

STEP 4
Warm up a tiny amount of the black face paint crayon with your fingers and roughly apply this over your mummy bandages. This will make it look like you crawled out of a 2,000 year old tomb

ELEVATE THE LOOK: Sure, you’re a creepy mummy, but why not become the bone-chilling walking undead? Pop in some Primal Contact Lenses in Zombie I. We guarantee anyone who stares into your dead eyes will run the other way.

MASK: We went with a ghoulish mummy face mask to compliment the costume. Find this template at our Photolab or create a personalized mask by uploading your own photo.

Want a sweet and simple costume for your little one? Check out this super easy costume you can create yourself using items you can find at London Drugs! Just follow the step-by-step tutorial below.

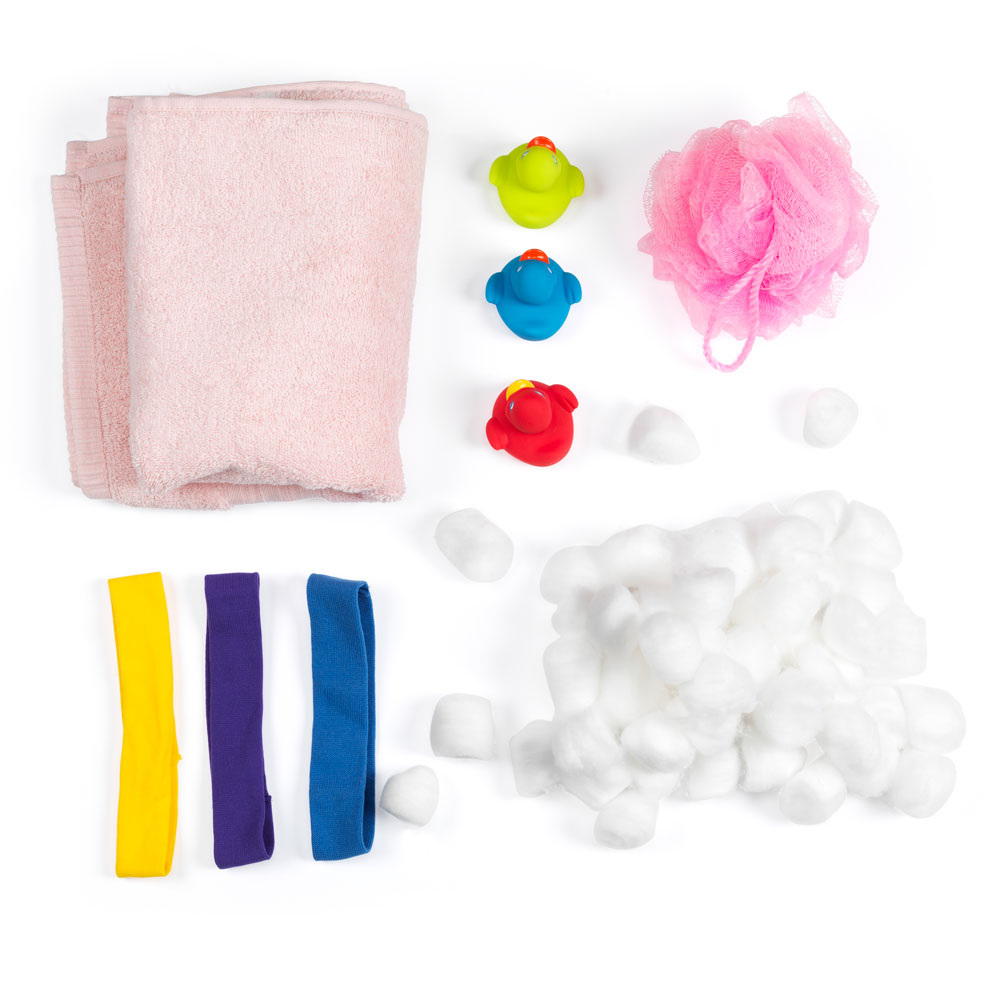
WHAT WE USED:

A small towel (any colour works, we chose baby pink)
Goody Ouchless Headbands (any colour works, we chose bright pink)
-Playgro Bright Baby Duckies (You can use any small bath toys)
Body puff (any colour works, we chose pink)
Cotton Balls
A Hot glue gun

STEP 1
This step requires you to get a bit crafty in creating your little one’s costume. Gather together the bag of cotton balls, small towel, head bands and rubber duckies. Using a hot glue gun, attach cotton balls in clusters onto one side of the bath towel. These will act as bubbles and bath foam. As well, take one of the rubber duckies and secure to the headband will a dollop of hot glue.

STEP 2
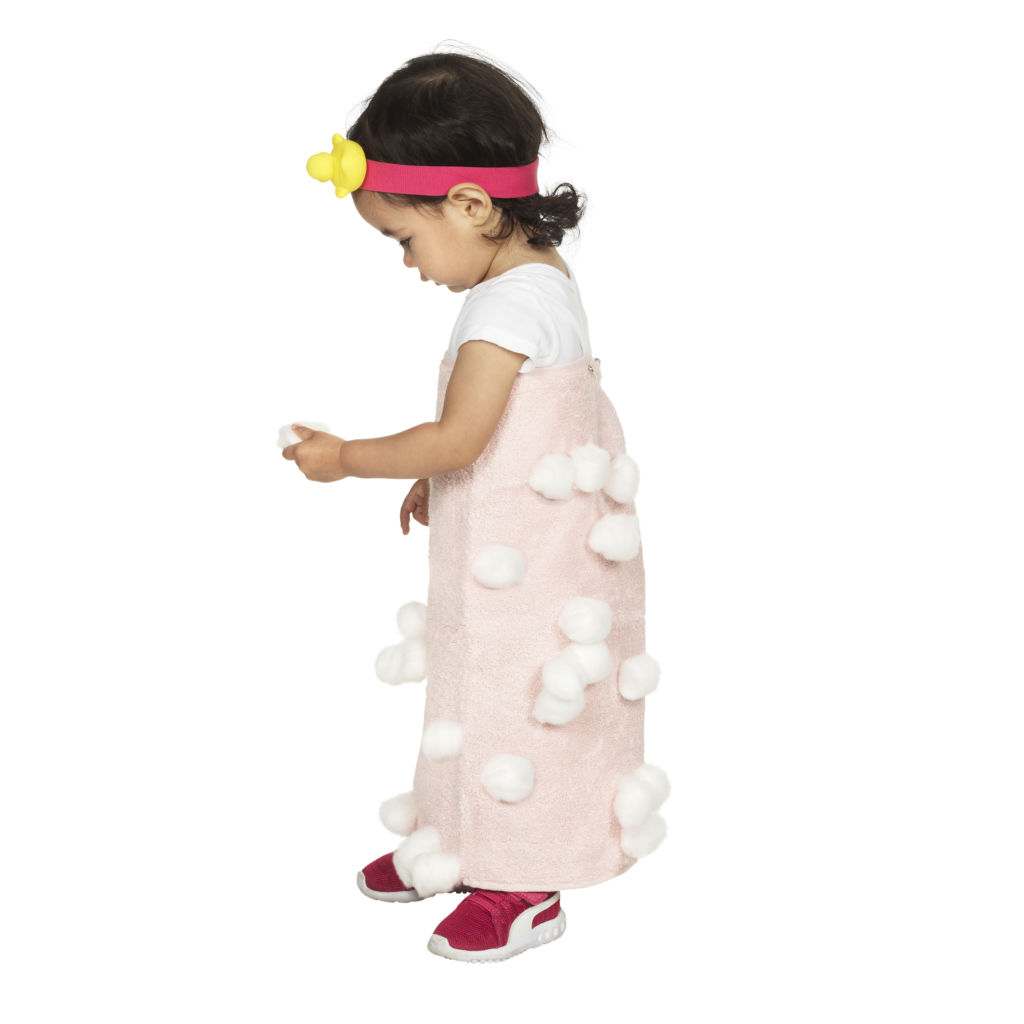
It’s now time to turn your little one into a bath time cutie! Take the small towel wrap it around your little one with the cotton balls facing the front.  Secure it in place with safety pins.

STEP 3
The final step is to accessorize! Put the rubber duckie head band on, place the body puff around your little’s wrist and give them another rubber duckie to hold. Voila! An easy and adorable DIY costume that is sure to garner a lot of “Awwww!” and “So cute!” comments.

MASK: We went for a face mask with bubbles and a rubber ducky to compliment the costume. Find this template at our Photolab or upload your own image!

Not into dressing up for Halloween but still want a fun, seasonal face mask? No problem! Our Photolab has a collection of pre-designed face masks with fall patterns or Halloween faces. We even have Canada-themed designs, animal patterns, school designs, and more! You can also choose from our Weddingstar Halloween face mask selection as well.

And there you have it! 5 DIY costumes all created with items found at London Drugs. Choose the look you like best to create for Halloween this year, or simply use these ideas as inspiration to create your own unique costumes. Have fun building your own spooky (or cute) look, be safe while maintaining social distancing, and Happy Halloween!

3 Décor DIYs Using Your Photos

There’s something tangible and nostalgic about having a printed photo that has allowed prints to endure, even in the age of digital photography. Now, those once ‘old school’ style prints like Polaroids have become trendy once again, thanks to their stylized look. While it used to be that those photos were only ever displayed in photo albums (or even relegated to shoe boxes), crafty DIYers have since devised all kinds of unique and fun ways to showcase your best shots. Here, our LDExperts in the Photolab are sharing 3 of their favourite décor ideas you can easily do yourself, using vintage-style photos.

Before we dive into each of the décor DIYs, let’s first take a look at the different kinds of prints you may want to choose from. Your decision will depend on whether you’re planning to print some of your existing digital or film images, or want to use photos that print instantly from a camera, like the Fujifilm Instax or Polaroid Originals OneStep 2 VF Instant Camera.

The classic look of instant photos

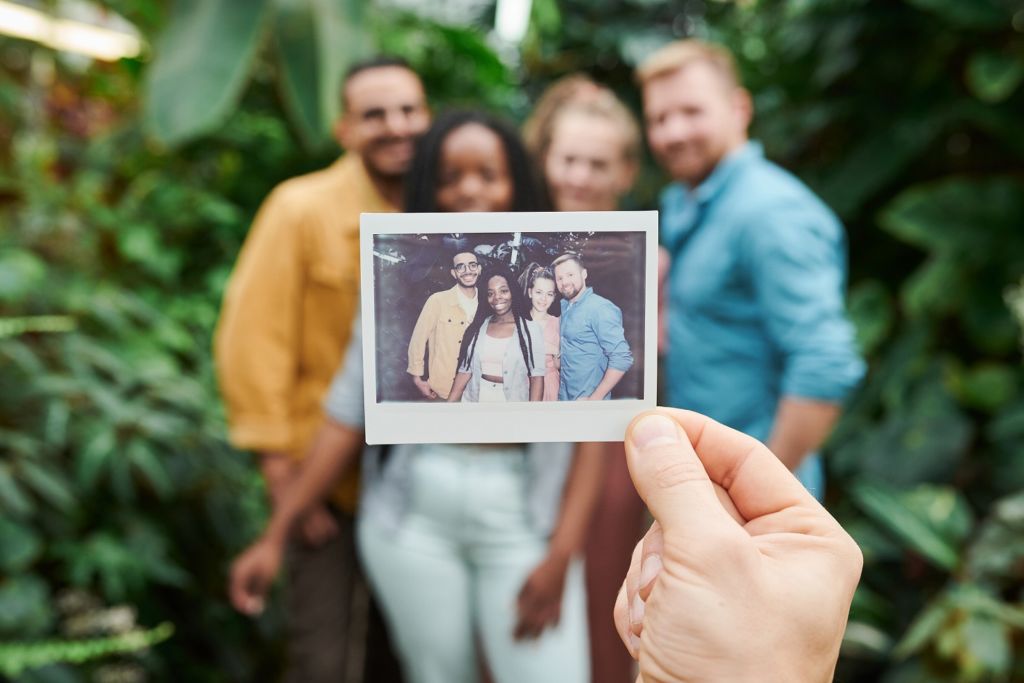
Both Instax and Polaroid Originals are great options if you want to enjoy taking photos the ‘old fashioned’ way, but want the convenience of having the print photo immediately in your hands. These positive film cameras will instantly print out your image in that classic Polaroid-style you’ve come to know and love – and they’re ready to be displayed right away!

Giving your digital & film photos a vintage look

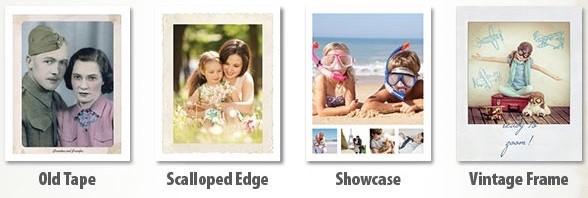
Meanwhile, if you love the look and feel of that nostalgic photo style but aren’t interested in a new instant camera, you can also choose to have your digital or film photos printed by our Photolab in any of our 7 new 4×5″ vintage print styles! Choose from Old Tape, Scalloped Edge to Vintage Frame, all of which will give your prints that classic look. Ordering is easy; simply upload your digital files online or use our London Drugs Photolab App (available for iOS and Android). If you prefer to order in-store, you can visit your nearest London Drugs to use our kiosks, or if you’ve shot on film, you can drop off your rolls to have that film developed and digitized.

Now that you know what kind of photos you want to use, let’s take a look at 3 ways you can display them as décor!

1. Photo Collage

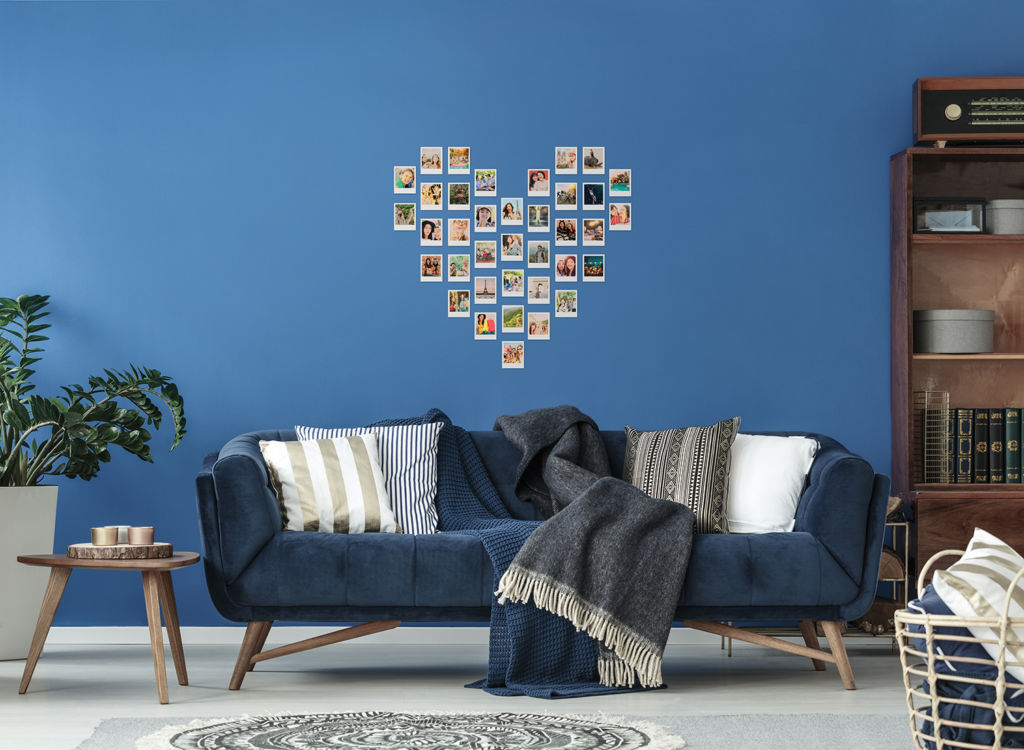
Looking to spruce up a blank wall? A photo collage is a fun and easy way to create your own wall décor! Pick your favourite prints, and plan out a design – anything from a simple square grid, to a heart shape. You can decide on a theme too, if you have enough photos to choose from: friends, family, travel, or all of the above.

We also recommend sticking to the same frame colour for all of your photos in the collage, or placing them strategically based on the frame colour (ex. using all black frame photos as the edge of your collage). Instax Mini film, for instance, comes in a variety of frame options, such as classic white, black, rainbow or patterned.

Sort through and lay your photos out on a table or floor to start deciding where you want each photo to go. This is especially important if you’re doing a more complicated shape like a heart.

Once you’re ready to start affixing your photos to the wall, use Scotch Wall-Safe Tape in small loops on the back of each photo. This tape sticks securely, but also removes cleanly, leaving no residue or wall damage behind. To help keep your photos even on the wall as you affix them, you can also use painter’s tape as a guide.

2. Photo Garland

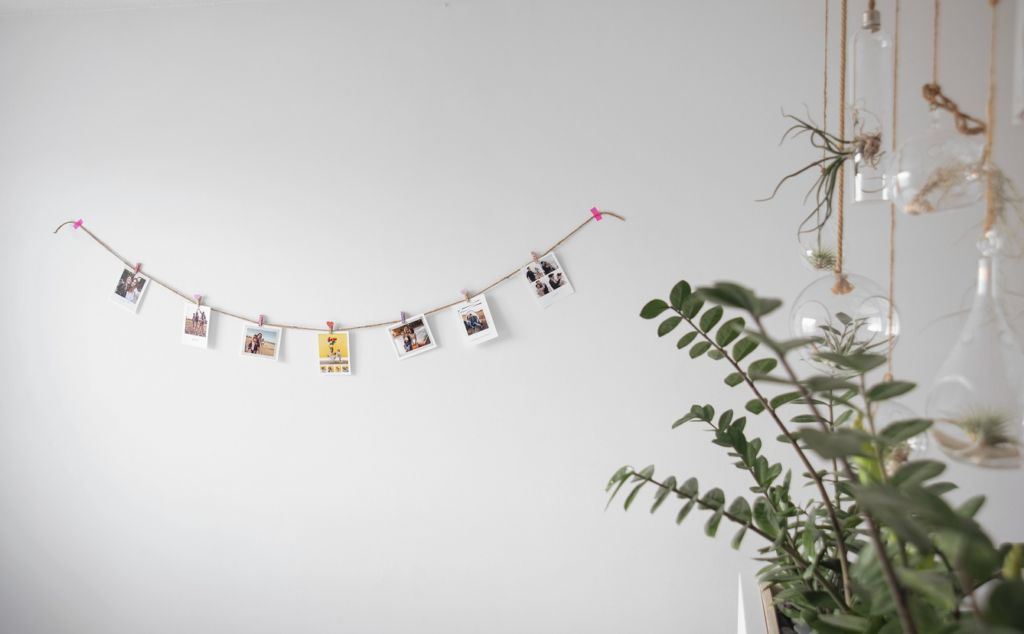
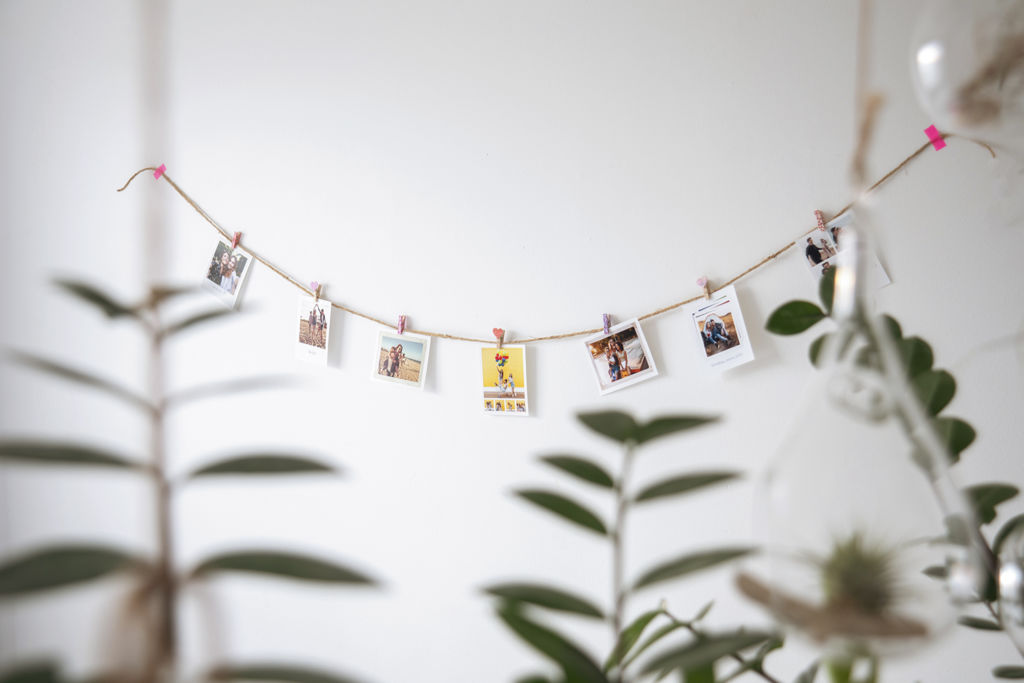
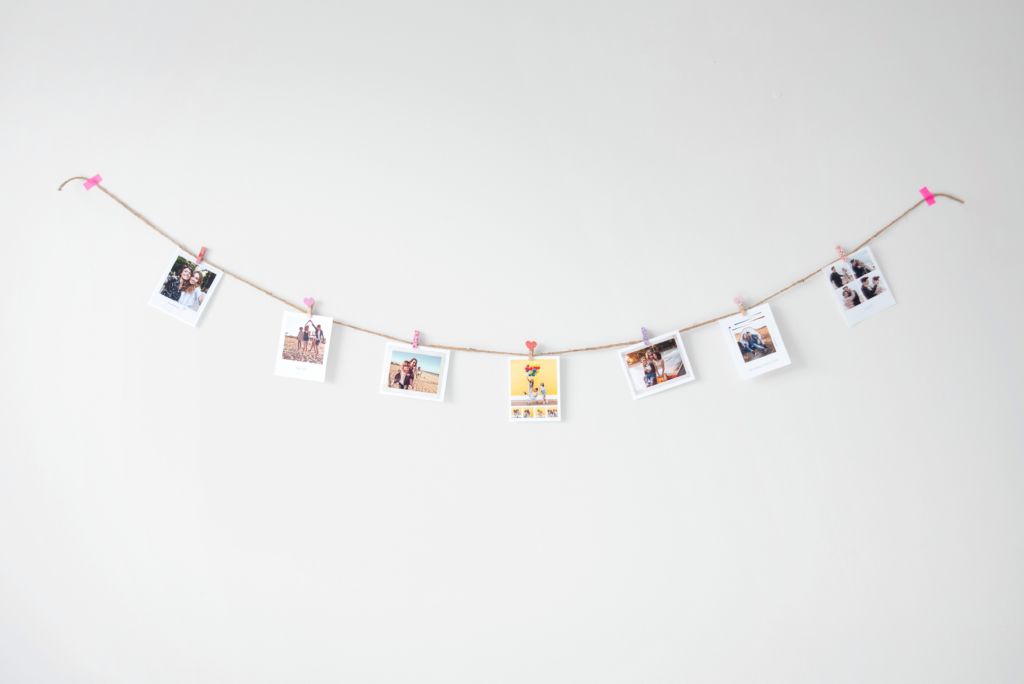
Another way to creatively showcase your photos is with a photo garland. Simply put, photos are strung along a piece of twine, attached using small pegs. Fujifilm has even created their own Instax Mini pegs, which are perfect for holding your photos in place. The twine is then stuck to the wall on either end, allowing the photos to hang. If you pick up a pack of those Instax Mini pegs, the twine is included!

Photo garlands can be a fun way to display your photos chronologically, from left to right. For example, showcase your photos from years ago to present day, perhaps even doing a string of photos for each year or month, depending on how many photos you have to work with. Or create a string for each category of photo, like a separate string for each vacation you’ve taken, or a string for family photos vs. a string for friends’ photos. The choices are endless!

There are also all kinds of ways to customize your garland, from adding bunting made out of paper or burlap, to intertwining fairy lights among the photos. This is your chance to be as creative as you want.
To attach your photo garland to the wall, you could use stylish Washi Tape, or Command’s Small Spring Clips which hold strongly without damaging your walls.

3. Mood Board Grid

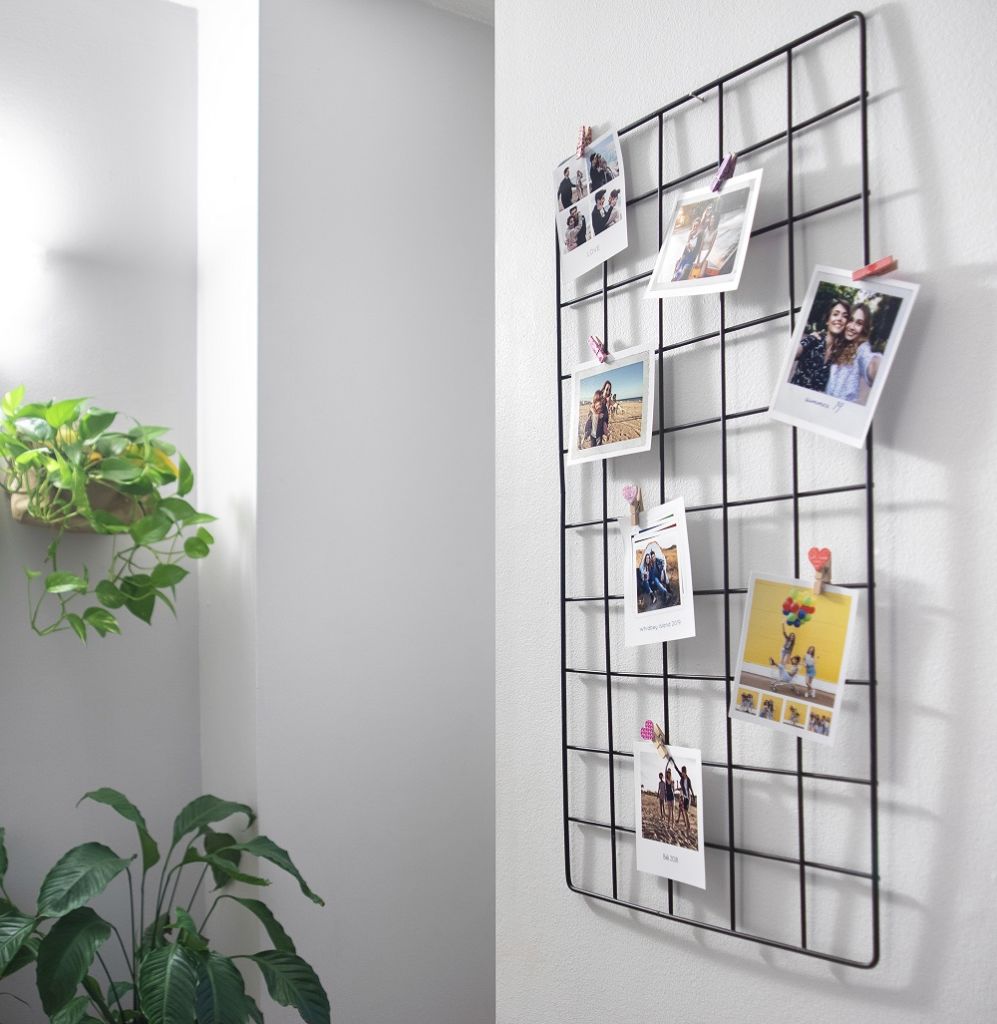
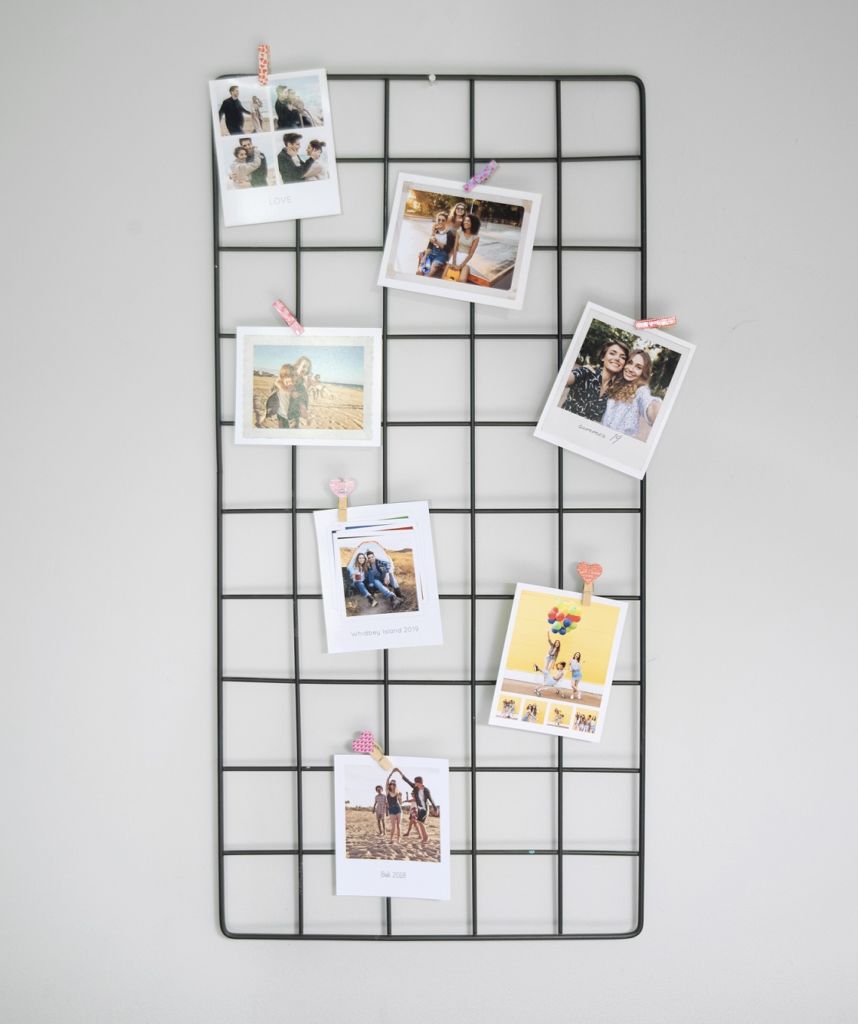
These mood boards, which are made in a grid shape, are ideal for displaying everything from notes and cards to your favourite photos. They’re a perfect way to decorate your desk, whether at home or at the office. The grids can come in a variety of sizes, which will determine how many photos you will be able to attach.
Use small pegs, like the Instax Mini pegs, to clip each of your photos to the grid. Either attach them ad hoc, or in rows. The best part of this method is how easy it is to update your photos regularly!


Need a little help getting started with your project? Our LDExperts in the Photolab are always happy to help if you have any questions about printing your photos. Just visit us at any London Drugs location!
6 Last-minute Halloween Costumes Your Friends Will Love

Yikes, did you just get a last-minute invite to a Halloween party? Or did you spend so much time planning the kids’ costumes that you completely forgot about your own? Don’t worry, because we’ve got some ideas for fun Halloween costumes for the whole family that you can easily put together and still impress your friends!

Box of Timbits

Who doesn’t love Timbits! You’ll be the hit of the Halloween party, especially if you carry a real box of the little morsels with you. Bonus: get your BFF to paint a plastic garbage can brown, and you’ll have your Double Double!

More last-minute Canadian Halloween costume ideas here.

Spider Web

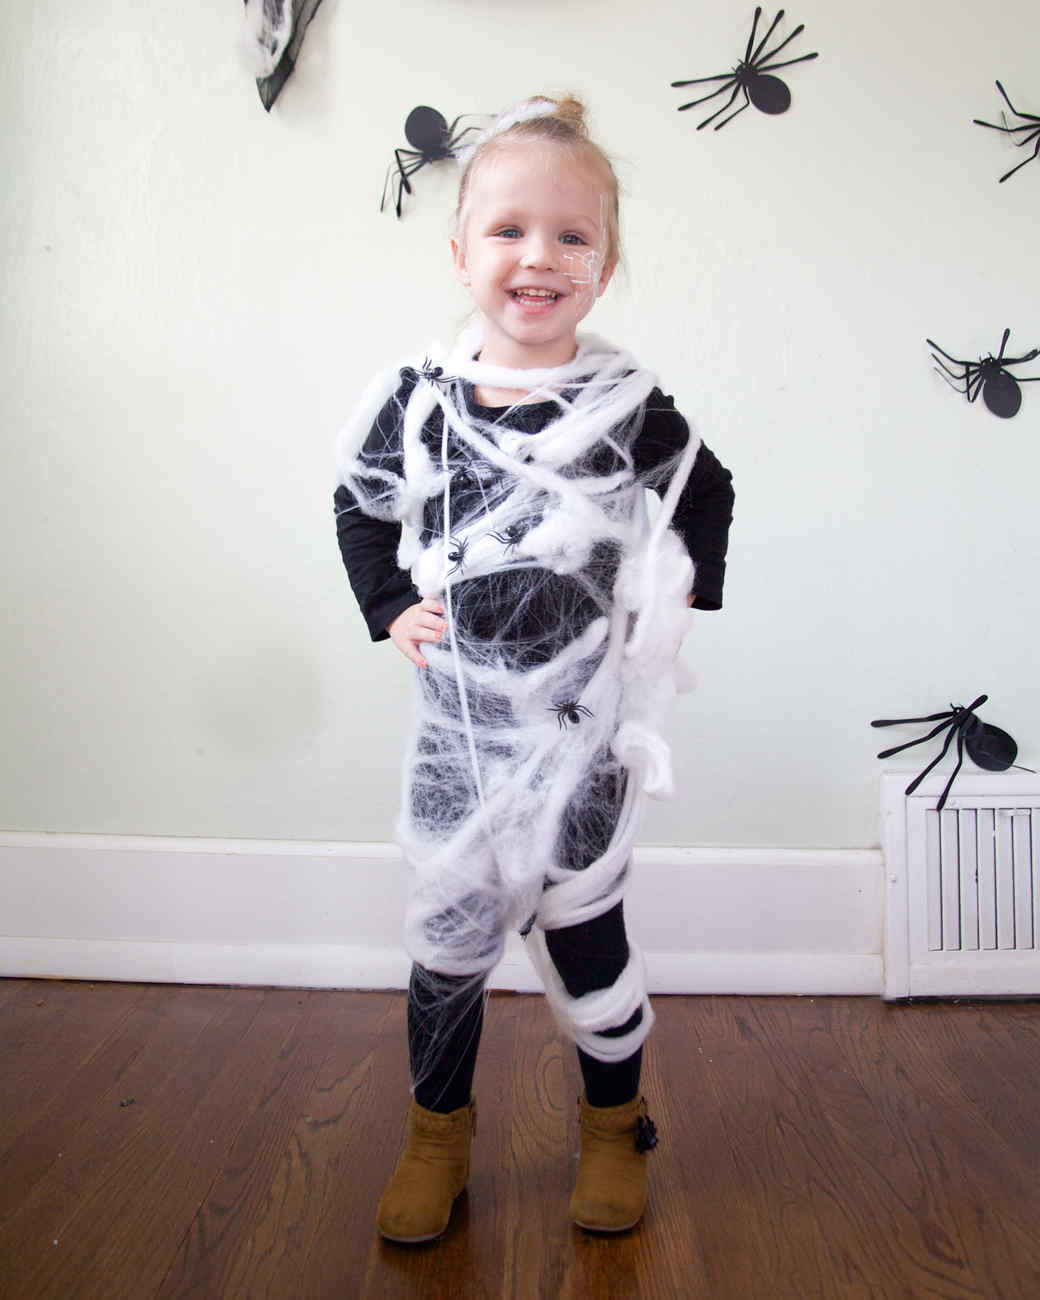
Everyone has a bag of that fake spider web in the decorations box, right? Wrap some around your kid, add some plastic spiders and spooky makeup, and you’re ready for tricks and treats.

More last-minute Halloween costume ideas for kids here. 
Rosie the Riveter

Last-minute Halloween costumes for the whole family

Photo from brit.co

Rock this iconic symbol for women’s equality with a denim shirt, work pants, red bandana, and an up-do.

Don’t forget hair and makeup! Here’s a super easy tutorial:


Party Animal

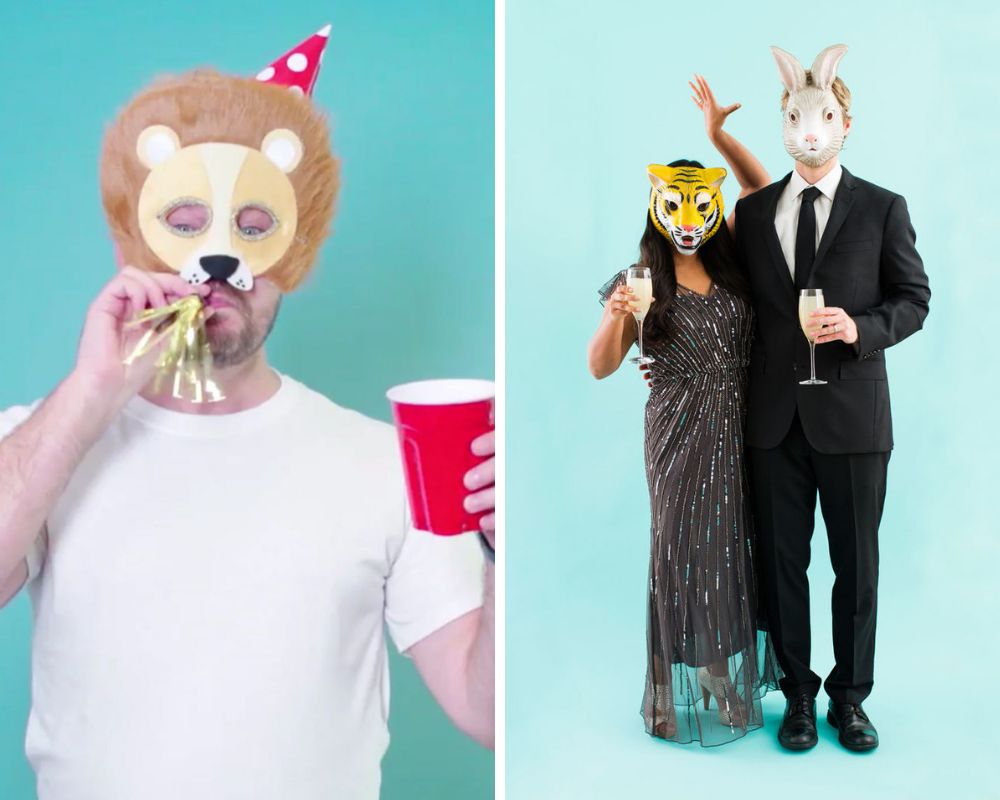
For this one, all you need is an animal mask, a party hat, and a drink. Take it uptown with some formal wear!

Lots more easy Halloween costume ideas here.

Pizza Slice

This one is more easy-ish, but the cuteness factor makes it worth the trip to the fabric store. Bonus: the kid can help with the glueing! We’ve got the step-by-step tutorial for you right here.

The Flash

Last-minute Halloween costumes for the whole family

Photo from brit.com

Grab a full-length body suit from the party store and get glueing. Or, if you’re really in a pinch, pull out those red long johns from the ski bag.

More fun DIY Halloween costume ideas for men here.


This Halloween, no matter what you wear, have fun, be safe, and don’t eat too much candy. Or do, we won’t judge. 

2017 Ultimate Holiday Gift Guide

Still shopping? No sweat! We’ve collected all our 2017 Gift Guides into one convenient list.

Starting back in November, we created gift guides to help you surprise and delight every type of person on your list. In case you missed them, or need a refresher, you’ll find each gift guide below.

Holiday Gift Guide for the Home Cook

Christmas is a time of epic food and meals shared with friends and family. Tis the season for those who love to cook! This guide is for those who love spending time in the kitchen.

Top tip: If you’re not sure they’ll use the latest gadget, a tried and true kitchen basic is always appreciated.

[Shop the full Home Cook Gift Guide]

***

Holiday Gift Guide for Technology Buffs

Got a few gadget-obsessed people on your list? This guide is for them. Smart tech, wearable tech, and fashionable tech—yes, you can get it all!

Top tip: Great gadgets make life easier, not harder. Include batteries when necessary!\

[Shop the full Techie Gift Guide]

***

Holiday Gift Guide for Kids (and Parents)

Is there anything kids love more than tearing into a wrapped present? Maybe the surprise item inside! This guide is for the kids in your life, with gift ideas that parents will love too.

Top tip: Board games and lego are classic toys for a reason! And they’re great fun for the whole family.

[Shop the full Kids Gift Guide]

***

Holiday Gift Guide for DIYers

A guide for those who love to do it themselves—“it” being anything and everything! These folks can be among the hardest to shop for, since they prefer experiences over things.

Top tip: For DIYers, it’s all about tools!

[Shop the full DIYer Gift Guide]

***

Holiday Gift Guide for Music Lovers

This one’s for those who have perfected the soundtrack of their lives. Help them enjoy the music they love even more with a great gift.

Top tip: Headphones are essential for a modern music lover on the go.

[Shop the full Music Lovers Gift Guide]

***

For more gift-giving advice for the music lover on your list, speak to an LD Expert today. To make a purchase, visit London Drugs in-store and online. And find more gift ideas from the London Drugs Christmas Experts.

London Drugs wishes you and yours a Merry Christmas and a Happy New Year!


2017 Holiday Gift Guide for DIYers

It’s less than a month until Christmas. Still working on your holiday shopping? We’ve got you covered!

Leading up to December 25, we’re posting holiday gift guides for everyone on your list. We have already shared guides for the home cook, kids (and parents), and techies. Today’s guide is all about the DIYer!

What do you get for someone who likes to make things? Buying a scarf for a knitter or a nice planter for someone who works with ceramics can seem a waste. Instead, give them what they love best—tools or supplies to make something themselves!

Here’s our guide to buying a cool crafty present for the DIYer on your list.

1. Build their Tool Box


DIYers love new tools. Not only will they expand their range of projects, but new tools are sometimes just inspiring in and of themselves—opening up a whole new world of possibilities.

DIY Gift Guide

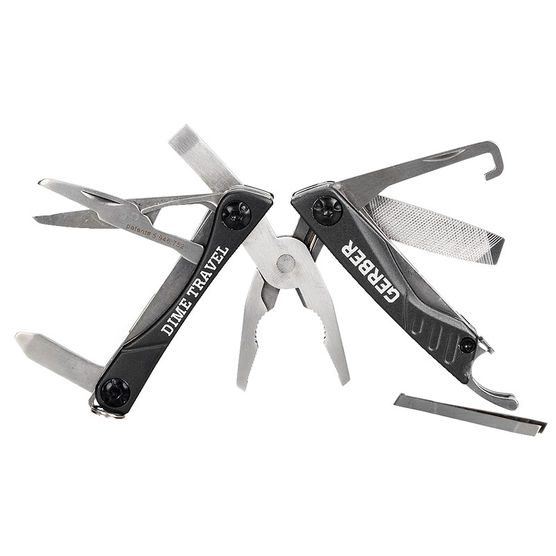
Help the DIYers in your life build their ultimate tool box with a glue gun, an X-Acto knife, and a screwdriver with multiple bits. These long nose pliers are perfect for making jewelry, and a tape measure will be useful no matter the project. An adjustable wrench means they’ve always got the right size. Scissors are necessary for just about any DIY project. And a multitool means they can carry it all with them and be ready for anything.

2. Grow their Garden


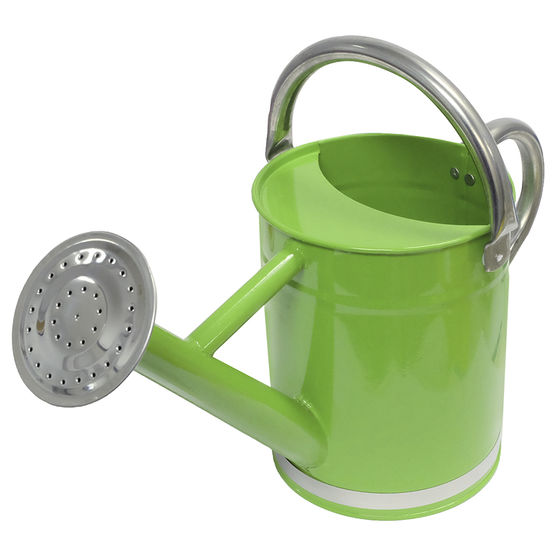
It’s not really the right season for gardening, but don’t let that stop you. There are plenty of great presents for DIY plant lovers that you can still find at this time of year, like garden gloves and a gorgeous green watering can. They’ll be great in the spring for outdoor use, but they can be used with indoor plants as well.

DIY Gift Guide

We’ve got plenty of great planters that will look lovely on a beautiful plant stand. And this Crabtree & Evelyn Gardeners hand soap and hand cream duo will remind your DIYer that you care about them and their well being. No cracked skin here!

3. Sew So Well


Sewing is such a handy skill. Sewers can make clothes, create curtains, upgrade their bed with a new duvet cover, mend fabric, fashion their own duffle bags and totes–the list is almost unending. It’s perfect for upgrading one’s home or wardrobe with big or small projects and is a life skill that everyone should have.

https://www.londondrugs.com/home-and-lifestyle/appliances/small-appliances/irons-garment-steamers-and-sewing-machines/sewing-machines-and-attachments/

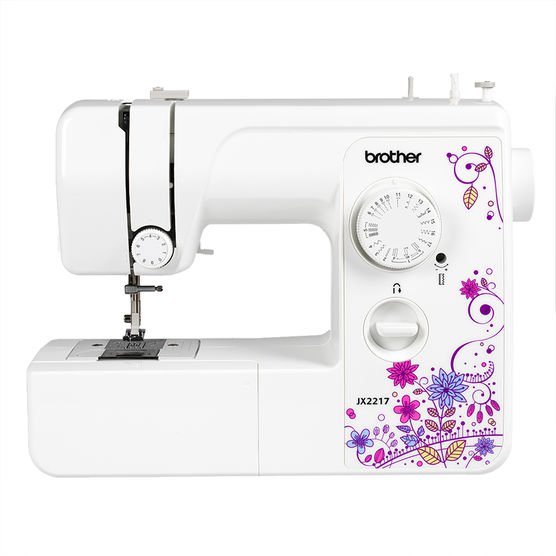
Make sewing easier for your DIY friend with a new sewing machine. If they’ve already got one they love, then think about supplemental sewing tools like a new iron, fabric scissors, a seam ripper, or a hand sewing kit.

4. Perfect Preserving


Who doesn’t love some delicious homemade jellies and jams? You can certainly make some yourself for excellent Christmas gifts (check out our guide to canning and preserving for tips and recipes!), but for the DIYer on your list, you’ll want to be giving them supplies.

DIY Gift Guide

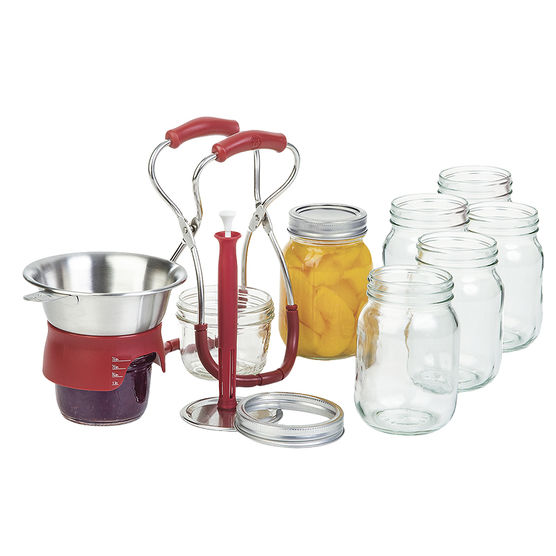
A canning kit complete with a funnel, jar lifter and lid lifter, as well as glass canning jars and lids, is a great gift for someone who’s looking to expand their DIY ways into food preservation (it’s a special order item, so be sure to get this one early!). It’s not just for jam; canning is perfect for pickling too! Preserving food via canning is both a science and an art, which is just what crafty folks love.

For more gift-giving advice for the DIYer on your list, speak to an LD Expert today. To make a purchase, visit London Drugs in-store and online. We’ll be back in a few days with a gift guide for music lovers. See you then!

See all of our 2017 Holiday Gift Guides here:

2017 Holiday Gift Guide for Kids (and Parents)

2017 Holiday Gift Guide for Techies

2017 Holiday Gift Guide for the Home Cook 

2017 Holiday Gift Guide for Music Lovers