It’s summertime! And while the living may be easy, planning the perfect beach barbecue requires a bit of work. Beach days can be a fun way to bring friends and family together, especially if you don’t have outdoor space at homeㅡyou can make use of public beach facilities and get some swimming in too! We’ve got everything you need to throw the best beach barbecue this summer.
1. Portable Grill
Obviously, the most important part of a beach barbecue is the barbecue! You’ll want a portable grill that is easy to set up. There may be restrictions in your area about the size of the barbecue or what kind of fuel it uses. In Vancouver, for example, any barbecue in a public park needs to be at least 75 cm off the ground. A good tabletop grill will suffice! In Alberta, check the current fire ban situation before you start planning your barbecue, but for most of the summer a gas or propane stove will be allowed.
It’s fun to hang out in the sand, but you at least need something to sit on to keep that sand out of your food. Beach towels offer double duty as a place to sit and tool to dry you off after a dip in the water. This donut printed towel is a fun pick!
If you would rather sit off the ground, there’s a number of camping chair options that will get you up higher. A foldable chair or two is easy to stash in your car trunk.
4. Music
Nothing gets the party started like some tunes! Bring a portable bluetooth speaker and play music directly from your smartphone. You’ll be the coolest person at the beach.
5. Games
For kids and kids at heart, pack some games for your party. Golf toss is easy to play and tons of fun. Bocce is another great option that requires even less equipment. Even just a frisbee can make a beach day better!
6. Food, Drinks, and Dishes
Last but not least, a beach barbecue needs food! Food, drinks, and things to put those on and in. Burgers and hot dogs are the classic barbecue foods, but if you want to up your game and impress your friends, bring some corn on the cob and grill it up elote-style. The Mexican street dish is easier to make than you think!
Compostable paper plates are a great option for the beach, but if you have particularly liquid or greasy foods, plastic may be a better choice. For drinks, you can stick to cans and bottles, or you can class it up with cute enamel camping mugs. Just like dad used to have!
Make the most of the sunny days and breezy nights by spending time outside this summer.No matter what you choose to do, it’s always more fun with friends!
Summertime in Canada is now in full force, and we’ll take any excuse to enjoy the sunshine and warm weather. For many, summer calls for patio lunches and weekends at the beach. But for others, it may simply mean retreating back home and unwinding in the backyard.
Whether you’ve hired a landscaper, excel at gardening, or delve into home DIY projects, backyards always seem to be a work in progress. It doesn’t matter if you’re working with a tiny apartment patio or an extravagant poolside gazebo, the following list of 8 Beautiful Backyards to Drool Over are bound to impress—and hopefully inspire you—this summer season.
If you love to entertain, share a home with a group, or have a large family, this DIY outdoor theatre will be a hit. Perfect for warm nights, this design lets you enjoy watching your favourite films under the stars.
You don’t need a lot of space to create stunning backyard structures. This frugal DIY pergola can be assembled more easily than you would think, and can be made on a dime.
If you are committed to using space, a lawn isn’t needed for this stylish outdoor design. With a little ingenuity, these homeowners were able to refurbish their unused driveway and turn it into a backyard sanctuary.
For nature lovers looking for a little zen in their lives, a koi fish pond isn’t as hard to make as you might think. This elegant koi pond and waterfall duo give a sense of serenity to a small but oh-so-cozy backyard.
If you’re lucky enough to have access to a hot tub, we envy you! This lovely set-up can be appreciated even in the cooler months, but will definitely be a meeting place for friends and family during the summer.
If you can’t get enough of beach life, why not bring the beach to you? Inspired by the rustic outdoors, this campfire set-up will bring back many summer memories.
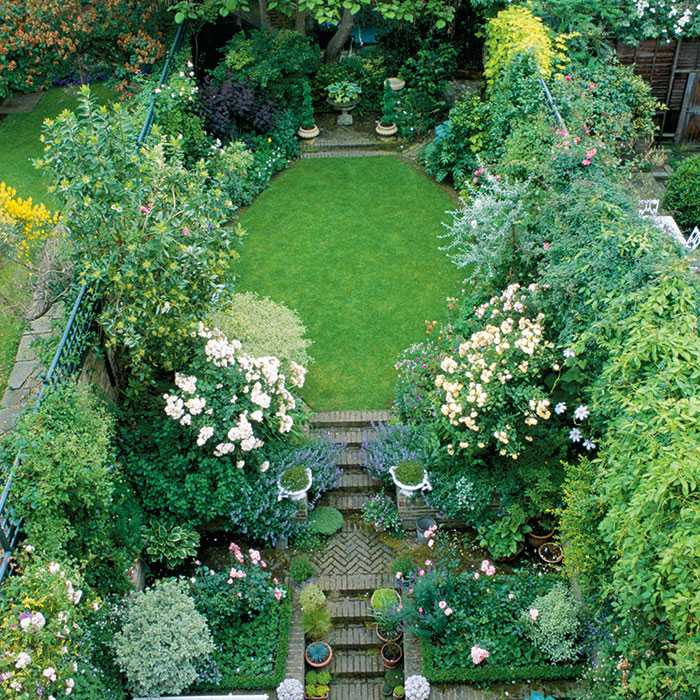
Got a green thumb? This lush green gardenscape is a heavenly escape. With a little TLC and gardening know-how, your backyard can look just as flawless.
This classic design reminiscent of the Secret Garden is perfect for apartment dwellers looking for change. Using a faux grass rug, you no longer have to worry about watering a lawn or mowing the grass.
You can find some beautiful and functional pieces to redesign your backyard from London Drugs in-store or online. Make sure to browse our Outdoor Living Guide for more inspiration!
Washing your car has historically been a daunting task…
This is how we cleaned cars in 1914
In the 1950’s this is how we cleaned cars. Note even nearly 70 years people still clean their cars like this.
An average car wash uses over 200 liters of clean drinking water, contaminates the ground with dirt and you don’t know how your car will look on the other side (pressure washes usually scratch the car).
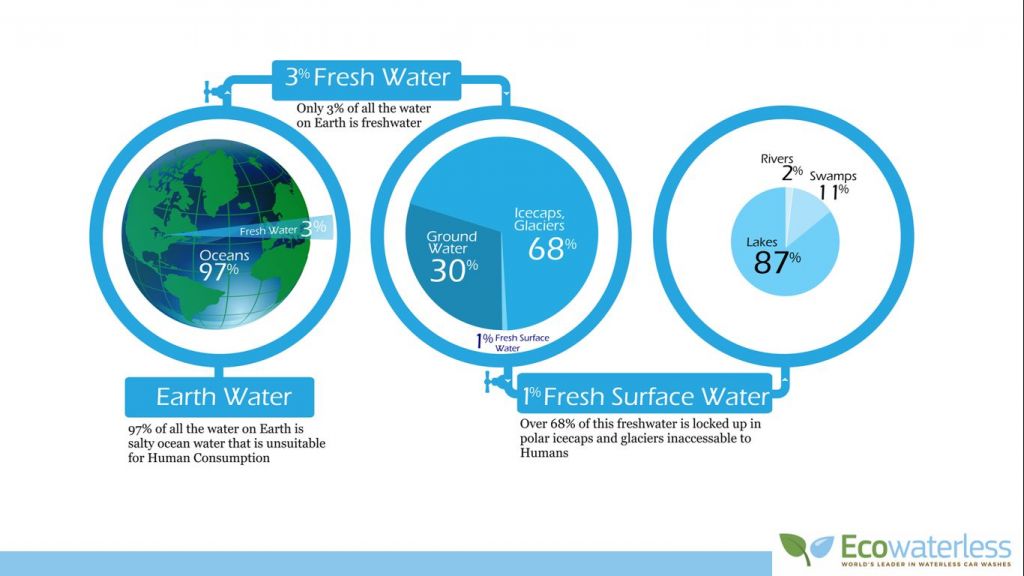
Of all the earth water: 97% is unusable as it is in the ocean and is salt water. The other 3%is fresh water and only 1% of that is accessible which we can use to drink and our other water needs. This is as the other 2% is locked in icecaps.
Right now: 460 billion litres of clean drinking water is used annually in the car washing industry.
That’s enough water to fill 184,000 Olympic sized swimming pools of clean drinking water.
Only 3% of the world’s water is fresh and only 1% of it is drinkable.
Each car wash is equivalent to 400 bottles of clean drinking water
That’s where Ecowaterless comes in.
Our solution uses zero water, contains only natural ingredients and is completely biodegradable. Along with that you can clean your car in 15 minutes as opposed to the time it would take with a hosepipe, bucket and sponge. Our solution also contains a natural wax which keeps your car shiny and adds another layer or wax coating to your car which protects it against dirt.
Each time you clean your car with Ecowaterless you save 400 bottles of clean drinking water. On top of this you save fuel, car emissions and time from travelling to and back a car wash.
Along with that, Ecowaterless donates a portion of their profits to Canada water aid and the company actively do local volunteering days. Ecowaterless has also won the Vancouver smart business award.
Summer is in full swing, and people are emerging into the sunshine after a long winter of hibernation. With the warm weather rolling in, you might be dreaming of sun-soaked afternoons and evenings spent lounging on a plush patio with all of your favourite people. And what better way to coax those folks into stepping outside than with totally tantalizing dishes? You won’t want to plan your warm-weather outdoor dining experiences without these top 10 patio recipes.
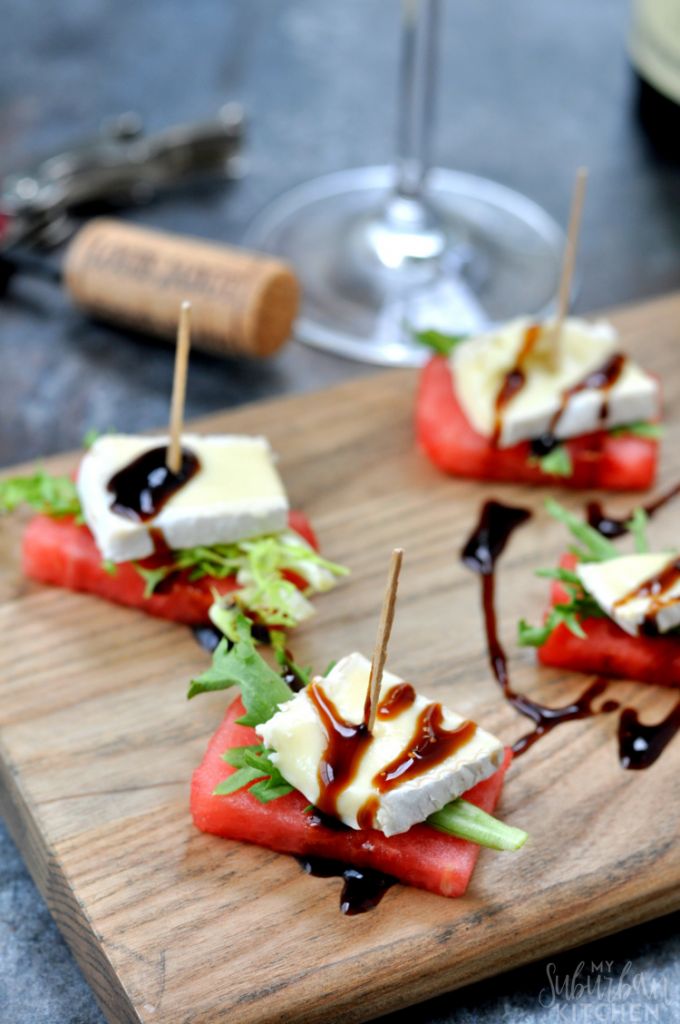
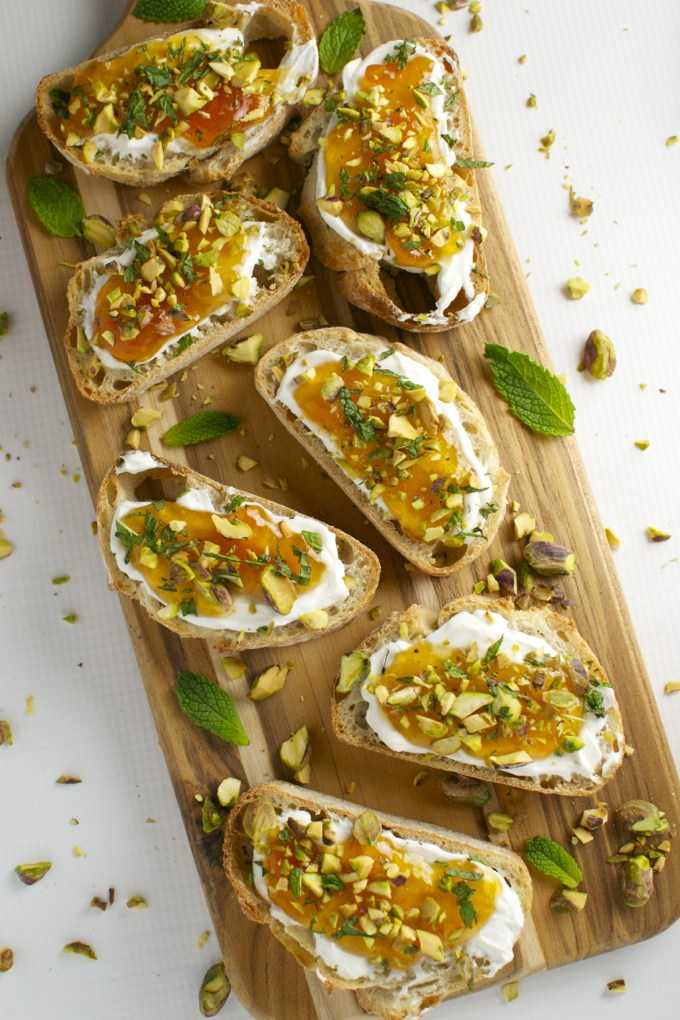
These refreshing appetizers are so easy to make, will add a pop of colour to your table spread, and have the perfect combination of sweet and salty flavours. Drizzle some balsamic vinegar over top for added flair.
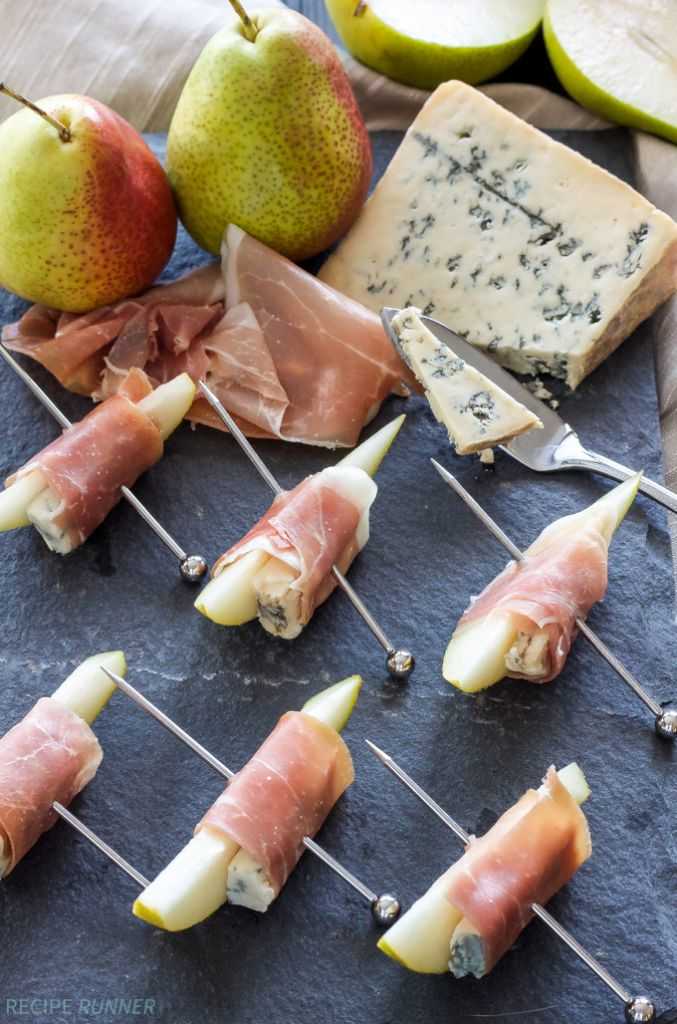
Jazz up your standard cheese platter by adding fruit and wrapping it all up in salty prosciutto. Fresh fruit and cheese were just meant to be eaten together.
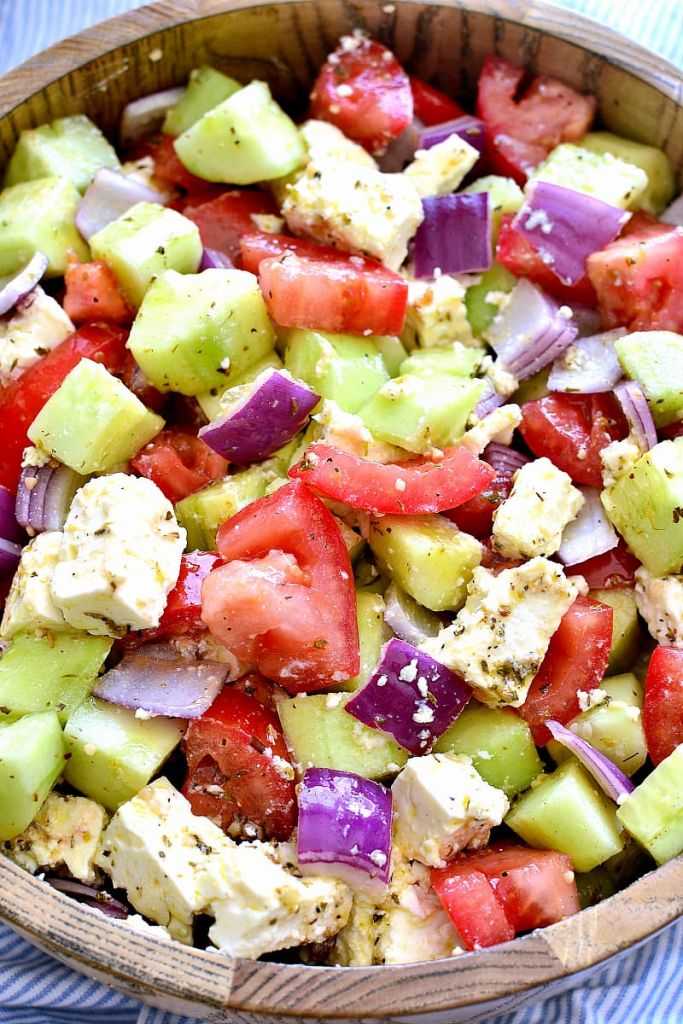
This fresh salad can come together in a pinch. With a handful of raw veggies, some cubed feta cheese, and a deliciously light vinaigrette dressing, it’s a quick and delicious no-fuss dish.
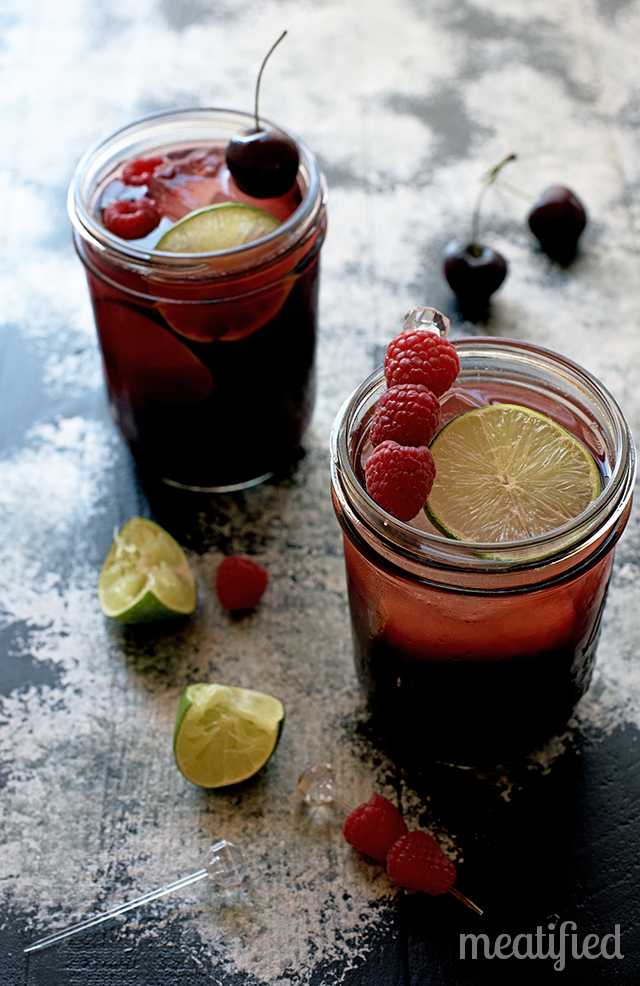
The colour of this mocktail alone makes it a perfect choice to add to your patio recipes arsenal this season. Pomegranate seeds and berries make a lovely garnish, and it will keep you and your guests refreshed on those long summer days.
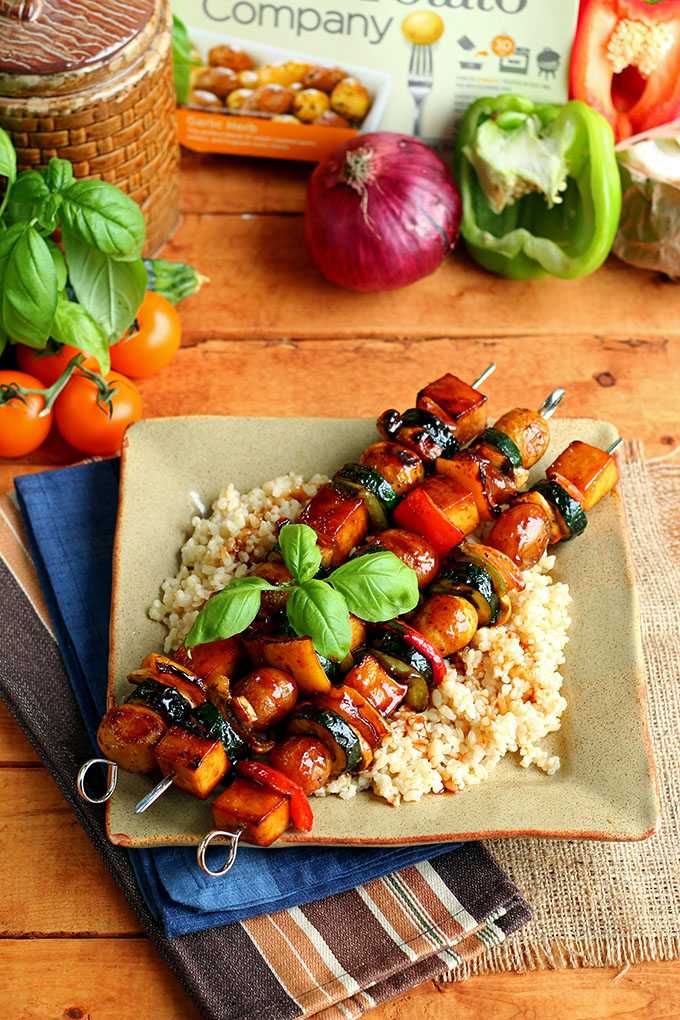
These appies pack an explosive flavour punch. With just five ingredients, you’ll be able to throw these together in no time and impress everyone with tasty and colourful treats.
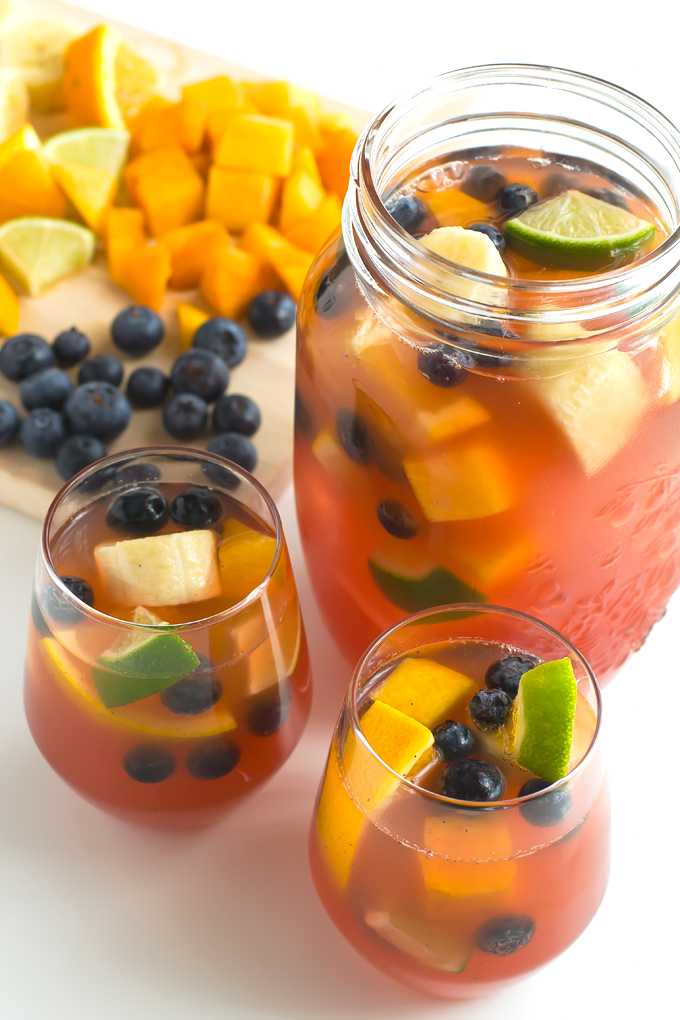
Possibly the most quintessential summer cocktail, sangria is perfect for entertaining. You won’t even miss the wine in this tasty recipe! Mix this fruity and bubbly concoction up in your favourite pitcher with some citrus slices and kick back.
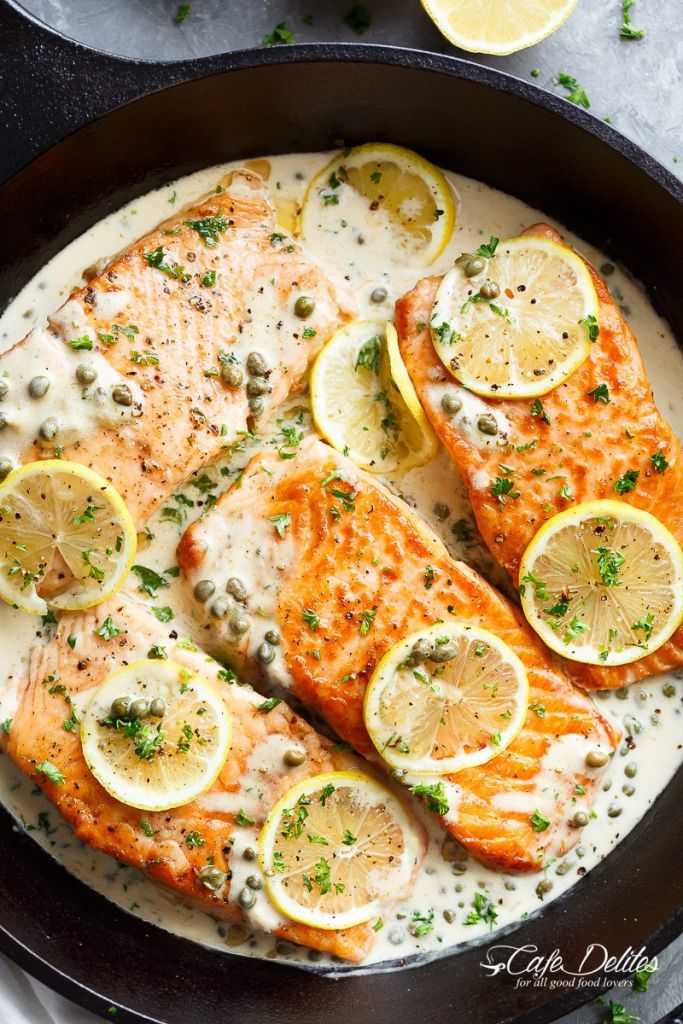
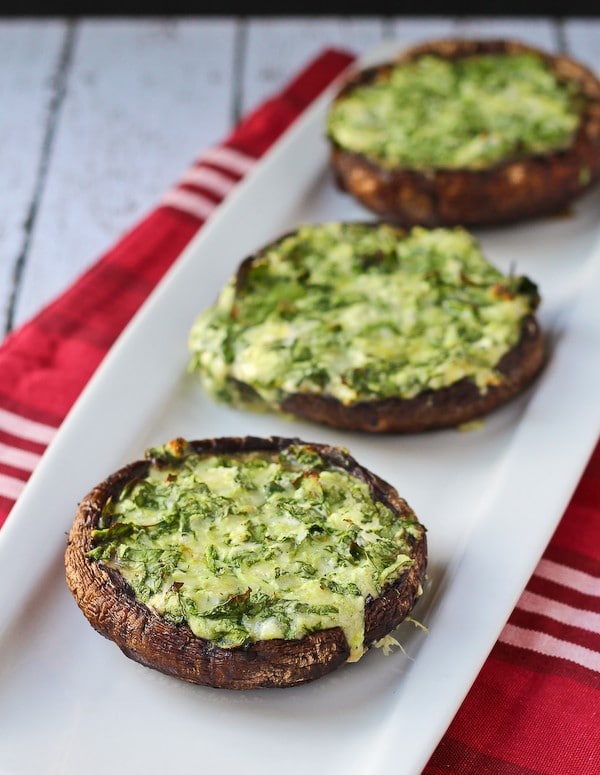
These make a great entrée if you’re looking to feed the vegetarians in your life. Portobello mushrooms are the perfect base for this delicious spinach and cheese filling.
The Golden Son by Shilpi Somaya Gowda Anil is the cherished eldest son of a large family from an Indian village, expected to inherit the role of leader of his clan and arbiter of its disputes. Leena is his closest companion, a fiercely brave girl who loves nothing more than the wild terrain they inhabit and her dear parents. As childhood friends, they are inseparable, with one of those rare relationships that transcends circumstance and the inequalities of life. But with the pressures and complications of adulthood, their paths begin to diverge. Anil journeys to America to pursue his dream of becoming a medical doctor, finding both temptation and trial at a gritty urban hospital in Dallas, Texas. In India, Leena leaves her beloved home to join her new husband in a distant village, only to discover her new family has unexpected complications. Anil and Leena struggle to come to terms with their identities thousands of miles apart. Many years later, their lives intersect once again. Altered by their choices and experiences, these two old friends are reunited when they need each other most. A tender and bittersweet story of friendship and family, The Golden Son illuminates the decisions we must make to find our true selves.
As Canadians, we are pretty darn proud of our culinary contributions to the world. We’re the nation that created poutine, Nanaimo bars, butter tarts, and maple syrup, so yeah, we take our food pretty seriously. Snacking is no different. What follows is an ode to these Quintessentially Canadian Snacks. Happy Canada Day!
Old Dutch Ketchup Chips
Is there anything more satisfying than polishing off a mini (or standard) bag of these almost too-red chips? Bonus, the stains on your fingers last for as long as the memory of that undefinably zingy and salty faux-ketchup taste.
The hard candy shell on a Smarties offering is superior to the candy shell on an M&Ms. Phew. Someone finally said it. These truly snackable treats are ideal constituents of a homemade, not very healthy trail mix.
Ruffles All-Dressed Chips
The existence of these chips demonstrates the principle that the whole can be greater than the sum of its parts. And greater, it is. The tang and zip of these vibrantly orange ridged chips keep Canadians coming back for just one more handful, until the bag holds nothing but fond, salty memories.
Nestle Coffee Crisp Chocolate Bar
Lighter-than-air wafer surrounded by a cloud of coffee-flavoured cream makes the Coffee Crisp a delight to eat. Pro tip, for the best chocolate-to-filling ratio, go for the fun size.
Crispers
A very hard, but somehow also crumbly biscuit base cut into a unique geometric form that can only be described as a wavy square. These Christie brand crackers offer a pleasurable snap when eating, and come in quintessentially Canadian chip flavours like Ketchup, All-Dressed, and Salt & Vinegar.
As you prepare to celebrate Canada’s 150th Anniversary, consider adding a quintessentially Canadian snack food to your barbecue spread, and remember that part of what makes Canada great is how strange we all are. Happy Canada Day!
With the introduction of the Instant Pot to my kitchen, making meals for my family has gotten so much quicker and more efficient! I’d been hearing about the Instant Pot and its miraculous time-saving ways, and there is no better time to try one of these fantastic tools out than the summer. Not only does this amazing cooker save time and energy, but it also helps keep your kitchen cool with its super-efficient insulated cooking system – no more sweating over a steaming pot on the stovetop or turning your kitchen into a sauna by roasting dinner in the oven on a hot day! As an added bonus, less heat lost into the air in your kitchen means less energy needed to cook your meal perfectly, helping to minimize your energy footprint for a greener kitchen.
The Instant Pot’s myriad functions make this multifunctional cooker more than worthy of its counterspace footprint – with pressure cooker, slow cooker, rice cooker, steamer, sautéing, and warming functions, this handy package can replace multiple old, worn-out appliances in your kitchen – even down to your yogurt maker, with pre-calculated programs for cooking soups, meats and stews, beans and chilis, poultry, white rice, multigrain, and porridges, to take the guesswork out of preparing these staple dishes.
While I was skeptical at first that the Instant Pot, with its wide range of uses, would measure up to appliances that focused only on a single utility, I was blown away by how well it performs all its functions. In a head-to-head with my rice cooker, the Instant Pot managed to cook rice perfectly in half the time! I was equally impressed by the ease with which it cooked lentils (only 30 minutes from dry!), soup (tasted like it had been simmering all day after only 45 minutes!), and beef (falling-apart-tender in under an hour!) – all-in-all, this multifunction miracle won me over quickly and completely.
London Drugs carries two models of the Instant Pot – the IP-DUO60 V2 and the IP-DUO80, and I’ve tested them both to help you choose which model is the best fit for your kitchen. The two models are almost identical except for their size, boasting the same great rundown of features – multicooker capability, easy steam-release valve, automatic stay-warm function, heavy-duty stainless steel inner pot, included steam/roasting rack and utensils, detachable power cord for easy storage, and more.
The primary difference is in the size, with the DUO60 having a 6-quart (roughly 5.7-litre) maximum capacity, and the DUO80 holding up to 8 quarts (approximately 7.6 litres). This difference adds up to roughly two inches of difference in diameter and another two inches in height, which sounds minimal, but when seen side-by-side, the DUO80 is a very clearly a much larger appliance (it consequently also takes slightly longer to come to temp or full pressure). If you’re cooking for a large family or like to make large batches of meals to freeze, I would definitely recommend the DUO80 for its extra capacity, but if your kitchen space is limited and you don’t need to feed crowds, the DUO60 is the way to go. If you’re not sure which model will work best in your kitchen, I definitely recommend looking at the product at your local London Drugs – as the Instant Pots are packaged very efficiently, just looking at the box gives you a fairly accurate idea of how much space it will take up in your kitchen.
All in all, using the Instant Pot has been an absolute pleasure, and I expect I’ll be using it many times a week long into the future. If you’re looking to invest in a new cooking appliance or replacing an old one that’s seen better days, I can’t recommend this product highly enough!
Korean-Fusion Style Burritos, makes 6-10 servings. Recipe time: 1 hour (not including burrito assembly)
Ingredients for kalbi-inspired shredded beef:
1-2 kg large chunks of braising or stewing beef (2 kg will fit in the DUO80, but may not fit in the DUO60)
½ cup rice wine
½ cup soy sauce
1 Asian pear, grated
5 tablespoons sugar
½ large white or sweet onion, grated
6 cloves garlic, minced finely
2 tablespoons sesame oil
2-3 green onions, chopped
Ingredients for burritos:
6-10 large burrito-sized tortillas
3-5 cups prepared white or brown rice (approx. ½ cup or more prepared rice per burrito)
1-2 cups seasoned rice vinegar (or plain rice vinegar with 2 tablespoons each of sugar and salt whisked in, per ½ cup vinegar)
Chopped kimchi (approx. ½ cup or more per burrito, to taste)
Chopped raw cabbage or other greens
Chopped cilantro
Chopped green onions
Sriracha (optional)
Mix all ingredients so that the meat is well-coated (this may be done inside the Instant Pot to minimize dirty dishes).
Place the beef in the Instant Pot, and pour in remaining mixture on top. Close Instant Pot lid firmly, and select the Meat/Stew function with the High Pressure option for 50 minutes.
While the meat cooks, cook your rice in a second Instant Pot, rice cooker, or on the stove (you can also wait until the meat is done and cook it in the Instant Pot your beef is currently cooking in, though you’ll have to wash the pot in between – if you do this, recipe will take an additional 20 minutes, approximately). When rice is cooked, allow to cool slightly, and sprinkle with ½ cup seasoned rice vinegar per cup of prepared rice before mixing gently to distribute the vinegar evenly.
Chop kimchi, raw cabbage or other greens, cilantro, and green onions.
When the Instant Pot is finished cooking, remove the beef to a clean bowl. Meat should fall apart easily – shred it using two forks before serving.
Allow each diner to assemble their burrito to their own tastes.
(The liquid left in your Instant Pot will be highly flavourful, and can be used as a great beef soup base after straining out any remaining solids and skimming off the fat.)


 The Golden Son by Shilpi Somaya Gowda