Capture the Beauty of Fall with these Photography Tips

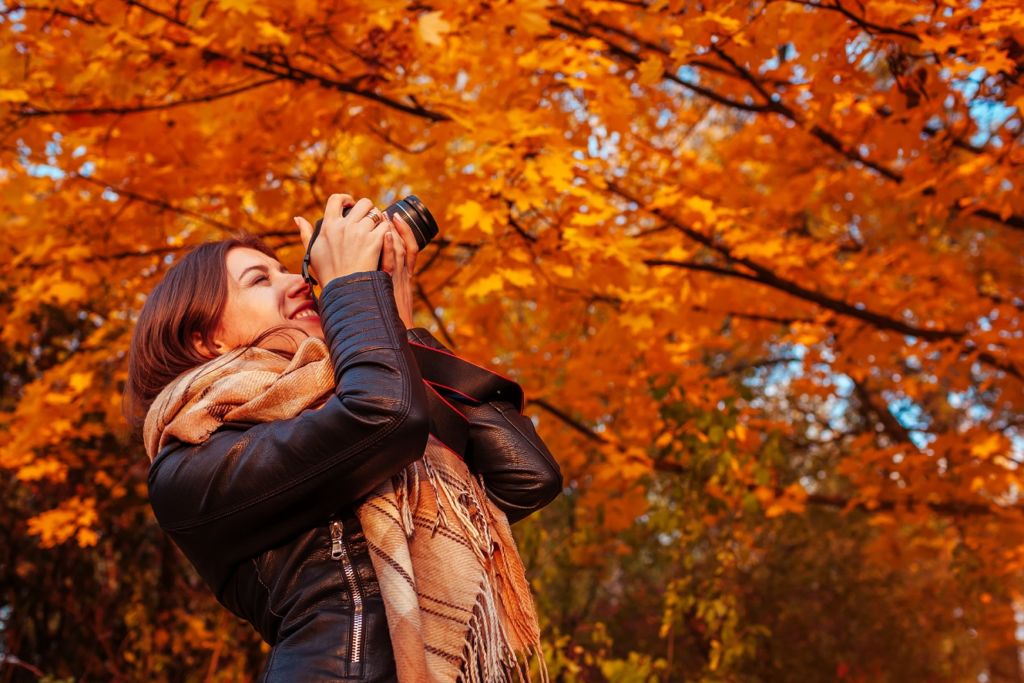
It’s hard to pick a favourite time of year for photography, but fall makes a pretty good case for the most photogenic season. Fall is the perfect time to explore your surroundings and experiment with your photography; the vibrant leaves and soft light create an opportunity for all kinds of beautiful landscape and portrait shots. To help spark your creativity, our LDExperts in the Photolab have some tips to share for capturing great photos of the fall foliage. Keep reading below to see them all!

Explore Your Location

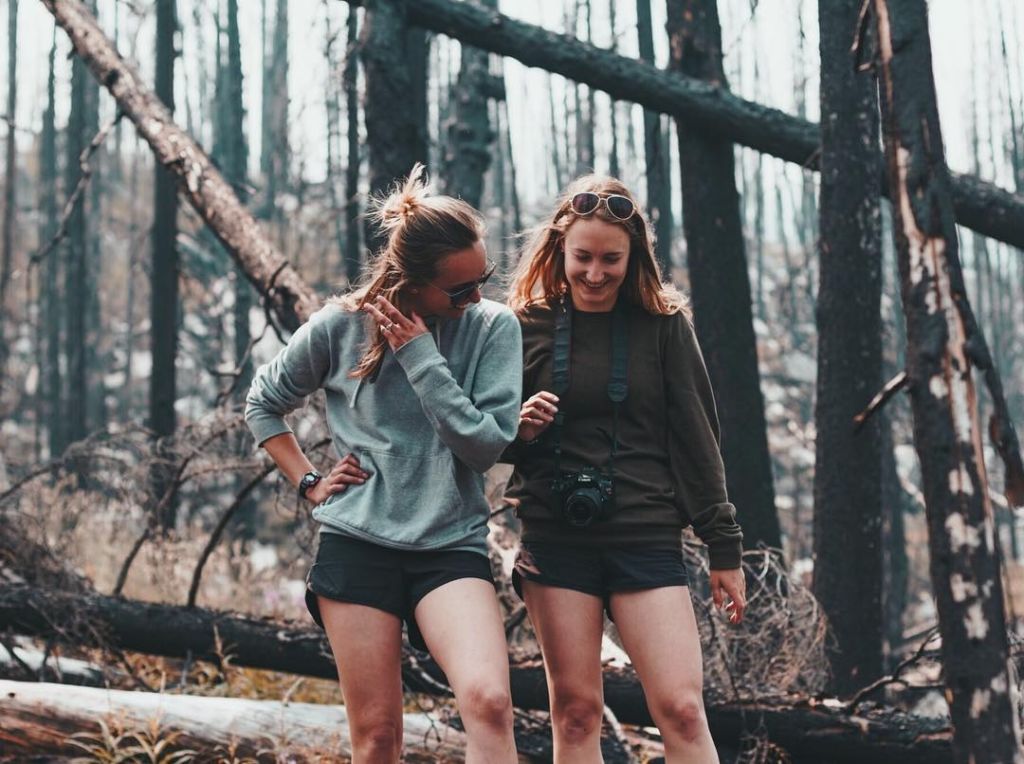
When heading out shooting, take the time to explore your location and find the perfect subject. There might be a tree with glowing red leaves right around the corner from that one that only has half its leaves left. It also helps to do a little research when your planning your shoot – take a peek through local hashtags on Instagram to see where people have spotted some of the best and most colourful trees, or search out articles from the previous fall season which may indicate some good spots to check out.
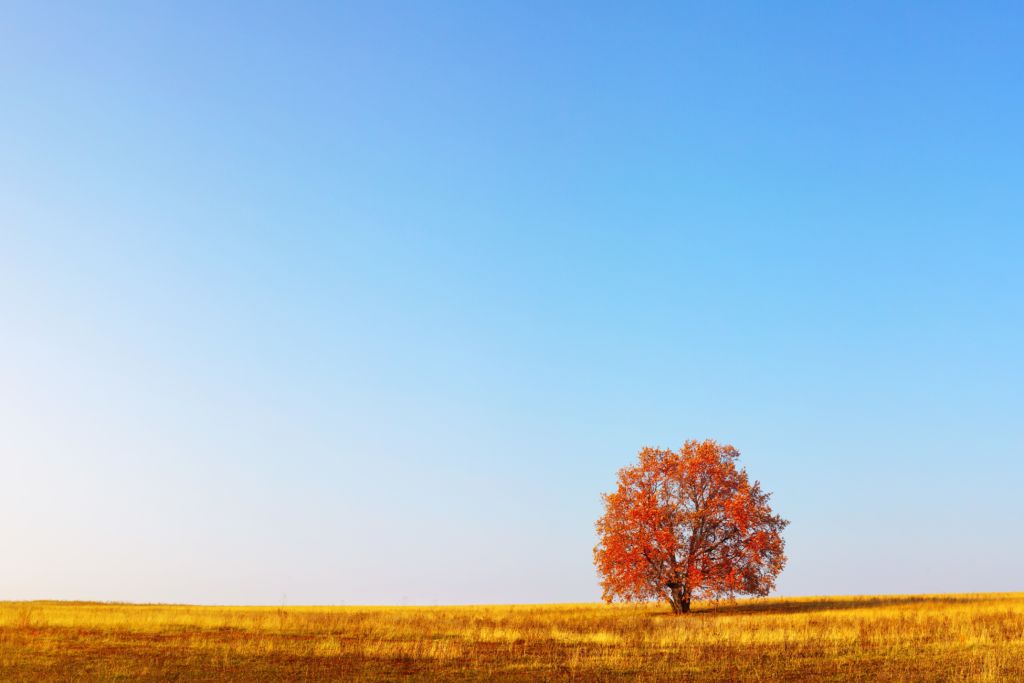
Single vs Multiples

A single leaf vs. a pile of leaves. A single coloured tree alone in a field vs. a rolling hillside covered in vibrant leafy trees. Play with numbers and create drastically different images.

Use All Kinds of Subjects

Obviously, the fall season presents beautifully coloured trees. But fall produces much more photo opportunities than just the trees; fresh mushrooms in the forest, apple picking, pumpkin patches and corn mazes also make for great fall photos. A photo walk around your neighbourhood might unearth some seasonal photo inspiration. Or check out event listings in your area to see what other fall activities might present some fall-themed photo ops.
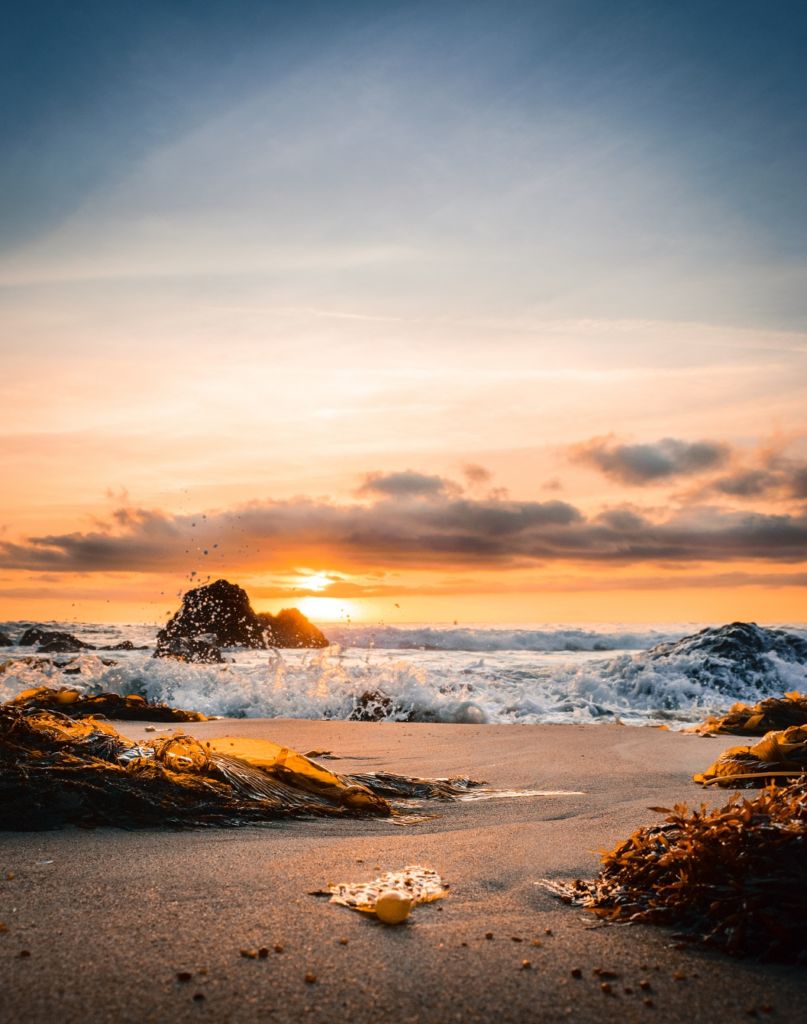
Shoot Rain or Shine

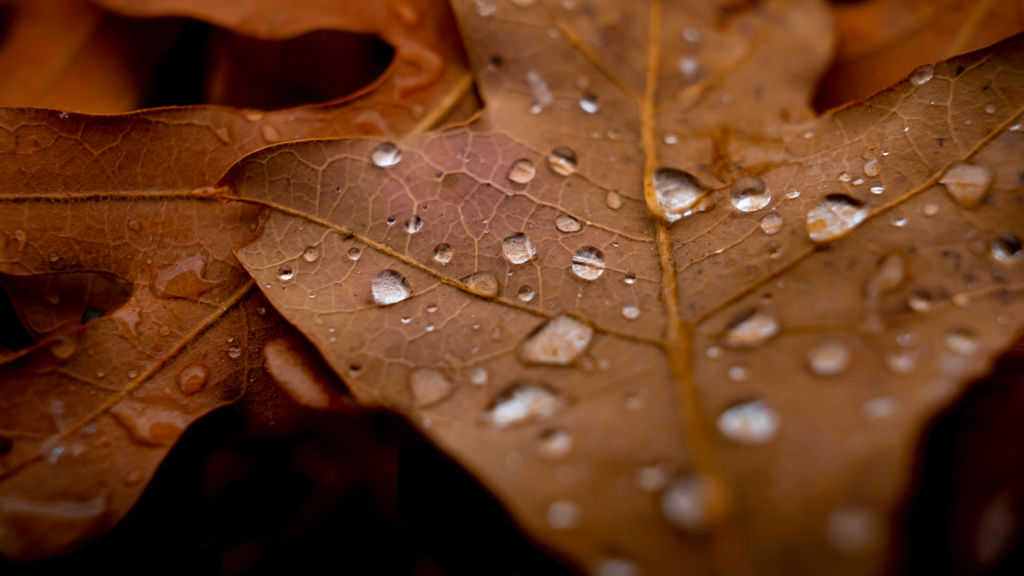
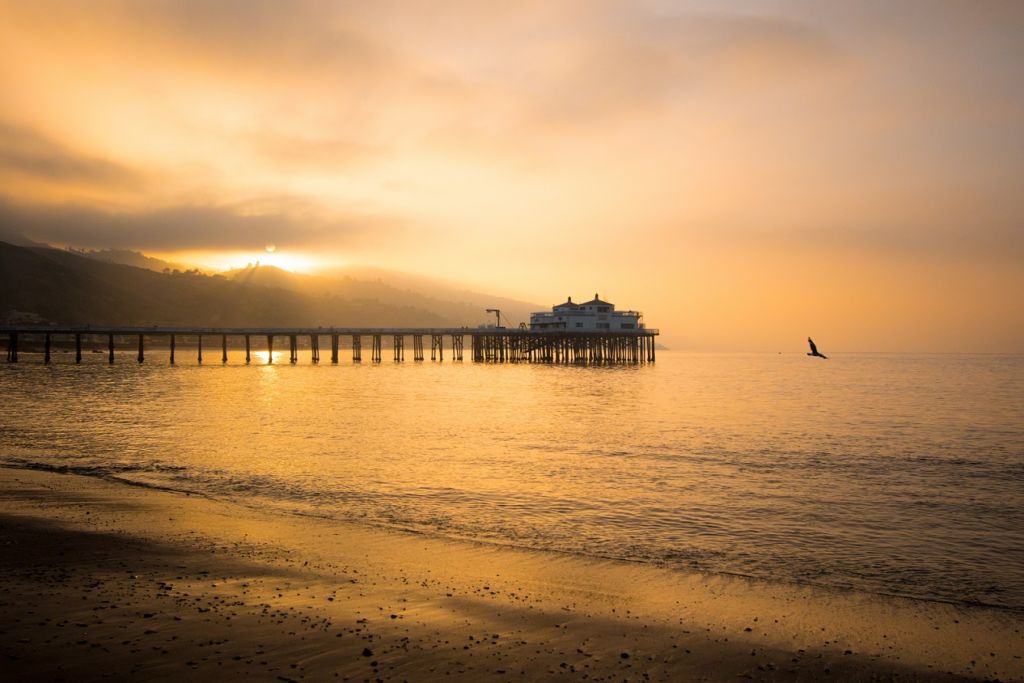
Don’t rule those rainy days out! Fall colours pop on overcast days. The moisture also lends itself nicely photography. Think of wet droplets on bright leaves. Imagine a bright red leaf floating in a puddle with a pretty reflection on the water surface. Overcast days might surprise you so don’t write them off. Instead, be excited about them! If it’s sunny, the early morning and late evening sun is ideal. It creates a warm glow and sidelight. If you’re shooting portraits, this may be the only light source you need!

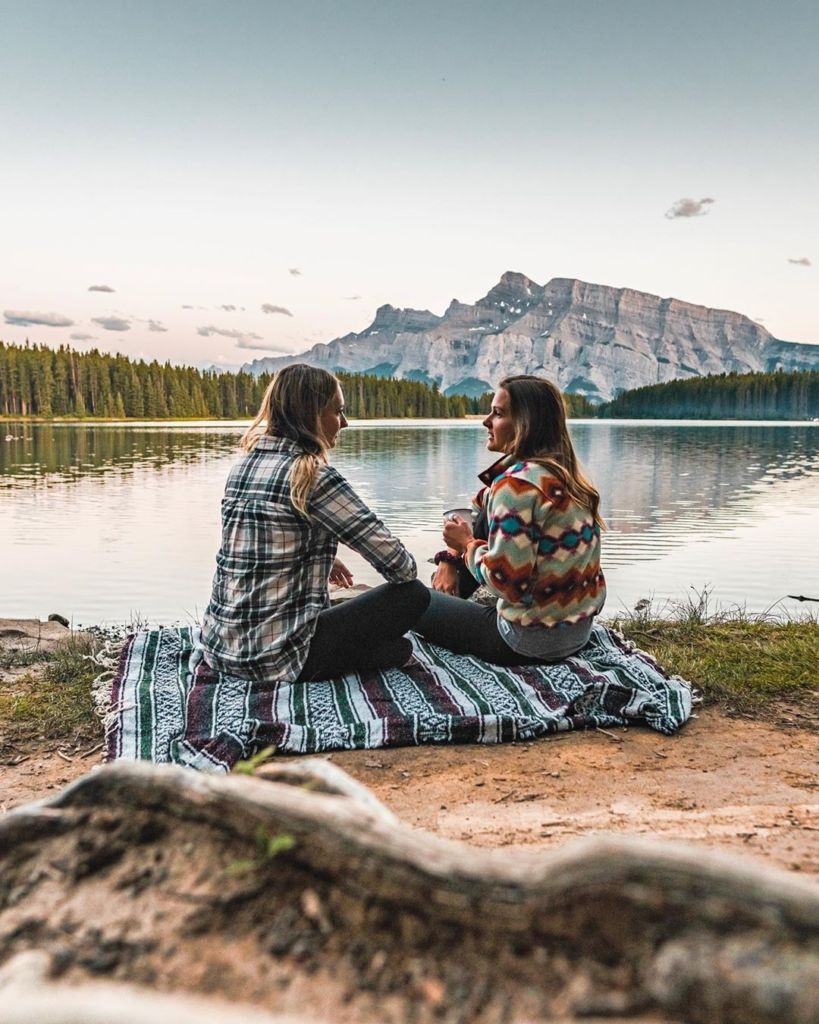
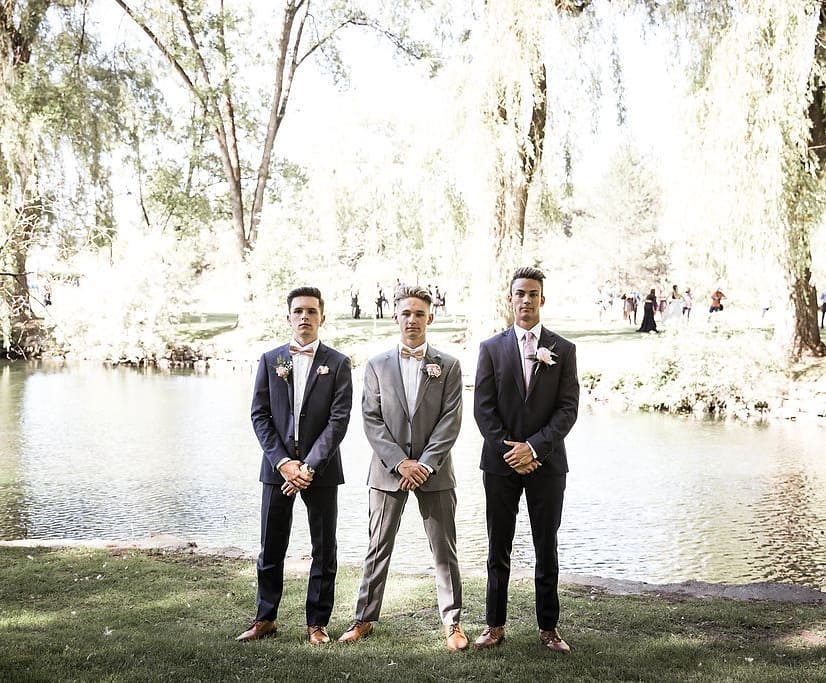
Capture Fall in Action

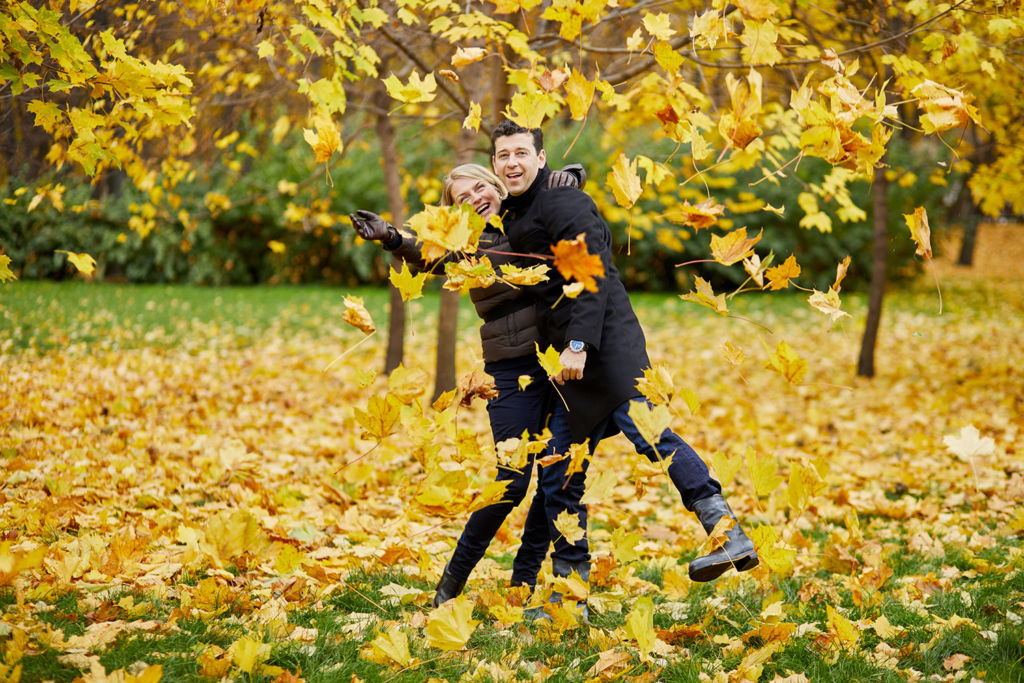
If you’re shooting people, there is lots of action you can capture in the fall, from children playing in leaves, to a couple standing face to face with leaves falling around them (you’ll need someone out of frame to throw them in the air for that one!). The act of pumpkin picking or apple picking also lend well to action shots. For more subtle action, someone sipping steaming apple cider in a colourful park is simple but impactful.

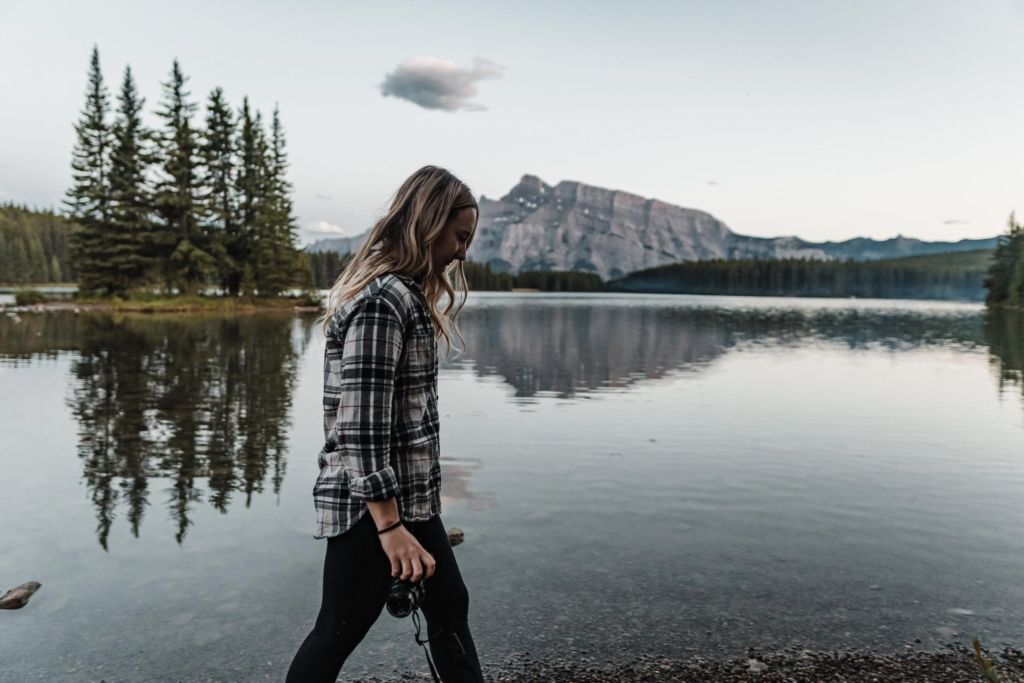
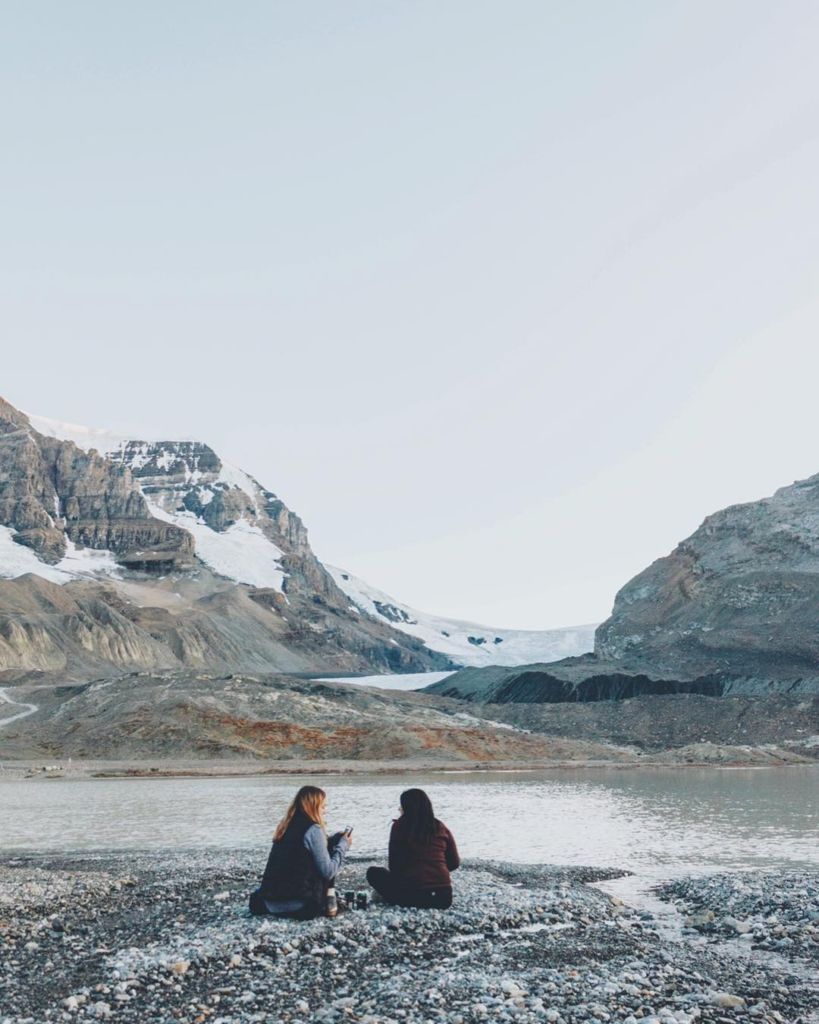
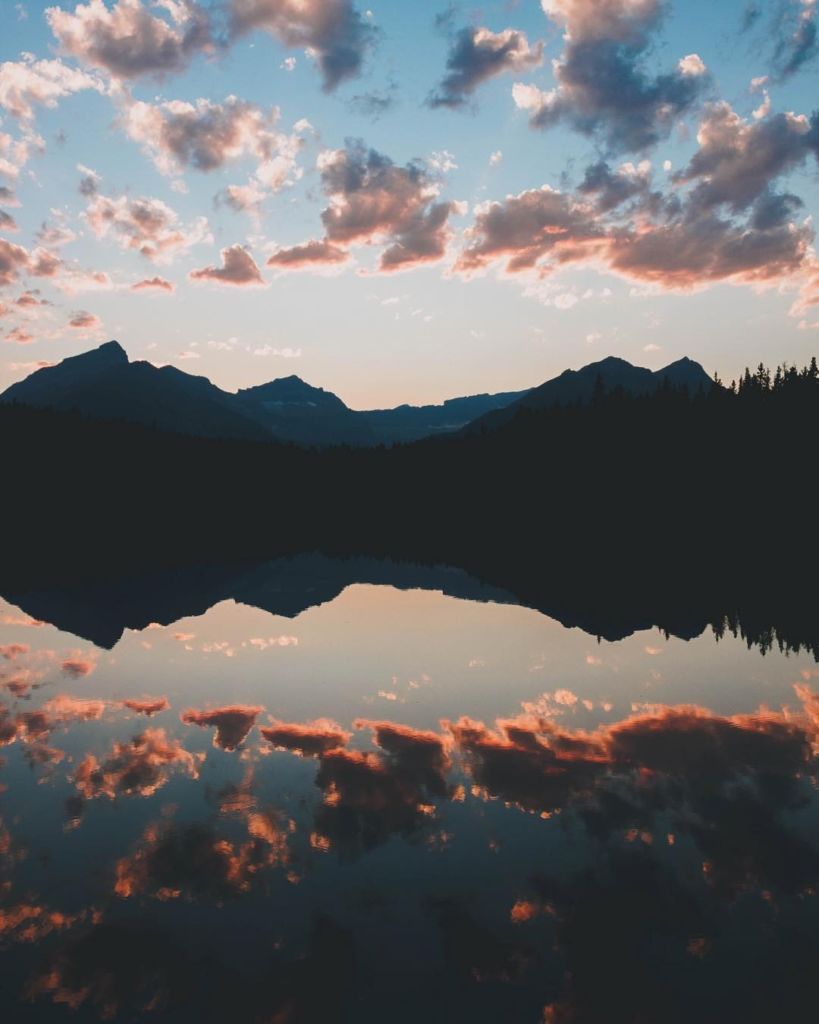
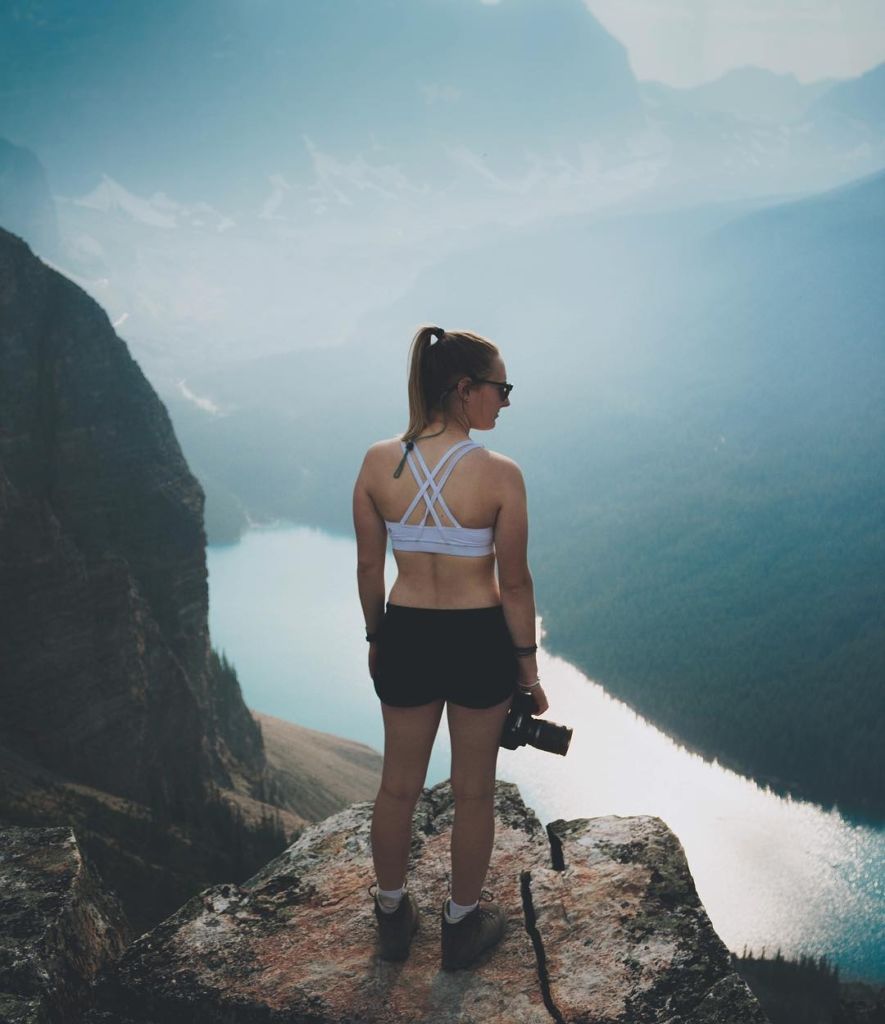
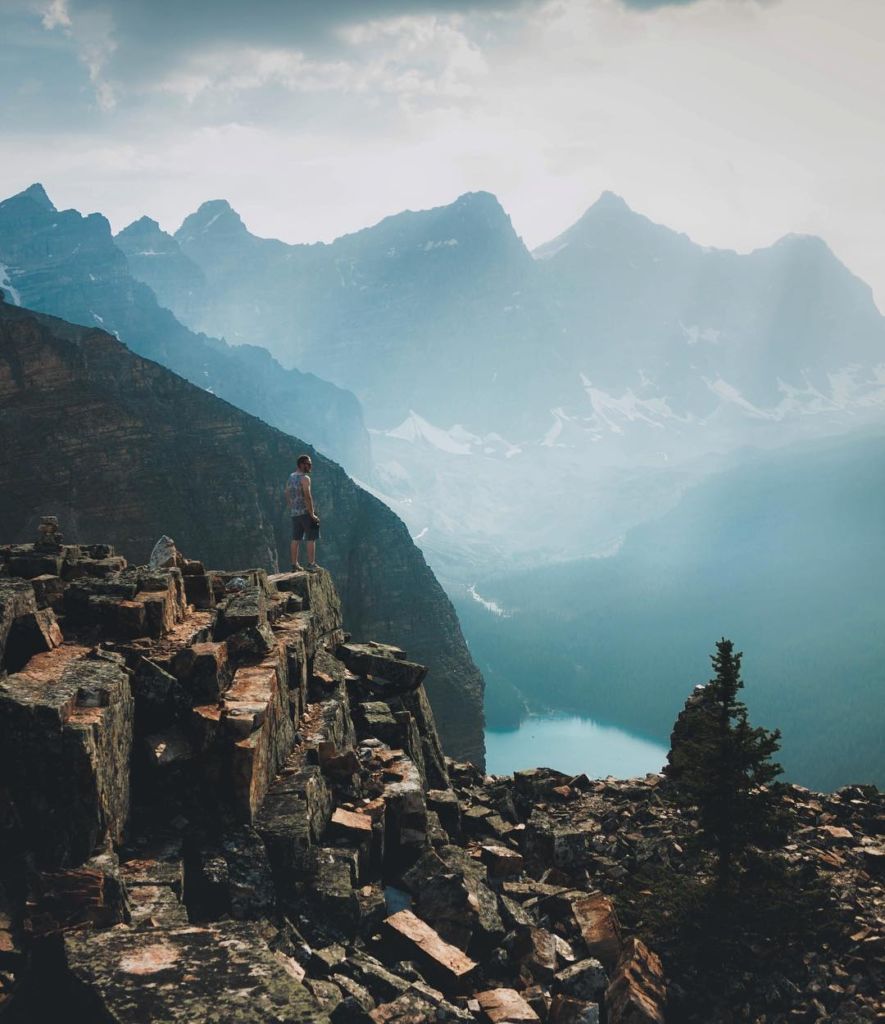
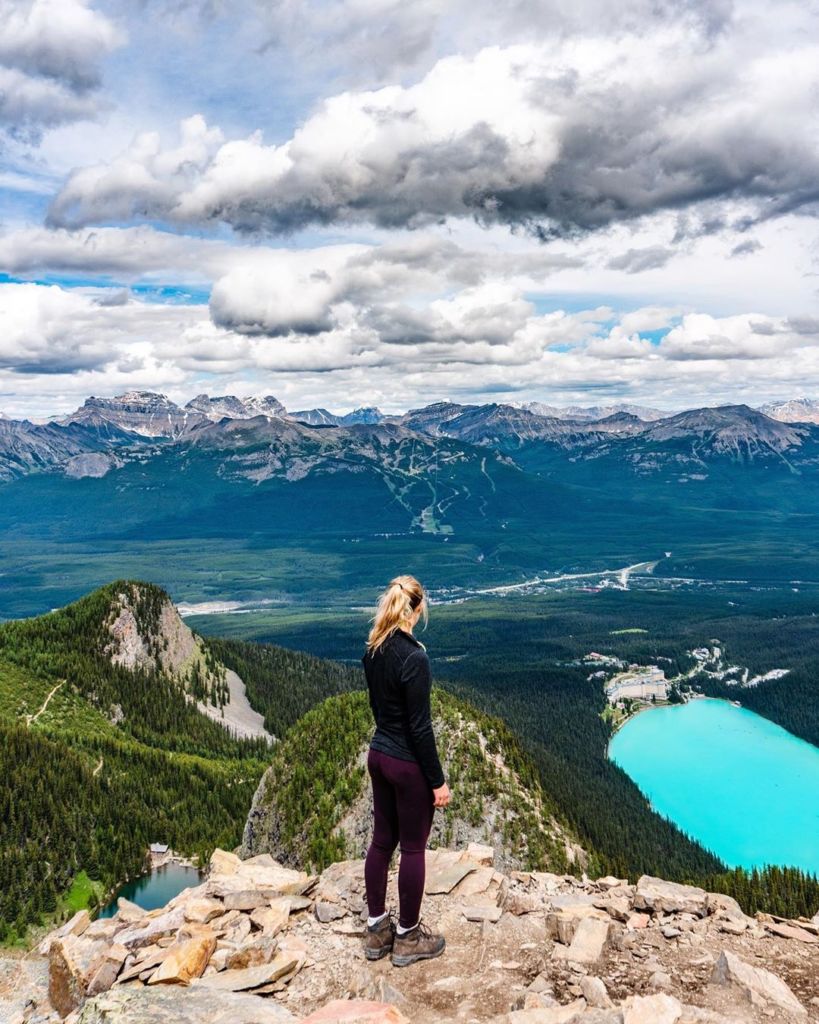
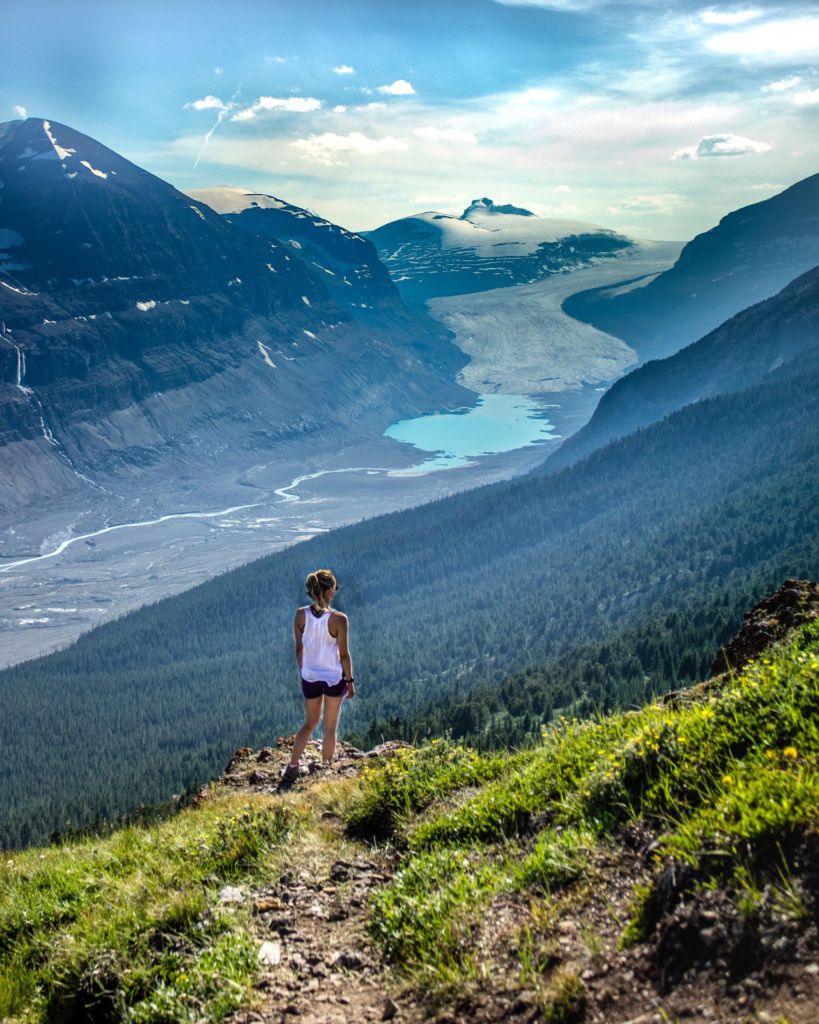
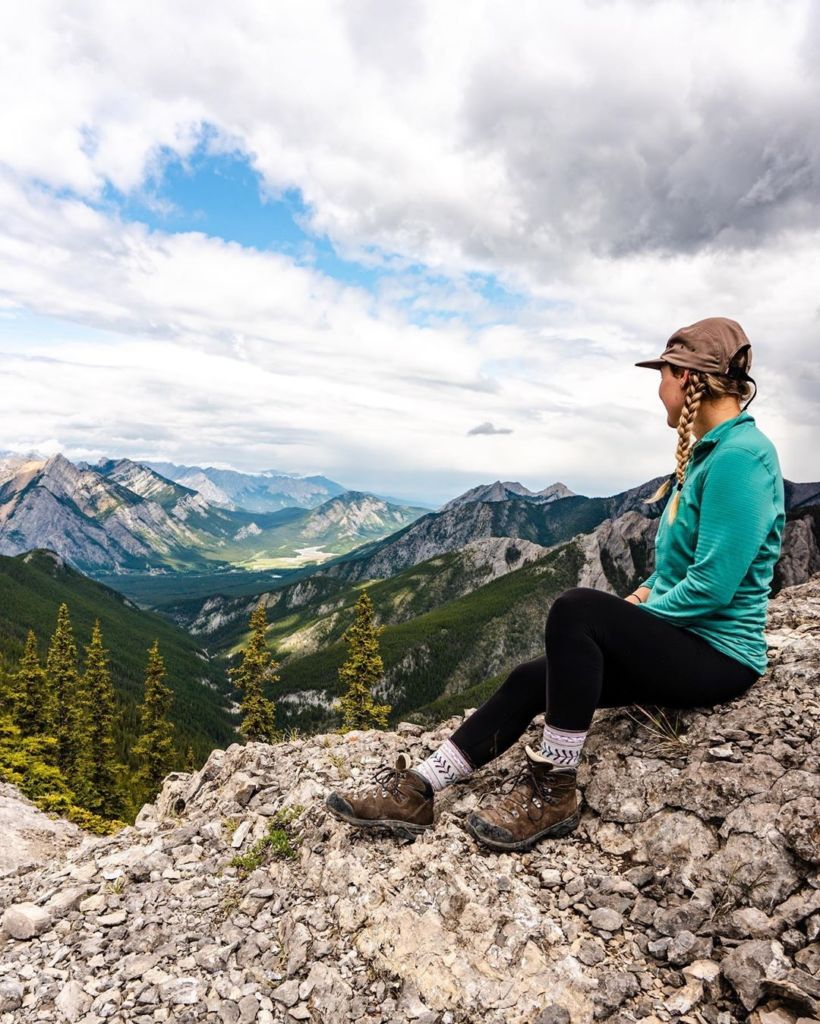
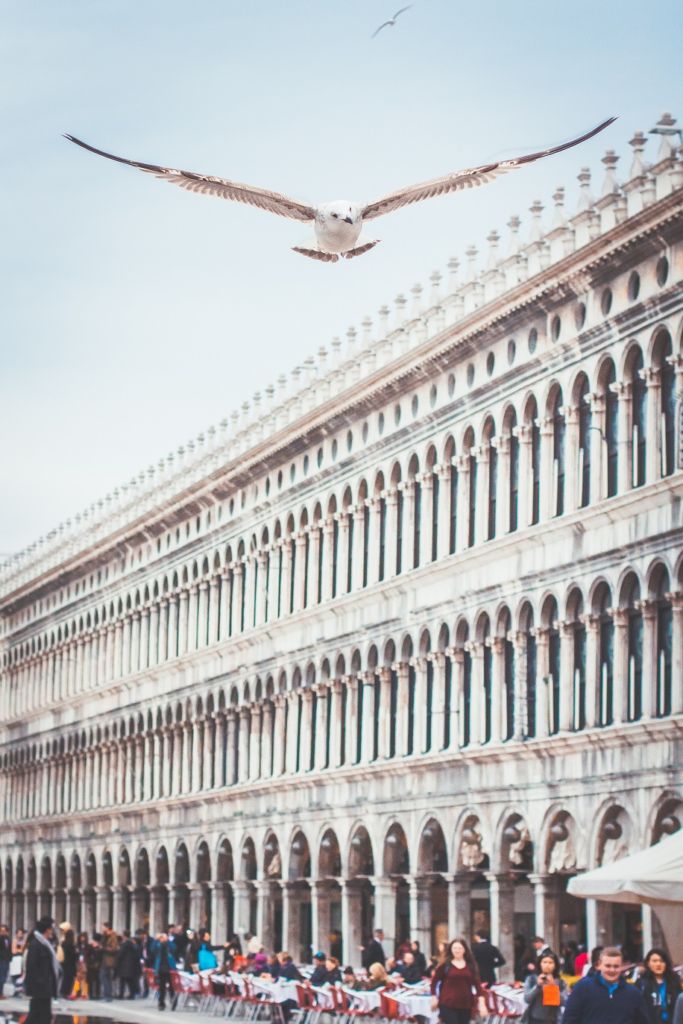
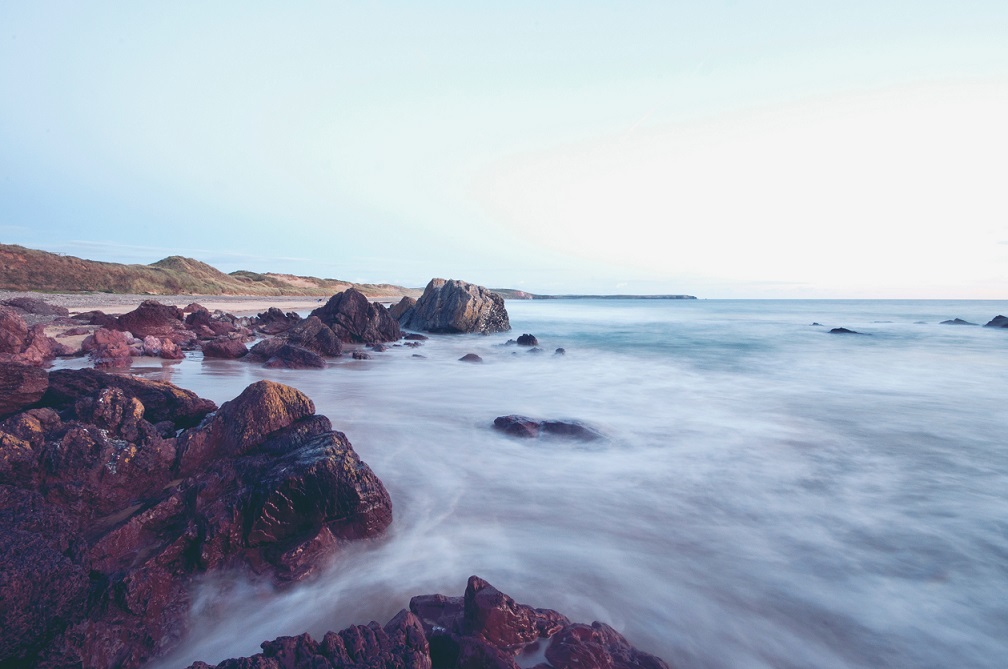
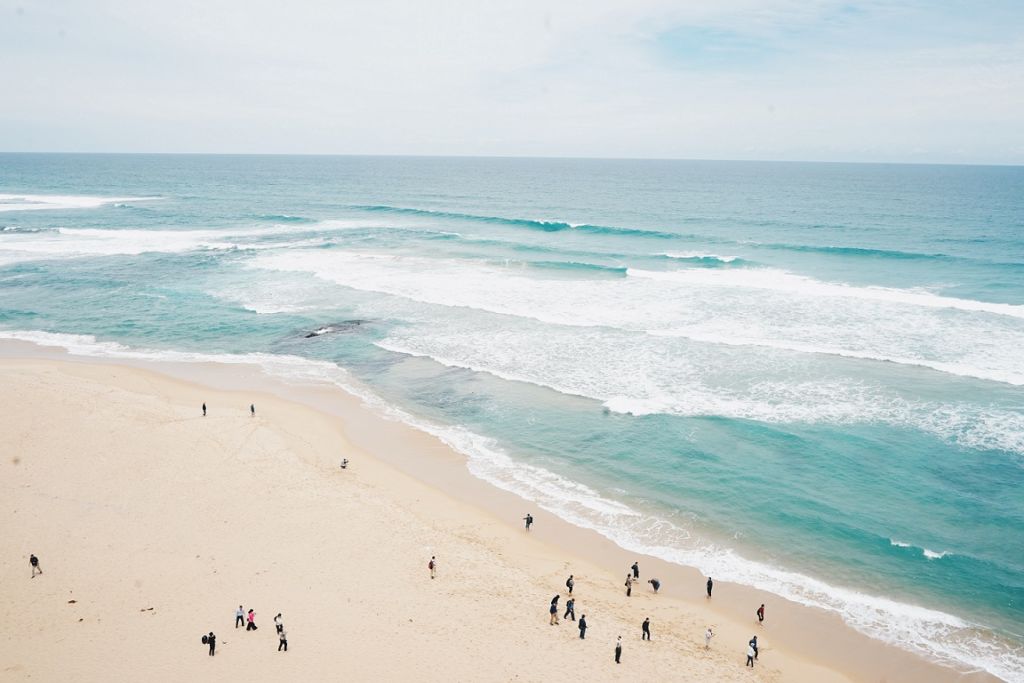
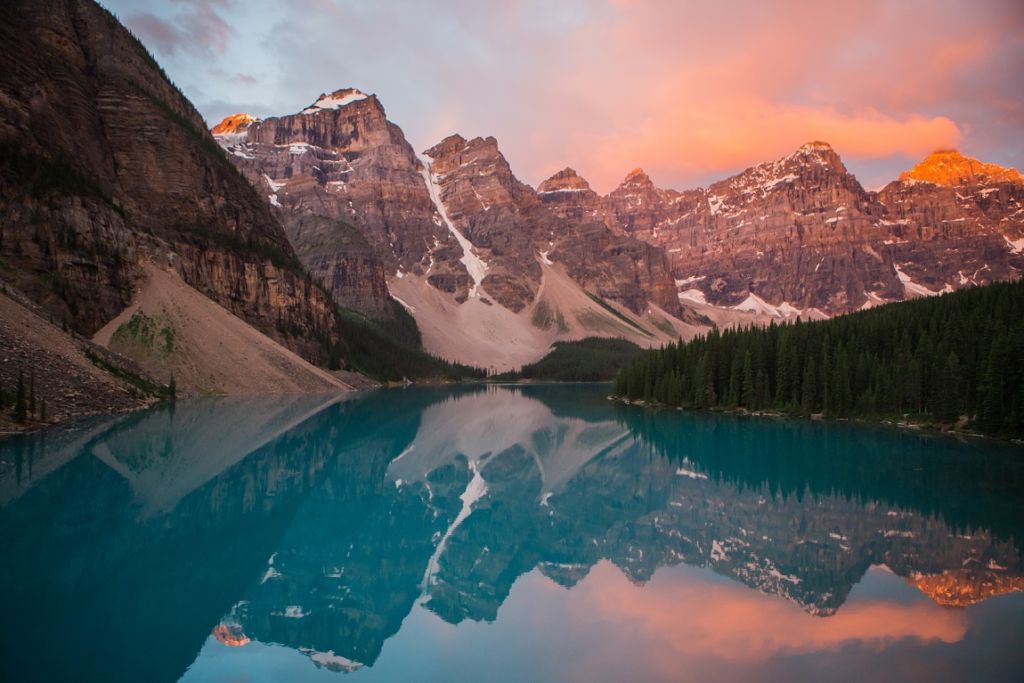
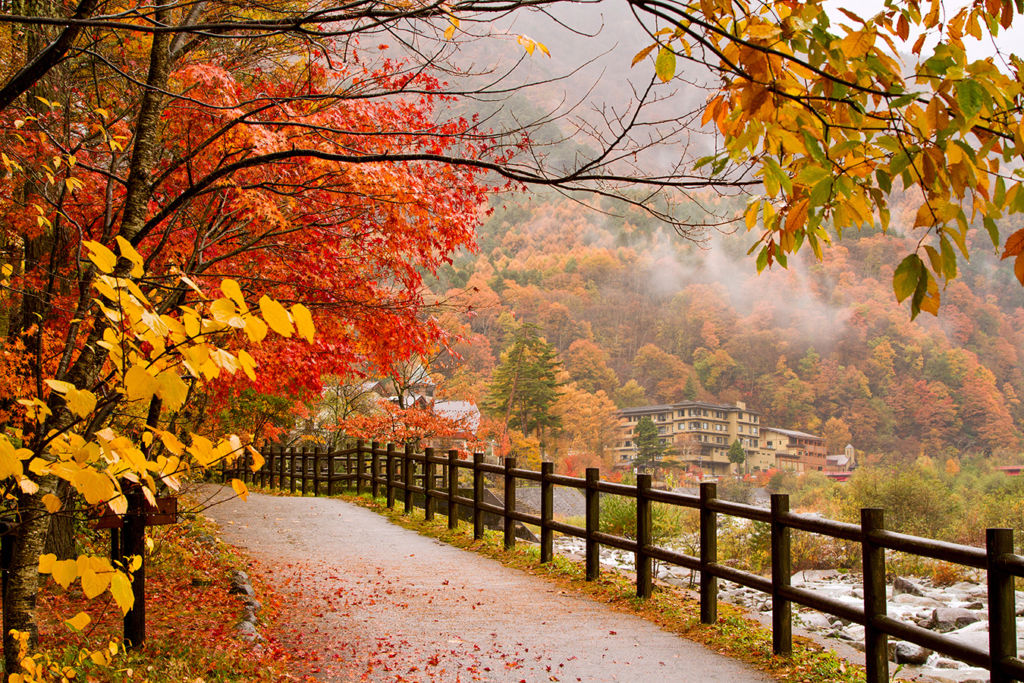
Try New Vantage Points

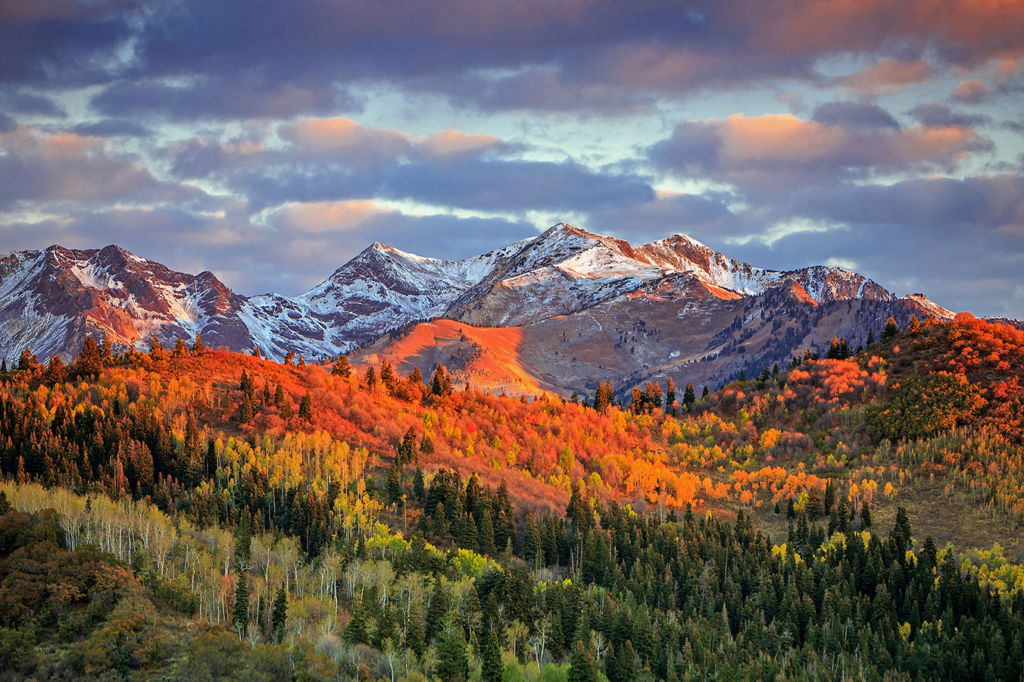
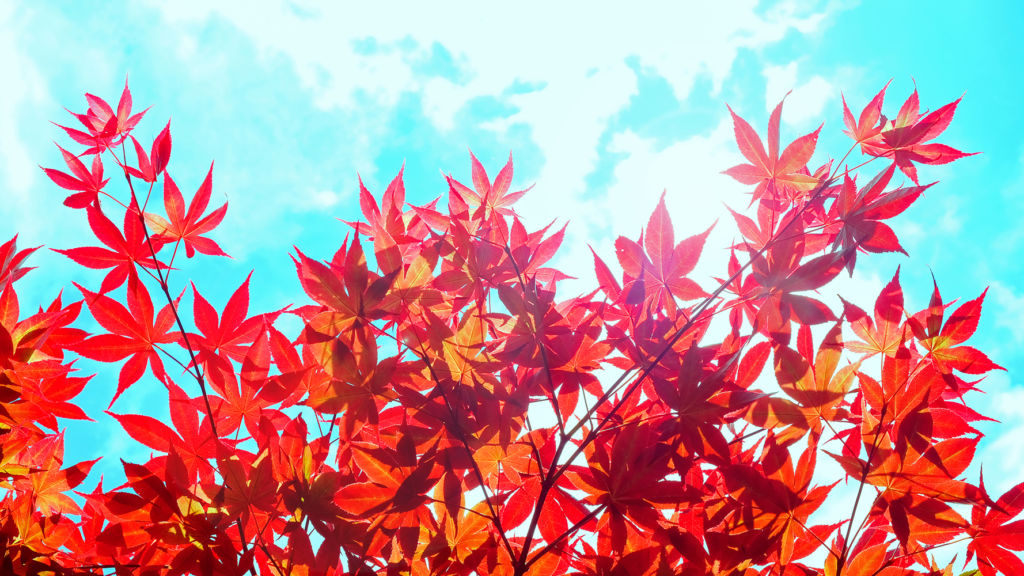
Glowing leaves on a blue sky, shot from below can have beautiful colour contrast, but so can climbing a hill to get the overview of the valley covered in turning leaves. Play with your vantage point and consider what you want as an end result.

Tech Corner (Bonus Tips for the Advanced User)

Focus

Fall air can be crisp, and allows your eye and your camera to see further when compared to summer. If you’re shooting wide, stop your lens down to F16 and capture that depth of the image. Or, if you’re shooting people, open your lens up to F2.8 and have that pretty bokeh with coloured trees beautifully blurred in the background.
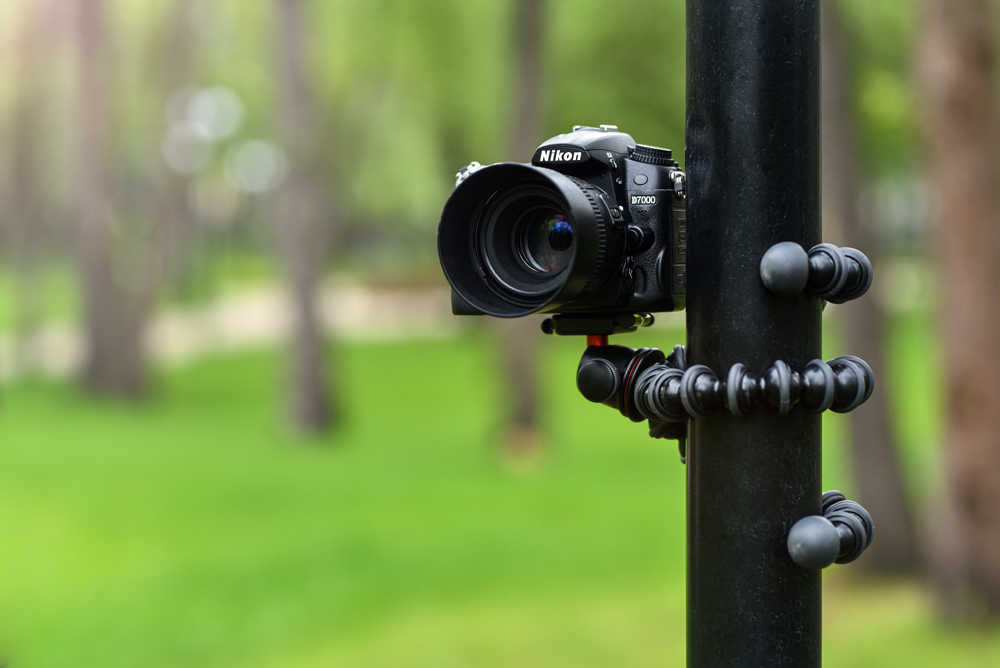
Equipment

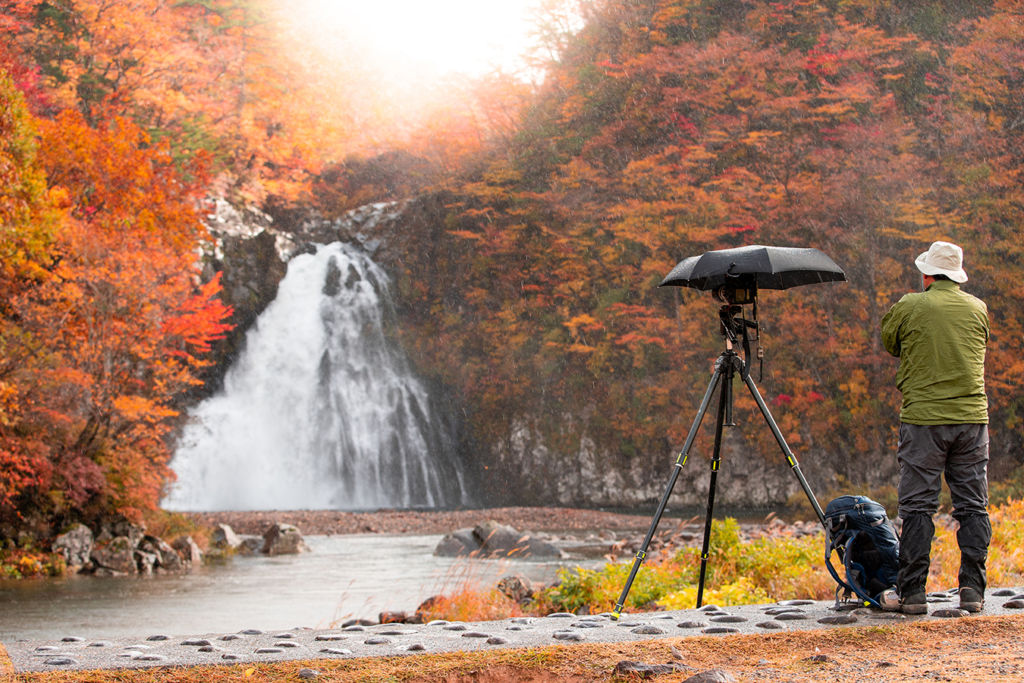
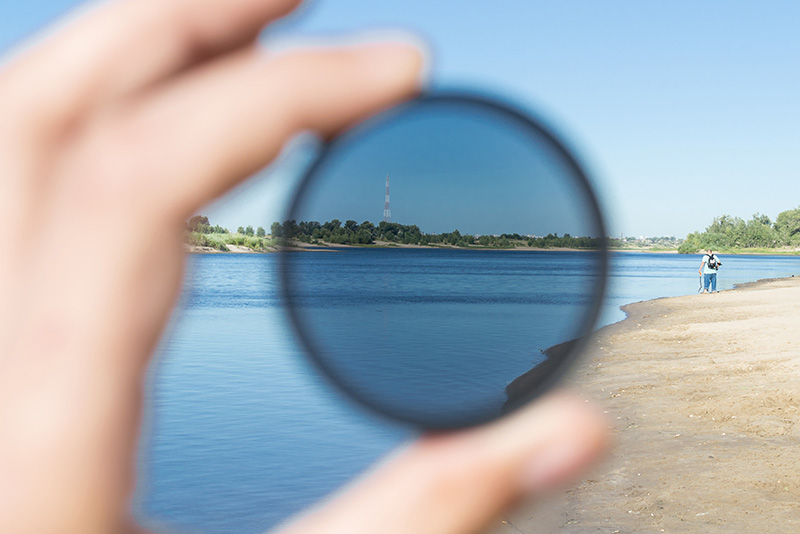
Tripod and filters are key. Shooting with a tripod will allow you to shoot at slower exposures and lower ISO’s while shooting deep depth of field. Filters will allow you to add contrast and pull back the sky. If you’d like to learn more, pop by a London Drugs store and talk to an LDExpert today to find out how filters can help improve your fall photography.

Showcase Your Best Fall Shots

After all that attention and care you’ve taken to get the best possible fall photos, you’ll want to do them justice by showcasing them! To truly make the colour in those fall leaves pop, an aluminum metal panel is a great print surface for your images. The high-gloss finish will make them look sharp and vibrant. Our Photolab can even print them up to 40×60, for images that will give that ‘wow’ factor. Glossy prints and enlargements, as well as metallic prints, are also excellent choices for displaying your colourful fall photos.

Need some help picking the right print surface? Our LDExperts are always happy to help! Just visit us at your local London Drugs Photolab. If you already know exactly how you want to showcase your images, you can get started with your order online, or on your smartphone using our London Drugs Photolab App for iOS and Android.


Expert Tips for Bringing Your Camera on Your Next Camping Trip

A camping trip is one of the best ways to get out and enjoy all that the great outdoors has to offer – especially in the summertime! It’s all about turning off your phone, breathing in that fresh air, enjoy others’ company, and taking in the beauty of nature. For Canmore Alberta-based photographer Sarah Magyar, it’s also an opportunity to snap some truly great photos to remember the whole experience. If you’re keen to capture your next camping adventure, you’ll want to check out Sarah’s 7 tips below for bringing your camera along while camping.

Bringing my camera camping is something I always do. I don’t necessarily bring it for ‘professional’ photography reasons, but more so I can capture moments. My friends and I camp a lot, even if half of us have to work the next day, so bringing my camera means I get to capture and keep memories of smiling faces, people enjoying each other’s company and most importantly people shoving hotdogs and smores in their mouth!

Don’t forget your camera

So tip #1 for bringing your camera on your next camera trip is well, bring it! Capturing those authentic memories will mean more to you than the most perfect landscape image. Capture the moments that you want to hold on to forever: the ones you can look back on in years to come that will bring a smile to your face and remind you of the way things smelt, felt and looked.

Pack your lenses in the car

Tip #2! If you’re car camping, bring a few lenses, or all your gear! There are so many opportunities for photos while camping: portraits, landscapes, products, sports, the list goes on! So you’ll want to make sure you have all your lenses so you don’t miss an opportunity to get the perfect shot. Plus, you’re car camping so it’s not like you have to lug it around with you, just keep it safe and locked in your car!

Have extra batteries on-hand

Tip #3 don’t forget the extra batteries! We’ve all been there, you have the perfect shot lined up, you go to flip the switch to turn on your camera and it doesn’t turn on. I must say it is one of the worst feelings in the world! Making sure you double, even triple check will guarantee you won’t miss that awesome shot!

This is especially important to remember while backcountry camping as batteries can drain faster in the cold. Also, when you’re in the backcountry, there’s no outlets which means no charging your batteries if they die. I always make sure to bring at least two, or three, extra batteries with me when backcountry camping.

London Drugs has a great selection of batteries for almost all cameras! Added bonus they also offer a wide assortment of chargers for your batteries if you’re looking to charge all your batteries at once.

Keep your camera cool

Onto tip #4: if you’re going to be leaving your gear in the car while camping and it is hot out, you’ll want to protect it! Bring an empty cooler or something that will keep your gear cool and out of the heat. This will also protect it in the back of your car. I find this also helps with lens changes. Camping can be dirty and dusty, so make sure to keep your sensor and lens protected and clean.

Bring a portable tripod

Tip #5: Invest in a good/packable/reliable tripod! This will give you a chance to set up some great landscape shots, or allow you to maybe get in the frame and capture some memories with you and your friends. A tripod is always a good thing you to keep with you, especially if it’s small and doesn’t take up too much room.

Invest in a good backpack

Tip #6 is for both car camping and backcountry camping: invest in a good backpack! This will allow you to keep all your gear together. My bag has a rain cover which is essential when I am backcountry camping; the weather is unpredictable in the mountains and you never know if it might rain! I personally have a backpacking backpack that I put a camera insert in, however you can purchase bags with camera inserts in them. Having a good backpack will also help protect your gear when you are putting it in the back of the car or keeping your backpack in the tent with you while you sleep.

Get to know your surroundings

Tip #7: If you are a landscape photographer make sure to know the area that you’re camping in. Make sure you know where the sun will set and rise to make sure you capture those beautiful sunrises and sunsets. Whether you’re car camping or backcountry camping, know where you’re going to be sleeping and do a quick internet search to see if there is anything unique in the area you might want to capture.

Use a camera clip

Tip #8 is primarily for backcountry camping and something I find to be essential. Invest in a good camera clip that attaches to your backpack strap. Some are sleeves that slide onto your backpack strap and some are metal clips you clip on. I love capturing moments during camping trips and this allows me to have my camera accessible at any moment so I don’t have to stop and pull out my camera and slow everything down.

Print your favourite shots

When I’m finally home from an amazing backpacking or camping trip I always try to order some of my favourite images as prints. This allows me to keep those moments with me. It is also a great gift idea! Have a great photo of your best friend laughing at the campfire? Why not put it on a mug or a blanket or pillow? Better yet, you can create a poster collage of a whole bunch of images from that trip, or even use those photos to create your own calendar! The London Drugs Photolab has a great selection of different ways you can print your favourite memories and share them with your friends, or keep them for yourself.

7 Hikes for Stunning Photos This Summer

Sparkling blue lakes, panoramic views of endless mountain chains, calm meadows with wildflowers blowing in the breeze and breathtaking scenery all come to mind when you think about hiking in the Canadian Rockies. With the endless amounts of trails and mountains to summit, it can be easy to feel overwhelmed with all the possibilities of capturing amazing moments, wildlife or perfect landscapes. To help get you started, Canmore Alberta-based photographer Sarah Magyar has compiled her top 7 hikes to capture stunning photos this summer,  – some easy and some a little more difficult!

1. Tower of Babel

This is one of my all-time favourites. I am not one to re-do hikes, there are just too many to experience out here! However, this is one I try to do every year. It offers amazing views of the Valley of Ten Peaks, Moraine Lake and Consolations Lake.

It’s short but difficult, and is more of a scramble than a hike, but the views at the top are worth the physical effort. There are awesome rocks you can sit on, lakes you can shoot from above, and of course you can capture the world-renowned Moraine Lake.

2. Devil’s Thumb

Devil’s Thumb is an awesome hike in Lake Louise I would rate as moderate/difficult. The trail passes by Mirror Lake, Lake Agnes, Lake Agnes Tea House and Big Beehive making it one of the most photographic hikes I’ve done. You have the opportunity to capture some of the most picturesque spots in Lake Louise.

You follow the trail to Big Beehive then hang a right up to the top. You don’t actually get to the views of Big Beehive doing Devil’s Thumb but you pass right by the trail and I highly recommend adding the extra 500m to 1km to your trip as it offers an unbeatable view of Lake Louise.

3. Parkers Ridge

Parker’s Ridge is located along the Icefields Parkway and is an easy/moderate hike. Once you’re at the top you get awesome views of the Saskatchewan Glacier and of the Parkway. Highly recommend this one for families and anyone trying to capture something different such as a glacier!

4. Rock Pile at Moraine Lake

It is no secret Moraine Lake is one of the most beautiful (and popular!) places in Canada – in fact it used to be on the Canadian $20 bill! The Rock Pile hike is super easy and good for all ages. It will allow you to get the perfect shot of Moraine Lake, just like you’ve seen all over Instagram.

For an added bonus, visit at sunrise and walk to the dock where the canoes are. Whether it’s a cloudy morning or a clear one, it will be mesmerizing.

5. Peyto Lake

Peyto Lake is another classic spot to stop and capture the amazing blue of the lake. Some even say it looks like a wolf head! This is a heavily trafficked location and it is best to go and catch at sunset. The hike up is super easy and leisurely so it’s good for any and all ages!

6. Athabasca Falls

This waterfall is one you don’t want to miss and is along the most beautiful road, the Icefields Parkway. You have the chance to walk to the waterfall and continue to look over the gorge. This is a magical place and offers a few different perspectives for you to get creative photos!

7. Wasootch Ridge

Located in Kananaskis, this hike is a little more difficult. The beginning is steep and you gain quite a bit of elevation, but the views are worth the effort. You get views of both sides of the valley as well as the well-known mountain in Kananaskis called Yamnuska. Again, this hike offers the opportunity to get a few different shots all in the same day!


Getting these shots is half the fun! I love going home, plugging in my memory card and ordering prints, or fun gear, of my pictures! The London Drugs Photolab does an awesome job of printing shots and making them look just as vibrant and beautiful as they do on the computer and in real life. Between aluminum metal panels, canvas gallery wraps, bamboo prints, and calendars, they’ve got tons of options to make your images come to life. They even have two brand new fine art papers: Kauai and Baryta! Kauai is a smooth cotton paper that is designed for a long life, and is the best choice for prints that require Museum Grade quality. Meanwhile, Baryta is a bright white cotton paper that is ideally suited for photographic images, yielding a high D-Max with exceptional tonal range. Both worthy of your best images!

9 Tips for Taking Better Photos on Vacation

Got a summer vacation planned? Don’t forget to pack your camera! Your travels will no doubt provide all kinds of unique photo opportunities you won’t find at home. It’s easy enough to point and shoot, but if you really want to take your vacation photos to the next level, we recommend you follow these travel photography tips from our LDExperts in the Photolab.

Choose your Camera Wisely

While they certainly take great photos, carrying around a large DSLR camera on vacation can be bulky and cumbersome. In some cases, it can also make you a target for pickpockets. Or if you’re into candid street photography, a large camera can make it difficult to capture your subjects in their natural state without them spotting you. For any or all of these reasons, you may want to consider taking a mirrorless camera on your travels instead. Mirrorless cameras are far smaller in size than their DSLR counterparts, meaning they are more portable, lighter and less obvious when carrying them on vacation – yet they will still help you take high-quality shots.

If you find those still too large, you can always opt for a compact point-and-shoot camera, or even just use your phone! If you decide on using the latter, you’ll also be able to order prints of your photos on-the-go using our London Drugs Photolab App (for iOS and Android): a nice added bonus!

Carry a Tripod & Timer

If you do want to take some posed pictures on your vacation, our LDExperts recommend taking along a small tripod and self-timer. This way, everyone on your trip can be in the photo! This works great for groups or if you’re travelling alone. Selfie sticks are a favourite amongst lots of travellers, but they often can’t capture as much of the scene, as you’re limited by the length of your arms and the length of the stick. With a small tripod like these flexible ones from Joby, you can wrap the tripod’s legs around something nearby like a fence post or street sign to stabilize your camera. Then just use your camera’s self timer or a remote to activate the shutter!

Create your Vacation Story

Rather than capturing a random smattering of photos while on your vacation, try to tell the story of your trip with photos. For instance, start with capturing your journey to your destination (did you take a plane? Train? Automobile?). It could be as simple as a shot of the plane’s wing from your window seat, or a photo with your suitcase, ready to catch the train. Once you’re at your vacation destination, make sure to capture photos of each of the places you visit, and the people you meet, to help tell your story. After your trip, you’ll be able to piece together your vacation story in the form of a high-quality photo book.

Notate Your Favourite Places

Sometimes it can be hard to recall the names of streets, towns, shops and restaurants you encountered on vacation once you return home. To avoid that, make a point of taking photos of street signs and storefronts so that you can easily recall the names. These can also be important parts of your photographic storytelling! In fact, if you’re planning on creating a photo book with your vacation photos, you’ll be able to notate those details using our customizable photo book templates.

Compose Your Shots

While the advent of digital photography has been a blessing in many ways, it can also be to our detriment. Unlike film photography, which forces us to be more intentional with our shots, with digital photography, there is sometimes less time spent on composing one good photo – after all, you can take 100 more in the blink of an eye! Try to slow down and think about your shot. See if there is anything interesting to use as a focal point: a bright pop of colour, an interesting person, or a unique object. It will help elevate your shot from an average photo to something of beauty.

Once you get home, you’ll be able to showcase those well-composed shots with some beautiful fine art prints – choose from bamboo, canvas, metallic paper, glossy or pearl.

Think Big…and Small

While wide, establishing shots of your surroundings are important to help tell the story of your vacation, it’s also worth thinking about capturing the smaller details too. It could be anything from small souvenirs in a market, to sizzling skewers at a street food stall.

Get Photos of your Food

While we’re not encouraging you to spend so long taking photos of your food that it gets cold, taking snapshots of your culinary adventures while vacationing can make for some great photos. Not only will they make your mouth water long after you’ve arrived back home, but you’ll also have a visual diary of all the incredible dishes you tried on your trip. In fact, if you capture enough foodie shots, you could create a whole foodie photo book by the end of your trip!

Opt for Candids

There is a place for posed photos in your vacation album, but if we’re being honest, it’s the candid shots that are usually our favourites. It’s those shots that truly showcase the fun, experiential moments you’ve had on vacation. If you’re travelling with friends, family or a significant other, try capturing them in the element. It could be something as simple as a photo of them enjoying some R&R at the beach, or it could be a more complex action shot of them parasailing. Best case scenario, you’re travelling with people who are willing to snap some candids of you too!

Try a Different Perspective

We’ve all seen the same photo of the world’s most iconic buildings and landscapes over and over again. Why not capture them from a different perspective – like this photo of the Eiffel Tower in Paris? It shows a unique aspect of the building’s intricate structure, and creates a far more intriguing shot than the standard landscape photo of the well-known tower. Imagine how incredible a shot like this would look like as an enlargement!

Stroll around the area and pinpoint some unique spots to shoot from before deciding on what perspective you want to capture – it could be right below your subject, or far, far above it. Even a reflection in a puddle could offer a unique perspective.


Follow these pro tips while on vacation, and you’ll definitely be proud of your photos when you return home! If you need a little help with how to best showcase your vacation photos, come visit our LDExperts in the Photolab. Or if you already know exactly how you want to showcase your vacation photos, you can submit your order online, or using our London Drugs Photolab App for iOS and Android.

6 Summer Photography Tips for Capturing Beautiful Beach Views

Whether you’re hitting the beach close to home, or vacationing somewhere abroad this summer, one thing you’ll want to take with you is your camera. Beaches are a place of so much natural beauty, from their seemingly endless horizons and stunning sunrises to their abundance of sea life and dramatic crashing waves. To help you capture even better photos at the beach this summer, our LDExperts in the Photolab have compiled the best beach photography tips – keep on reading below to learn more!

Take Advantage of Golden Hour

Shooting at sunrise is your best bet to give your photos that beautiful golden glow. With the light coming from a low angle at that early time of day, you’ll be able to avoid those harsh shadows (‘raccoon eyes’) that usually occur at midday. Golden hour is also a great chance to play with silhouettes.  The warmer colours also give a certain ‘magical’ quality to photos – hence why this time of day is also referred to as ‘magic hour’!

Capture the Details

While you might usually think of wide-angle shots when it comes to beach photography, don’t forget about close-ups. There are plenty of opportunities to capture small details at the beach: everything from textured seashells to clumps of seaweed and little crabs. Experiment with the depth of field to really emphasize them.

Experiment with Long Exposure

The combination of beach waves and long exposure photography can make for some truly stunning shots. Consider playing with your shutter speed to achieve different effects. A long exposure of greater than 10 seconds will turn the moving tides into smooth serene waters. Or you can try a medium length exposure, of about 2 to 9 seconds, that will show a bit more movement to the water. You’ll need to adjust your ISO and aperture accordingly, once you’ve decided on your shutter speed – likely a low ISO around 100, and a smaller aperture of around f/10 or f/11. A good tripod and a remote shutter are important accessories for getting the shot, too. As is an ND filter.

Look for a Focal Point

While the sheer vastness of ocean beaches is stunning in person, they can make for rather empty and boring photos…until something is introduced into the foreground. Search for interesting focal points like lifeguard towers, large rock clusters, a wooden stump, a sandcastle or even a pair of sunglasses.

Keep Your Eye on the Horizon

If you’re capturing the horizon in your shot, the most important thing is to keep the horizon as square to the framing as possible. While the horizon should be straight across the frame, there’s no need for it to be perfectly centered. Experiment with the placement of the horizon, either above or below the centre of the frame.

Use Fill Flash to Avoid Shadows

One of the biggest issues when shooting at the beach midday is the dark shadows that often fall on your subjects’ faces. One way to avoid that is to use your flash. The flash will fill those shadowy places on the face, like around the eyes and nose. This can also be used when shooting into the sun to avoid your subject from turning into a silhouette (unless that’s what you were hoping to achieve). The flash can sometimes be a bit too bright, however – if that’s the case, you may need to step a bit further away from your subject, and zoom in if you can.


Capturing a beautiful shot at the beach is just the first step – the next is deciding how best to showcase it! Our London Drugs Photolab is here to help, with a large variety of print options. For a vibrant sunrise or sunset shot, consider ordering an aluminum metal panel, which will make those vivid colours really pop. Or, choose a canvas gallery wrap, canvas print or bamboo print to give your sandy beach photos some added texture. Or, if you’d like to frame your masterpiece, choose an enlargement up to 44”x96” in size. Your beach photos would also be a great addition to a personalized calendar.

You can even order your prints right from the beach – simply download our London Drugs Photolab App for iOS and Android, or use our Photolab website. Or if you’d like to chat with one of our LDExperts, just visit us in the Photolab to get some extra help and use our in-store Photolab kiosks.

6 Summer Photography Tips for Better Photos at the Lake

We might be slightly biased, but Canada really does have the best summers. The beaches are basking in sun, patios are buzzing, campsites are aplenty, and lakes are prime for a dip. In Part 1 of our Summer Photography Tips series, our LDExperts in the Photolab are sharing their expertise for capturing the perfect photos lakeside. If you’re planning to visit Canada’s lake country this summer, make sure to check out these tips before you go, so you can capture even better summer photos!

Adjust Your Exposure

The number one issue when shooting in the middle of a sunny summer day is managing the brightness in your photos. Rather than shooting in Auto mode, our LDExperts recommend switching to Manual mode if you have it, and trying out some of the different exposure levels. If your camera has spot metering, even better. Using spot metering, you can essentially let your camera know which part of the image you want to be well exposed. If you notice your subjects are squinting due to the bright sunlight, face them away from the direct sun and simply meter on their face to ensure it’s well exposed. Of course, having your subject throw on a pair of sunglasses helps avoid the squinting issue entirely.

Be the Early Bird

If you’re taking your camera along to shoot iconic lakes like Moraine Lake or Lake Louise in Banff, being the early bird certainly means you’ll get the worm. The early start will ensure you capture the most pristine lake photos, unencumbered by tourists walking in and around your shot. Photographer Garrett Parker snapped this one of Moraine Lake at sunrise; look at how still that lake water is!

Use a Polarizing Filter

When shooting at the lake, where there is likely an ample amount of blue sky and blue water present in your photos, a polarizing filter will be extra handy. Essentially a polarizing filter filters out some of the light that is polarized, reducing reflections while also boosting contrasts. It will make those skies and lakes a deeper, richer hue. In a pinch and don’t have a polarizing filter? Try shooting through your polarized sunglasses!

Experiment with Reflections

Trees, mountains and structures can add a unique look to your photos in the form of reflections on the lake’s surface. James Wheeler snapped this shot in Field, BC with the canoe platform perfectly reflecting on the untouched lake.

Boats Make for Great Subjects

On a lake, boats make the best subjects. Whether they’re bobbing gently on the water, or racing across creating energetic waves, there’s lots of opportunities for unique boat shots. Depending on the lighting, you can experiment with reflections of the boat on the water, or even silhouettes like in the shot above.

Use Leading Lines

The viewer’s eye will be drawn to strong lines like a lake’s wharf, so try composing your shot around similar structures. Add a subject at the end of the wharf for added effect. A path leading to the lake or stepping stones would also make for compelling shots.

Shoot from Above

Have a drone in your photography arsenal? The lake is a perfect place to experiment with some unique aerial photos (within Transport Canada’s regulations, of course)! Just make sure you have enough battery power to get your drone out over the water and then back to shore before it runs out of juice.


Of course, great photos don’t deserve to just sit on your camera or phone – they deserve to be shared and displayed! Compile your favourite lakeside snapshots into a photo book, or take the best of the best and have them printed as a fine art prints, like an aluminum metal panel or enlargement. We also have all kinds of customizable novelties we can print your summer photos on – like a water bottle or even a beach blanket!

To get started, either download our London Drugs Photolab App for iOS and Android, or upload your photos to our Photolab website. If you’d like a little extra guidance from our LDExperts, come visit us in-store in the Photolab!

Best Places to Take Graduation Photos

Graduation is a major milestone – the end of one massive chapter of life, and the start of another. It’s an exciting time, and an important one to commemorate with some great photos. To help you capture this milestone event, whether it’s your own graduation, a friend or family member’s or a client’s, our Photolab LDExperts have compiled a list of the best places across Canada to take graduation photos. Keep reading all the way to the end for tips on how to best showcase your favourite grad photos, too!

Queen Elizabeth Park, Vancouver

Queen Elizabeth Park in Vancouver is a favourite spot amongst photographers for everything from wedding and engagement to grad photos. The main reason for that is that there are so many photo ops in one location! Energetic water fountains make for a fun place to snap some group grad photos. Wander into the park and find lots of spots filled with beautiful greenery and flowers, which are an excellent place for individual or couples photos.

UBC Rose Garden, Vancouver

Whether you graduated from UBC or not, the university’s Rose Garden is a stunning spot to take your grad photos. The garden is manicured with fragrant multi-coloured roses, and the panoramic views of mountains and ocean make for a beautiful backdrop. Flowers there are in bloom starting in June – perfect timing for your grad celebrations!

Polson Park, Vernon

Located near the heart of Vernon, Polson Park is a popular spot for weddings, engagement and grad photos alike. The park is well known for its Floral Clock, Japanese Garden, Chinese Pagoda and Rose Garden, all of which make for great photo ops. Photographer C. Daisy captured the shot you see above at one of the two ponds located the in park.

Downtown Calgary

Not interested in grad photos full of florals and greenery? Photographer Jessica Gray found this unique spot for her clients on a parkade rooftop at 3rd street and 6th avenue in downtown Calgary. It’s definitely one of the most unique group grad photos we’ve seen, and it looks like they had a blast too!

McHugh Bluff, Calgary

Calgary’s downtown skyline always makes for a great backdrop. Grab your grad crew and snap some photos at McHugh Bluff, which offers a beautiful view of the city in the distance.

Alberta Legislature Building, Edmonton

If you’re in the area, Edmonton’s Alberta Legislature Building is worth a stop to take some group graduation shots. The neutral tones of the building really make the colourful prom dresses pop! We also love how photographer Erin of @pickledbeetsphotography captured this shot from a low angle, making the Legislature Building in the background look even taller.

Former Royal Alberta Museum, Edmonton

If you’re looking for a truly unique spot to snap some graduation photos in Edmonton, the former Royal Alberta Museum (now called the Glenora Building) is a must-visit! The columns shown in the photo above make for a perfect group photo op.

Kiwanis Waterfall Garden, Regina

The Kiwanis Waterfall Garden is such a beautiful spot in Regina for graduation photos. This creekside park has a stunning waterfall feature and nature-filled walking trails that would be perfect for capturing group or portrait shots.

Assiniboine Park, Winnipeg

Considered one of Winnipeg’s finest attractions, Assiniboine Park is a go-to for lots of grads looking for beautiful photos in their suits and gowns. The English Garden within the park is full of winding paths, free-form flower beds, and tranquil ponds: a perfect spot to take out the camera for some couples or portrait shots.

Photographer Lauren Cox, who shoots grad sessions for her clients, knows that the greenery in Assiniboine Park makes the perfect backdrop for colourful prom dresses!

Centre de la Nature, Laval

For a tranquil nature-filled spot for grad photos in the Greater Montreal area, the Centre de la Nature should be your first stop. This large urban park sprawls 50 hectares, with shaded pathways, flowers in bloom, tall trees and shrubbery, and even a lake. If you don’t mind risking getting the dress wet for a great shot, the lake even has canoe rentals!


After you’ve captured some great graduation photos, you know everyone from your mom to your great aunt will want copies to celebrate this big milestone. Send them prints and enlargements in the size of their choice, so they can proudly display your photos in their home! If there are just too many photos to choose just one, why not create a graduation photo book? Or a sleek collage poster that you can share with your friends? We even have graduation themed templates!

While you’re at it…don’t forget to order something special for the teachers you’ll be leaving behind after graduation. A photo mug, personalized notepad, or personalized photo card would be a thoughtful way to say thank you for all their hard work over the school year.

To order your graduation prints and gifts, just download our London Drugs Photolab App, available for iOS and Android, or simply visit our Photolab site or use our in-store kiosks.

Congrats, grads of 2019!

« Previous Page Next Page »