Getting Ready for Travel: Is Your Passport Up-to-Date?

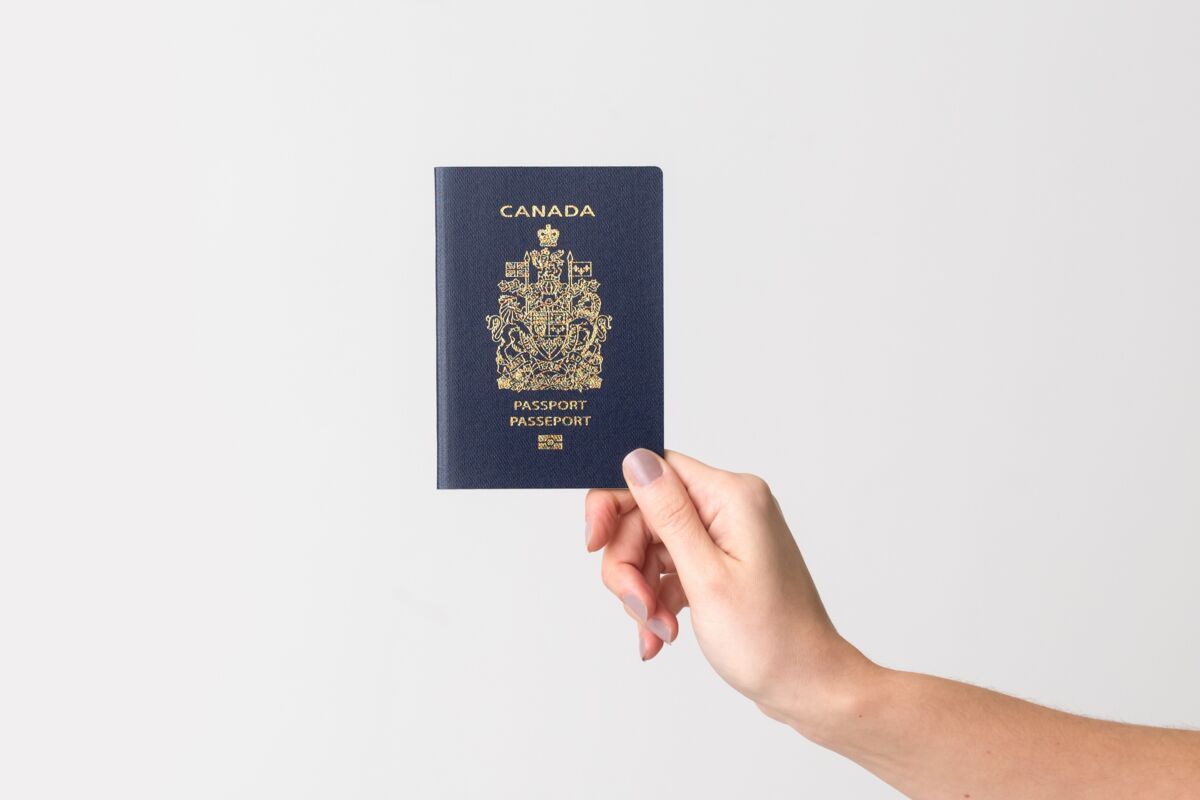
As the world begins to re-open after an unprecedented year without travel, you may be itching to pack your suitcase and take a trip abroad in the near future. Before you start thinking about purchasing a ticket though, best make sure your passport is up-to-date!

If your passport is expired, about to expire, or has run out of pages, you’ll need to renew your passport or apply for a new passport. Applications can take a while to be processed, so you’re better off starting the process sooner rather than later if you’re planning a specific trip you’ll need your passport for.

As part of the passport application process, you’ll need 2 identical and unaltered passport photos. To help make the process as smooth as possible, here’s everything you need to know about getting your passport photos taken:

Quick & Convenient Passport Photos

While passport photos are often given a bad rep because of their less-than-glamorous aesthetic and stringent requirements, they’re a crucial piece of the application process and stand between you and your globetrotting dreams! Luckily, you can visit any London Drugs Photolab location to quickly and conveniently get your passport photos taken. No need to book an appointment, just drop by during regular operating hours.

Using Advanced Biometric Technology

The list of photo guidelines that govern what constitutes a legal ID photo is long, and if the photographer gets any of them wrong, your photo is rejected and your passport won’t be issued until you include ones that meet all the requirements – something that can certainly throw a wrench into your plans if your departure date is imminent. To avoid the inconvenience of a rejected photo, we recommend visiting your local London Drugs Photolab, where our LD Photo Experts have proven experience in getting passport photos right. They are properly trained and well-versed in current passport law and use the latest biometric technology. In fact, London Drugs was the first retailer to offer this new biometric technology from Europe that ensures every photo matches your issuing country’s EXACT specifications.

Our LD Photo Experts make the process quick and easy, using that advanced biometric software which automatically checks pictures against passport office guidelines to streamline the acceptance program. The reliable imaging technology ensures your passport photo always passes the appropriate requirements, and our Photo Experts will give you a quality checklist to show you exactly that. You can also request a Biometric Passport/ID Check Print certificate to show the photo meets government criteria.

Photos for Countries Outside of Canada

In addition to providing photos that meet the requirements of Passport Canada, our Photo Experts can also take passport, visa, and other identification photos for more than 100 governments, with the criteria readily available in the system.

Electronic Passport Photos

You can add a digital image upload option to any passport or ID photo for an additional fee. For more details, simply ask a Photo Expert at your local London Drugs.

Our $50 Guarantee

We have full confidence in our Photolab’s ID photo expertise and biometric passport photo technology. That’s why we stand behind it with this guarantee: if the passport office declines your photo, London Drugs will refund your purchase and offer to both retake the photo and give you a $50 London Drugs gift card to compensate you for the inconvenience.**

To be clear: this covers not only your Canadian passport photo, but any of the ID photos available at the Photolab, including:

  • Travel Visas
  • Landed Immigrant identification
  • Permanent Resident identification
  • Firearms licenses
  • Passport photos for countries other than Canada

This guarantee also covers all age groups, including babies and toddlers, who can be challenging to photograph properly.

If you’d like more details about ID photos, including technology, privacy or other links and resources, this handy page contains it all. Or better yet, pay a visit to your local Photolab where a knowledgeable Photo Expert can answer all your questions and take your photo at the same time.

Other Updates to Make Before Travelling

1. Check that your vaccinations are up-to-date

This year more than ever, ensuring your vaccinations are up-to-date is an important part of your travel planning.

In addition to checking your country of travel to see COVID-19 travel restrictions and vaccine requirements, it’s also important to check if there are any other vaccinations you should receive, to protect against diseases prevalent in the area you’re planning to travel to. Doing so will ensure you have a safe and healthy trip. You can book a Travel Clinic appointment with our Travel Clinic Pharmacists, who are specially trained to administer common travel vaccinations such as hepatitis A and B, yellow fever, typhoid, and traveller’s diarrhea, and can provide a certificate of proof or waiver (some destinations may require an International Certificate of Vaccination).

Our Pharmacists can advise regarding not only on vaccinations, but also medications and health supplies you’ll need based on your destination(s). You can find more information about our Travel Clinics here.

2. Check that your travel insurance is up-to-date

After you get your passport photos and travel vaccinations, pop over to our Insurances Services desk to make sure your travel insurance is fully up-to-date before travel. Let one of our helpful agents set you up with the right Tugo Travel Insurance coverage for your itinerary. You can also visit us online to conveniently get a quote, purchase a plan, or find your nearest location. We’ve got some travel tips there for you as well!


Once you’ve checked these items off your pre-travel to-do list, you’ll be able to focus on the fun stuff – planning where you’ll eat, sleep and visit! And when the time comes to take that much-anticipated vacation, we wish you a safe and wonderful trip.


*Disclaimer: London Drugs will make every effort to ensure your passport photo meets government standards. However London Drugs cannot guarantee acceptance of passport photos by the Passport Office and expressly disclaims liability for any loss, damages, inconvenience or disrupted travel plans if not accepted for any reason. We recommend you submit your passport application well in advance of any proposed travel plans.

Should Old Photos Be Forgotten?

Because that’s what will happen in 2015 to all those great photos you’ve taken during the holidays if you leave them on your hard drive or sock them away in the cloud. Sure, you’ll share them on your InstaTwitFace account, where they will accumulate Likes and warm & fuzzy comments, but within a few days your followers’ collective short-lived attention span will flitter elsewhere and your wonderful holiday photos will fade away into obscurity.

Don’t relegate your holiday photos to the cloud. Print them out using one of our many options and display them throughout the year.

Don’t relegate your holiday photos to the cloud. Print them out using one of our many options and display them throughout the year.

OR…

You could actually, you know, do something with them. Like turn them into actual physical keepsakes. The kind that people are able to see in perpetuity. And every time they cast their eyes on it they will remember that specific moment or event. After all, isn’t that why we photograph these moments in the first place? Not so that they can remain a bunch of digital information packets that we archive indefinitely in cyberspace.

The specific kind of physical product you should create is entirely up to you. You can go for something traditional and classic, or choose a piece with a funkier, more modern edge, or maybe warm & fuzzy is more your thing. And yes, you can even opt for something purposefully tacky if the photo calls for it.

If you’re not familiar with the Photolab’s photo printing products, I’ve reviewed a few of the more popular ones below.

Enlargements and Awesome Prints

The holidays are the time of the year when typically the whole family gets together. The whole gang of friends, too. At the workplace, the annual holiday party is the one of the few times where everyone is gathered in one place—and the marketing department actually gets dressed up! All of which are reasons why this tends to be the best time of year for taking photos, and why holiday photos often make the best ones to put on display. The Photolab offers a great selection of enlargements and art prints to suit any photo, occasion, or décor.

Enlargements— To begin with, there’s always the simple, tried and true photo enlargements. The Photolab can print sizes from 7 x 7” all the way up to 44 x 66” — the latter being the ideal size if a co-worker is photographed in a Christmas sweater so hideous it simply begs to be on display in the lunchroom all year.

A simple enlargement is a great option for a desk photo, or if you’ve already got a frame you really like. Hey, some people are frame fans. I get it.

Gallery wrap— If you managed to capture some amazing shots of the kids, or your winter vacation to the ski resort yielded some breathtaking scenic panoramas, a gallery wrap can provide a stunning reproduction of either.

Using specially pigmented inks, the image is stretched on a fine art canvas, which requires no frame (although you can still add one for aesthetic purposes if you wish.) The canvas wrap adds tremendous depth and dimension to the image, giving it the presence of a gallery piece. This post provides more detail about gallery wraps.

Metal Prints— If you really want to make a bold statement, a metal print is a state-of-the-art way to display a photo. This method infuses dyes onto specially coated aluminum sheets, providing vibrant colour reproduction and incredibly crisp detail. These shimmering, glass-like prints are an eye-catching way to bring life to an accent wall. I’ve written more extensively about metal prints in a previous post.

The Photolab offers quite a variety of art prints, which I encourage you to explore. You’re bound to find the ideal option to suit both your photo and your home or office.


Don’t Lose Your VHS Memories

Here’s a sad situation. You have a family get together, and want to reminisce about first birthday memories caught on video. You unearth the VHS tape you’ve been carefully storing all these years and pop it in the old player—the player that’s been banished to the spare TV in the basement because it was replaced by the DVD player a few years ago. Sadly, the first birthday moments of your kids are marred by noise and blips and other signs of degrading video tape.

VHS tape lasts between 10-15 years, if stored properly, while DVDs can last a lifetime if properly stored.

Here are some other solid reasons to transfer your video tapes:

  • Space—DVDs and cases take up a fraction of the space of those clunky VHS tapes
  • Duplication—Now you’ll have an original you can make copies of for family members
  • Fun—Since the tape is transfered to DVD in an editable format (request this when dropping off), with the right software you can enhance your memories with subtle music and subtitles.

London Drugs offers a duplication service to help you hang on to those memories. Just bring your VHS—or mini DV, or Video8, Hi8 or Digital8—in to the Photolab at London Drugs, and the staff coordinate the content transfer.

The cost is $40 per hour of tape, and you’ll receive the content back as digital files on DVD. If you want it in an editable format (i.e. importing into Movie Maker or iMovie to add music) let the staff know when you bring in your tapes. The process takes about 3 weeks, from drop off to pick up.

Before your family memories get a second older, get them transferred professionally at London Drugs.

High Key Portraits: A Home Experiment

You may not be familiar with the term, ‘high key photography,’ but you certainly have seen high key images. Imagine an ethereal photo of a baby on a white blanket, or a bride glowing against a brilliant background. High key images have a bright, blown-out white background with minimal shadows. This makes gentle and uplifting portraits that convey a positive mood.

Professional studios often use high key techniques to shoot portraits, but we wanted to see if an amateur photographer could get a similar effect.

The Experiment: Can an amateur photographer take a high key photo?
We enlisted an amateur photographer with an entry-level DSLR camera (a Nikon D5000) and a basic external flash, and we gave her an assignment: using items from around the home, set up a makeshift studio to take high key portraits.


The Set-Up:
A window serves as a diffuse light source (the window is to the right, outside of the frame). Our amateur photographer used a lamp using a cold fluorescent lightbulb for a backlight, positioned at an angle to the window. Two white sheets serve as a backdrop.

You will need:

  • A white backdrop: Our test shot was done against two white sheets tacked against a bookshelf, but anything white will do. For a smooth, seamless backdrop, professional muslin or paper comes in brilliant white.
  • A large, diffuse light source: This makeshift studio is in a bright room with large, south-facing windows (the windows are to the right of photo, not shown). If the sunlight through the window creates harsh shadows, cover the window with a white curtain or sheet to diffuse the light.
  • A backlight: an essential element of high key photography is a brightly illuminated background, so you will need a very strong light to blow out the shadows. In our sample setup, the lamp provides adequate light. For a better effect, a small studio light would put out brighter, whiter light.
  • A good quality flash: Here’s where a small investment will really pay off. External flashes fit right over your camera’s hot shoe and provide stronger, better quality light than the in-camera flash.
  • Editing software: Without expensive studio lighting, it will be difficult to capture high key images with just your camera. Our photographer found that edits were necessary to fix the white balance, enhance the exposure, and increase the brightness. Basic editing software is available free on the web; more comprehensive editing software is available at reasonable prices through London Drugs Computer Department.

Your high key photo shoot, step by step:

  1. Set up your studio space, including props, if you wish. Since our amateur photographer was shooting children, she used white stuffed animals that were close at hand.
  2. Opt for white or light-coloured clothing. High key photography minimizes contrast, so the clothing should not distract.
  3. Set your camera to save in JPEG + RAW. RAW files are like a digital negative, which means no processing or alterations are made by the camera’s software. You will likely have to alter your high key photos after you shoot, and RAW files are the best way to do this.
  4. Start shooting. Look for obvious shadows in the image and try to eliminate them by adjusting your light or your camera’s position. Your initial files will likely not have the full impact of a high key photo—you can easily fix this during photo editing.
  5. Edit on your computer. There are many good photo editing programs on the market. This photo was edited using Photoshop Elements by cropping, then adjusting the white balance, exposure, contrast, and clarity. The total edit time took about 10 minutes.


Another shot, a little more stylistic.

Finally, the lamp was swapped out for an entry level studio lighting kit, improving the backlighting. The following photo required very little editing.

Experimenting with high key photography can give you delightful portraits that are as unique as their subjects.

October is the perfect month to take family portraits, test photo editing, and create custom cards that will be ready in time for the holidays.

Four Seasons: A Photo Project

In Canada, photography is closely linked to the calendar. Think about the colours and moods of the different seasons—fresh green in spring, bright and bold in summer, crisp and orange in autumn, and frosty white in winter. The seasons affect every Canadian photographer, regardless of the subject. Parents filming kids are influenced by the light and weather just as bird enthusiasts, wildlife photographers, travellers, and college students. We are a seasonal nation, and it shows in our pictures.

The seasons affect photography primarily because of light. Canada is a country of dramatic light: in the summer it is bright and overpowering, in the winter, glaring off the snow, it is bouncing and unpredictable. In the spring and fall, the strong, directional light and unpredictable weather patterns create their own challenges. To be a photographer in Canada, you must think about the season, and therefore think about the light.

Looking back at 2011
As 2011 winds down, we have the perfect photography project for you: group your photos, season by season, and look at the light. With digital albums, this is very easy to do.

  1. Look at your photos sequentially, season by season, looking for light quality. Look for skin tones, shadows, glare, and crispness.
  2. Don’t pay attention to how you look. When we look at photos of ourselves, often our photographer brain shuts off. Am I blinking? Should I lose 10 pounds? Do I have a mouthful of potato salad? Forget about it. For this project, you are looking only at light and photo quality.
  3. Pay attention to the failures. Do your ski holiday photos look murky? Your beach shots dark? Your winter birthday parties over-exposed by the flash? Think about what went wrong—often a bad picture could have been transformed if the white balance was adjusted, the subject was angled differently with respect to the light, or you used (or didn’t use) a flash.
  4. Note the type of shots that worked. Perhaps you shot a group photo in the shade during the summer—no one was squinting, no one was in shadow, the group looks cohesive, happy, and interesting. Your successes, season by season, will lead to more successes next year.
  5. Print your successful shots. A picture’s impact can be significantly different on paper than it is on the screen. Colour, proportion, everything can appear differently in print. We encourage you to get your best shots off your hard drive and onto paper, whether you make simple prints, compile them into a photobook, or make a custom calendar—more on this later.

Looking forward to 2012
Year to year, we are faced with the same type of photographic challenges. Skiers will shoot winter photos, those born in November will have indoor birthday parties, the lake by the cabin will continue to reflect light in a weird way.

  1. Now that you’ve reviewed all of your 2011 photos, create a calendar of your best photos from 2011.
  2. In each month, note what you have learned: a bed of cherry blossoms makes a spectacular backdrop, Halloween pictures are best shot during the day; the family reunion picture is best when taken from above.
  3. Our Home Edition calendar software gives ample room for comments. Write them in, so you will remember your thoughts when Autumn 2012 rolls around.
  4. After completing and sending off your Seasonal Photo Project to be printed, go back and change the notes. Write regular photo captions, add birthdays and special celebrations, and print out a second version for gifts.

Our unique, cyclical light is what gives Canadian photographs their charm. We encourage you to look at your light, learn what works, and take even better pictures in 2012.

Picture Perfect: Decorating with Photos

Looking for personal, dramatic artwork to decorate your home? Think pictures: vibrant botanicals, sweeping landscapes, artful black and whites of your family. Photographs are the perfect medium—you can get exactly the shot you want, adjust the colours, and print the precise size to fit your space. Enlargements won’t break the bank, either: if you enlarge photos to a standard size and purchase a ready-made frame and matte, you can produce a gorgeous piece of artwork for a fraction of the price of a well-made professional print.

Before your photo shoot

Set your camera to FINE: For enlargements, you will need a very fine image—go for the highest resolution your camera will allow.
Consider shooting in RAW: Many cameras allow you to photograph in RAW format, which is the digital equivalent of a film negative. These files will be large, but they will allow for precise colour correcting afterwards, either by you or the print technician.

During your photo shoot

Think light: Most photographs look best in natural light, and natural light looks best in the early and late hours of the day. Take note of where the light is hitting, and experiment with angles to catch your subject in an unexpected way.
Think of your room: Pictures are about more than colour and light—they are about mood. A dappled, daytime forest photo looks different than a sunset shot, with looming shadows and deep contrast. Dramatic rooms like dining rooms and living rooms showcase different types of shots than a family room or kitchen.
Get close up: Macro shots—extremely close-up photos—are a simple way to get a dramatic shot. Even the most basic point-and-shoot camera can focus at a remarkably short distance.
Experiment with monochromatic: Does your room have a strong colour scheme? Try photographing objects that are within the colour palette: think green botanicals in a moss-coloured bathroom, or a brilliant sky filled with balloons in a blue child’s room. Monochromatic artwork helps unify a space.
Consider contrast: If you’re looking for pop, think about the colour wheel. If your room is a cool blue, consider a fiery red and orange photo of tulips. If your room is neutrals, look for brilliant purples, rusts, or blues, highly saturated colours that will draw the eye. Contrast colours will form a focal point in the room, adding drama and interest.
Black and white: If your walls are painted a gorgeous, saturated colour, consider black and white shots. Surrounded by a black gallery frame and a crisp white matte, your vivid walls will allow the photos to pop.

After your shoot

Play with your pictures: The most basic photo retouching programs will allow you to adjust contrast and colour. Try adding effects that make your photo look like a painting, or adjust the colours to neon intensity. Play with your images and find something that works. If you are unsure about the effect, a standard size print costs a few cents and will let you see how your computer retouching translates into print.
Leave it to the experts: London Drugs’ print technicians hand-inspect every image. If you are unsure about colour balance and other technical components of your picture, you can trust that we will print at optimal settings.
Enlarge to a gallery print: For a designer look, have us create a gallery print. We print your image on canvas and stretch it around a wooden frame. Your gallery print is ready to hang on the wall—no additional frame or matte required.

For all of your photography and enlargement questions, drop by the London Drugs Photolab. We would love to show you samples of our enlargements, give you technical specifications, and help you create the perfect piece of photographic artwork.

Shooting in RAW: An introduction to the ‘Digital Negative’

Give your photos the professional treatment

Each month, we delve into the world of your camera’s menu—those cryptic settings beyond AUTO mode that can change the way you take pictures. This month, we’re tackling RAW, a method of creating images that are precisely corrected for white balance, tint, contrast, and other elements.

Professional photographers often shoot in RAW because they can make the lighting, exposure, and colour balance perfect afterwards. Today, good quality photo editing software is readily available, which means anyone with a dSLR can shoot images in RAW and give them the professional treatment before printing.

What is RAW?

Your camera gives you the option of saving your images in several formats. Most of us save in jpeg, but dSLR cameras also allow you to save in RAW. And if you’ve ventured into unknown territory and taken shots in RAW, you were likely blown away by two things: the massive size of the image, which can easily run 8 to 10 MB, and the dull, flat image quality.

To understand RAW images, let’s first think about how a camera saves a jpeg image.

  1. The sensor picks up an enormous amount of information when you press the shutter—an 8 megapixel camera will capture about 8 MB of information.
  2. The camera’s internal software calculates white balance, looks for redundant information, sharpens the image, corrects the lighting, adjusts the tint.
  3. The camera deletes unnecessary pixels, saving a fraction of the visual information.
  4. The resulting jpeg is relatively small, already processed, and ready to print.

A RAW file stops your camera from making visual decisions about your image. The result is all of the information, unprocessed, in one big file. RAW files are big because they contain all the bits the camera deletes out of a jpeg image; they seem flat and dull because they are unprocessed. But contained in that big file are all the tools to create a gorgeous, perfectly balanced photo.

What do you do with RAW files?

To handle your RAW files, you will need photo editing software. To start out, you may wish to download free photo editing software—a quick internet search will generate dozens of basic programs that can handle RAW files.

Each of these programs can auto correct your images. You can also tweak the different elements yourself, like sharpness, contrast, saturation, and tint. Let your creativity flow—the mood and feel of your photos can be enhanced in post production, bringing drama to already fantastic images.

When you are done experimenting with your RAW files, upload them to the London Drugs site and print out tests. This will give you a good idea about how your on-screen changes translate into print. London Drugs also provides our specific printer profiles so you can calibrate the colour on your screen to our machines. These are called “ICC Profiles”.

Intimidated about RAW? We’ll do it for you!

Our photolab accepts your unprocessed RAW files. We will analyze and correct your images for you, hand-inspecting each one to make sure it’s perfect. The result is truly gorgeous photos, perfected and printed by professionals.

For all of your photo questions, drop by the London Drugs Photolab. Our Camera Department, Computer Department, and Photolab work closely together to help you go from snapshot, to hard drive, to print, easily and effortlessly.

« Previous Page Next Page »