London Drugs hosts first #LDFotoCon Consumer Photography Show in Vancouver

LDPHOTOCON

London Drugs is pleased to present its first #LDFotoCon Consumer Photography Show taking place in six locations throughout the month of May. Customers can learn the ins and outs of digital cameras and photography with the help of expert photographers and representatives from top manufacturers such as Canon, Nikon, Sony, Panasonic, Microsoft and Fuji.

With workshops happening throughout the day, amateur and prosumer photographers can discover how easy it is to capture images that will take their photos to the next level.

READ MORE

London Drugs Proud Sponsor of 2nd Annual Capture Photography Festival

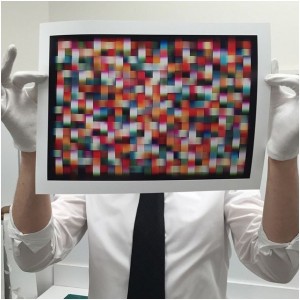
IMG_4972London Drugs Photolab Prints High-Profile Exhibits for Local & International Photographers

The Capture Photography Festival has launched for the second year in Vancouver, celebrating both local and international lens-based artistic talent, and London Drugs is thrilled to once again be a sponsor for the event. Capture features dynamic, high-profile exhibitions from Vancouver’s leading galleries that aim to foster emerging talent and initiate public conversation about photography as an art form.
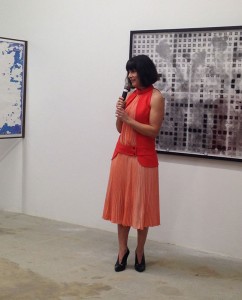
IMG_4966Building on Vancouver’s rich history of photography, including such photographers as Fred Herzog, Jeff Wall, and Roy Arden, many of the well renowned photographers being featured during the festival are working directly with the London Drugs photolab to produce archival, museum-quality prints, for the exhibitions. The experienced Photolab staff is working one-on-one with the photographers, using the lab’s cutting edge equipment, to produce the best quality prints possible. In fact, London Drugs Photolab technical specialist John Goldsmith is a professional photographer himself and was featured in the inaugural season of Capture Photography Festival. No one understands the relationship between lab and photographer better than John!
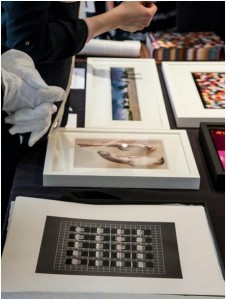
mini_editionsThis year, the London Drugs Photolab is producing prints for renowned photographers who are exhibiting their work in prestigious galleries throughout Vancouver as part of the Capture Photography Festival.

jessica_eaton_mini_editionProfessional photographers aren’t the only ones who are able to print their work at museum-quality, though. Whether you’re an amateur, freelancer, or professional, the London Drugs Photolab will use their state-of-the-art printing processes and experienced lab techs to process images worthy of a gallery exhibit- even if they’re for the walls of your own home.

High Key Portraits: A Home Experiment

You may not be familiar with the term, ‘high key photography,’ but you certainly have seen high key images. Imagine an ethereal photo of a baby on a white blanket, or a bride glowing against a brilliant background. High key images have a bright, blown-out white background with minimal shadows. This makes gentle and uplifting portraits that convey a positive mood.

Professional studios often use high key techniques to shoot portraits, but we wanted to see if an amateur photographer could get a similar effect.

The Experiment: Can an amateur photographer take a high key photo?
We enlisted an amateur photographer with an entry-level DSLR camera (a Nikon D5000) and a basic external flash, and we gave her an assignment: using items from around the home, set up a makeshift studio to take high key portraits.


The Set-Up:
A window serves as a diffuse light source (the window is to the right, outside of the frame). Our amateur photographer used a lamp using a cold fluorescent lightbulb for a backlight, positioned at an angle to the window. Two white sheets serve as a backdrop.

You will need:

  • A white backdrop: Our test shot was done against two white sheets tacked against a bookshelf, but anything white will do. For a smooth, seamless backdrop, professional muslin or paper comes in brilliant white.
  • A large, diffuse light source: This makeshift studio is in a bright room with large, south-facing windows (the windows are to the right of photo, not shown). If the sunlight through the window creates harsh shadows, cover the window with a white curtain or sheet to diffuse the light.
  • A backlight: an essential element of high key photography is a brightly illuminated background, so you will need a very strong light to blow out the shadows. In our sample setup, the lamp provides adequate light. For a better effect, a small studio light would put out brighter, whiter light.
  • A good quality flash: Here’s where a small investment will really pay off. External flashes fit right over your camera’s hot shoe and provide stronger, better quality light than the in-camera flash.
  • Editing software: Without expensive studio lighting, it will be difficult to capture high key images with just your camera. Our photographer found that edits were necessary to fix the white balance, enhance the exposure, and increase the brightness. Basic editing software is available free on the web; more comprehensive editing software is available at reasonable prices through London Drugs Computer Department.

Your high key photo shoot, step by step:

  1. Set up your studio space, including props, if you wish. Since our amateur photographer was shooting children, she used white stuffed animals that were close at hand.
  2. Opt for white or light-coloured clothing. High key photography minimizes contrast, so the clothing should not distract.
  3. Set your camera to save in JPEG + RAW. RAW files are like a digital negative, which means no processing or alterations are made by the camera’s software. You will likely have to alter your high key photos after you shoot, and RAW files are the best way to do this.
  4. Start shooting. Look for obvious shadows in the image and try to eliminate them by adjusting your light or your camera’s position. Your initial files will likely not have the full impact of a high key photo—you can easily fix this during photo editing.
  5. Edit on your computer. There are many good photo editing programs on the market. This photo was edited using Photoshop Elements by cropping, then adjusting the white balance, exposure, contrast, and clarity. The total edit time took about 10 minutes.


Another shot, a little more stylistic.

Finally, the lamp was swapped out for an entry level studio lighting kit, improving the backlighting. The following photo required very little editing.

Experimenting with high key photography can give you delightful portraits that are as unique as their subjects.

October is the perfect month to take family portraits, test photo editing, and create custom cards that will be ready in time for the holidays.

Four Seasons: A Photo Project

In Canada, photography is closely linked to the calendar. Think about the colours and moods of the different seasons—fresh green in spring, bright and bold in summer, crisp and orange in autumn, and frosty white in winter. The seasons affect every Canadian photographer, regardless of the subject. Parents filming kids are influenced by the light and weather just as bird enthusiasts, wildlife photographers, travellers, and college students. We are a seasonal nation, and it shows in our pictures.

The seasons affect photography primarily because of light. Canada is a country of dramatic light: in the summer it is bright and overpowering, in the winter, glaring off the snow, it is bouncing and unpredictable. In the spring and fall, the strong, directional light and unpredictable weather patterns create their own challenges. To be a photographer in Canada, you must think about the season, and therefore think about the light.

Looking back at 2011
As 2011 winds down, we have the perfect photography project for you: group your photos, season by season, and look at the light. With digital albums, this is very easy to do.

  1. Look at your photos sequentially, season by season, looking for light quality. Look for skin tones, shadows, glare, and crispness.
  2. Don’t pay attention to how you look. When we look at photos of ourselves, often our photographer brain shuts off. Am I blinking? Should I lose 10 pounds? Do I have a mouthful of potato salad? Forget about it. For this project, you are looking only at light and photo quality.
  3. Pay attention to the failures. Do your ski holiday photos look murky? Your beach shots dark? Your winter birthday parties over-exposed by the flash? Think about what went wrong—often a bad picture could have been transformed if the white balance was adjusted, the subject was angled differently with respect to the light, or you used (or didn’t use) a flash.
  4. Note the type of shots that worked. Perhaps you shot a group photo in the shade during the summer—no one was squinting, no one was in shadow, the group looks cohesive, happy, and interesting. Your successes, season by season, will lead to more successes next year.
  5. Print your successful shots. A picture’s impact can be significantly different on paper than it is on the screen. Colour, proportion, everything can appear differently in print. We encourage you to get your best shots off your hard drive and onto paper, whether you make simple prints, compile them into a photobook, or make a custom calendar—more on this later.

Looking forward to 2012
Year to year, we are faced with the same type of photographic challenges. Skiers will shoot winter photos, those born in November will have indoor birthday parties, the lake by the cabin will continue to reflect light in a weird way.

  1. Now that you’ve reviewed all of your 2011 photos, create a calendar of your best photos from 2011.
  2. In each month, note what you have learned: a bed of cherry blossoms makes a spectacular backdrop, Halloween pictures are best shot during the day; the family reunion picture is best when taken from above.
  3. Our Home Edition calendar software gives ample room for comments. Write them in, so you will remember your thoughts when Autumn 2012 rolls around.
  4. After completing and sending off your Seasonal Photo Project to be printed, go back and change the notes. Write regular photo captions, add birthdays and special celebrations, and print out a second version for gifts.

Our unique, cyclical light is what gives Canadian photographs their charm. We encourage you to look at your light, learn what works, and take even better pictures in 2012.

Birds Fly South: Your Photo Checklist

For bird enthusiasts, autumn is a fascinating time of year. As the days get shorter and the weather becomes cooler, hundreds of species make their way south from their summer feeding grounds in the Canadian north. During these few short weeks, Western Canada is the rest stop for some of North America’s most beautiful birds.

Photographing birds in the autumn is truly a labour of love. With a little research and some key pieces of gear, you can capture beautiful images of your most exciting bird sightings.

  1. A good field guide: Smart phone technology is wonderful for on-the-go research. App versions of the Peterson, Sibley, Audobon, and National Geographic guides are all available through Apple’s App Store, each providing searchable databases, photographs and drawings, maps, and bird sounds.
  2. Your longest lens: A telephoto lens is a key piece of gear, one that is worth the investment. You will need the power to zoom in on individual birds and capture the exquisite details of their plumage.
  3. A polarizing filter: Migrating birds tend to flock near a water source, and the reflections can cause haze or glare that will ruin otherwise fantastic images. A polarizing filter is an inexpensive item that will also protect the surface of your long lens.
  4. Waterproof memory card holders: Raindrops, splashes, and spills can be deadly to an SD card full of images. Waterproof cases for memory cards are an essential for wilderness photography.
  5. Binoculars or scopes: Using your long lens to spot and identify birds can be unwieldy—many avid birdwatchers prefer binoculars or a tripod-mounted scope to make initial sightings.
  6. Quick release tripod: The benefits of a sturdy tripod are many—crisp, focused shots, a stable resting spot for heavy, fragile lenses, and precise planning for framing and camera settings. We recommend a tripod with a quick release, so you can easily remove your scope and secure your camera, or release your camera for a spontaneous, hand-held shot.
  7. A Thermos of hot coffee: Bird photography involves early mornings in chilly weather. Make sure to dress for the elements, and be prepared to wait for the perfect shot.

Customized greeting cards are a wonderful way to share your best bird photos.Upload your file to London Drugs Photolab and we will print your customized cards using the same attention to detail we give all of our prints.


Exploring Fall Through a Filter

Autumn is a fantastic season for photographers, with bold natural colours, dynamic storms, and spectacular migrating birds and wildlife. With the natural world on dramatic display, this is the perfect time to experiment with filters.

Filters are a simple, inexpensive way to add punch to your photography. Fitting right over your favourite lens, filters change the way the light hits your image sensor.

Lovely landscapes
Imagine a gorgeous autumn vista, with rolling hills ablaze in red, orange, and gold. The sky is a clear bright blue dotted with puffy clouds. The challenge with this landscape—and most landscapes—is that the land and the sky require different exposures to capture them at their best.

Graduated filters will transform the way you shoot landscapes. The filter blocks out more light rays in the top half, and fewer toward the bottom. Your landscape will be bright and bold, with a crisp and detailed sky.

Cool Days, Warm Skin Tones
Red-cheeked kids in the pumpkin patch, a family game of touch football, or an autumn hike in the woods: the colours of the Canadian autumn form a brilliant backdrop for your family photos. When you are photographing people outdoors, consider using a sky filter. This filter has a pink tint that will add lovely warmth to your photos, enhancing the fiery fall colours and brightening skin tones.

Filter Over Troubled Water
Water in the autumn can be breathtakingly beautiful, with flat lakes reflecting bright foliage, a stormy ocean, or a tumbling river. Photographing bodies of water, particularly on bright days, can cause haze or glare. A polarizing filter blocks out errant light rays, resulting in clear, crisp shots. Many photographers leave a polarizing filter on their cameras all the time.

Beautiful Blur
A neutral density filter doesn’t look like much—just a plain, grey filter that blocks out light rays evenly. But lowering the amount of light that hits the sensor allows you to slow the shutter speed and achieve an artistic blur of movement. Streams and waterfalls are wonderful test subjects: with the filter in place, you can get a perfectly exposed shot of the rushing water.

Your London Drugs Camera Department carries a variety of filters for different makes and models of cameras. Bring your camera in and we can help you choose the perfect filter to take gorgeous autumn shots.

Home Studio Essentials: Preparing for a Portrait Photo Shoot

Studio portraits capture people at their very best—bright eyes, luminous skin, and gorgeous details that bring out the unique personality of each person. Professional photography studios carefully control their lighting using a few basic principles. With a little planning and some strategic purchases, you can quickly set up your own temporary studio and take gorgeous portraits of your loved ones.

Studio Lighting Basics
When you look beyond the high tech equipment, a professional photography studio is simply a space with well-controlled lighting. Each lighting element has a specific purpose.

The main light
Placed above the subject and at an angle, the main light is the primary source of illumination. These lights often have an umbrella behind them to help direct the beams at the subject.

Your ideal main light will be strong, yet diffuse, the indoor equivalent of a cloudy daytime shot. You may have a room with a lot of natural light, or you can use an artificial light like a very bright lamp or a studio lighting kit. Quick to set up and simple to use, a studio light can give you the freedom to photograph in any room, at any time of day.

The fill light
A strong main light will create harsh shadows on the face, so studios will use a soft fill light to illuminate the dark side of the face. There are some tricks you can use at home to get the same effect.

Try using a soft box on your main light. A soft box diffuses the light rays through a large, softening surface area. There will be fewer harsh shadows on your subject’s face, reducing the need for a fill light.

Instead of a fill light, use a reflector. A reflector can be any flat, white surface that is angled to bounce the main light onto the shadow side of the face. You can use a large piece of white cardboard or foam core. Professional reflectors are collapsible and come with different surfaces that will subtly change the colour tones of the reflected light.

The back light
Shadows on the backdrop will distract from the portrait, so studios illuminate the backdrop as well. You can do this with small lights angled upward against the backdrop, or you can move your subject away from the backdrop. This larger distance will cast the shadows out of the frame. Take some test shots to find the perfect set up.

Tips and Tricks

Focus on the eye—Always focus on the pupil of the eye. This is the sharpest feature on the face, and will ensure a clear, bright-eyed portrait.

Shoot with a wide aperture—A wide aperture gives you a shallow depth of field. This means your subject will be in focus, with the background pleasantly blurred.

Use a tripod—For clear, sharp portraits, a tripod is essential. Knowing the location of your camera will allow you to precisely control lighting and other visual elements. You will also eliminate handshake, which happens to the surest of photographers.

Consider your backdrop—There are very few places in a home that have both an attractive, distraction-free backdrop and perfect lighting. We recommend finding your best lighting conditions, and adding a simple backdrop that will not compete with the portrait. This can be as simple as a smooth white sheet hanging against the wall. You can also purchase a portable backdrop frame that can expand to 9’ wide by 12’ high, perfect for group portraits. Use your own fabric or paper backdrop, or purchase them ready-made.

Shoot in RAW—Portraits are perfect for shooting in RAW. You can carefully manage white balance and exposure on your computer. Since your lighting conditions will be exactly the same in any given photo shoot, you will be able to correct the white balance for all your shots in one batch.

London Drugs can help you find the best home studio products for your needs. Drop by our Camera Department and our LDExperts can help you out.

« Previous Page Next Page »