While spending more time at home, have you found yourself enjoying the art of cooking or baking more? If so, you are not alone. A quick scroll through any social media feed and you’ll see everyone is cooking up a storm. If you want to capture your home creations in photos, we are here to help. We’re sharing 3 concepts to improve your food photography using your phone, a piece of paper and natural light, and it won’t interfere with enjoying dinner!
Follow along to learn how to elevate your food photography beyond the snapshot by considering content and framing, staging, and lighting. The examples below were all shot with an iPhone 11 and available light.
1. Content & Framing
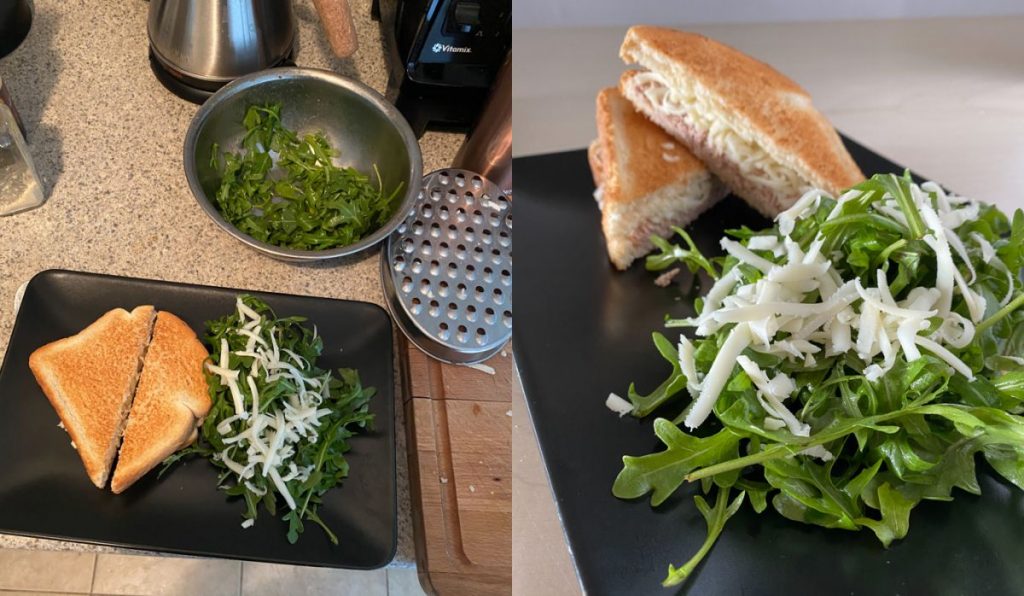
What makes the images above different? The image on the left looks busy with all the counter items distracting focus from the food. To make your food photos shine, consider everything that is present in the frame. Ask yourself if something is required to tell the story, and if so, how does it interact with the rest of the items. A clean background will allow the food to stand out.
In the above right, you see the image is taken at a ¾ height with the salad as the prominent item, and the sandwich slightly out of focus in the background. You can also take an overhead shot looking straight down depending on how you feel the plate will come to life best. For an overhead shot, you will want to consider the surface it will be on, and any items that are visible. There are many other angles you can do, and if using an interchangeable lens system, a macro lens will allow you to get in to capture up-close details. For this blog, we will keep it to phone photography.
2. Staging
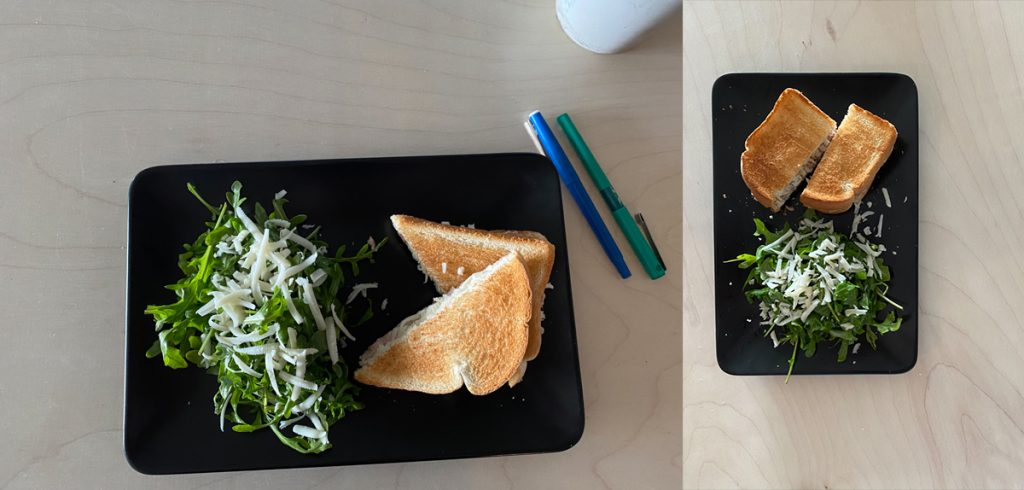
When plating your dish, carefully craft your plate. Examine the above two images. Notice the sandwich is cut differently, and in the left it is stacked and has some unnecessary items in the frame, whereas the right is side by side.
Consider how the elements of the dish appear together. On fancy cooking shows, or at high-end restaurants they always take great care in the presentation, and at home should be no different. A simple bowl of spaghetti can be twisted in a circular motion vs dumped on a plate. These small details will go a long way to help the visual presentation. Once you have your plate ready, make sure there are no unintended fingerprints, or drips on the rim of the plate, and then it’s time to set up your shot.
3. Lighting
Lighting is what will make or break the image. In all photography, the easiest way to improve is to learn how light behaves, how to manipulate it and control it. We will be using only available light for this tutorial.
Your camera has a built-in white balance. Mixing natural and artificial light will create colour casts of warm (yellow cast) and cool (blue/cyan cast). This is due to the different light temperatures of the light sources. It is better to use one or the other to avoid various colour casts in your final image.
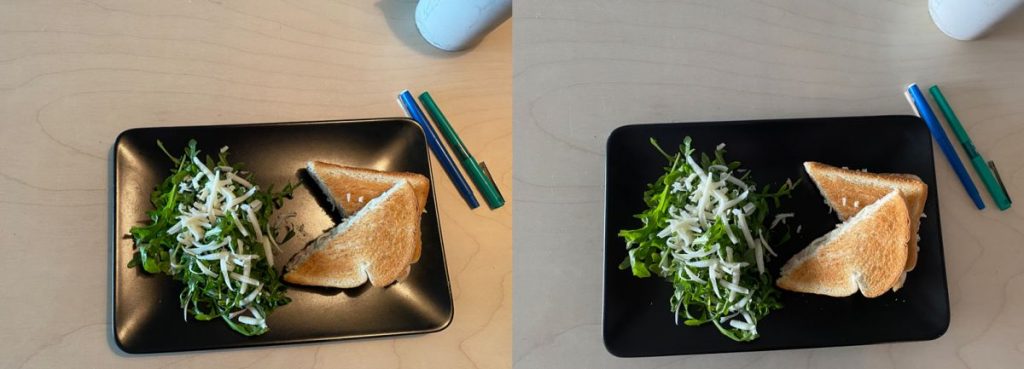
In the two images above, the available light sources are from a window on the left side and an overhead light. In the left image, the overhead light is on and in the right image, it is lit only with the window. Notice how the colour is more balanced using a single light source? In the left, there is a yellow glow in the plate and a harsh shadow from the mug. The lighting in the left image is more balanced, but the shadows are still too dark.
To fill our shadows and help balance the light in the right image above, we will use a white piece of presentation board. Any white surface can work with varied results, from a sheet of printer paper to a white paper box. Get creative with what you have around the house. Place the white paper beside the object, on the opposite side from the window. This allows the light to reflect back on the subject, and fill in that shadow. Move the card around at different angles, and watch how the light changes on the plate.
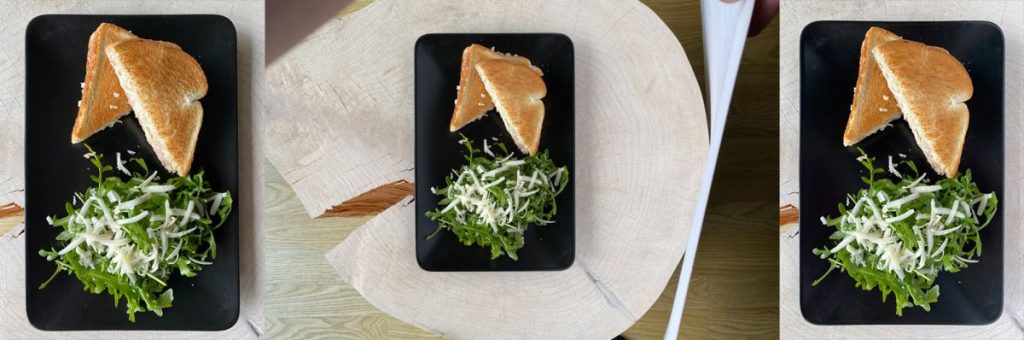
Putting it all together
Next time you make something tasty in the kitchen, consider these 3 points and watch your food photography come to life! By taking a minute to consider your image content and framing, staging, and lighting, you can craft photos as beautiful as your kitchen delights are tasty. Below is a comparison of different outcomes with the lighting conditions described above.
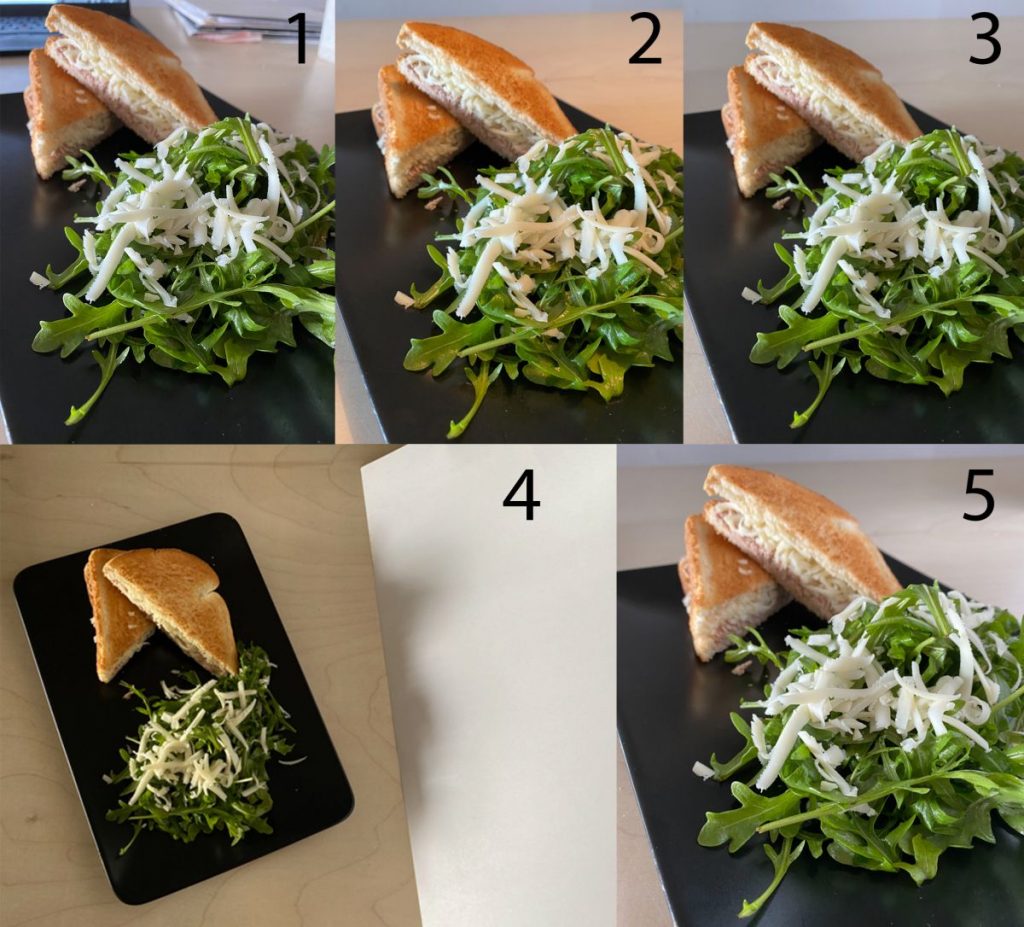
1 – Background untidy, 2 – Naturally lit with overhead artificial light, 3 – Naturally lit, 4 – Add white card, 5 – Result with white card
Be sure to consider bringing your new home chef images to life. A homemade cookbook is great for future generations to preserve your unique and tasty recipes. Our Photolab makes book-making easy, and with your new food photography skills, your cookbook will be loved by all.
