Customized calendars are one of the most popular items the Photolab has to offer. And why not? Their merits—specifically their customizability and their immense sentimental value, especially as gifts but even for oneself—have been covered frequently in past Photoblog posts like these.
However, since the last post about them the Photolab has rolled out its magical new website and in-store kiosks, making their creation easier and even more customizable than ever before. And if you doubt this claim for even a moment, I invite you to read at your leisure the demonstration that follows—
How to create a customized photo calendar
using the Photolab in-store kiosk:
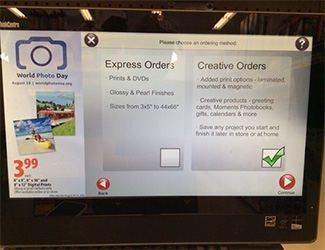
Begin by selecting Creative Orders, and then Agree to the Terms & Conditions on the next screen.
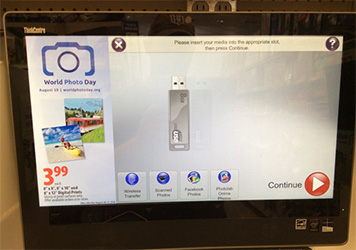
Then choose where you want to get your photos from. This time, I chose to log in and access the ones I’ve uploaded to my Photolab account.
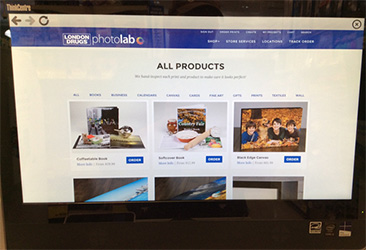
Next I select Calendars from the Products page.

On the Calendar page you can choose your calendar type, your binding…you can even choose a single page or a desktop. I’ve selected the traditional style of calendar, because I happen to be a traditional guy.
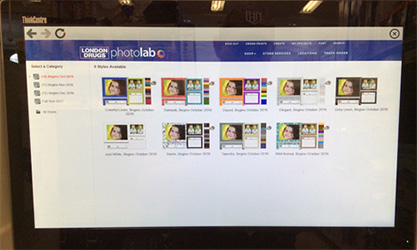
In fact, I went even more traditional and selected the standard 8.5×11” calendar. As you can see, I’ve got nine styles available in this size to choose from.
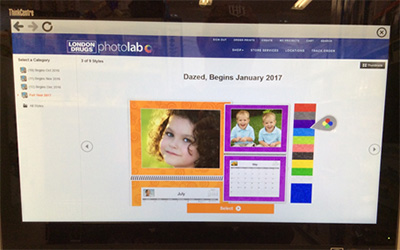
From the menu on the left I can also choose to start my calendar in October, November or December, or I can just choose the full 2017 calendar year.
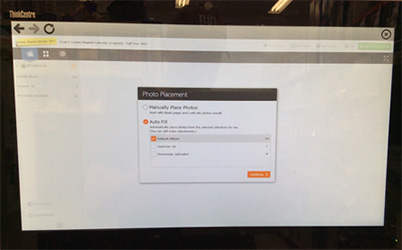
You can place your photos manually one-by-one, or you can select the autofill option. Usually when I post a demo like this, I choose the manual option so I can take you through it; but since I’ve gone that route so often, this time I’m going with autofill—you know, just to balance things out a bit.
When you select autofill, it pre-loads photos from your album into the calendar template, and then you can proceed to edit them.
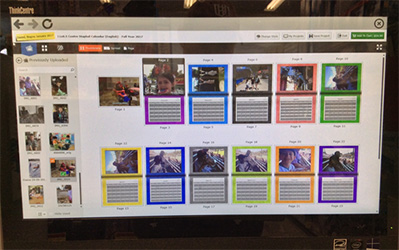
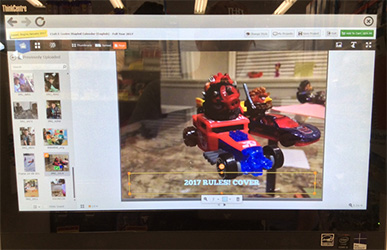
From the top left of the screen you can choose your layout; you can also select whether you want to edit the calendar in page view, spread view or as a grid of thumbnails.
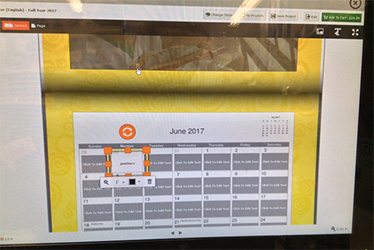
Not only can you edit or add text to your photos, but you can also add and edit text in each of the individual date boxes on each page, for every month. Now you can give Grandma’s birthday the same official recognition as a national holiday!
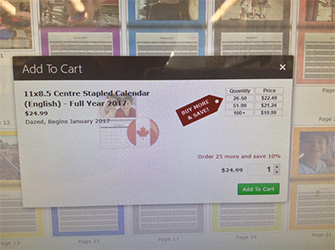
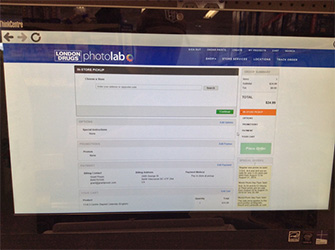
Once you’re finished with all your tweaks and edits, you can save the project to your account or add it to your shopping cart. As you can see, volume discounts are clearly pointed out. Then choose your shipping or in-store pickup preferences, and you’re done!
But the helpful advice doesn’t end there, dear readers! One thing the Photoblog hasn’t addressed much is the fact that however you want to make your Photolab calendar, great photos will make it that much better—except what do you do if you happen to have a dearth of quality photos? The solution is in this month’s companion post, which contains a helpful way to keep some handy DIY photography tips right close by whenever those perfect photo-ops present themselves.

Question: Can this calendar be created online as well?
Without having to go to the in-store kiosk?
If ‘yes’ – where do I go to find that option?
Thank you for your great services!
Also to us slightly older folk who aren’t that computer savvy…
Astri Wright
I made one of these calendars last year, as a trial run. I really liked the results except for the calendar dates all being printed in a dark gray tone. Is it possible to leave the calendar date boxes white? If so, how does one make that choice?
Thanks.