Think you can’t take stunning photos with just your iPhone? Think again! We’ve got some handy tips to take your iPhone photos from drab to fab.
1. Composition
The best way to make beautiful and impressive photos is by thinking about how the subjects are positioned. In photography terms, that’s called composition. The rule of thirds is a good place to start working on your composition, and below are a few more tips to keep in mind when setting up a photo:
- Negative Space is the area around and between the subjects of an image. One, single compelling subject will stand out more than a frame cluttered with objects. Try placing your subject against open sky, water, an empty field, smooth table top, or a large wall. Tip: tap the screen of your iPhone on the subject before you take the photo to ensure that it’s sharp and exposed correctly.

- Perspective – When taking photos, most people stand straight, point the phone at the subject at eye level, and take the shot. If you want to create interest, try changing your perspective: stand above your subject, crouch lower and point the camera up (or even lie down!), move in closer, stand further away, or move off to the side. Take many shots of the same subject from different positions and see what kind of unusual perspectives you get.

- Depth – Creating depth draws the viewer’s eye into the scene, especially in landscape photography. One way to create depth is to include leading lines in your composition. Use a road, path, railway track, river, fence or water line that leads from the foreground into the distance. Another way to create depth is to include an object in the foreground. Get rocks, flowers, leaves or other things that are close to you into the bottom or side of the frame, or if you can’t find any foreground objects, just shoot from a lower angle. Long story short, think in three dimensions, not just two.

Photo by Pacheco via Flickr
- Diagonal Alignment – We crave visual balance, and a creative way to achieve that balance is through diagonal alignment. If you have two main subjects in your scene, especially if it’s still life, try positioning them diagonally. If you can’t control the position of your subjects, you’ll need to move yourself around. (Hint: find a diagonal leading line.)

Photo by Jeremy Brooks via Flickr
- Symmetry is incredibly pleasing to the human eye, and it’s also one of the simplest ways to compose a great photo. This doesn’t always fit into the rule of thirds, but you’re allowed to break the rules once in a while to get a cool photo.

2. Patterns and Abstracts
To make a strong visual impact, capture a pattern or abstract subject. Only showing the essence of something creates mystery and interest without revealing the entire subject. Try cropping a portion of a larger photo, or take a close-up shot of an everyday object that leaves the viewer wondering what it might actually be.

Photo by Paul Frankenstein via Flickr
3. Texture and Details
Close-up images that capture intricate or delicate details can make for engaging visual content. Keep an eye out for pleasing textures and surfaces like peeling paint, moisture droplets, frost, wood grain, fabric, or animal fur.
Tip: iPhone lenses are limited, so you can’t get too close to your subjects. Instead, take the photo from a bit of a distance and crop it, and use the “sharpen” tool in your favourite photo editing app to enhance the details. (More on those tips later.)

Photo by Pablo Fernandez via Flickr
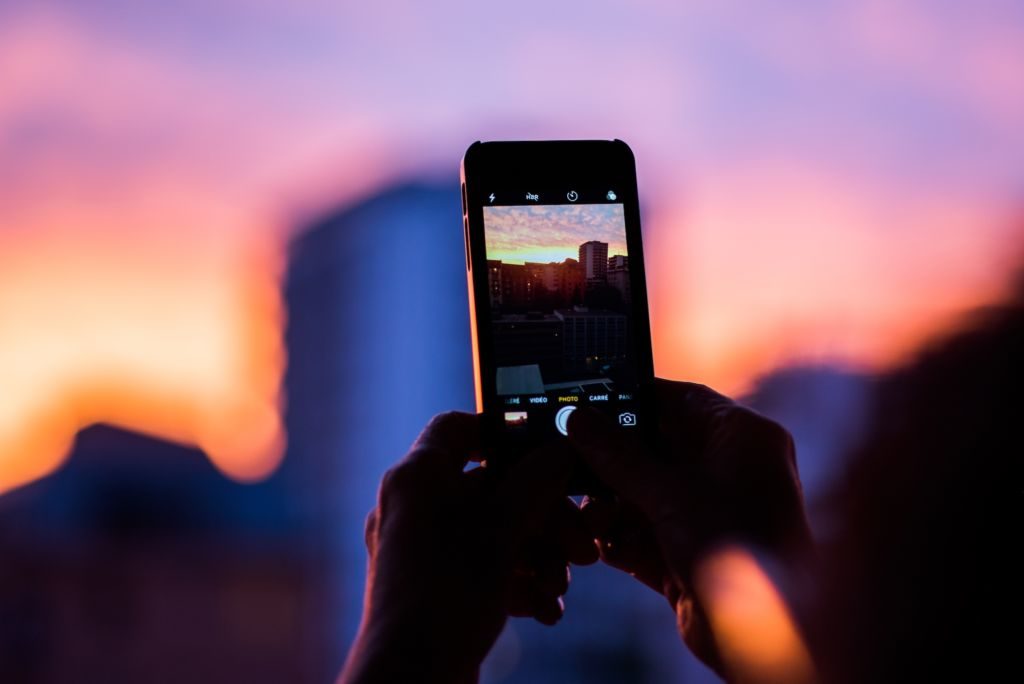
4. Silhouettes and Shadows
Silhouette photos are always eye-catching. To start, your subject needs to be positioned in front of a light source, and sunrise or sunset is the best time to capture the most beautiful silhouettes. If you’re shooting indoors, place your subject in front of a window, lamp, or a reflected light source.
Shadows are also fun to play with; once you place your subject in front of the light, try focusing on the shadow on the ground and see what striking shapes appear.

Photo by Michelle Robinson via Flickr
5. Reflections
We already mentioned that the human eye loves symmetry, and a reflection is another beautiful way to capture that. A cool reflection can also create depth and mystery. Of course a calm body of water is a perfect place to find a beautiful reflection, but keep your eye out for other reflective surfaces to shoot: mirrors, a wet street, windows, ice, sunglasses, and glass buildings are all perfect.
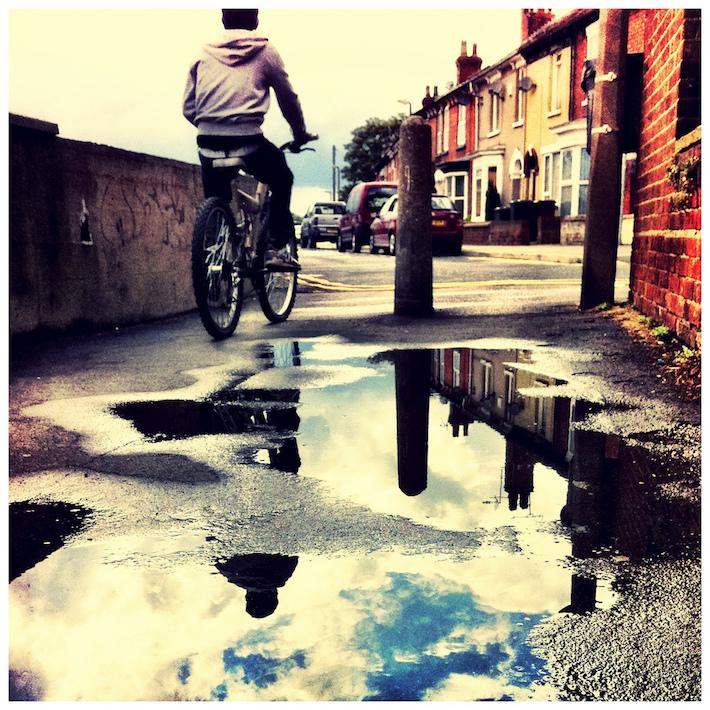
Photo by Skip via Flickr
6. Colour
Playing around with colour is a fun way to find your photography style. Think about what colours you are drawn to (muted, vibrant, bold, natural, etc.) Learning about complementary colours can also help you know what to look for and create even more visual impact. Whatever catches your eye will probably catch someone else’s eye too.

7. Candids
Posed photos are wonderful for family memories, but candid shots can sometimes tell a more captivating story. Try putting people in a setting where they can act naturally and not have to pose, like walking down a colourful street, chatting happily together, or looking at a beautiful sunset.

Photo by Michelle Robinson via Flickr
8. Natural Light
You may have noticed already that it’s nearly impossible to get a nice photo using the iPhone’s flash, so the best way to light your photos is with natural light. First, turn the flash off: open up your camera app, tap on the little lightning bolt in the upper left corner, then choose Off. Indoors, windows will be your best friend – just avoid direct sunlight, and don’t shoot directly into the window (unless you’re trying to create a silhouette on purpose).
If you’re shooting people, place them next to something naturally reflective like a light-coloured wall. If you are outdoors, overcast days are perfect for taking photos anywhere. If it’s a bright, sunny day, try to find a shady spot with some reflected light, or shoot during the “golden hour” (the period of daytime shortly after sunrise or before sunset). Night time photos can be trickier with an iPhone, so make sure there is some kind of light source nearby like a lamp or a streetlight.

Photo by Hanne Miriam Larsen via Flickr
9. Quantity
Now that we don’t have to worry about wasting precious film, we have the luxury of increasing our odds of getting a nice photo by taking lots of them. With landscapes and still life, take at least 3-5 photos for each shot (you never know when the wind will change or the sun will go behind a cloud!) and with people or animals, take even more.
Tip: Before you head out the door on a day you know you’ll be taking lots of photos, back up your phone, then clear out your Photos folder to ensure you’ve got enough memory.
10. In-phone Settings
- Gridlines – An easy way to improve your photos is with the Grid function. It will superimpose gridlines on the screen that are based on the rule of thirds. Go to Settings, choose Photos & Camera, and switch Grid on. Experiment with lining up your subjects in the sections going up and down or across the screen.
- Focus and exposure – You can use the auto focus feature by tapping on what you want in the sharpest focus, and a square will appear and focus on the area you tapped. (This will also automatically adjust the exposure, too.)
- Avoid zooming in – If you’re far away, it’s tempting to zoom in on your subject, but because the iPhone doesn’t have lenses that focus like an SLR camera, all that will do is make the photo look blurry or pixelated. Instead, get closer to your subject or take the photo from a distance and crop it later.
11. Filters and Editing
Photos filters are everywhere these days, since there are so many to choose from and easy to use. There are a few handy built-in filters in your iPhone. When you open a saved photo, tap on Edit in the top right corner of the screen, then tap on the little 3-circle Filters icon at the bottom. Scroll through the filters to choose the one that suits your mood. You can also adjust the levels manually by clicking on the dial icon, then choosing Light, Colour, or B&W. The Crop tool (the little turning square icon on the left) will help you change the size or zoom in to your photo, or you can turn it if necessary. These options could get your photo where it needs to be, but they are fairly limited. An editing app will take your photos to the next level, and there are many good ones in the App Store that are free or inexpensive.
12. Accessories
- Mobile tripod – Smartphones make photography very easy, but if you want to elevate your selfie game, get yourself a mobile tripod. It will ensure your shot stays level and balanced, and because mobile tripods are barely bigger than your mobile device, they are easy to take anywhere.
- External lenses – If you want to experiment with more angles and perspectives in your iPhone photography, invest in an external lens. From macro to fish-eye to wide-angle options, these add-ons can bring an entirely new look to your photos, without breaking the bank on a bag full of expensive gear.
We hope you will use these tips to start getting creative with your iPhone photos. Want to show off your best photos for all the world to see? Take them to our Photolab!
