As winter turns to spring, outdoor landscapes begin to bloom and blossom with stunning photo ops. If you’ve got your photography equipment ready to go, here are some helpful tips to ensure you capture your next outdoor masterpiece.
1. Near and Far, It’s All Relative
When photographing stunning natural landmarks such as mountains, try to capture not only the hero of the image but also its immediate surroundings. That way you can give the viewer a greater sense of scale.
As you’re framing your shot, have a look around you to see if there’s something closer than your hero subject that will help you tell a better story in your shot as a whole. A wide angle lens like Olympus’ 9-18mm ultra wide angle lens will increase the space differential, helping you to better tell that story.
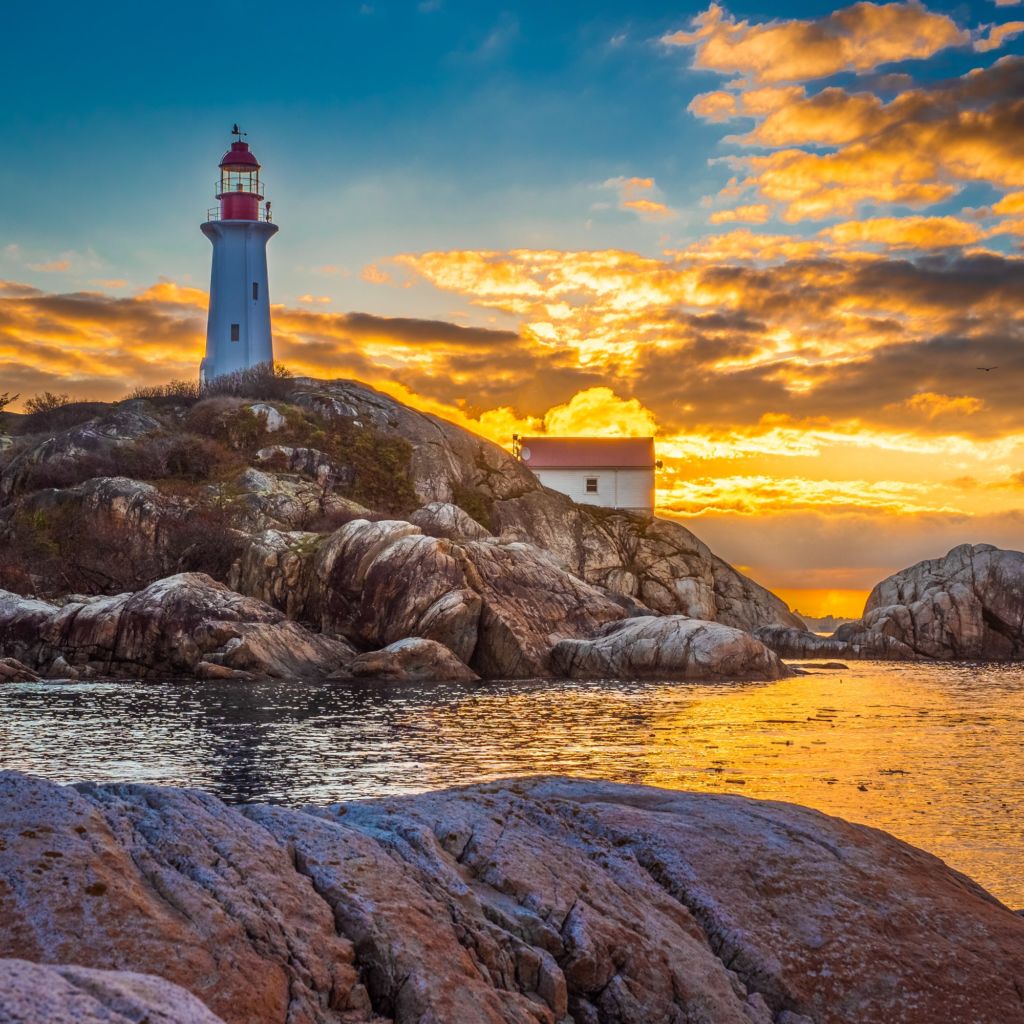
In this shot, while it would have been easy to photograph just the water and lighthouse, taking a step back and including the rock formation in the foreground gives the shot a better sense of space.
If you’re having trouble finding foreground subjects, consider using people. The human element can drastically change the feel of the image too, because then the person becomes the image’s hero!
2. Shoot at the Best Times of the Day
Did you know there are better times of the day to photograph landscapes (apart from when there is good light and the sky is clear and blue). There are four specific times of the day that pros love to shoot — provided the weather is ideal. These are called the golden hour and the blue hour, and both of these phenomena happen twice a day — in the early morning and in the late afternoon.
Golden hour occurs just after sunrise and before sunset — when the light is softer and bathes everything in a soft yellow glow that is very pleasant to photograph. Most things (including people) look better when photographed in this light.
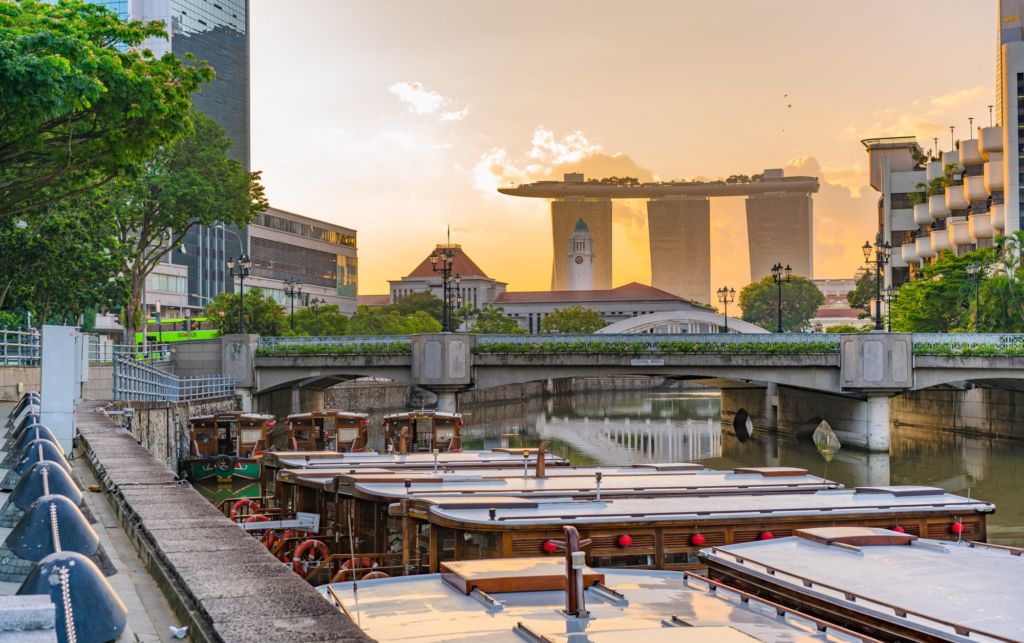
The blue hour occurs after the sun has dropped below the horizon and bathes everything in a soft blue light. This light creates a nice contrast to the warmth of golden light, and can make your image feel colder. The blue hour is a particularly good time for shooting urban landscapes and cityscapes, as it make landscapes look very dramatic and colour-rich.
3. Add Drama to Your Shot by Slowing Down Your Shutter Speed and Getting the Most Out of Your Filters
Because there is generally plenty of light during the day, using slow shutter speeds can be challenging. This is where your Neutral Density (ND) Filter will come in handy. Slowing down your shutter speed allows your camera to capture the flow and movement of things rather than the sharp features people would be most used to seeing. For example, waterfalls and streams can look stunning when slower shutter speeds are used. Just remember to pack your tripod!
A polarizing filter will allow you to remove the reflections off reflective surfaces such as water or glass. This is particularly useful when you’re trying to make your images look cleaner. Additionally, you can also stack filters so that you combine the effect of an ND and a polarizing filter!
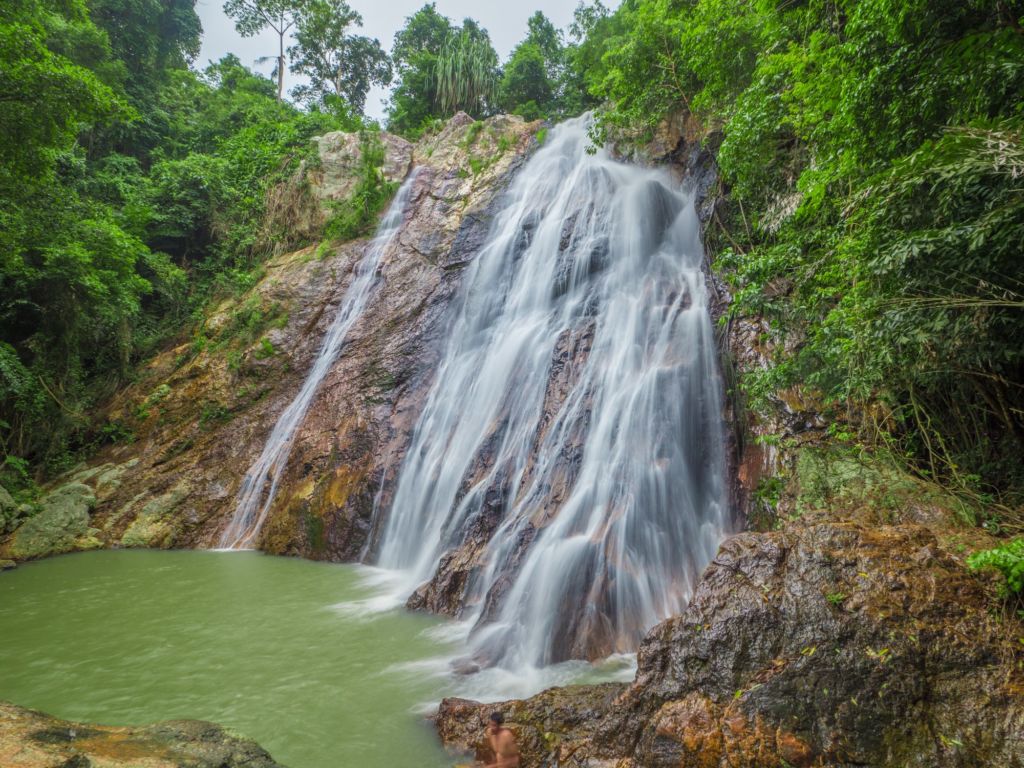
In this shot of a waterfall, notice how it is difficult to see the detail in the waterfall. Because of the way it was shot, it looks like the water is flowing rather than stationary. This is because this shot was taken at a slower shutter speed. In this shot, the camera was set to a shutter speed of two seconds. This allows the camera to adequately blur the waterfall.
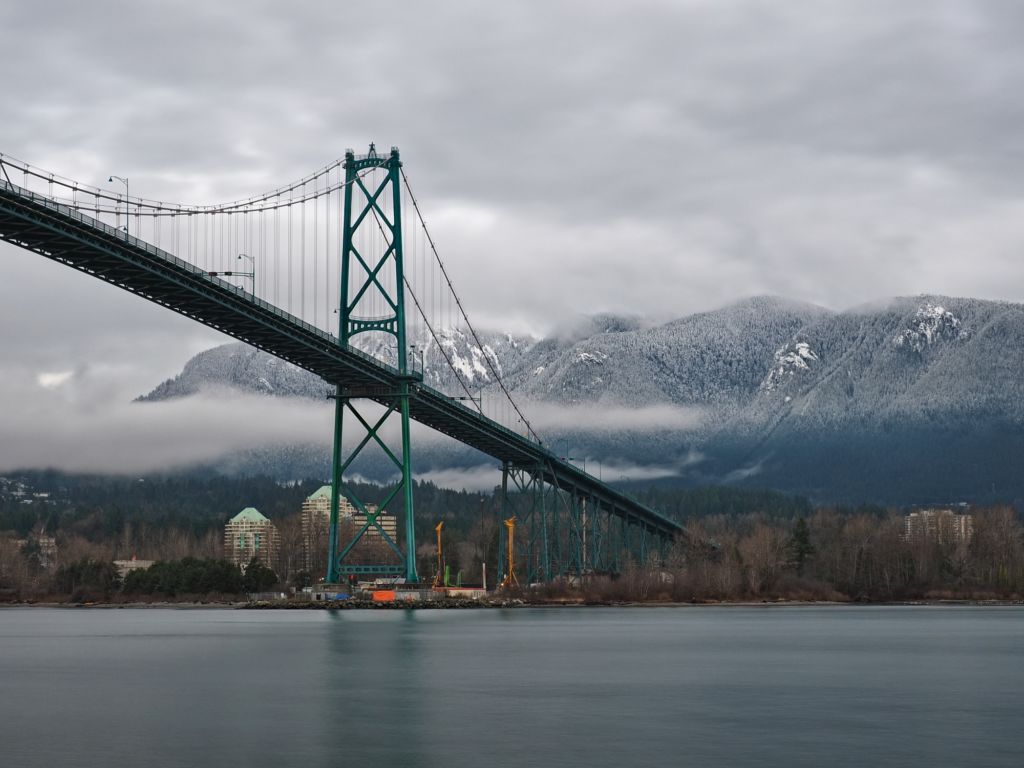
By slowing down your shutter speed, notice that rather than seeing the waves of the sea crashing on the beach, you instead see a serene flow? This was a 30-second exposure. Just remember that you will need a tripod to achieve this result as you will not be steady enough to handhold the camera.
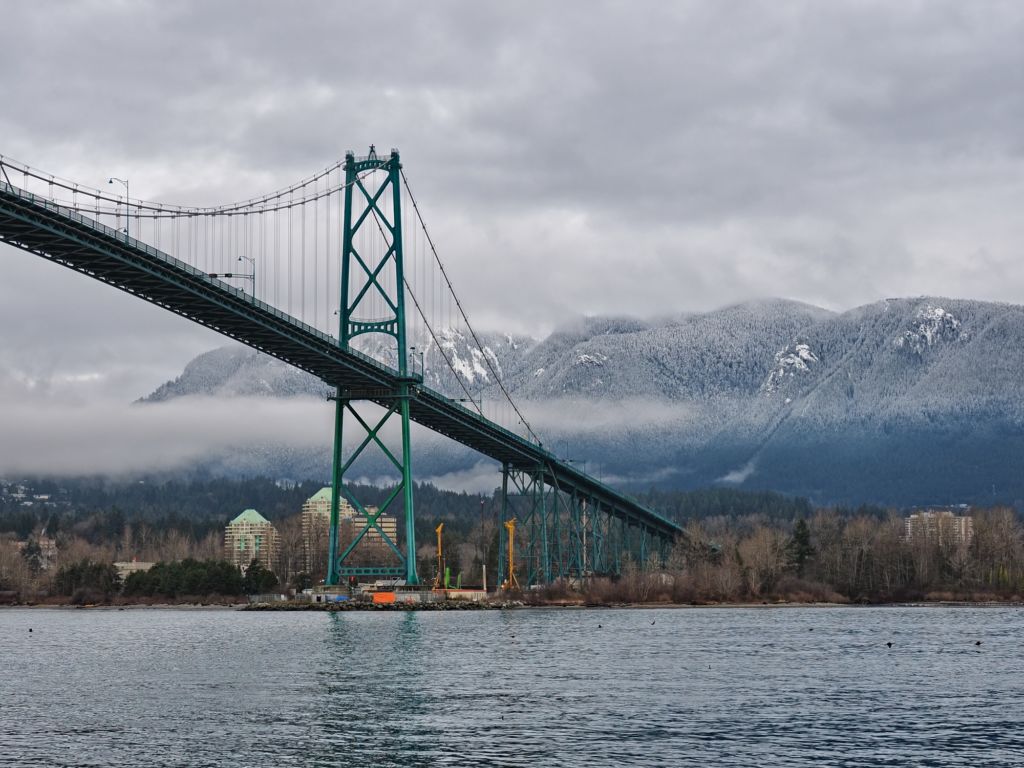
This is the same shot, however a neutral density (ND) filter was used to allow for slower shutter speeds. This shot was taken at 30 seconds and allows for the water to be less distracting ensuring that the viewer concentrates on the heroes of this shot – the bridge and the mountains!

A polarizer will remove reflection from the surface of the water so that you can see the detail underneath. Notice how you can see detail of the rocks underneath the water?
4. Get Lower to Accentuate Your Perspective and Subjects
Sometimes when you take a landscape shot, it just lacks that extra pop? It could be that you are simply not getting down low enough. Vistas that stretch for miles on end can be exaggerated by the simple act of photographing from a lower perspective.
Mirrorless cameras with articulating screens, such as the one found in the Olympus E-M5 Mark II, will allow you to get lower without placing undue stress on your back or knees.
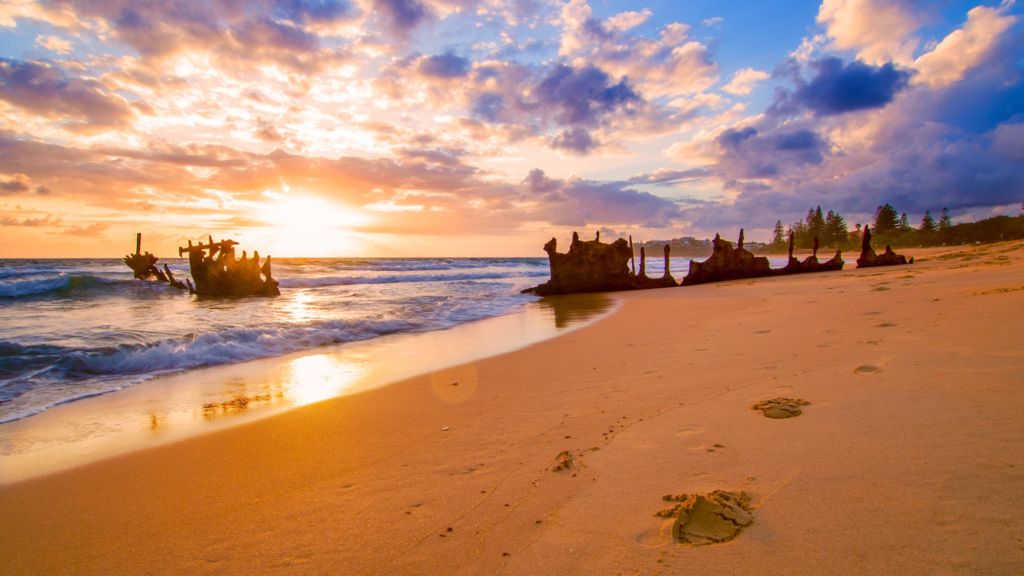
See in this image how the camera was positioned close to the surface of the sand so that you see the footsteps leading toward the shipwreck? Shooting lower allows you to accentuate your perspective as well as provide the viewer with something interesting to follow in the shot – in this case, the footsteps.
5. Converging Lines Will Always Help Frame Your Shot
Ever noticed when you look at some pictures how your eye is lead to look toward a certain direction? This is often because of a phenomenon called converging lines. Due to perspective, if edges run parallel into the distance, those edges will seem to appear to get closer and closer as the distance increases. A great example of that is when you look at train tracks into the distance. Identifying converging lines in your shot is an essential skill for landscape photography that will take your game to the next level!
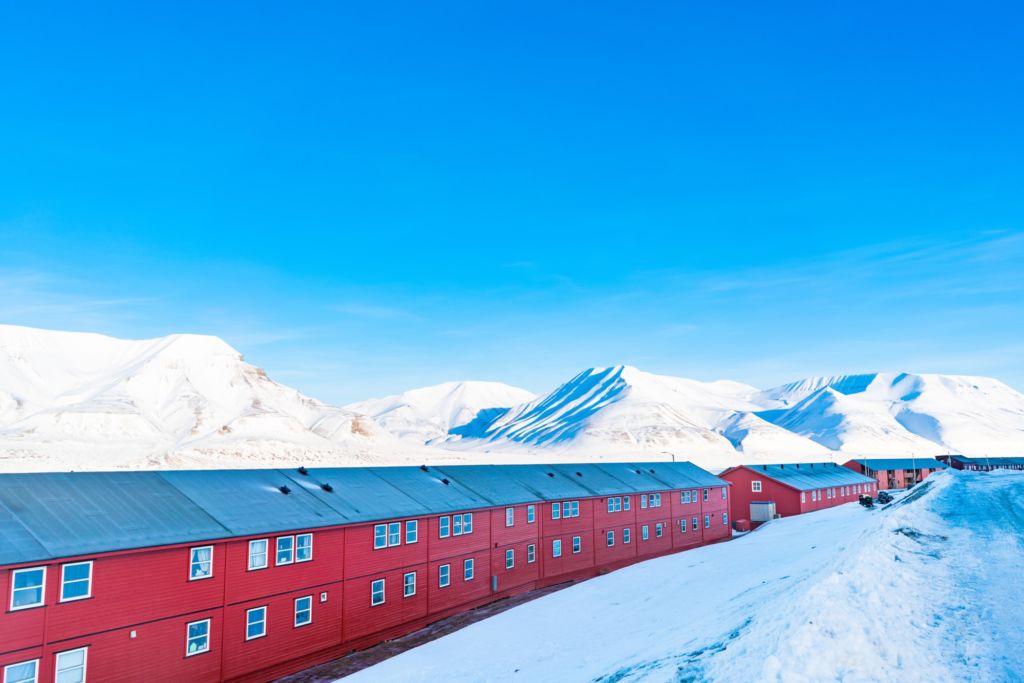
In this photo, the lines made by the buildings guide your eyes toward the right side of the image. This is a great way to use landscape features to lead the viewer’s gaze.
London Drugs carries a wide range of equipment for all your photography needs. Come talk to one of our experts in store, or check out our camera equipment online.
