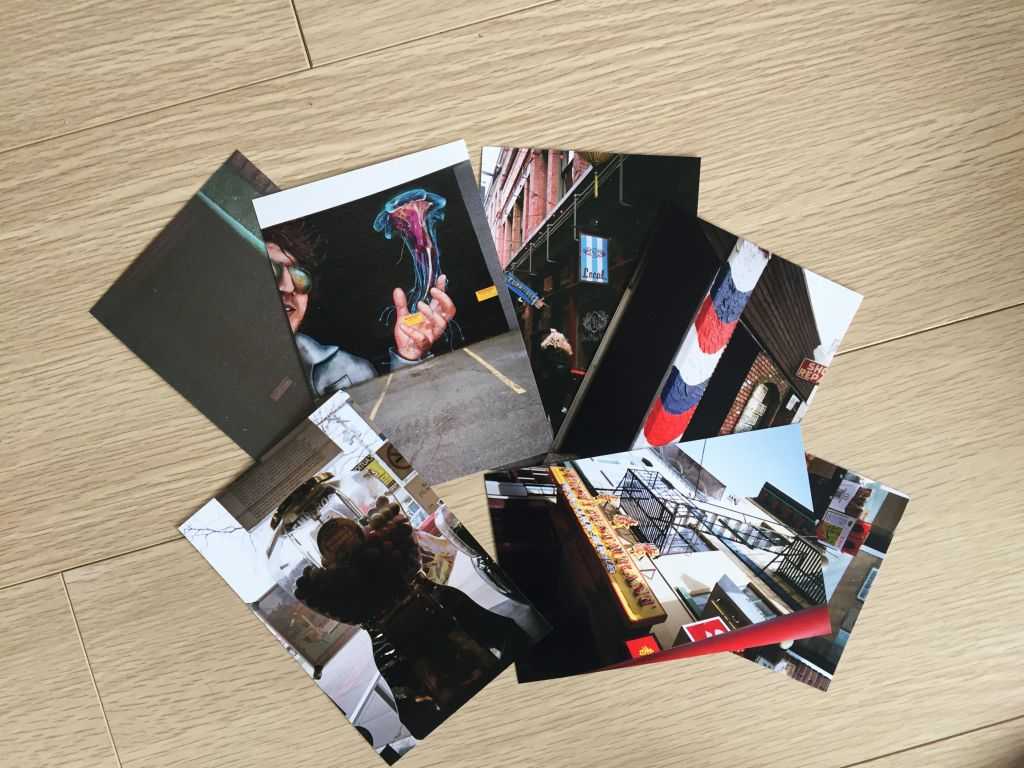
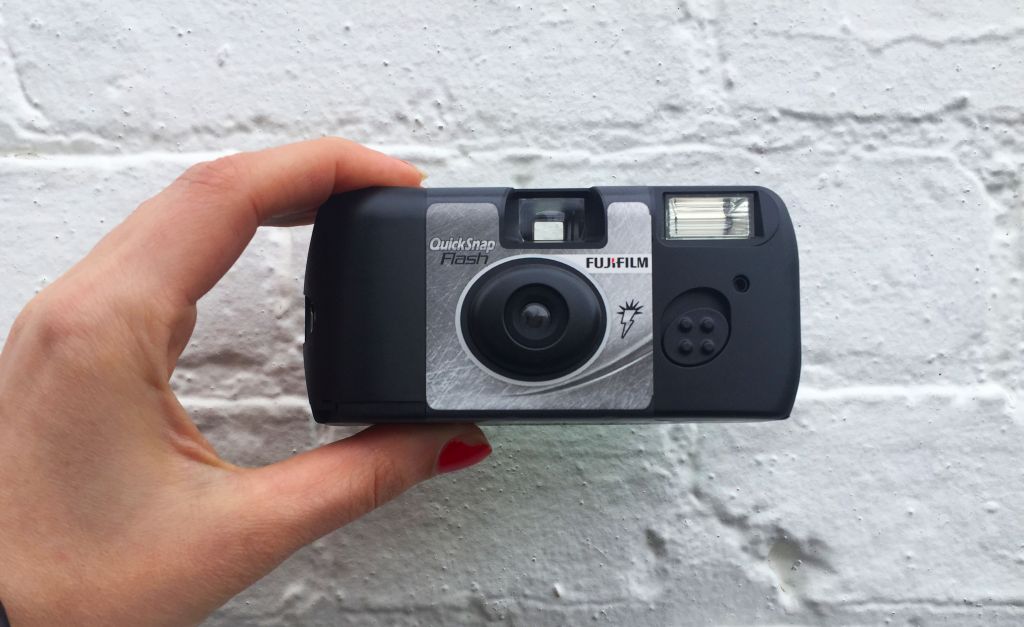
It can be tough to escape our screens, even on vacation. Ditching your digital camera for a disposable camera is a great way to capture your trip sans screen, and the rush of developing your photos once you’ve returned home will help alleviate any post-vacation blues. What the printed product lacks in pixels, it makes up for in a tangible home for your precious memories.
All packed? It’s time to take some snaps with your single use camera!
During your vacation…
Choose a daily photographer
Each day of your trip, assign someone the role of official photographer for your group and a set number of photos to take before the sun goes down. Whether you’re traveling with kids, family, or friends, a variety of viewpoints will make for a fun final product.
Add a pop of colour
Shoot your pictures through tinted sunglasses, coloured glass, or even a pair of pantyhose! For a less dramatic effect, hold a candy wrapper or piece of cellophane in front of the flash and achieve a technicolour tint. Most importantly, have fun and make sure to capture everything you find cool, compelling, or quirky about the trip. The more bizarre, the better!
Once you’ve returned home…
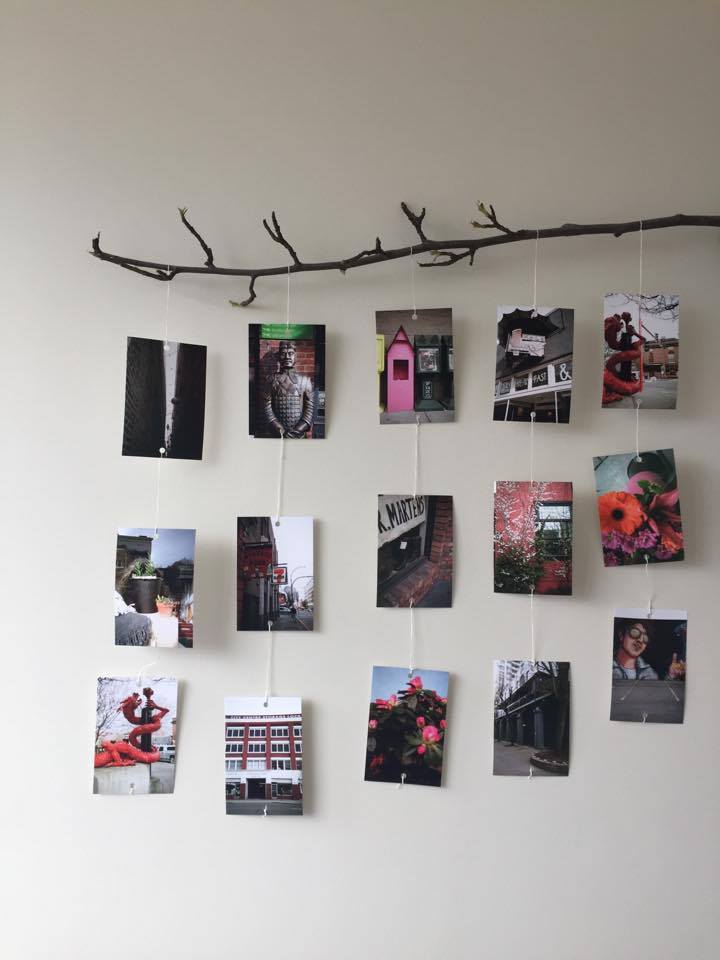
Create a DIY floating photo wall
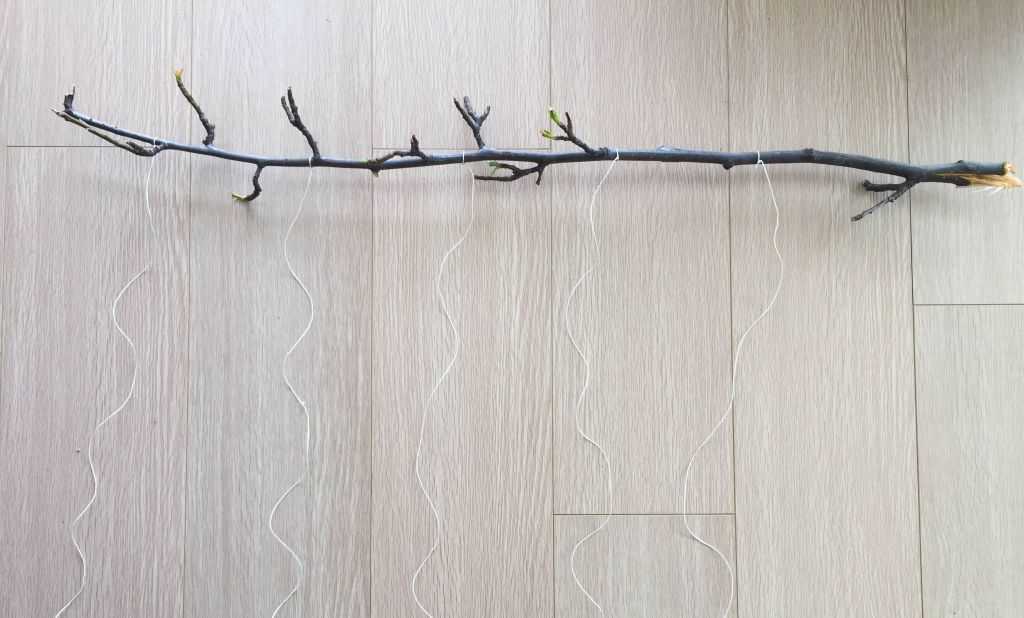
Looking for an easy way to turn your photos into a gorgeous mobile display? All you need is a hole punch, some string, and a long, slim stick.
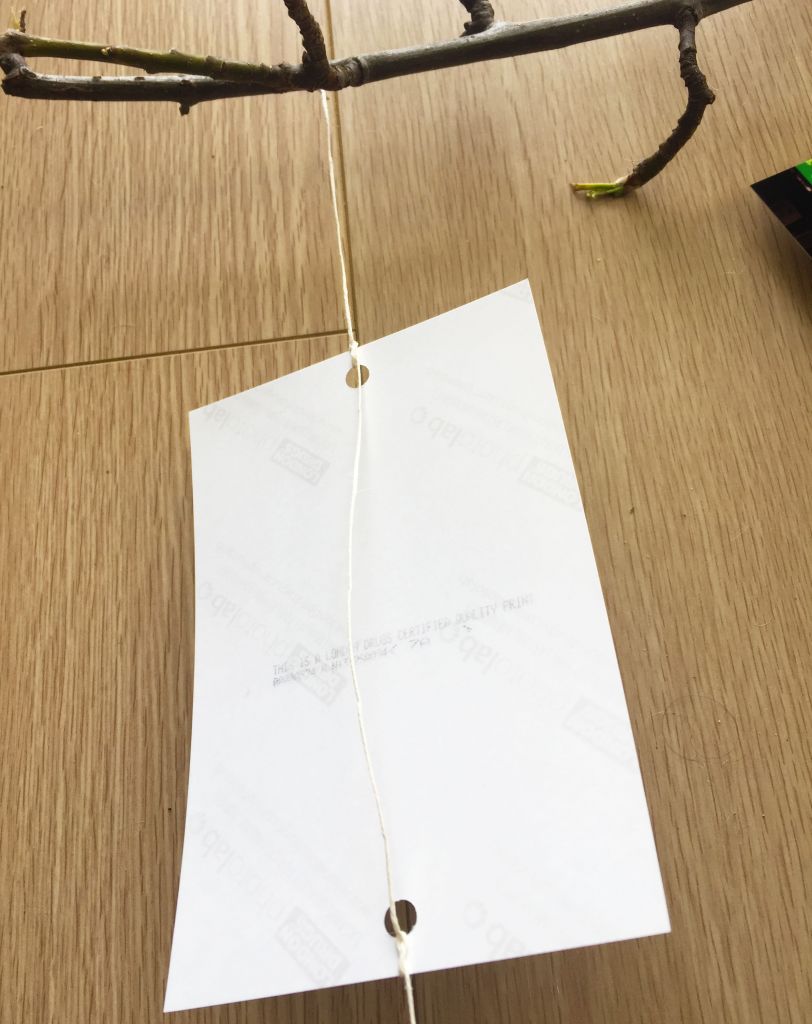
1. Start by punching two holes in each picture—one in the centre of the photo near the top, and one at the centre of the photo near the bottom.
2. Cut several segments of string, between 4 and 5 feet long and tie them along the length of the stick. Leave a hands’ length or more between each piece.
3. Once the string is secured to the stick, take a strand and thread the end through the top hole punch of any picture. Shimmy the picture to the top of the string and secure it there with a knot.
4. Then, bring the string around the back of the picture and thread it through the bottom hole punch. Secure the bottom of the photo to the string with another knot.
5. Pick another photo from the pile and repeat steps two and three, attaching your next photo to the string right below the first photo. Two photos down!
6. Continue to attach photos along the length of the string until you hit the end, then move on to the next strand.
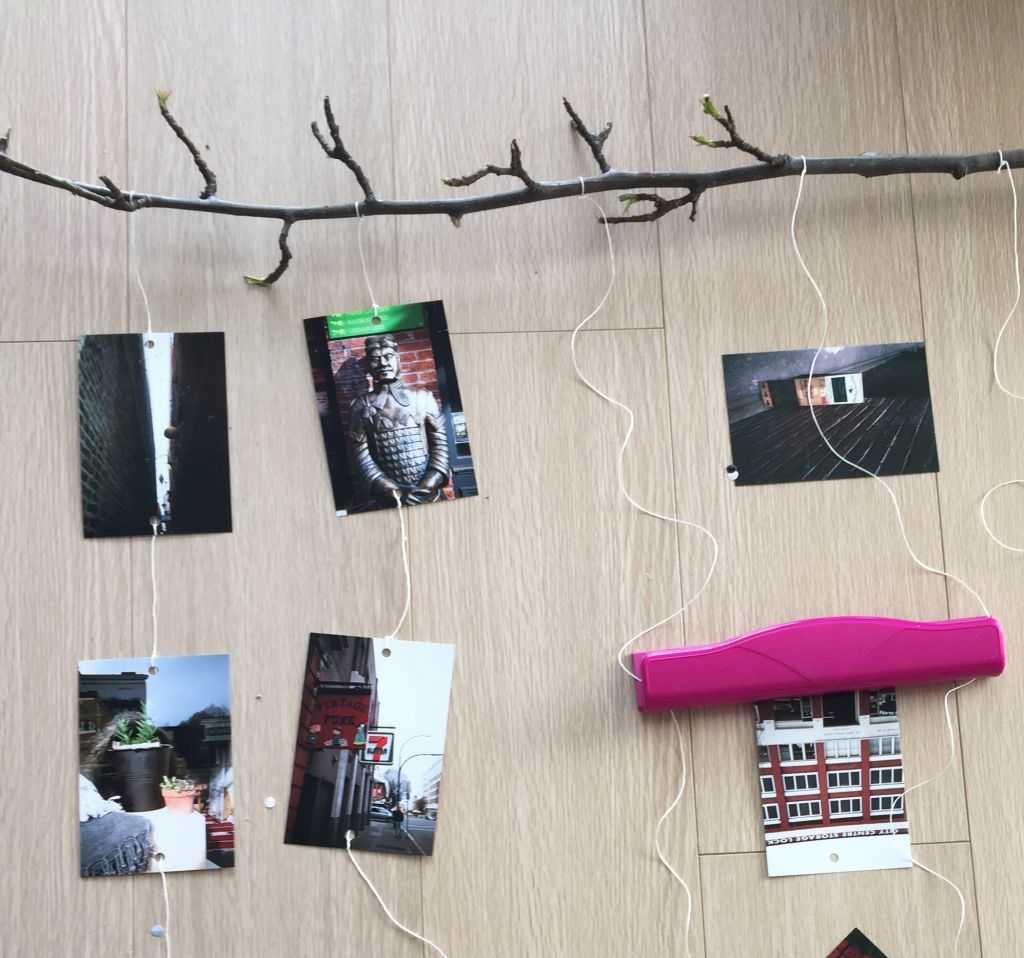
7. Once each strand is loaded with photos, you’re ready to put your pièce-de-résistance on display. Cut another length of string and tie each end to an end of the stick. Use this string to hang your floating photo hanger from a nail or hook in the wall for all to see.
Create your own framed collage
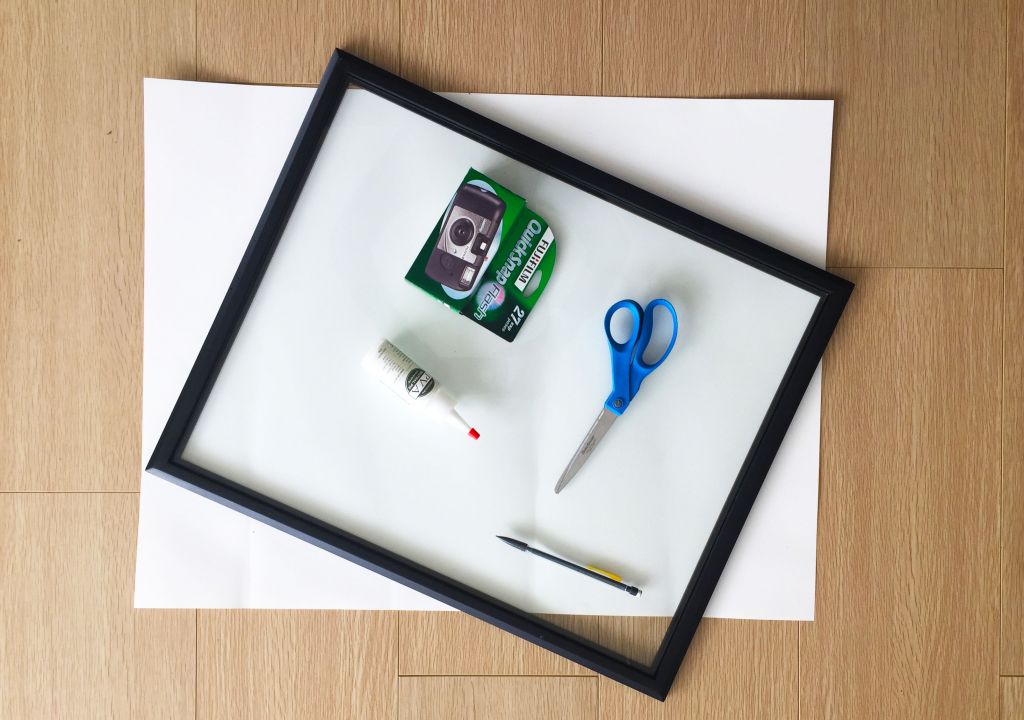
Think collages are a kitschy kindergartener craft? Think again! A framed photo collage can be an upscale way to display your favourite photos. For this project, you’ll need a large picture frame, a tube of glue, scissors, a pencil, and a piece of white poster board.
1. Start by cutting the poster board to fit the picture frame.
2. Then, decide on the shape your collage will take—something with a simple silhouette like a heart, martini glass, or palm tree is perfect. Can’t think of a shape? A short word or date is equally eye-catching!
3. Sketch the outline of your shape on the white poster board then fill it in with your printed pictures. For the best results, cut your pictures to fit the shape of the collage—round edges, trim corners, cut pictures in two. It’s up to you!
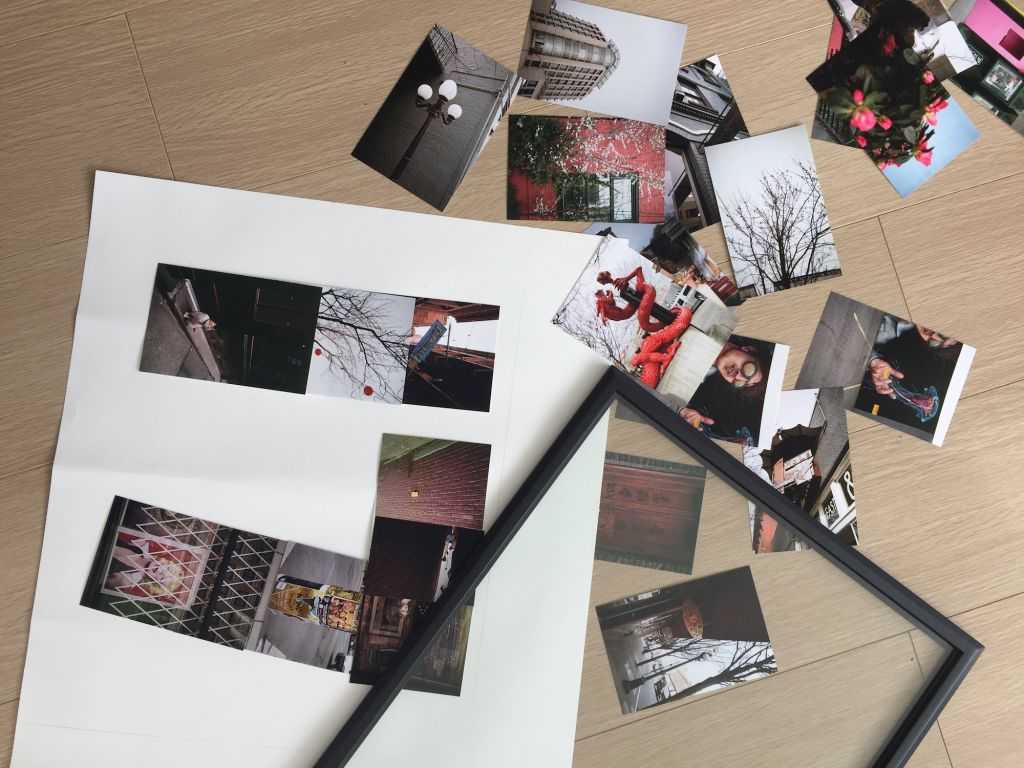
4. Once you’ve figured out the perfect placement for each picture, glue them in place. Lay the poster board down on a flat surface, and let it dry overnight.
5. In the morning, pop it into the picture frame and mount it on a wall. Your personalized collage will serve as a reminder of your vacation every time you walk by.
Heading on a trip? Swing by London Drugs and grab a disposable camera. We’ll be happy to print your pictures once you get home!
