The Cutest First Day of School Photos

Whether your kids are learning from home or are back in the classroom this September, one thing is certain: the first day of school is even more of a significant moment in time than it usually is. In the midst of such extraordinary times, there’s even more reason to document the ways life has changed (or stayed the same) this year – from life at home to the first day of school. Many parents snap a first day of school photo each year to signify the start of a new chapter for their child, while documenting their growth since the previous school year. They grow up so fast, and photos help you document it!

Below, we’ve rounded up 10 of the cutest first day of school photos of little ones ready to hit the books. And keep on scrolling to learn how you can preserve your child’s first day of school milestone, with prints from our London Drugs Photolab (plus get a code for free shipping)!


Our Photolab can help you mark this important annual milestone in you and your child’s life with keepsakes you’ll appreciate being able to look back on years from now. Choose from quality prints in different finishes such as glossy, pearl, bamboo, metallic and even canvas. Also, our print size options are nearly endless, starting at 4×4 and going all the way up to 44×96 for some prints. We can even turn those first day of school photos into fridge magnets!

You can conveniently pick up your order in-store, or if you’re not nearby a London Drugs location, we can ship it directly to you. Use our promo code SHIP2020 for free shipping on orders over $7.99! Valid September 17 – September 30, 2020.

NEOWISE Comet – Tools to See and Capture

The NEOWISE comet is viewable for the month of July across western Canada, and we are here with a few helpful tips to help you make the most of it! Although it will only come within about 103 million kilometers of earth, it will be visible to the naked eye in the north western night sky. To get a better view, a pair of binoculars will help get in closer. If you want to really see it up close and personal, consider using a telescope. We have a wide range of options a variety of price points available in-store and online.

If you’re looking to capture images of the Neowise comet in the night sky, for optimal results you will want to use a mirrorless or DSLR camera. Surprisingly, you can capture beautiful images even with a kit lens. If you attach a telephoto lens, you’ll be able to get even closer. Shooting in manual mode with a high ISO and slow shutter speed will ensure to let in as much light as possible and have the control to capture the image you want. Check out the examples below captured by LD Expert Tim Y earlier this month in Saskatoon Saskatchewan. We’ve included the camera settings, and focal length he used to show what can be captured with everything from a kit lens at 55mm to a 600mm telephoto. Hopefully this can help you to create your own striking images!


Taken in downtown Saskatoon. 55mm lens, 5 seconds, F4, 1600 ISO This is an approximation of how it would look to the naked eye.

10mm lens, 30 seconds, F8, 3200 ISO

55mm lens, 10 seconds, f2.8, 1600 ISO

135mm lens, 20 seconds, F2.8 800 ISO With camera mounted on a Skywatcher Star Adventurer tracking mount. (Special order item)

80mm lens, 15 seconds, f2.8, 1600 ISO

Whether you choose to view or capture, we have the tools and accessories to get the most out of the experience.
“Remember, there is a big, beautiful sky out there and there is always something interesting to capture with your camera. Take the time to head out where the world is dark, the sky is clear and the memories are just waiting to be made and captured.” Tim Y

See more of Tim’s amazing night sky photography on Instagram @livingskyguy

Tim Y, an LD Expert from Saskatoon. Tim has been a photographer for over 40 years, an #LDExpert for over 30 years, and an astrophotographer for five.

Elevate Your Photography – Food Photos at Home

While spending more time at home, have you found yourself enjoying the art of cooking or baking more? If so, you are not alone. A quick scroll through any social media feed and you’ll see everyone is cooking up a storm. If you want to capture your home creations in photos, we are here to help. We’re sharing 3 concepts to improve your food photography using your phone, a piece of paper and natural light, and it won’t interfere with enjoying dinner!

Follow along to learn how to elevate your food photography beyond the snapshot by considering content and framing, staging, and lighting. The examples below were all shot with an iPhone 11 and available light.

1. Content & Framing

What makes the images above different? The image on the left looks busy with all the counter items distracting focus from the food. To make your food photos shine, consider everything that is present in the frame. Ask yourself if something is required to tell the story, and if so, how does it interact with the rest of the items. A clean background will allow the food to stand out.

In the above right, you see the image is taken at a ¾ height with the salad as the prominent item, and the sandwich slightly out of focus in the background. You can also take an overhead shot looking straight down depending on how you feel the plate will come to life best. For an overhead shot, you will want to consider the surface it will be on, and any items that are visible. There are many other angles you can do, and if using an interchangeable lens system, a macro lens will allow you to get in to capture up-close details. For this blog, we will keep it to phone photography.

2. Staging

When plating your dish, carefully craft your plate. Examine the above two images. Notice the sandwich is cut differently, and in the left it is stacked and has some unnecessary items in the frame, whereas the right is side by side.

Consider how the elements of the dish appear together. On fancy cooking shows, or at high-end restaurants they always take great care in the presentation, and at home should be no different. A simple bowl of spaghetti can be twisted in a circular motion vs dumped on a plate. These small details will go a long way to help the visual presentation. Once you have your plate ready, make sure there are no unintended fingerprints, or drips on the rim of the plate, and then it’s time to set up your shot.

3. Lighting

Lighting is what will make or break the image. In all photography, the easiest way to improve is to learn how light behaves, how to manipulate it and control it. We will be using only available light for this tutorial.

Your camera has a built-in white balance. Mixing natural and artificial light will create colour casts of warm (yellow cast) and cool (blue/cyan cast). This is due to the different light temperatures of the light sources. It is better to use one or the other to avoid various colour casts in your final image.

In the two images above, the available light sources are from a window on the left side and an overhead light. In the left image, the overhead light is on and in the right image, it is lit only with the window. Notice how the colour is more balanced using a single light source? In the left, there is a yellow glow in the plate and a harsh shadow from the mug. The lighting in the left image is more balanced, but the shadows are still too dark.

To fill our shadows and help balance the light in the right image above, we will use a white piece of presentation board. Any white surface can work with varied results, from a sheet of printer paper to a white paper box. Get creative with what you have around the house. Place the white paper beside the object, on the opposite side from the window. This allows the light to reflect back on the subject, and fill in that shadow. Move the card around at different angles, and watch how the light changes on the plate.

Putting it all together

Next time you make something tasty in the kitchen, consider these 3 points and watch your food photography come to life! By taking a minute to consider your image content and framing, staging, and lighting, you can craft photos as beautiful as your kitchen delights are tasty. Below is a comparison of different outcomes with the lighting conditions described above.

1 – Background untidy, 2 – Naturally lit with overhead artificial light, 3 – Naturally lit, 4 – Add white card, 5 – Result with white card

Be sure to consider bringing your new home chef images to life. A homemade cookbook is great for future generations to preserve your unique and tasty recipes. Our Photolab makes book-making easy, and with your new food photography skills, your cookbook will be loved by all.

Expert Tips for Bringing Your Camera on Your Next Camping Trip

A camping trip is one of the best ways to get out and enjoy all that the great outdoors has to offer – especially in the summertime! It’s all about turning off your phone, breathing in that fresh air, enjoy others’ company, and taking in the beauty of nature. For Canmore Alberta-based photographer Sarah Magyar, it’s also an opportunity to snap some truly great photos to remember the whole experience. If you’re keen to capture your next camping adventure, you’ll want to check out Sarah’s 7 tips below for bringing your camera along while camping.

Bringing my camera camping is something I always do. I don’t necessarily bring it for ‘professional’ photography reasons, but more so I can capture moments. My friends and I camp a lot, even if half of us have to work the next day, so bringing my camera means I get to capture and keep memories of smiling faces, people enjoying each other’s company and most importantly people shoving hotdogs and smores in their mouth!

Don’t forget your camera

So tip #1 for bringing your camera on your next camera trip is well, bring it! Capturing those authentic memories will mean more to you than the most perfect landscape image. Capture the moments that you want to hold on to forever: the ones you can look back on in years to come that will bring a smile to your face and remind you of the way things smelt, felt and looked.

Pack your lenses in the car

Tip #2! If you’re car camping, bring a few lenses, or all your gear! There are so many opportunities for photos while camping: portraits, landscapes, products, sports, the list goes on! So you’ll want to make sure you have all your lenses so you don’t miss an opportunity to get the perfect shot. Plus, you’re car camping so it’s not like you have to lug it around with you, just keep it safe and locked in your car!

Have extra batteries on-hand

Tip #3 don’t forget the extra batteries! We’ve all been there, you have the perfect shot lined up, you go to flip the switch to turn on your camera and it doesn’t turn on. I must say it is one of the worst feelings in the world! Making sure you double, even triple check will guarantee you won’t miss that awesome shot!

This is especially important to remember while backcountry camping as batteries can drain faster in the cold. Also, when you’re in the backcountry, there’s no outlets which means no charging your batteries if they die. I always make sure to bring at least two, or three, extra batteries with me when backcountry camping.

London Drugs has a great selection of batteries for almost all cameras! Added bonus they also offer a wide assortment of chargers for your batteries if you’re looking to charge all your batteries at once.

Keep your camera cool

Onto tip #4: if you’re going to be leaving your gear in the car while camping and it is hot out, you’ll want to protect it! Bring an empty cooler or something that will keep your gear cool and out of the heat. This will also protect it in the back of your car. I find this also helps with lens changes. Camping can be dirty and dusty, so make sure to keep your sensor and lens protected and clean.

Bring a portable tripod

Tip #5: Invest in a good/packable/reliable tripod! This will give you a chance to set up some great landscape shots, or allow you to maybe get in the frame and capture some memories with you and your friends. A tripod is always a good thing you to keep with you, especially if it’s small and doesn’t take up too much room.

Invest in a good backpack

Tip #6 is for both car camping and backcountry camping: invest in a good backpack! This will allow you to keep all your gear together. My bag has a rain cover which is essential when I am backcountry camping; the weather is unpredictable in the mountains and you never know if it might rain! I personally have a backpacking backpack that I put a camera insert in, however you can purchase bags with camera inserts in them. Having a good backpack will also help protect your gear when you are putting it in the back of the car or keeping your backpack in the tent with you while you sleep.

Get to know your surroundings

Tip #7: If you are a landscape photographer make sure to know the area that you’re camping in. Make sure you know where the sun will set and rise to make sure you capture those beautiful sunrises and sunsets. Whether you’re car camping or backcountry camping, know where you’re going to be sleeping and do a quick internet search to see if there is anything unique in the area you might want to capture.

Use a camera clip

Tip #8 is primarily for backcountry camping and something I find to be essential. Invest in a good camera clip that attaches to your backpack strap. Some are sleeves that slide onto your backpack strap and some are metal clips you clip on. I love capturing moments during camping trips and this allows me to have my camera accessible at any moment so I don’t have to stop and pull out my camera and slow everything down.

Print your favourite shots

When I’m finally home from an amazing backpacking or camping trip I always try to order some of my favourite images as prints. This allows me to keep those moments with me. It is also a great gift idea! Have a great photo of your best friend laughing at the campfire? Why not put it on a mug or a blanket or pillow? Better yet, you can create a poster collage of a whole bunch of images from that trip, or even use those photos to create your own calendar! The London Drugs Photolab has a great selection of different ways you can print your favourite memories and share them with your friends, or keep them for yourself.

7 Hikes for Stunning Photos This Summer

Sparkling blue lakes, panoramic views of endless mountain chains, calm meadows with wildflowers blowing in the breeze and breathtaking scenery all come to mind when you think about hiking in the Canadian Rockies. With the endless amounts of trails and mountains to summit, it can be easy to feel overwhelmed with all the possibilities of capturing amazing moments, wildlife or perfect landscapes. To help get you started, Canmore Alberta-based photographer Sarah Magyar has compiled her top 7 hikes to capture stunning photos this summer,  – some easy and some a little more difficult!

1. Tower of Babel

This is one of my all-time favourites. I am not one to re-do hikes, there are just too many to experience out here! However, this is one I try to do every year. It offers amazing views of the Valley of Ten Peaks, Moraine Lake and Consolations Lake.

It’s short but difficult, and is more of a scramble than a hike, but the views at the top are worth the physical effort. There are awesome rocks you can sit on, lakes you can shoot from above, and of course you can capture the world-renowned Moraine Lake.

2. Devil’s Thumb

Devil’s Thumb is an awesome hike in Lake Louise I would rate as moderate/difficult. The trail passes by Mirror Lake, Lake Agnes, Lake Agnes Tea House and Big Beehive making it one of the most photographic hikes I’ve done. You have the opportunity to capture some of the most picturesque spots in Lake Louise.

You follow the trail to Big Beehive then hang a right up to the top. You don’t actually get to the views of Big Beehive doing Devil’s Thumb but you pass right by the trail and I highly recommend adding the extra 500m to 1km to your trip as it offers an unbeatable view of Lake Louise.

3. Parkers Ridge

Parker’s Ridge is located along the Icefields Parkway and is an easy/moderate hike. Once you’re at the top you get awesome views of the Saskatchewan Glacier and of the Parkway. Highly recommend this one for families and anyone trying to capture something different such as a glacier!

4. Rock Pile at Moraine Lake

It is no secret Moraine Lake is one of the most beautiful (and popular!) places in Canada – in fact it used to be on the Canadian $20 bill! The Rock Pile hike is super easy and good for all ages. It will allow you to get the perfect shot of Moraine Lake, just like you’ve seen all over Instagram.

For an added bonus, visit at sunrise and walk to the dock where the canoes are. Whether it’s a cloudy morning or a clear one, it will be mesmerizing.

5. Peyto Lake

Peyto Lake is another classic spot to stop and capture the amazing blue of the lake. Some even say it looks like a wolf head! This is a heavily trafficked location and it is best to go and catch at sunset. The hike up is super easy and leisurely so it’s good for any and all ages!

6. Athabasca Falls

This waterfall is one you don’t want to miss and is along the most beautiful road, the Icefields Parkway. You have the chance to walk to the waterfall and continue to look over the gorge. This is a magical place and offers a few different perspectives for you to get creative photos!

7. Wasootch Ridge

Located in Kananaskis, this hike is a little more difficult. The beginning is steep and you gain quite a bit of elevation, but the views are worth the effort. You get views of both sides of the valley as well as the well-known mountain in Kananaskis called Yamnuska. Again, this hike offers the opportunity to get a few different shots all in the same day!


Getting these shots is half the fun! I love going home, plugging in my memory card and ordering prints, or fun gear, of my pictures! The London Drugs Photolab does an awesome job of printing shots and making them look just as vibrant and beautiful as they do on the computer and in real life. Between aluminum metal panels, canvas gallery wraps, bamboo prints, and calendars, they’ve got tons of options to make your images come to life. They even have two brand new fine art papers: Kauai and Baryta! Kauai is a smooth cotton paper that is designed for a long life, and is the best choice for prints that require Museum Grade quality. Meanwhile, Baryta is a bright white cotton paper that is ideally suited for photographic images, yielding a high D-Max with exceptional tonal range. Both worthy of your best images!

10 Photography Essentials: What You Need in Your Camera Bag

‘Tis the season to get outside and start taking fantastic photographs!

Whether you’re shooting landscapes, weddings, portraits, or just exploring the city through your lens, making sure your camera bag is “camera ready” is vital to snapping the shots you want. Nothing is worse than missing that perfect picture because you were under-prepared.

Curious what you need in your camera bag? Here are 10 photography essentials to guarantee a successful shoot.

10 Photography Essentials: What You Need in Your Camera Bag


1. Camera


This seems like a no-brainer, but ensuring your camera is photo-ready is one of the most easily overlooked tasks when prepping your camera bag. Before you launch into photography season it’s a good idea to give this core tool the once-over.

You can do this by checking the sensor for dust (many cameras have an auto-clean mode), charging the batteries to full, wiping down lenses with lens-safe wipes, and clearing any old images you no longer need from the memory.

Of course, if you’re new to photography and don’t have a camera yet, a basic digital camera will get you started.

While you’re at it, why not keep a backup camera handy? Grab your GoPro or even your smartphone and make sure the battery is charged. That way you’ll have a backup should anything go wrong with your primary device.

Pro-tip: If you’re taking pictures with your smartphone, easily send them for print directly from your phone using the Photolab app!
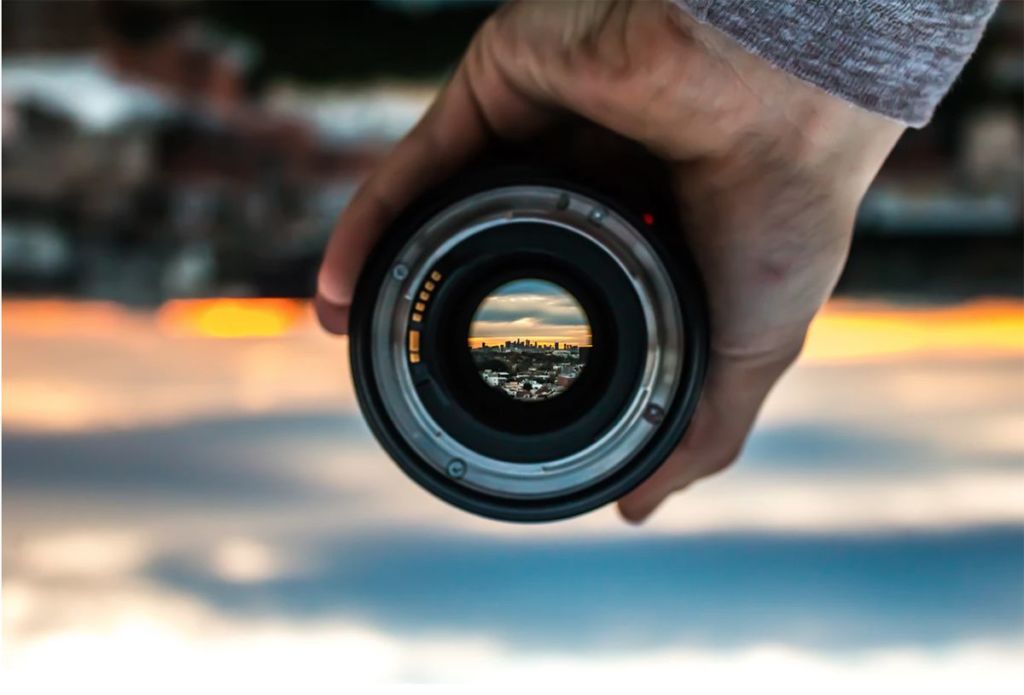

2. Lenses


  • Standard lens – 50mm / f1.8: This is basically the workhorse lens of many a photographer, and will have you shooting stunning images in no time. It creates clear, crisp images and is fantastic for indoor or lower-light photography. Ultimately it produces great images that appear more natural.
  • Telephoto lens: Think of this lens as a portrait lens. This will give you a lot of distance and a very shallow depth of field, bringing incredible focus to your subject. It’s great for weddings, wildlife, or sporting events.
  • Macro lens: Want massive up-close-and-personal detail on flowers, insects, plants, or other subjects? This is the lens for you.

3. Extra Battery

10 Photography Essentials: What You Need in Your Camera Bag

Aside from the necessary task of taking photos, a lot of things can drain your camera battery.

For example, if you use the LCD screen a lot to preview your shots, press the shutter button incessantly, turn the camera on and off quite often, or use functions like Bluetooth, Wi-Fi, or GPS, your camera battery may fall dead more quickly. Shooting video can also drain your battery. It’s not that you shouldn’t use these functions — they’re great tools within your photography arsenal! Unfortunately, they are also a drain on your power source.

Keep an extra charged battery on hand and ensure you don’t end up powerless when the right shot presents itself.


4. Polarizing Filters


If you find some of your photos look bland in post, polarizing filters are fantastic, especially for landscape and portrait photographers. When shooting outside, sunlight can be scattered, causing your final images to not look as vibrant as they did when you took them. These special filters help amplify colours and saturate light, while cutting glare and reflections in water and glass, even in hazy conditions.

They take up almost no room at all and easily attach to the lens of your camera. Investing in a couple can really take your photography to the next level!


5. Microfiber Cleaning Cloth and Digi Blower


A microfiber cloth and digi blower are two of the most understated — and useful — items in your camera bag!

Breathing on lenses can damage them with bacteria and moisture, while wiping them with any old towel can cause scratches that ruin photos. Using the proper camera cleaning supplies will ensure your camera works at optimal levels for as long as possible.

A microfiber cloth keeps on-the-go maintenance scratch-free and easy-breezy, while a digi blower is specifically designed to safely and effectively remove dust and dirt from sensitive digital cameras for safe cleaning of CCD sensors, memory card slots, and lenses.

Plus, if it’s large enough, you can use a microfiber cloth as padding to wrap around other accessories to keep them safe and undamaged during transport.


6. Spare SD memory cards


There’s nothing worse than catching the perfect shot and your camera tells you your memory card is full. Especially if the moment is fleeting.

Sure, you can go into Preview mode and scroll through the blurry or bad images to delete them, but that’s time consuming and draining on your battery. Instead, keep a spare SD memory card or two in your bag. They weigh nothing and take up practically no space at all.


7. Shot List

10 Photography Essentials: What You Need in Your Camera Bag

If you aspire to be a professional photographer, getting into good habits from the onset is a must. One of these good habits is developing a shot list.

Have you ever gone to the grocery store with a list of 10 items in your head, only to walk out with seven because you couldn’t remember the other three? The same thing happens in photography, only it’s worse because you can always go back to the store for the other things when you get home and realize what you missed. You may not be able to catch that same sunrise, gather the wedding party, or remake that perfect soufflé… and the opportunity to snap it will be gone.

Make a list of your must-have shots, and keep it close by. Use it like a checklist. This will help you tell the story you want to tell. Sure it takes a bit of planning, but future you will thank you for it.


8. A Way to Take Notes


Simply put: keeping field notes helps you take better shots.

Having your smartphone handy with your favourite note taking app or a classic notebook and a few pens in your camera bag allows you to quickly jot down something that worked well, as well as things that didn’t. Perhaps you want to remember a particular camera setting or a specific time the light was just right. Don’t just trust your memory — a lot can happen during a shoot, causing you to forget by the time you get around to uploading and editing your images.

Even the best photographers have a chance to learn from their mistakes and keeping detailed notes about how a shoot went — whether you’re a professional or hobbyist — can help make your photography better.


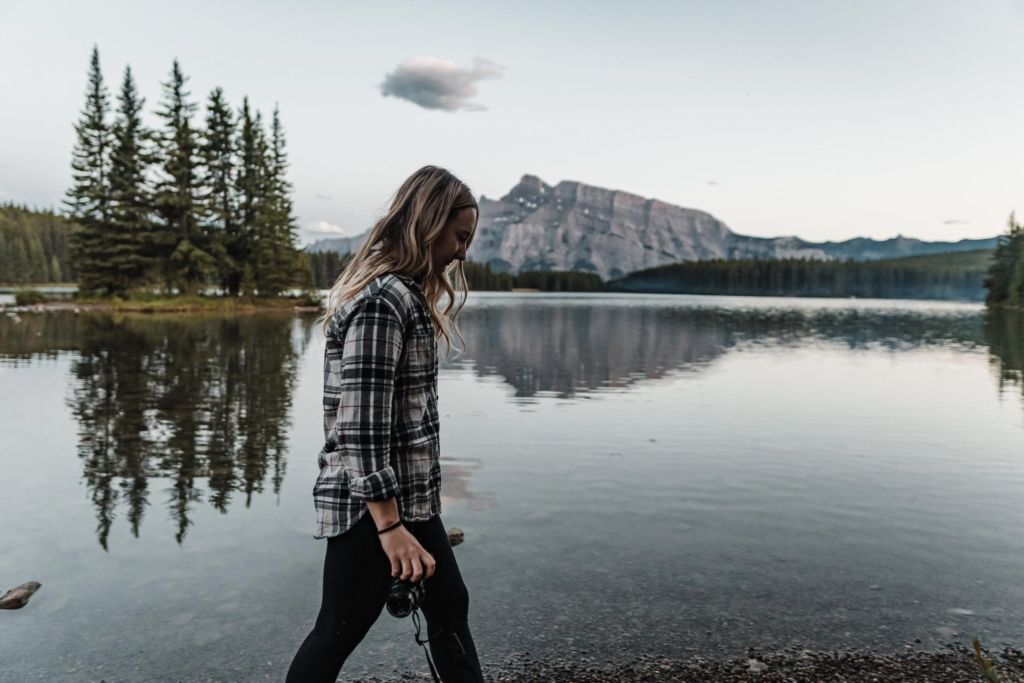
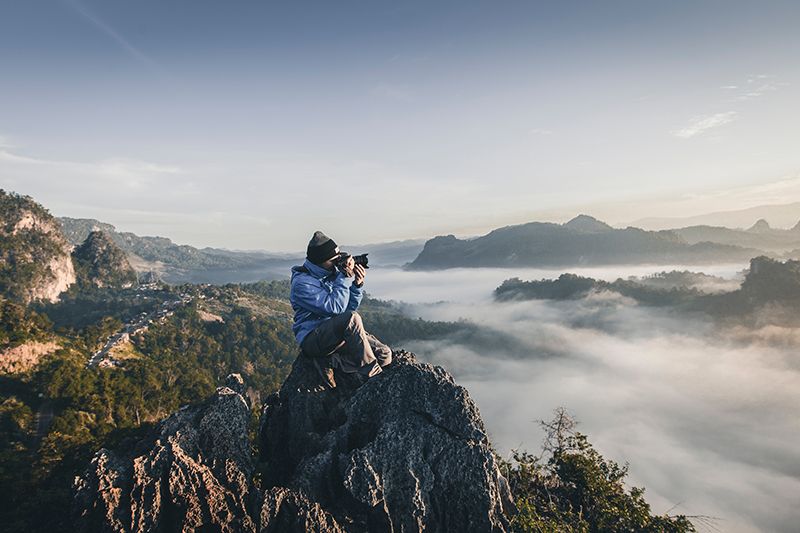
9. Sense of Adventure

10 Photography Essentials: What You Need in Your Camera Bag

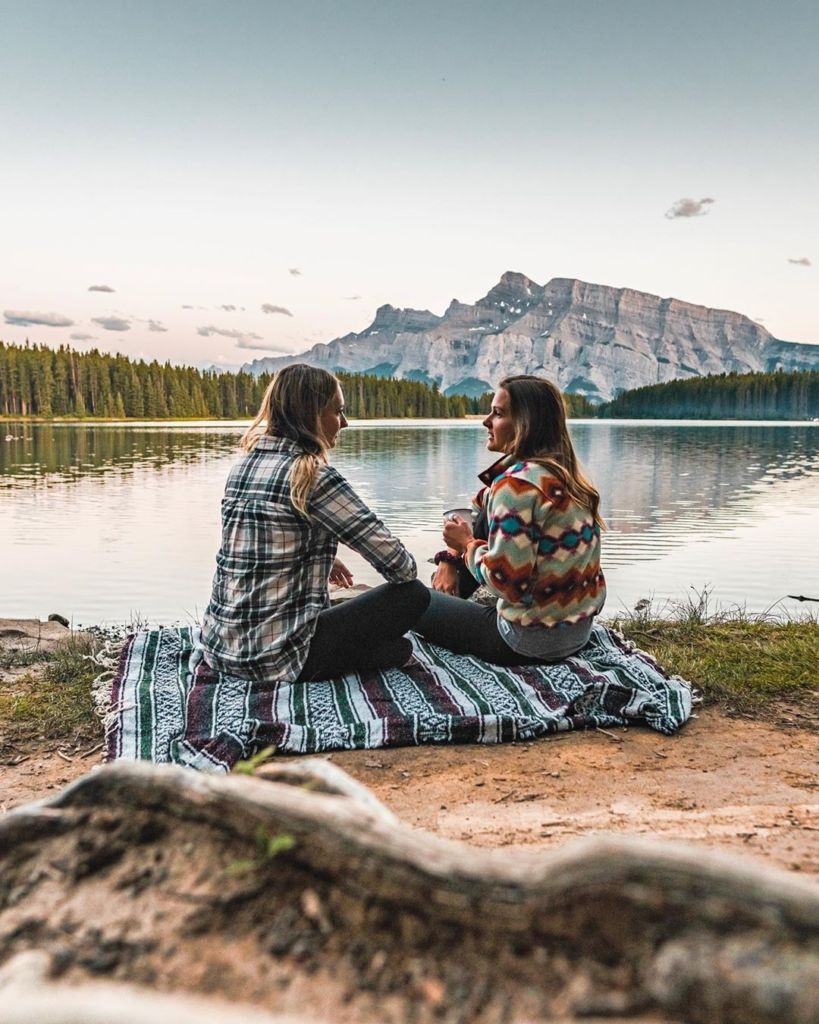
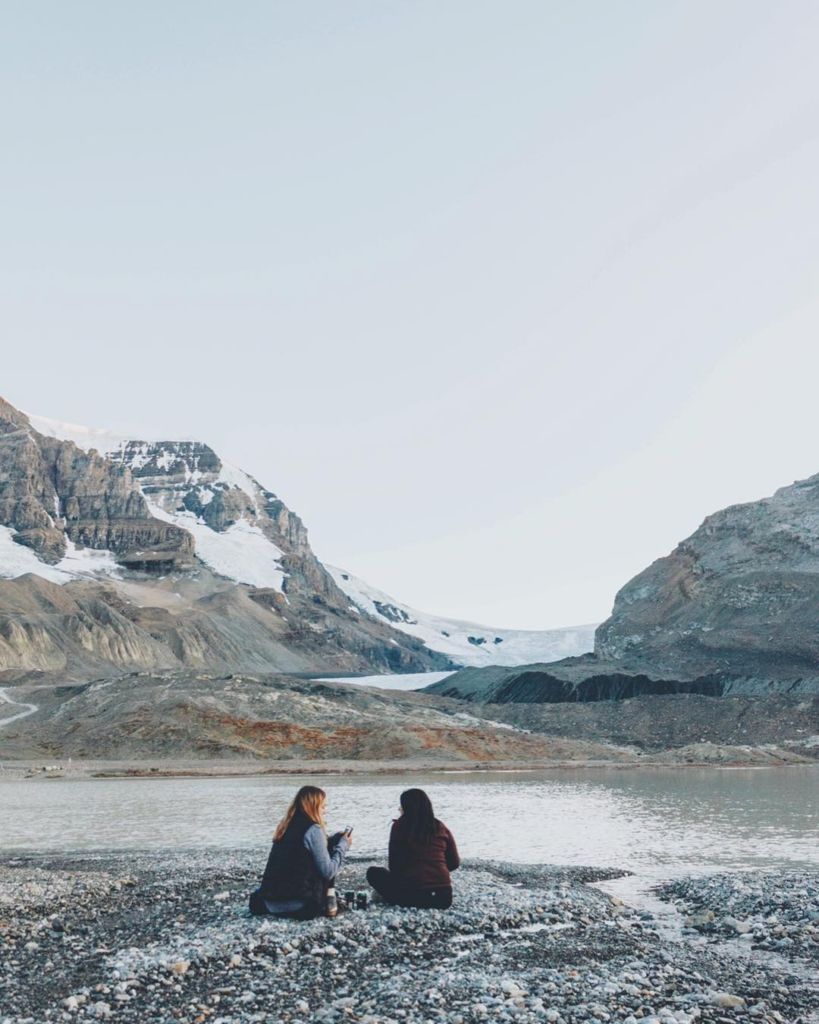
Photography gives us the chance to see the world through a different lens — a different perspective. It gives us the chance to explore our cities, share our travels, and indulge our senses. It also allows us to connect with other humans — whether we’re taking pictures of them, or enjoying the shots of others. And that’s exciting!

So get out there and take some pictures. It’s a big wide world… so don’t forget your sense of adventure!


10. BONUS Essential: A Tripod!


While a tripod won’t typically fit in your camera bag, it is something that can be useful during certain shoots. It’s true most new cameras come with built-in stabilizers, but for added value, here are our favourite two reasons to carry a tripod for those special occasions.

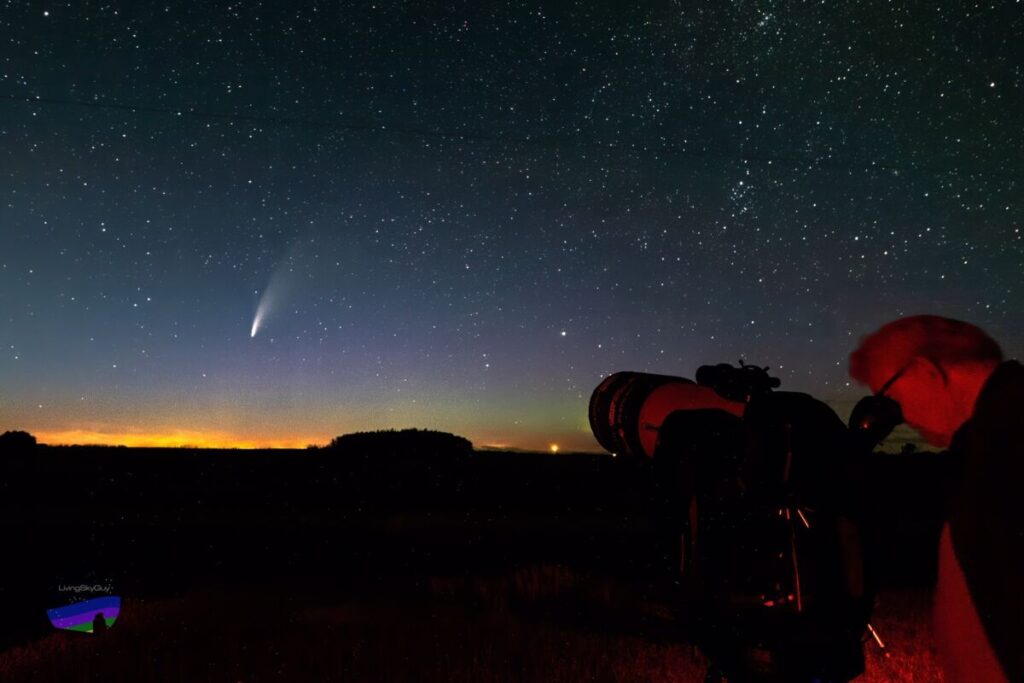
1. Stabilizing the shot. This is particularly important in low-light settings or when shooting subjects with loads of detail. When you’re shooting in low light, any vibration or movement from the camera can disrupt the light coming into the lens, causing your image to become blurry. A tripod stabilizes the camera and allows the light to enter the lens from the same angle and rate, enhancing your shot quality.

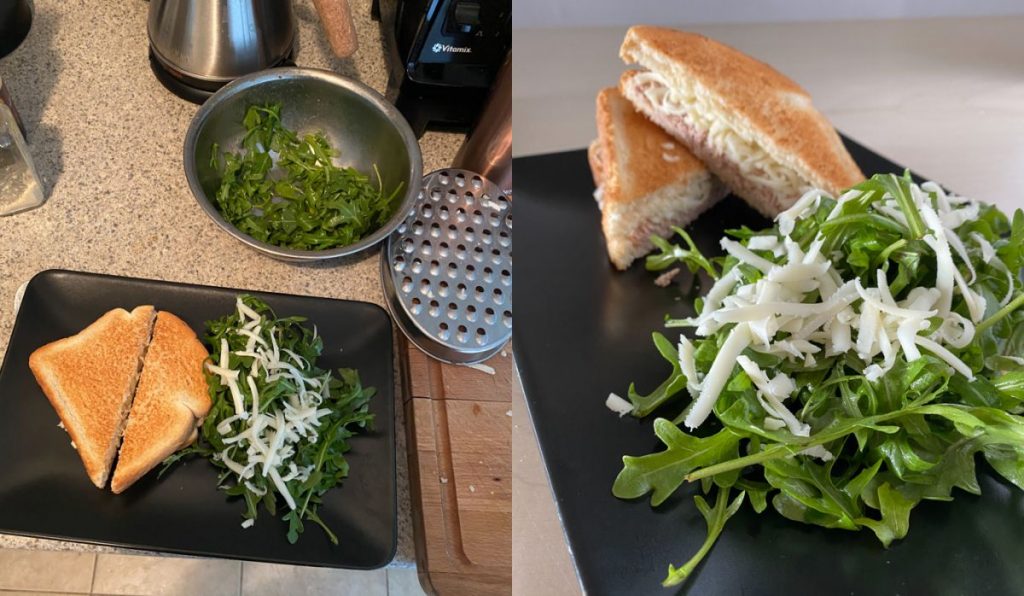
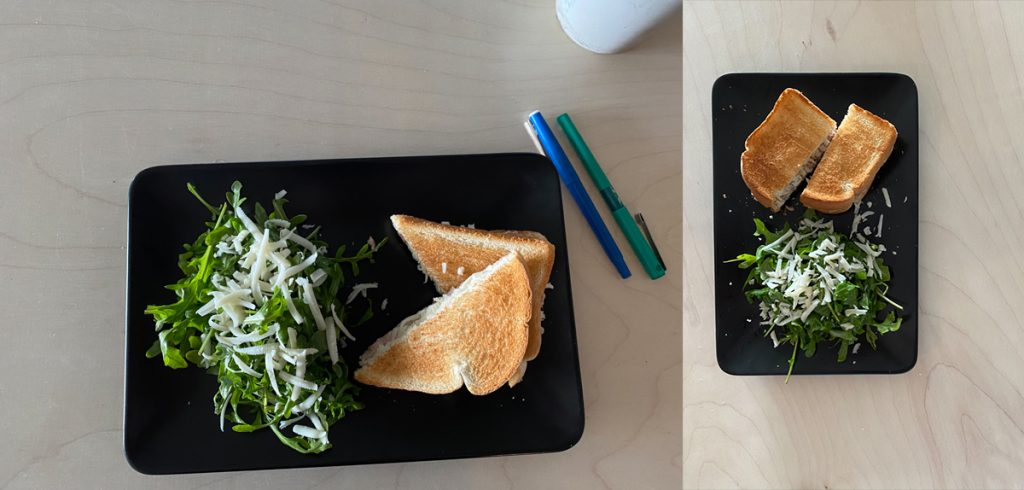
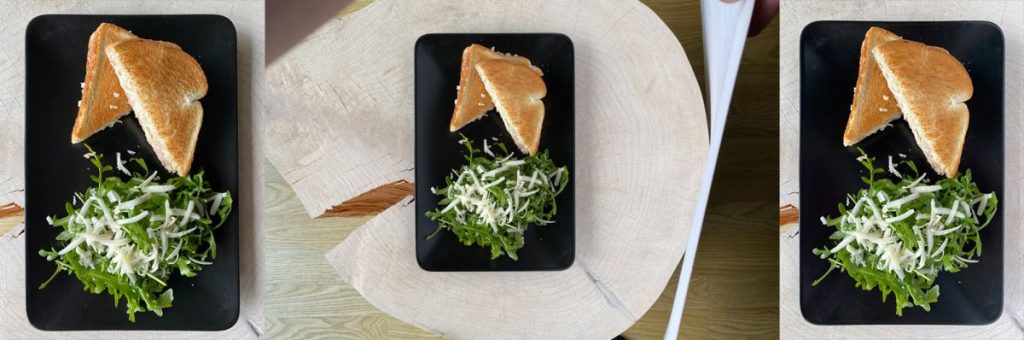
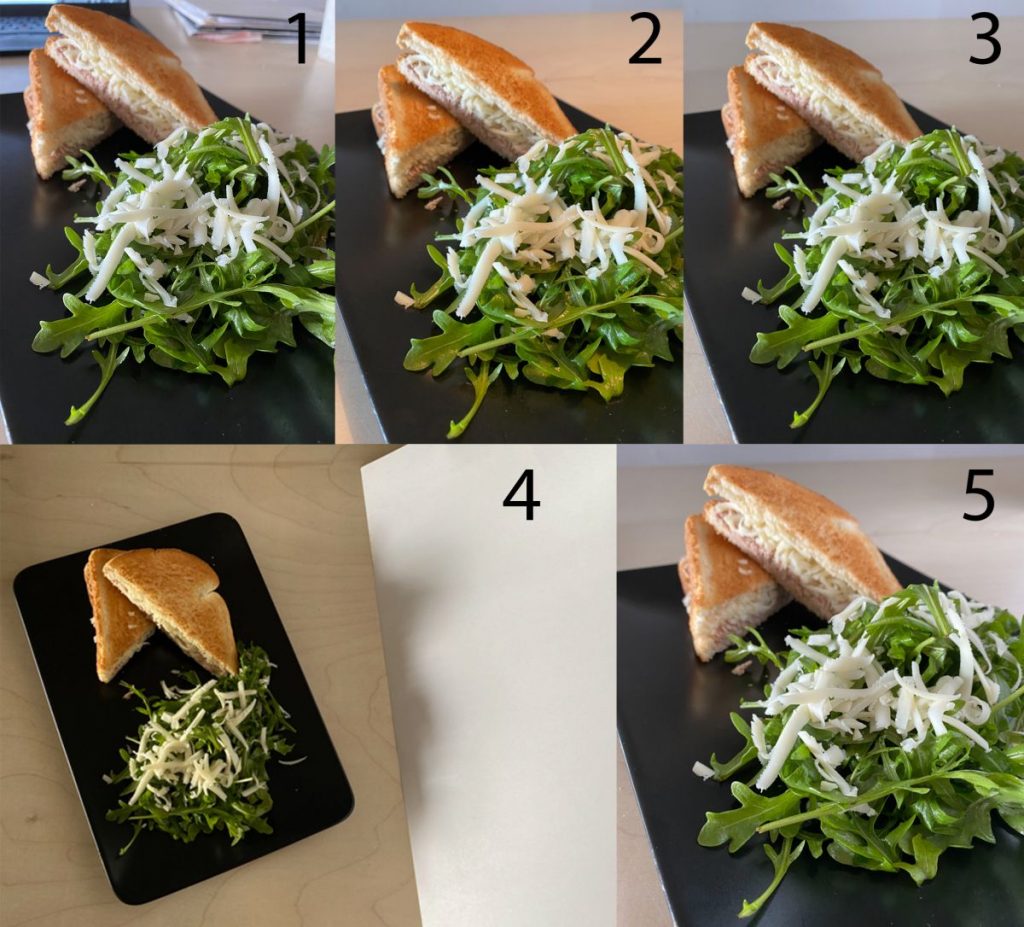
2. Consistency in shot. If you’re shooting a series of images that require the same frame (i.e. portrait photography for multiple subjects, food photography for a restaurant, the evolution of a flight of birds, etc…), a tripod ensures the angle never changes; it’s fixed, whereas if you’re holding the camera, slight variations in height can be magnified in the final product.


If you need help or gear for your camera bag this season, we can help! Whether it’s a shiny new lens, advice about the best way to light your shoot, or a few a whole new camera kit, we got you. Stop by your local London Drugs and talk to our LDPhoto experts — we’d love to see you!


5 Photography Tips for Stunning Landscapes

As winter turns to spring, outdoor landscapes begin to bloom and blossom with stunning photo ops. If you’ve got your photography equipment ready to go, here are some helpful tips to ensure you capture your next outdoor masterpiece.

1. Near and Far, It’s All Relative

When photographing stunning natural landmarks such as mountains, try to capture not only the hero of the image but also its immediate surroundings. That way you can give the viewer a greater sense of scale.

As you’re framing your shot, have a look around you to see if there’s something closer than your hero subject that will help you tell a better story in your shot as a whole. A wide angle lens like Olympus’ 9-18mm ultra wide angle lens will increase the space differential, helping you to better tell that story.

Photo tips for landscapes

In this shot, while it would have been easy to photograph just the water and lighthouse, taking a step back and including the rock formation in the foreground gives the shot a better sense of space.

Tips for Landscape Photography

If you’re having trouble finding foreground subjects, consider using people. The human element can drastically change the feel of the image too, because then the person becomes the image’s hero!

2. Shoot at the Best Times of the Day

Did you know there are better times of the day to photograph landscapes (apart from when there is good light and the sky is clear and blue). There are four specific times of the day that pros love to shoot — provided the weather is ideal. These are called the golden hour and the blue hour, and both of these phenomena happen twice a day — in the early morning and in the late afternoon.

Landscape Photography Tips

Golden hour occurs just after sunrise and before sunset — when the light is softer and bathes everything in a soft yellow glow that is very pleasant to photograph. Most things (including people) look better when photographed in this light.

Landscape Photography Tips

The blue hour occurs after the sun has dropped below the horizon and bathes everything in a soft blue light. This light creates a nice contrast to the warmth of golden light, and can make your image feel colder. The blue hour is a particularly good time for shooting urban landscapes and cityscapes, as it make landscapes look very dramatic and colour-rich.

3. Add Drama to Your Shot by Slowing Down Your Shutter Speed and Getting the Most Out of Your Filters

Because there is generally plenty of light during the day, using slow shutter speeds can be challenging. This is where your Neutral Density (ND) Filter will come in handy. Slowing down your shutter speed allows your camera to capture the flow and movement of things rather than the sharp features people would be most used to seeing. For example, waterfalls and streams can look stunning when slower shutter speeds are used. Just remember to pack your tripod!

A polarizing filter will allow you to remove the reflections off reflective surfaces such as water or glass. This is particularly useful when you’re trying to make your images look cleaner. Additionally, you can also stack filters so that you combine the effect of an ND and a polarizing filter!

Landscape Photography Tips

In this shot of a waterfall, notice how it is difficult to see the detail in the waterfall. Because of the way it was shot, it looks like the water is flowing rather than stationary. This is because this shot was taken at a slower shutter speed. In this shot, the camera was set to a shutter speed of two seconds. This allows the camera to adequately blur the waterfall.

Landscape Photography Tips

By slowing down your shutter speed, notice that rather than seeing the waves of the sea crashing on the beach, you instead see a serene flow? This was a 30-second exposure. Just remember that you will need a tripod to achieve this result as you will not be steady enough to handhold the camera.

Landscape Photography Tips

Landscape Photography Tips

This is the same shot, however a neutral density (ND) filter was used to allow for slower shutter speeds. This shot was taken at 30 seconds and allows for the water to be less distracting ensuring that the viewer concentrates on the heroes of this shot – the bridge and the mountains!

Landscape Photography Tips

A polarizer will remove reflection from the surface of the water so that you can see the detail underneath. Notice how you can see detail of the rocks underneath the water?

4. Get Lower to Accentuate Your Perspective and Subjects

Sometimes when you take a landscape shot, it just lacks that extra pop? It could be that you are simply not getting down low enough. Vistas that stretch for miles on end can be exaggerated by the simple act of photographing from a lower perspective.

Mirrorless cameras with articulating screens, such as the one found in the Olympus E-M5 Mark II, will allow you to get lower without placing undue stress on your back or knees.

Landscape Photography Tips

See in this image how the camera was positioned close to the surface of the sand so that you see the footsteps leading toward the shipwreck? Shooting lower allows you to accentuate your perspective as well as provide the viewer with something interesting to follow in the shot – in this case, the footsteps.

5. Converging Lines Will Always Help Frame Your Shot

Ever noticed when you look at some pictures how your eye is lead to look toward a certain direction? This is often because of a phenomenon called converging lines. Due to perspective, if edges run parallel into the distance, those edges will seem to appear to get closer and closer as the distance increases. A great example of that is when you look at train tracks into the distance. Identifying converging lines in your shot is an essential skill for landscape photography that will take your game to the next level!

Landscape Photography Tips

In this photo, the lines made by the buildings guide your eyes toward the right side of the image. This is a great way to use landscape features to lead the viewer’s gaze.

London Drugs carries a wide range of equipment for all your photography needs. Come talk to one of our experts in store, or check out our camera equipment online.

Next Page »